大家早上好呀,又到了周末了,心情很舒服。摸鱼了一上午,想要写点东西。今天给大家带来的是,git和GitLab的安装。
快速定位到Gitlab安装
话不多说,开始吧
1、创建git文件夹
[root@VM-4-12-centos git]# pwd
/opt/git
2、下载git,yum配置的镜像库有git,直接下载
[root@VM-4-12-centos git]# yum -y install git
3、安装git核心依赖
[root@VM-4-12-centos git]# yum -y install git-core gitweb
3A、检查一下,没有问题
[root@VM-4-12-centos git]# which git
/usr/bin/git
[root@VM-4-12-centos git]# git --version
git version 2.27.0
5、新建git用户,密码是git
[root@VM-4-12-centos git]# useradd git
[root@VM-4-12-centos git]# passwd git
Changing password for user git.
New password:
BAD PASSWORD: The password is shorter than 8 characters
Retype new password:
passwd: all authentication tokens updated successfully.
6、初始化一个git项目
[root@VM-4-12-centos git]# git init demo.git
Initialized empty Git repository in /opt/git/demo.git/.git/
[root@VM-4-12-centos git]# ll
total 4
drwxr-xr-x 3 root root 4096 May 14 11:49 demo.git
7、修改git文件夹下的权限,给到git用户
修改前:

[root@VM-4-12-centos git]# chown -R git:git demo.git/
修改后:

8、切换到git用户,后面是向git推送数据,这里就不演示了
[root@VM-4-12-centos git]# su - git
-------------------------------------------------------------------------------------------------------------------------------------------------------->
9、接下来是GitLab的安装,首先安装环境依赖
[git@VM-4-12-centos git]$ su - root
[root@VM-4-12-centos git]# yum -y install python3
[root@VM-4-12-centos git]# yum -y install curl openssh-server openssh-clients postfix cronie python3-policycoreutils policycoreutils-python
10、开启SSH,方便等下我们上传项目
[root@VM-4-12-centos git]# systemctl enable sshd && systemctl start sshd
11、非必须,可以不选择,开启邮箱服务
[root@VM-4-12-centos git]# systemctl enable postfix && systemctl start postfix
12、下载gitlab安装包,Gitlab官网下载,注意:e18是Centos8使用,官方目前停更,e17是Centos7使用,正常维护。然后下载ce社区版本,不要下载ee收费版,另外,老哥推荐一个清华的镜像下载,不用等太久,清华镜像网站
[root@VM-4-12-centos git]# wget https://mirrors.tuna.tsinghua.edu.cn/gitlab-ce/yum/el7/gitlab-ce-15.1.2-ce.0.el7.x86_64.rpm
13、下载安装包时间有点久,需要耐心等待
[root@VM-4-12-centos git]# ll
total 1068328
drwxr-xr-x 3 git  git        4096 May 14 11:49 demo.git
-rw-r--r-- 1 root root 1093961576 7月   5 21:56 gitlab-ce-15.1.2-ce.0.el7.x86_64.rpm
14、安装gitlab,出现了如下提示,说明安装完成
[root@VM-4-2-centos gitlab]# rpm -i gitlab-ce-15.1.2-ce.0.el7.x86_64.rpm

15、然后我们需要提供对外访问,external_url添加你的ip地址
[root@VM-4-12-centos git]# vim /etc/gitlab/gitlab.rb
##! Note: During installation/upgrades, the value of the environment variable
##! EXTERNAL_URL will be used to populate/replace this value.
##! On AWS EC2 instances, we also attempt to fetch the public hostname/IP
##! address from AWS. For more details, see:
##! https://docs.aws.amazon.com/AWSEC2/latest/UserGuide/instancedata-data-retrieval.html
external_url 'http://101.35.245.191:9000'

nginx['listen_port'] = 9000
16、重新配置,然后重启,默认是80端口,我们修改成9000端口,云服务器开放9000端口
[root@VM-4-12-centos git]# gitlab-ctl reconfigure
[root@VM-4-12-centos git]# gitlab-ctl restart
17、访问 http://101.35.245.191:9000/
[root@tencent02 git]# netstat -ntlp
tcp        0      0 0.0.0.0:80              0.0.0.0:*               LISTEN      356763/nginx: maste
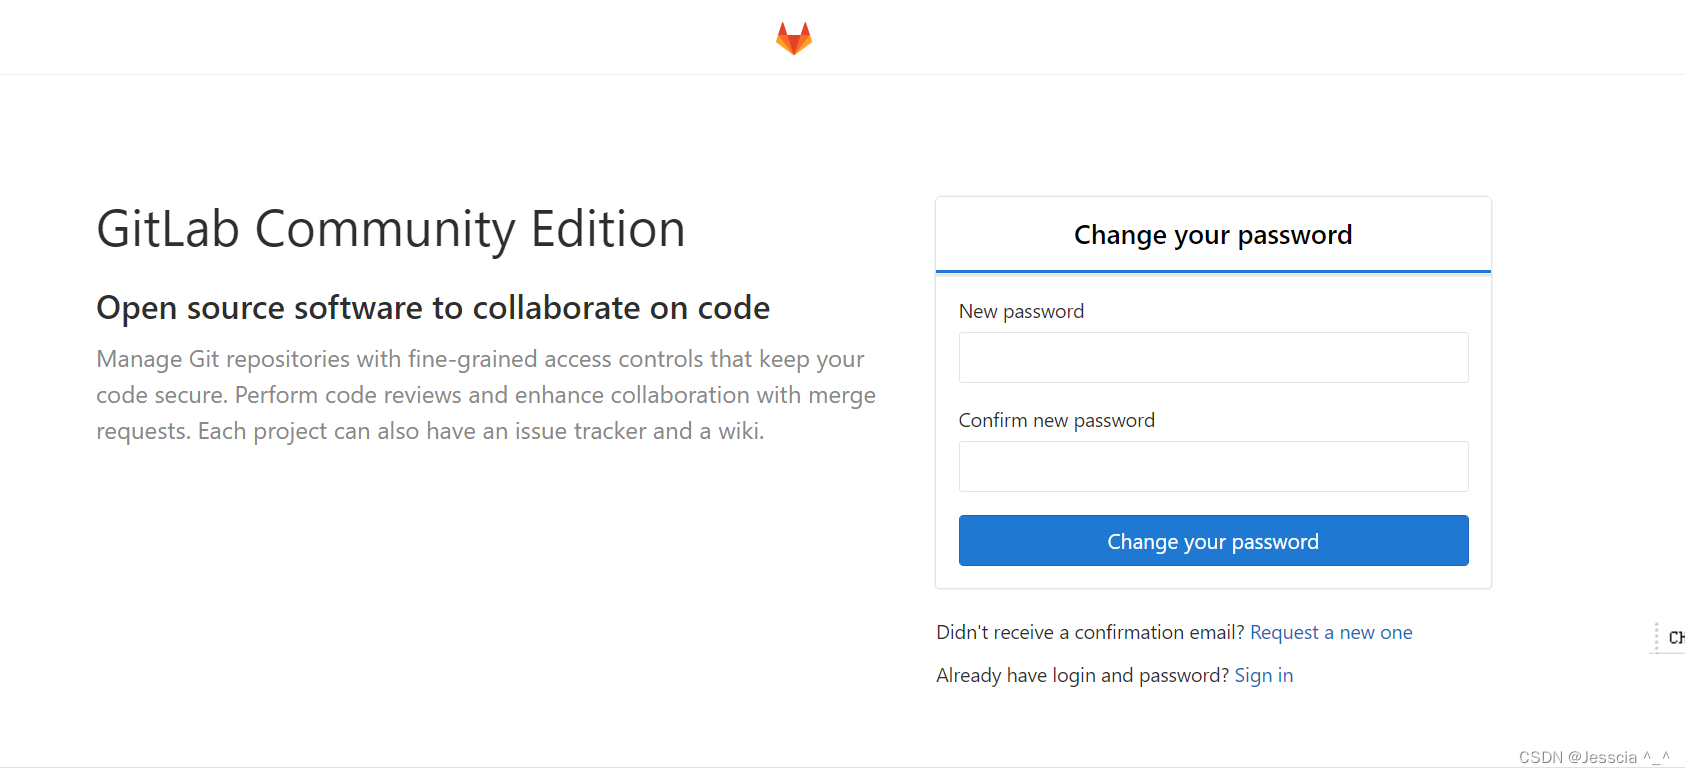
18、 如果没有出现以上界面,需要我们到服务器上修改密码
[root@VM-4-2-centos gitlab]# gitlab-rails console -e production
irb(main):001:0> user = User.where(username:"root").first
=> #<User id:1 @root>
irb(main):002:0> user.password = "root123456"
=> "root123456"
irb(main):003:0> user.password_confirmation ="root123456"
=> "root123456"
irb(main):004:0> user.save!
=> true
irb(main):005:0> exit
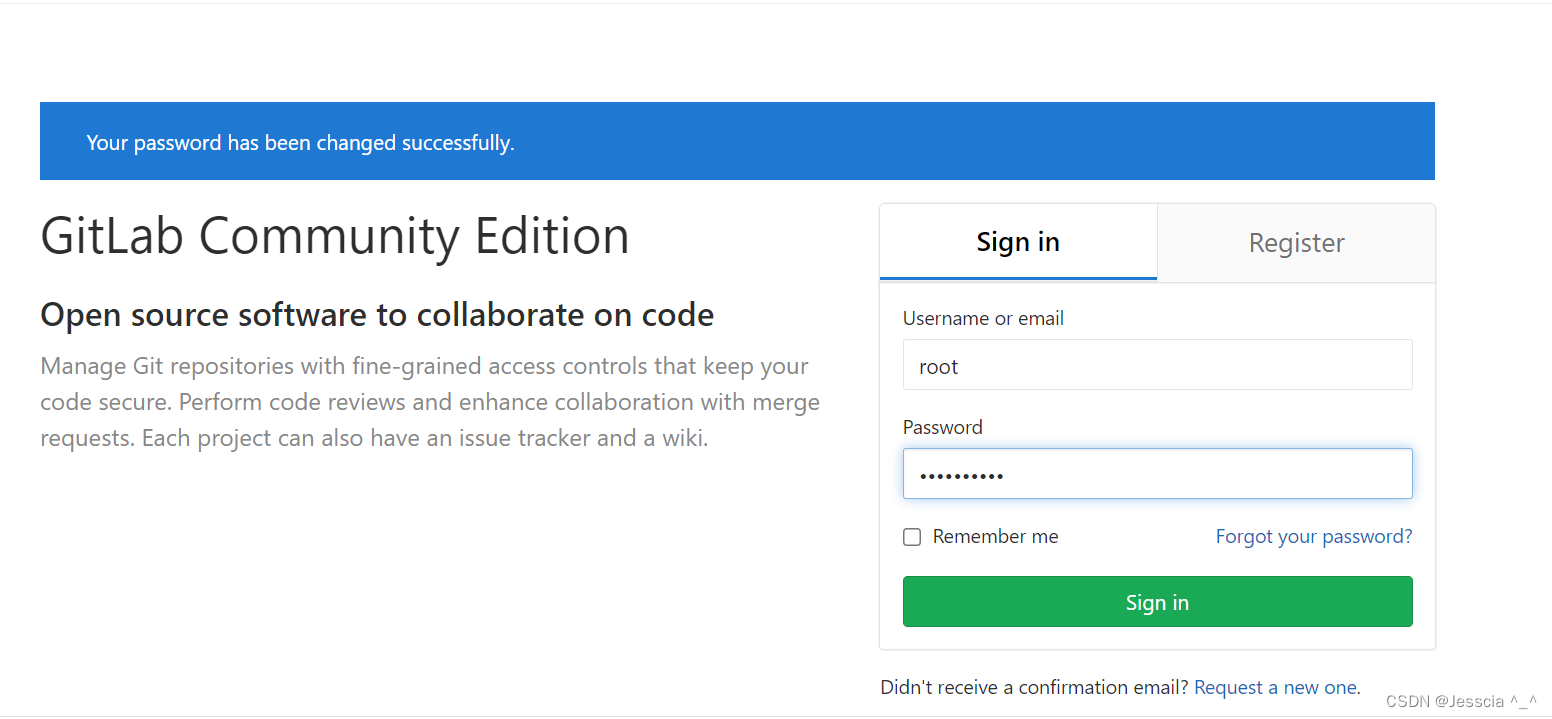
19、然后我们修改初始密码完后,系统自动跳转到登陆页面,使用root
加上你刚刚修改好的密码
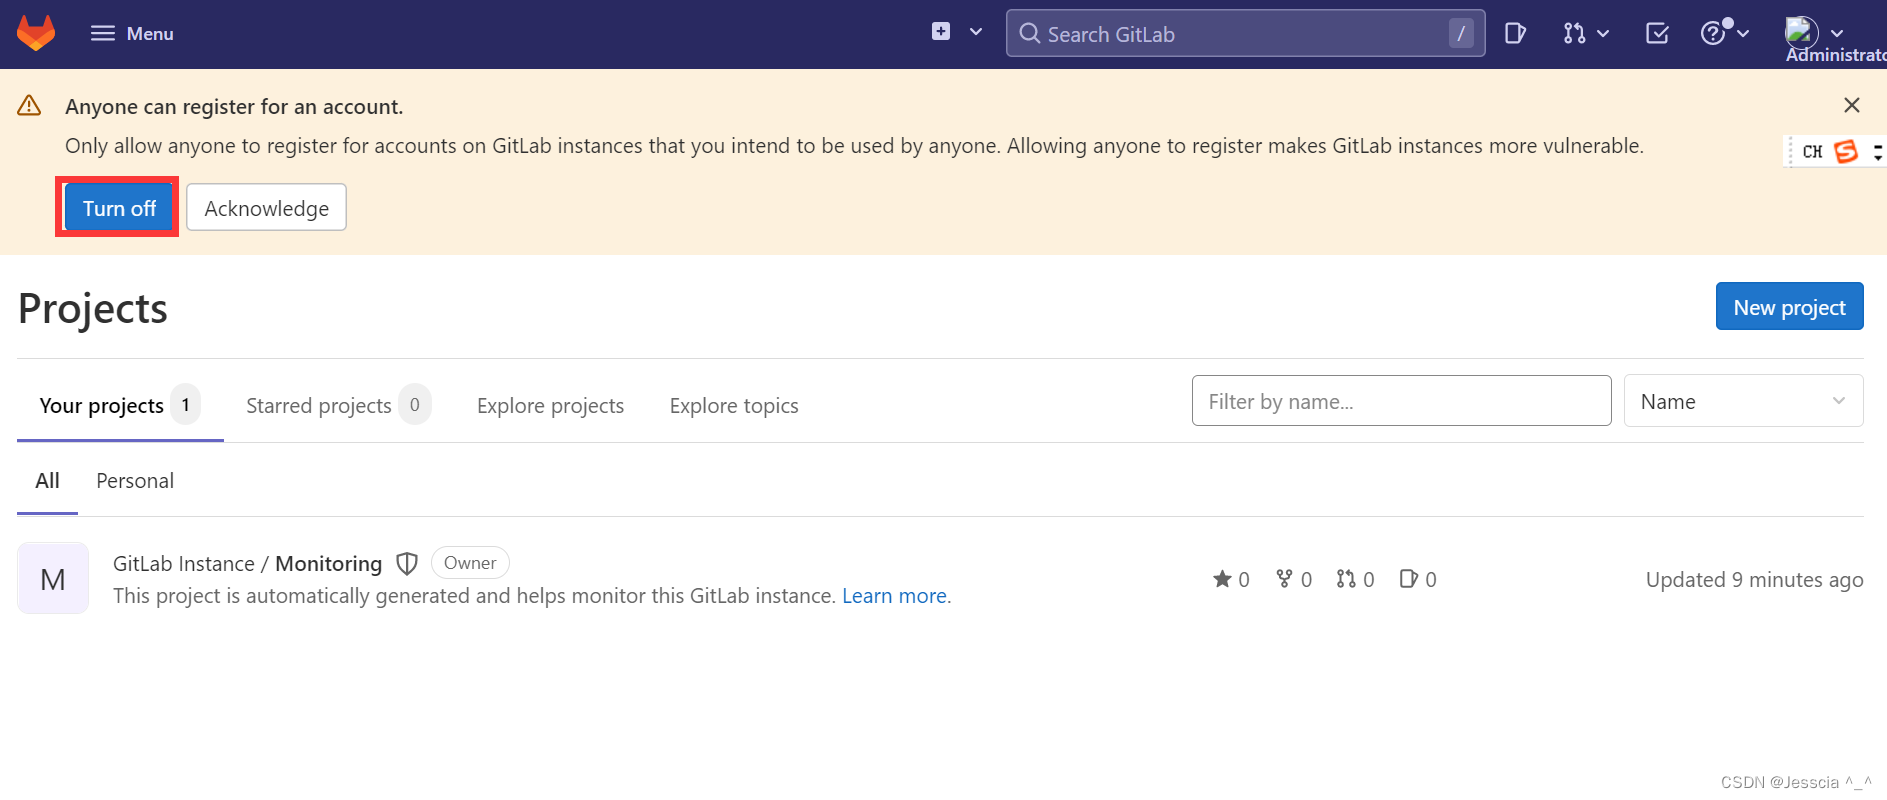
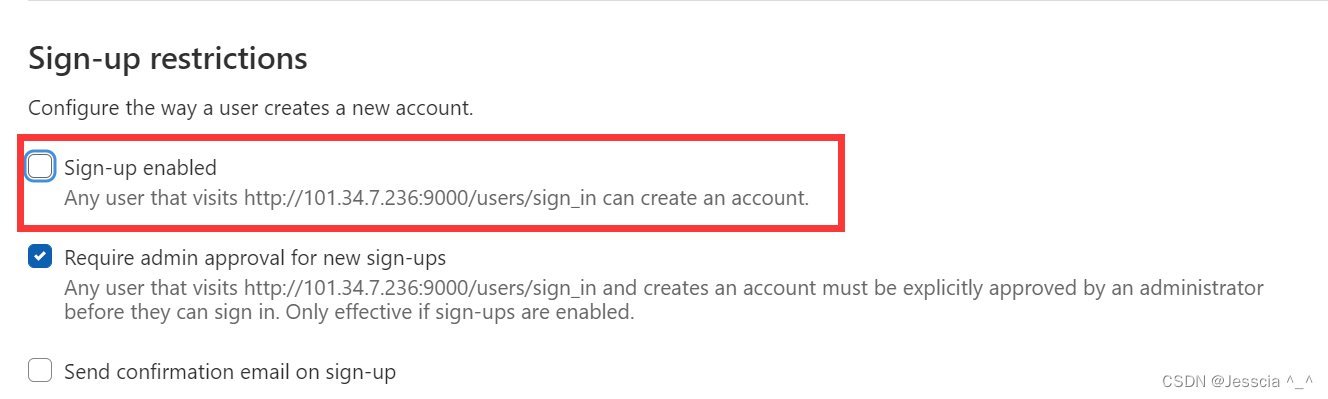
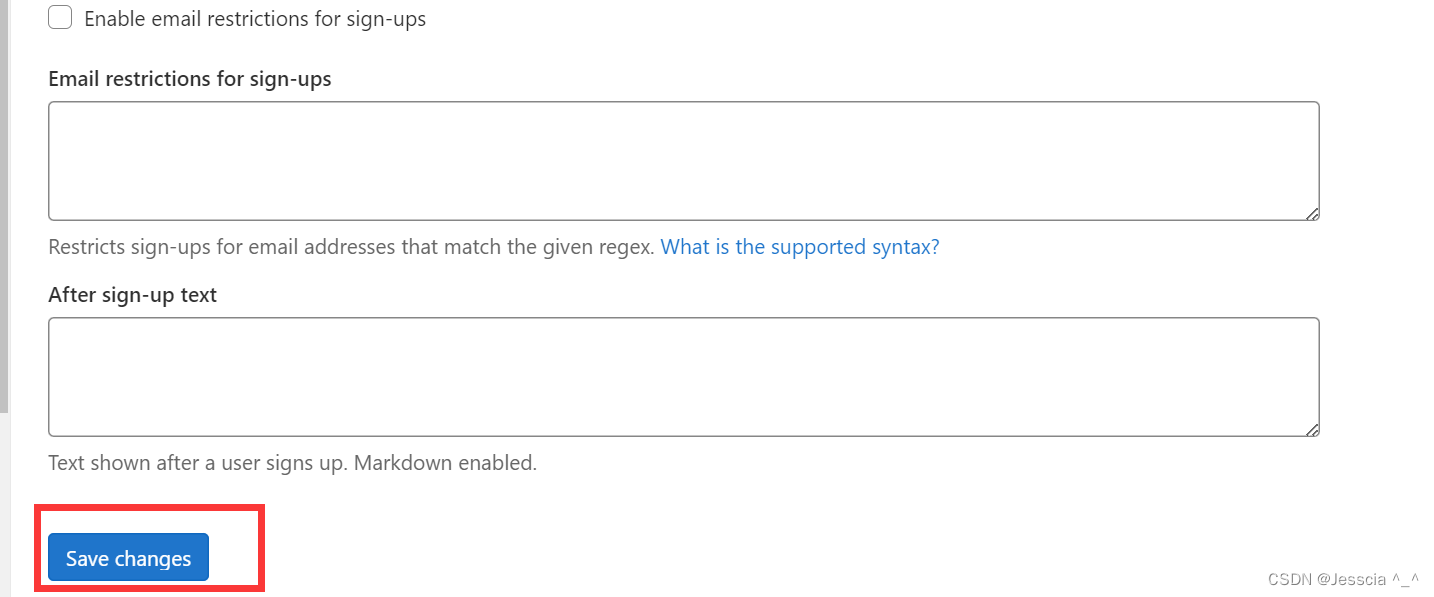
20、登录之后,禁止第三方用户访问网站,进行注册,然后记得保存!!!
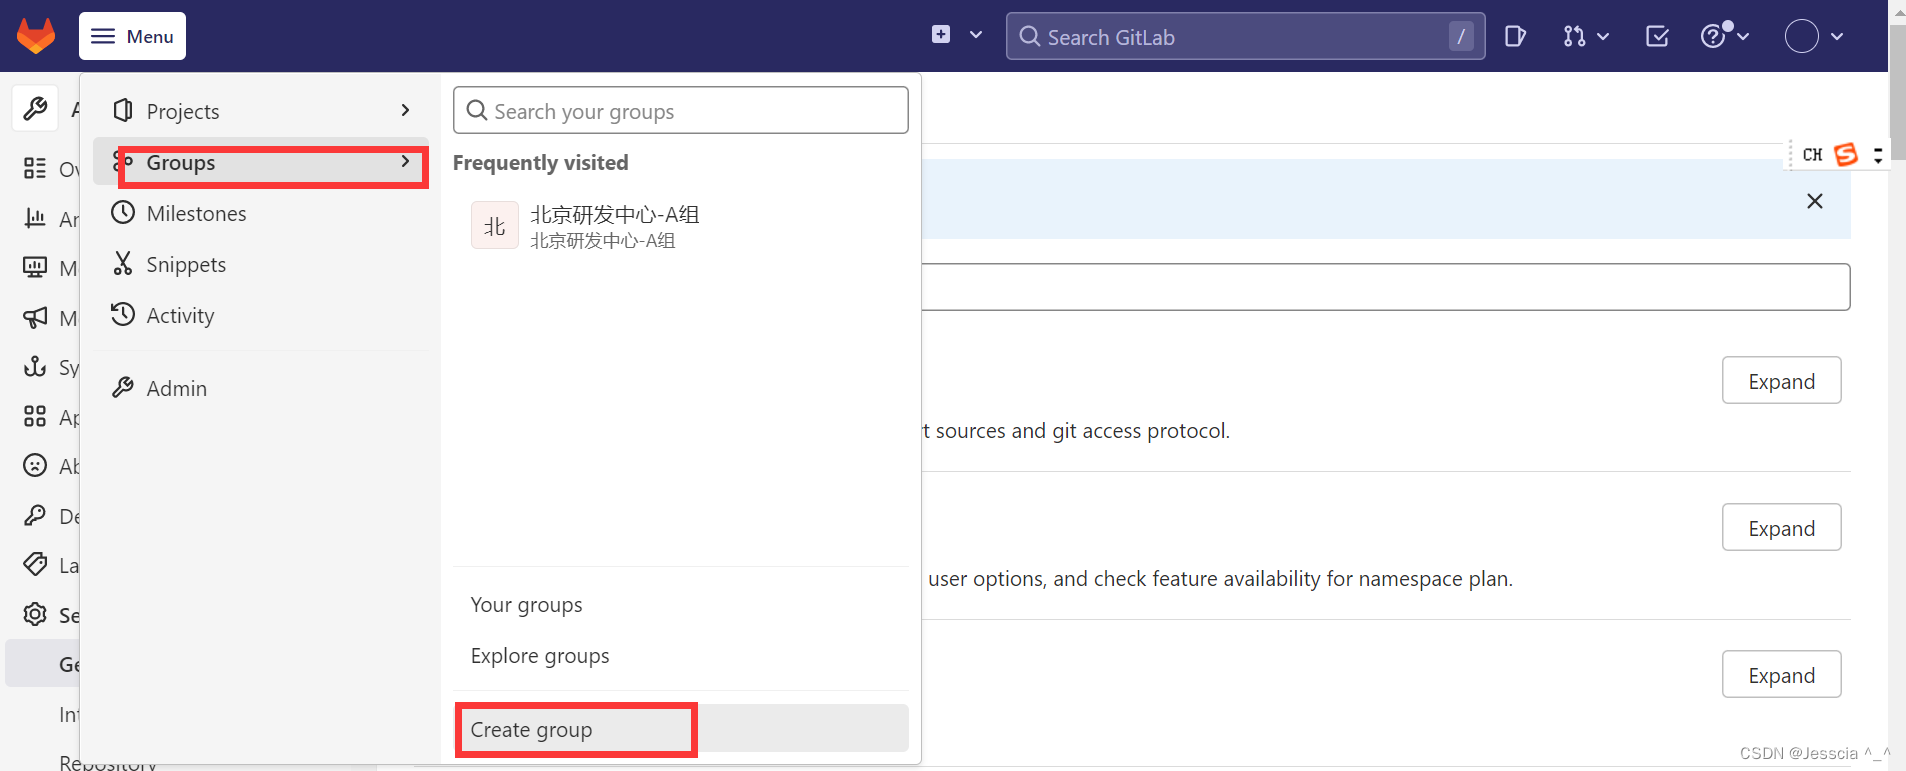
21、然后我们创建一个项目组

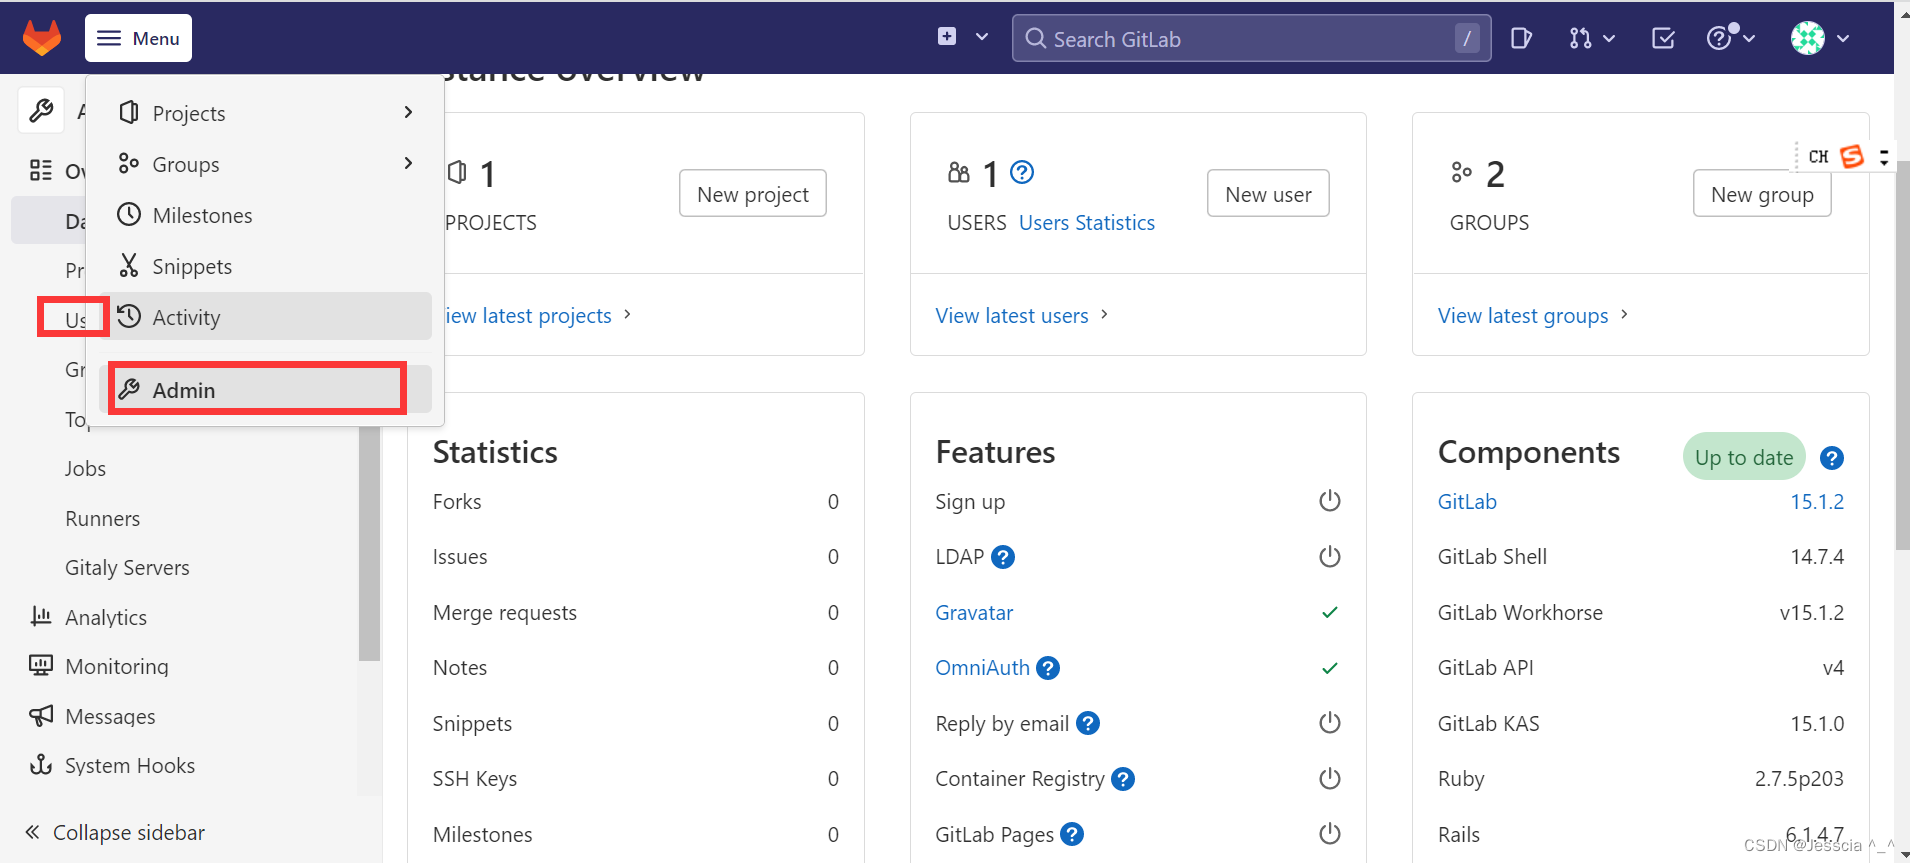
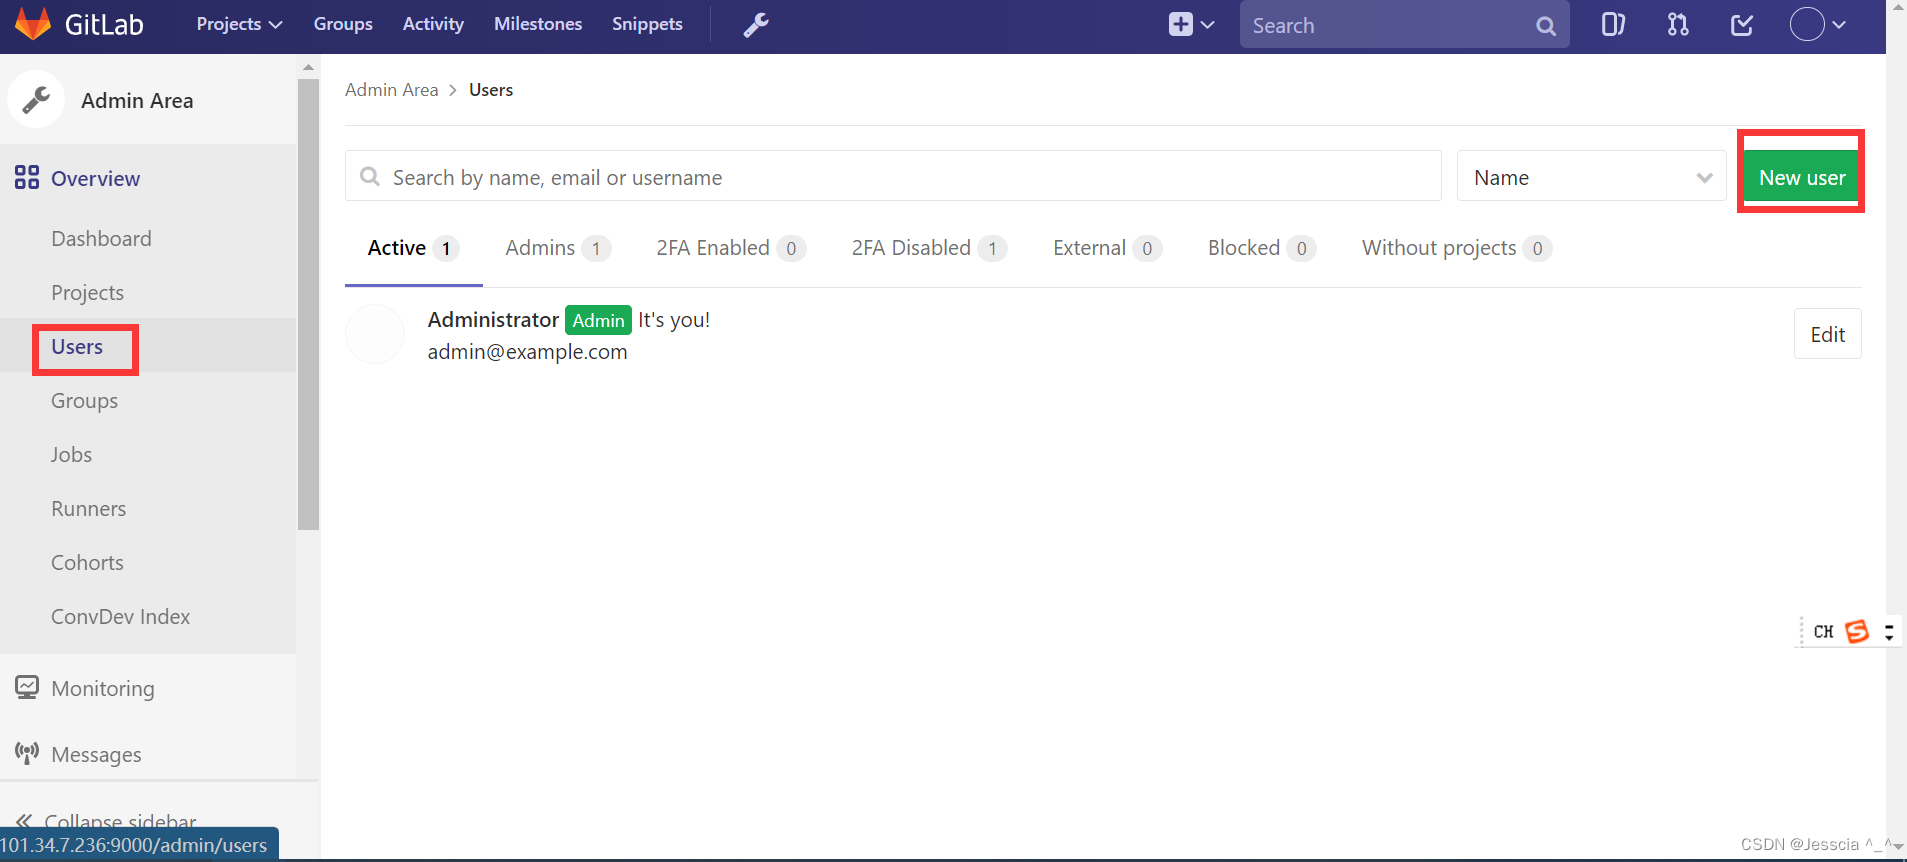
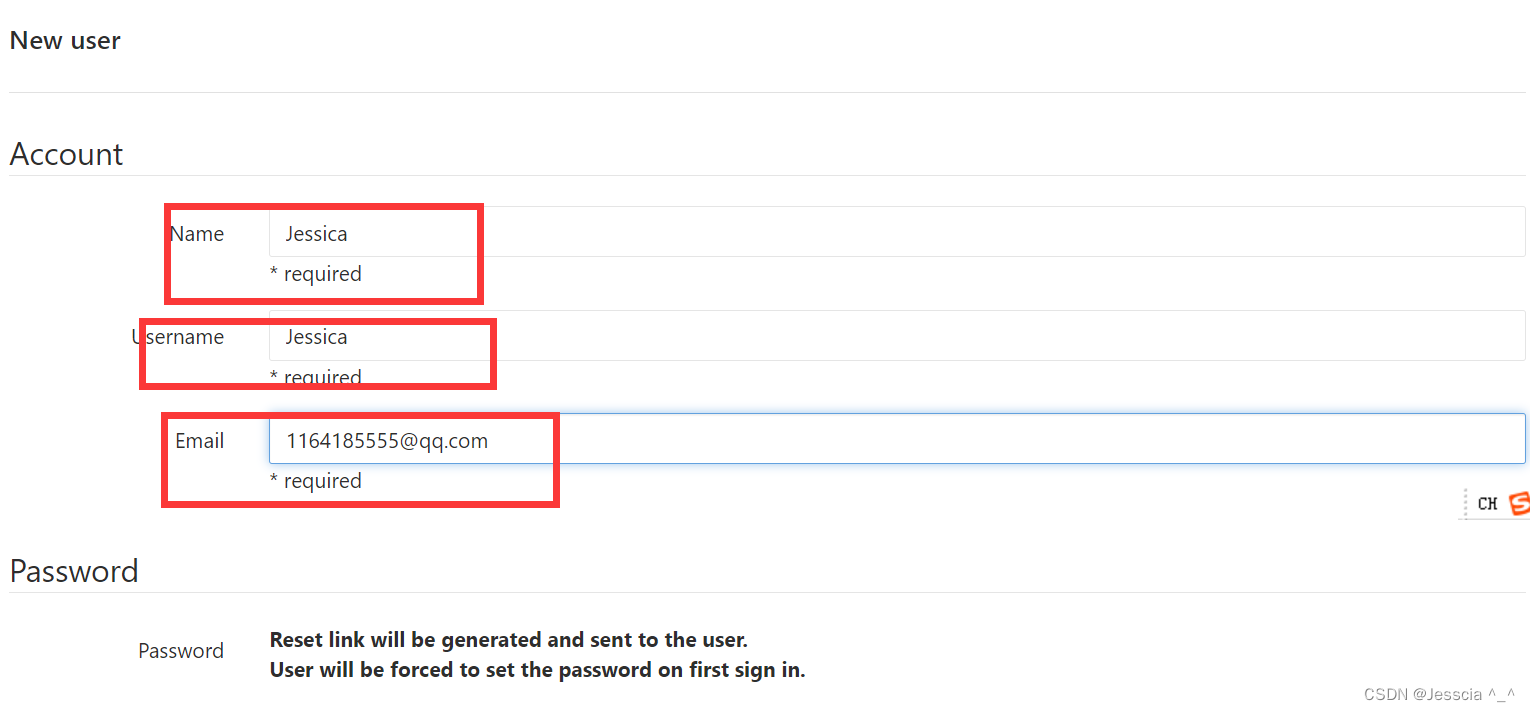
22、接着,新建组成员
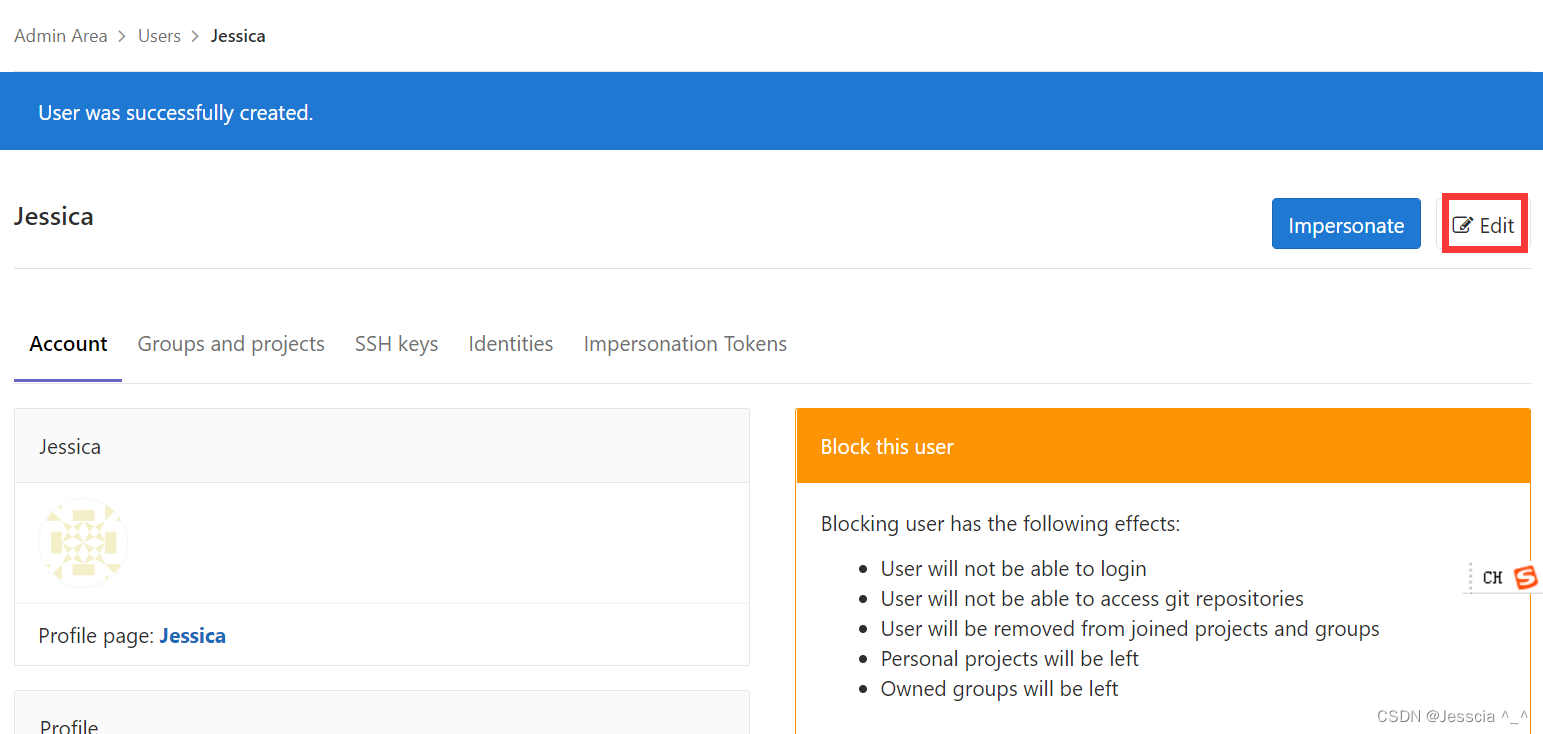
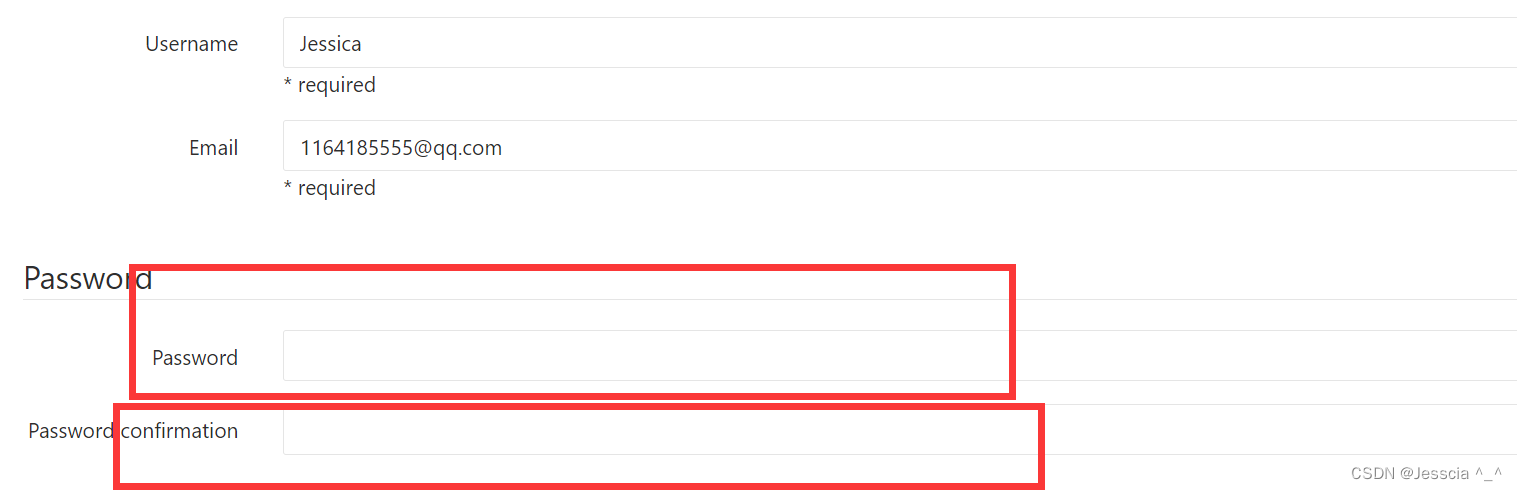
23、配置组员的相关信息,密码需要点击保存之后,再点击Edit才能设置
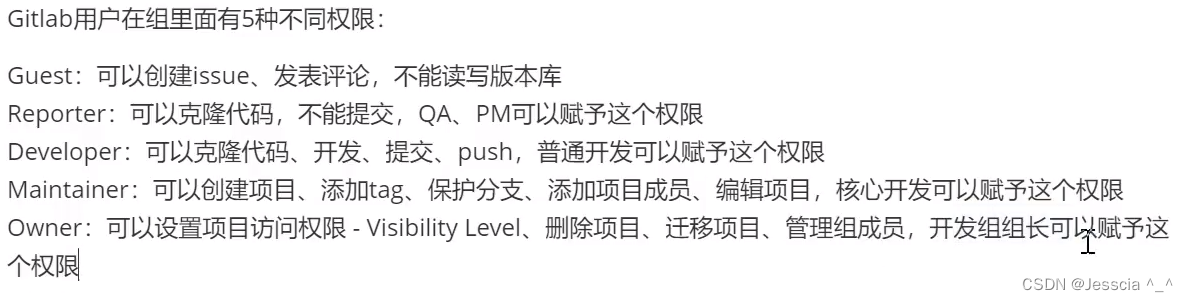
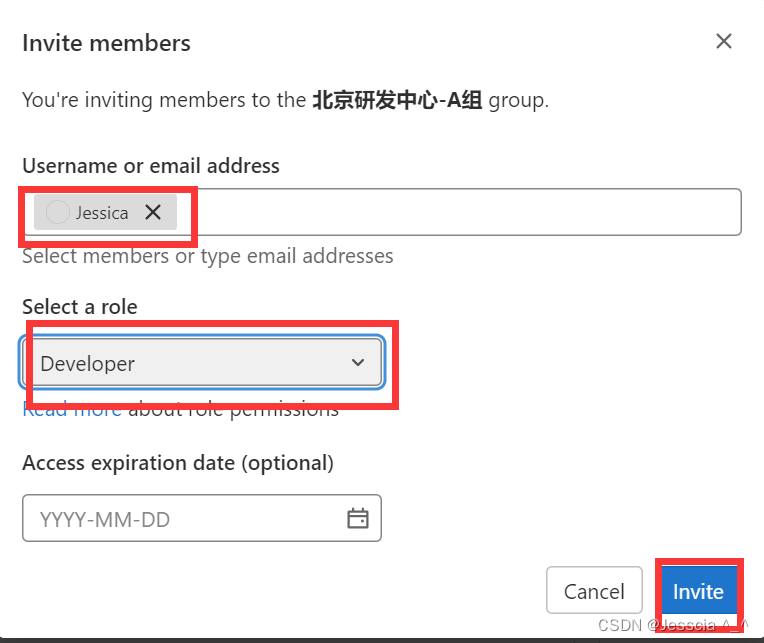
24、我们在拉组内成员的时候,注意权限,一般是开发者权限
25、然后,邀请你的同事,添加到项目组中来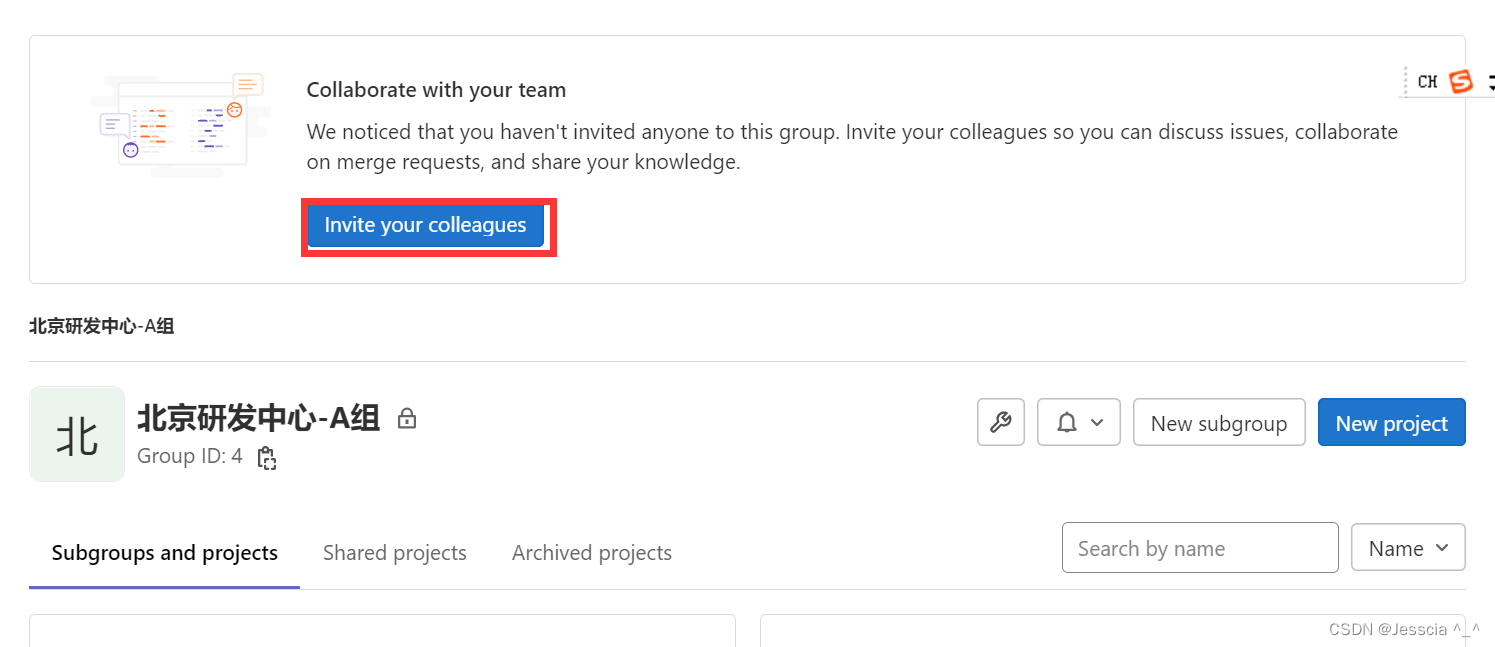
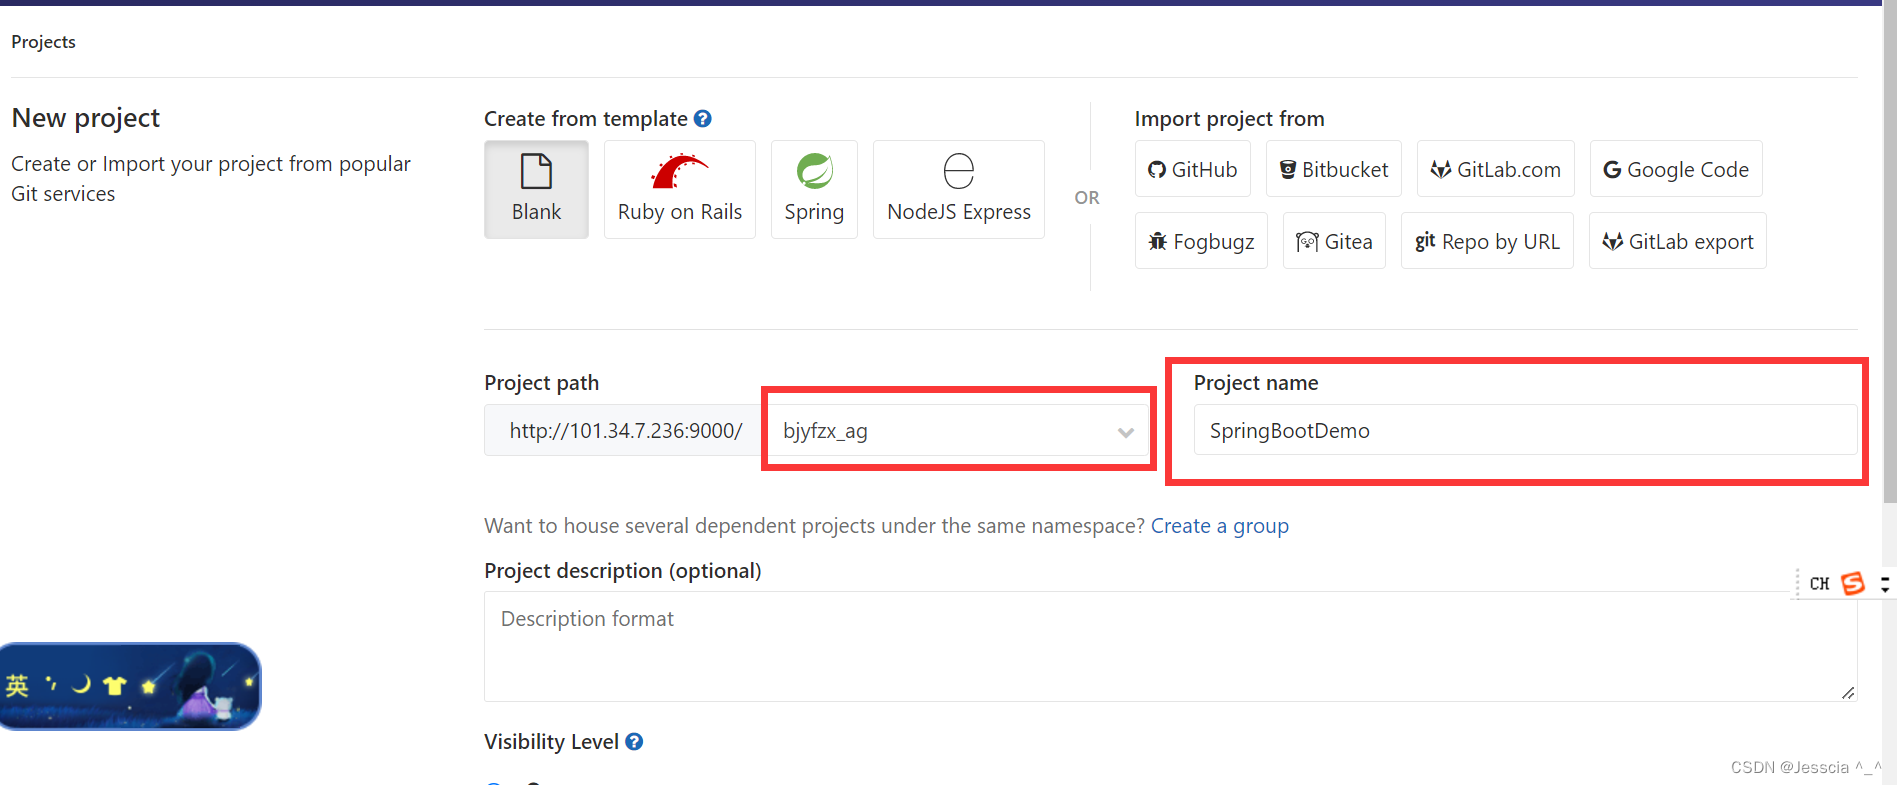
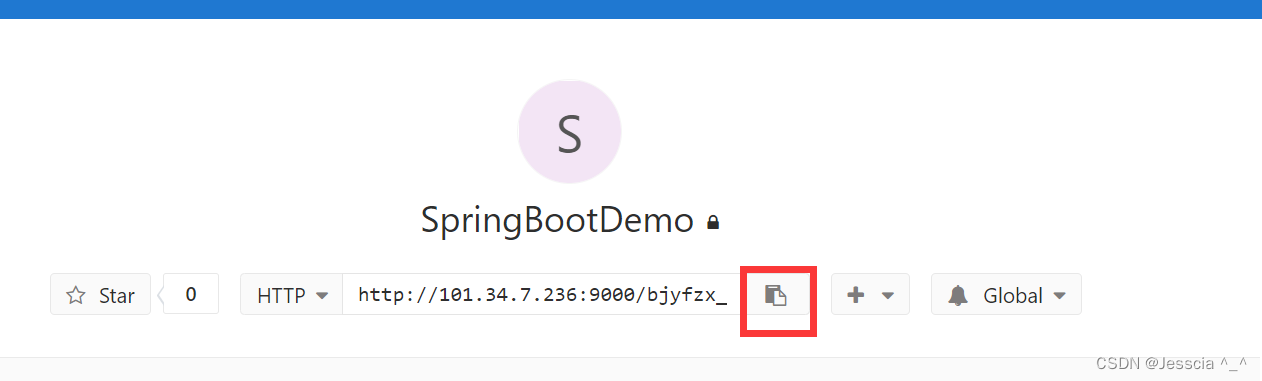
26、新建一个项目,SpringBootDemo
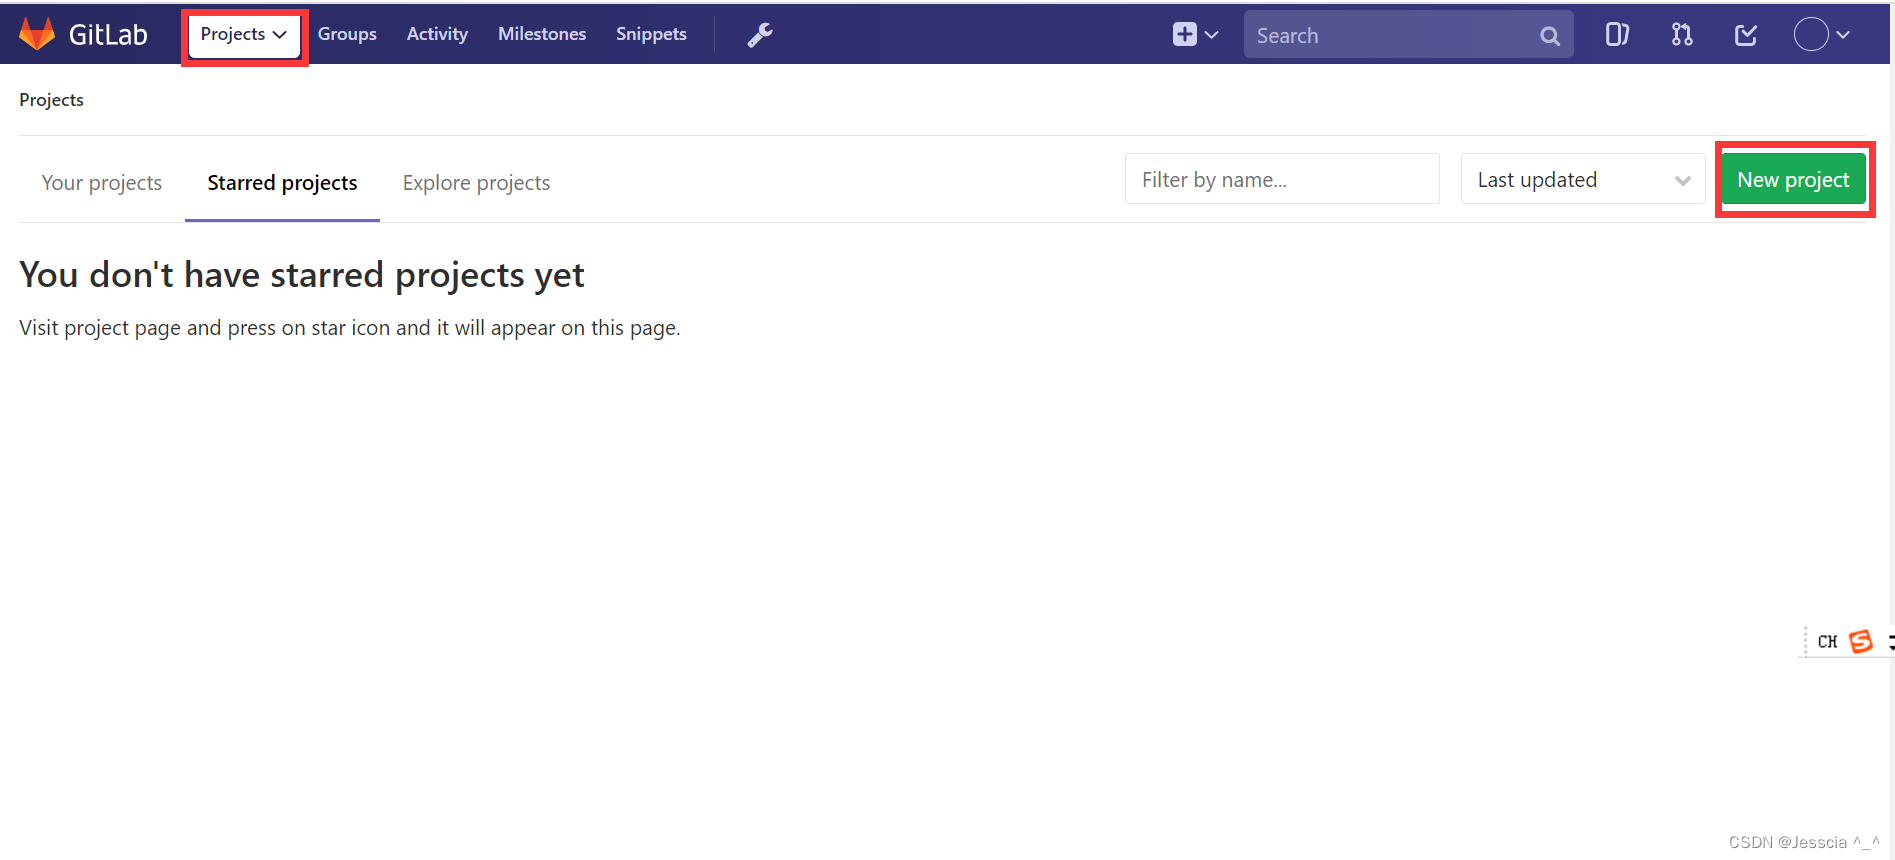
注意,项目名最好和IDEA项目名字一致
27、非必须,可以不选择,在集成Jenkins时,我们最好把Jenkins那台服务器设置一个ssh,免密登录拉取代码,然后我们在推送代码到远程的时候,我们最好把windows的rsa.pub,也放一份秘钥到gitlab上面来。
[root@VM-4-2-centos gitlab]# cd ~
[root@VM-4-2-centos ~]# ssh-keygen -t rsa
[root@VM-4-2-centos ~]# cat .ssh/id_rsa.pub
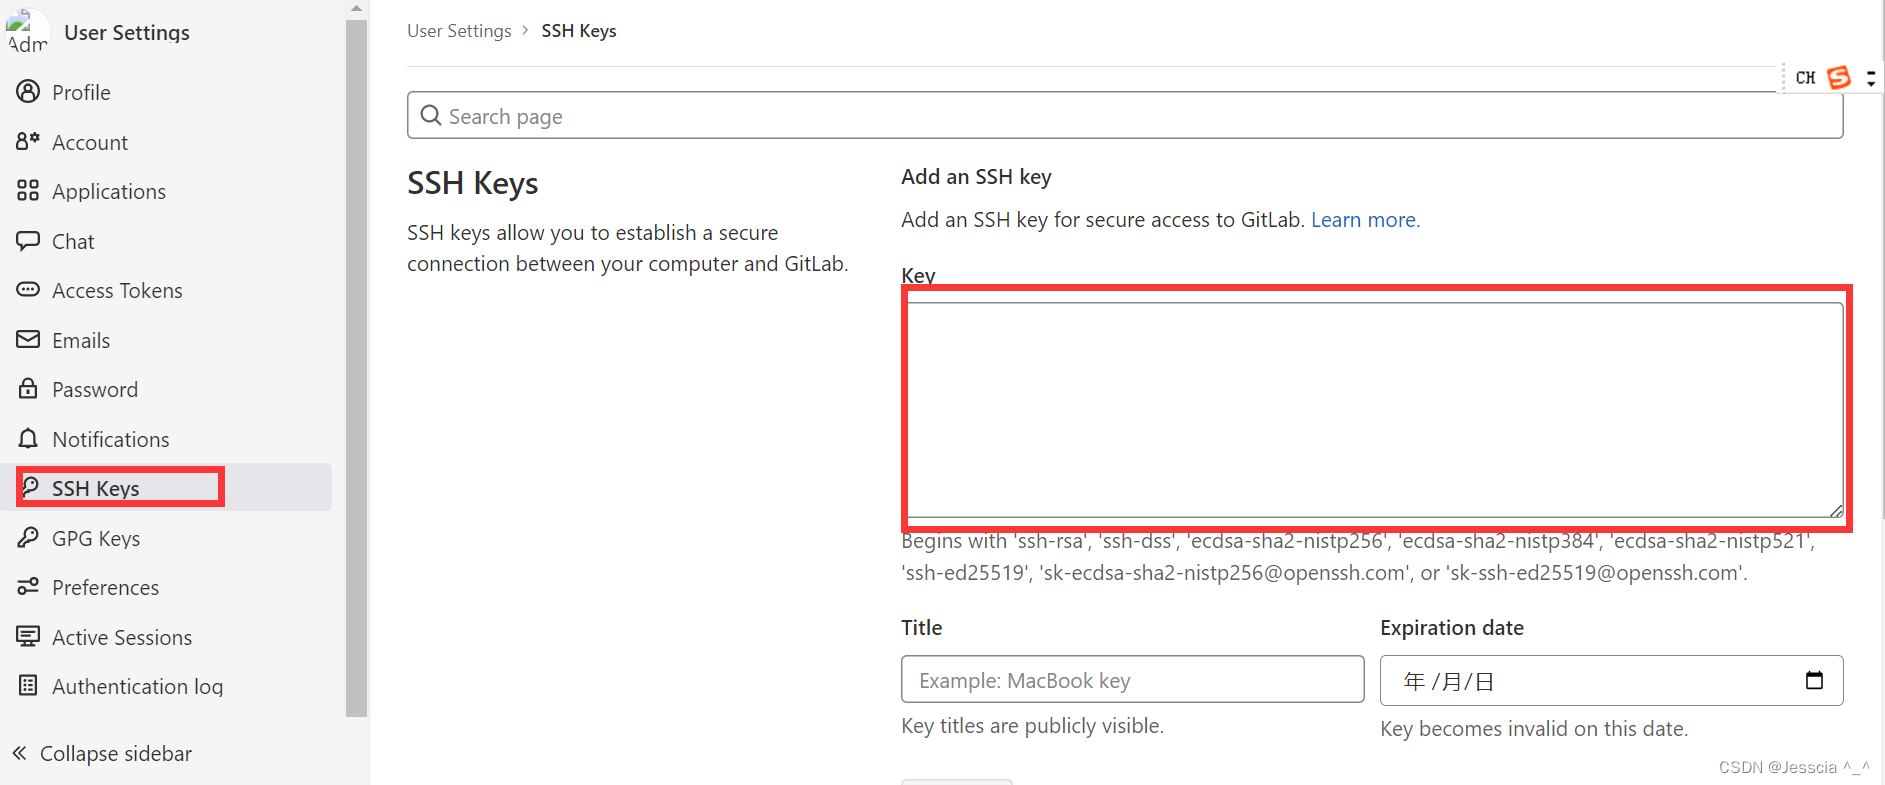
28、非必须,可以不选择,然后把公钥添加到gitlab中
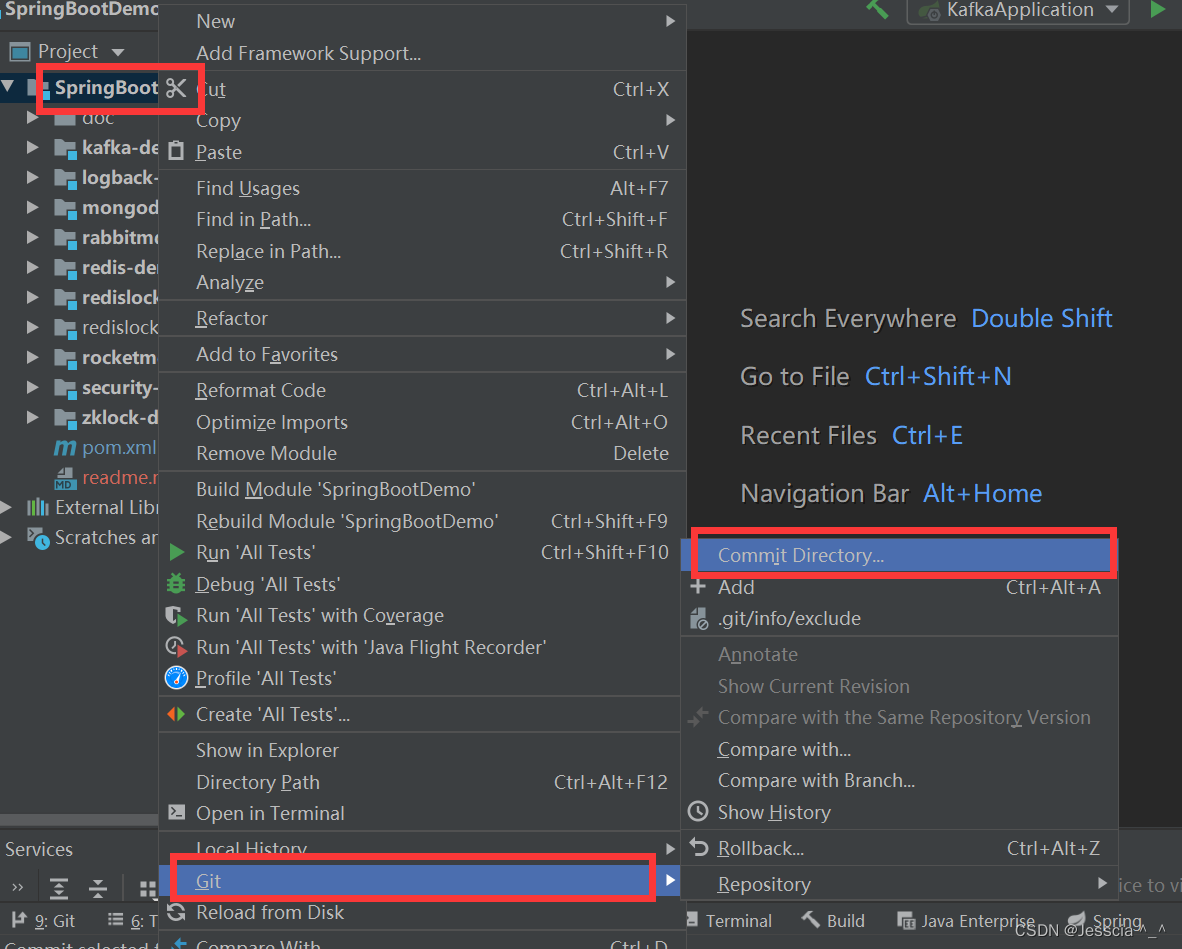
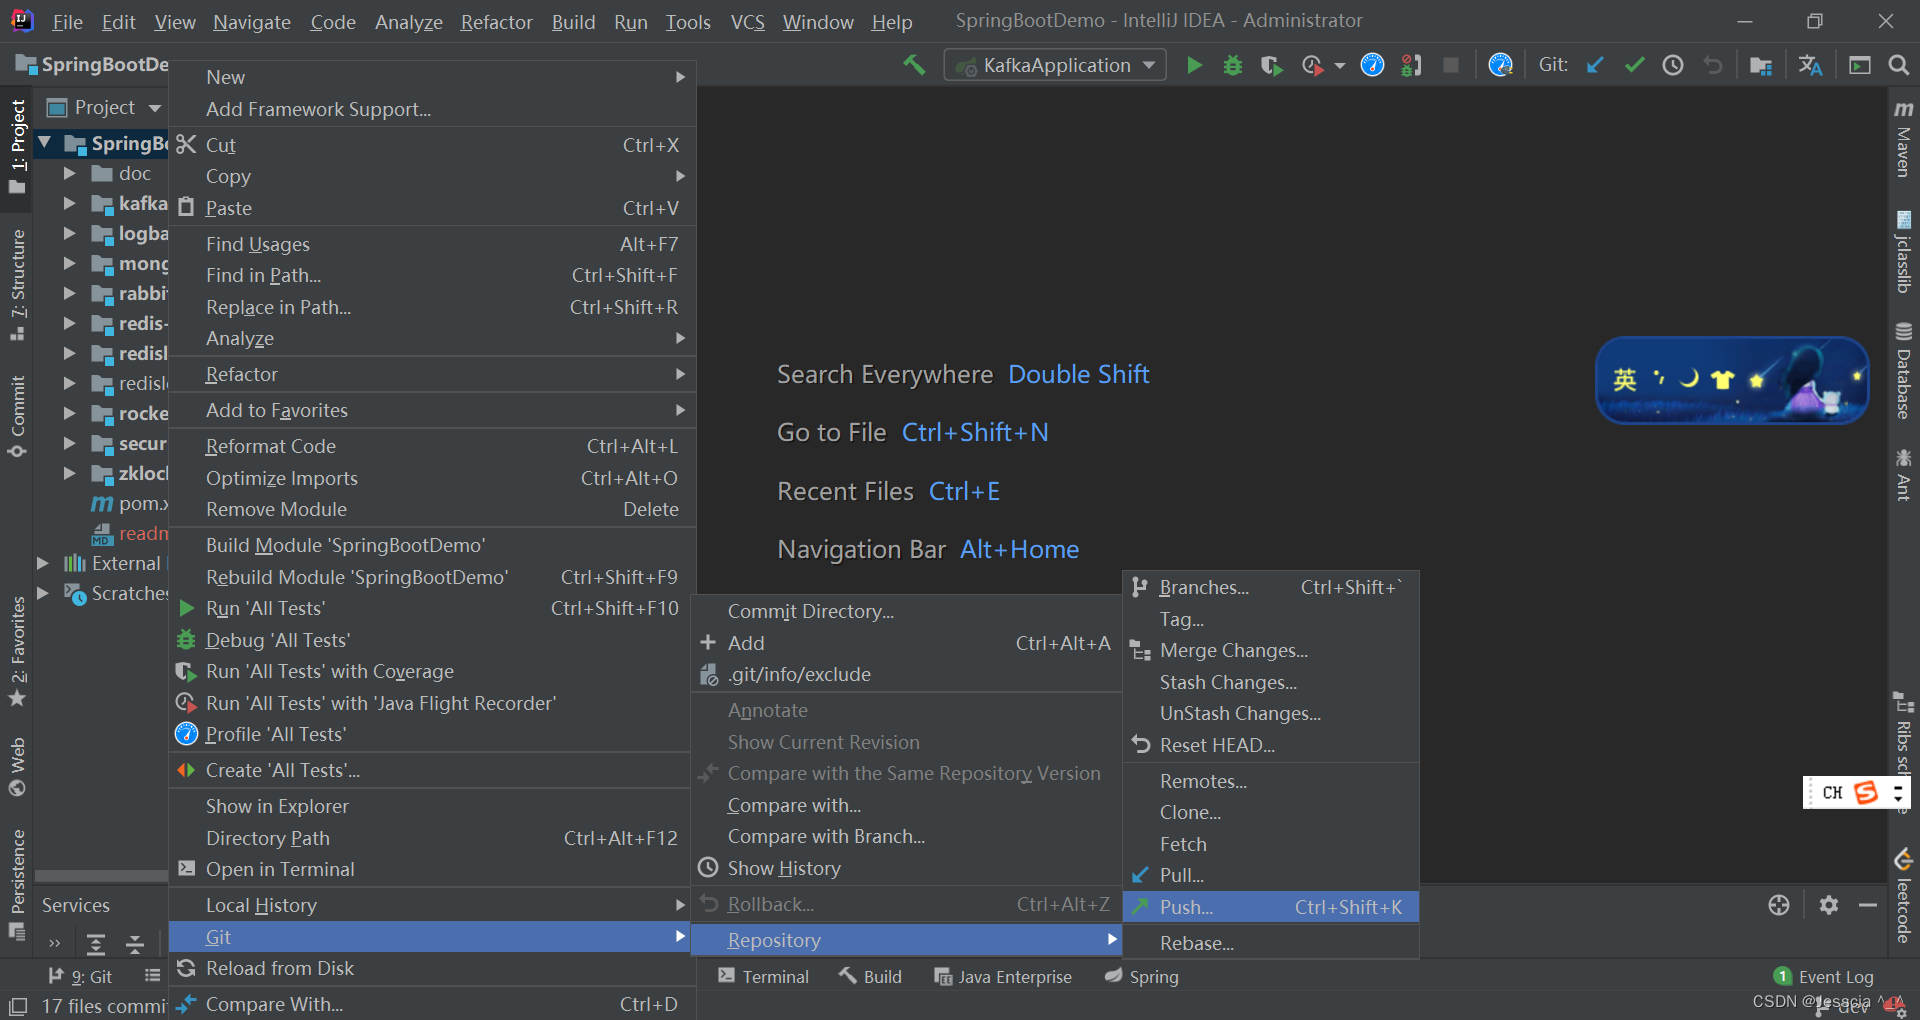
29、最后,我们使用IDEA提交项目代码,点击鼠标右键,选择git
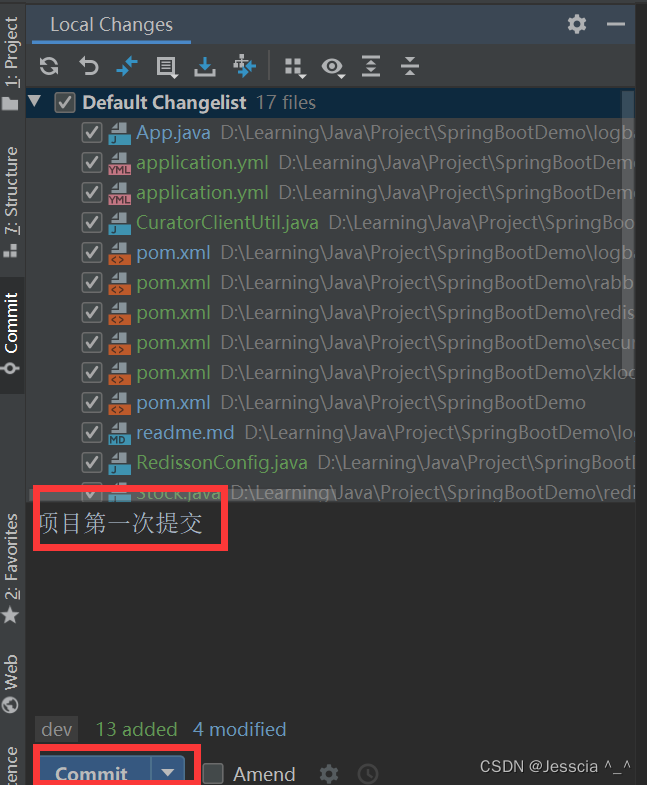
30、先提交到本地
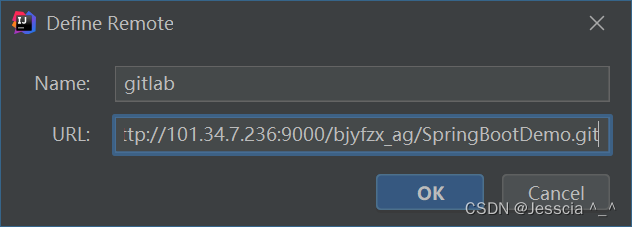
31、修改git提交地址
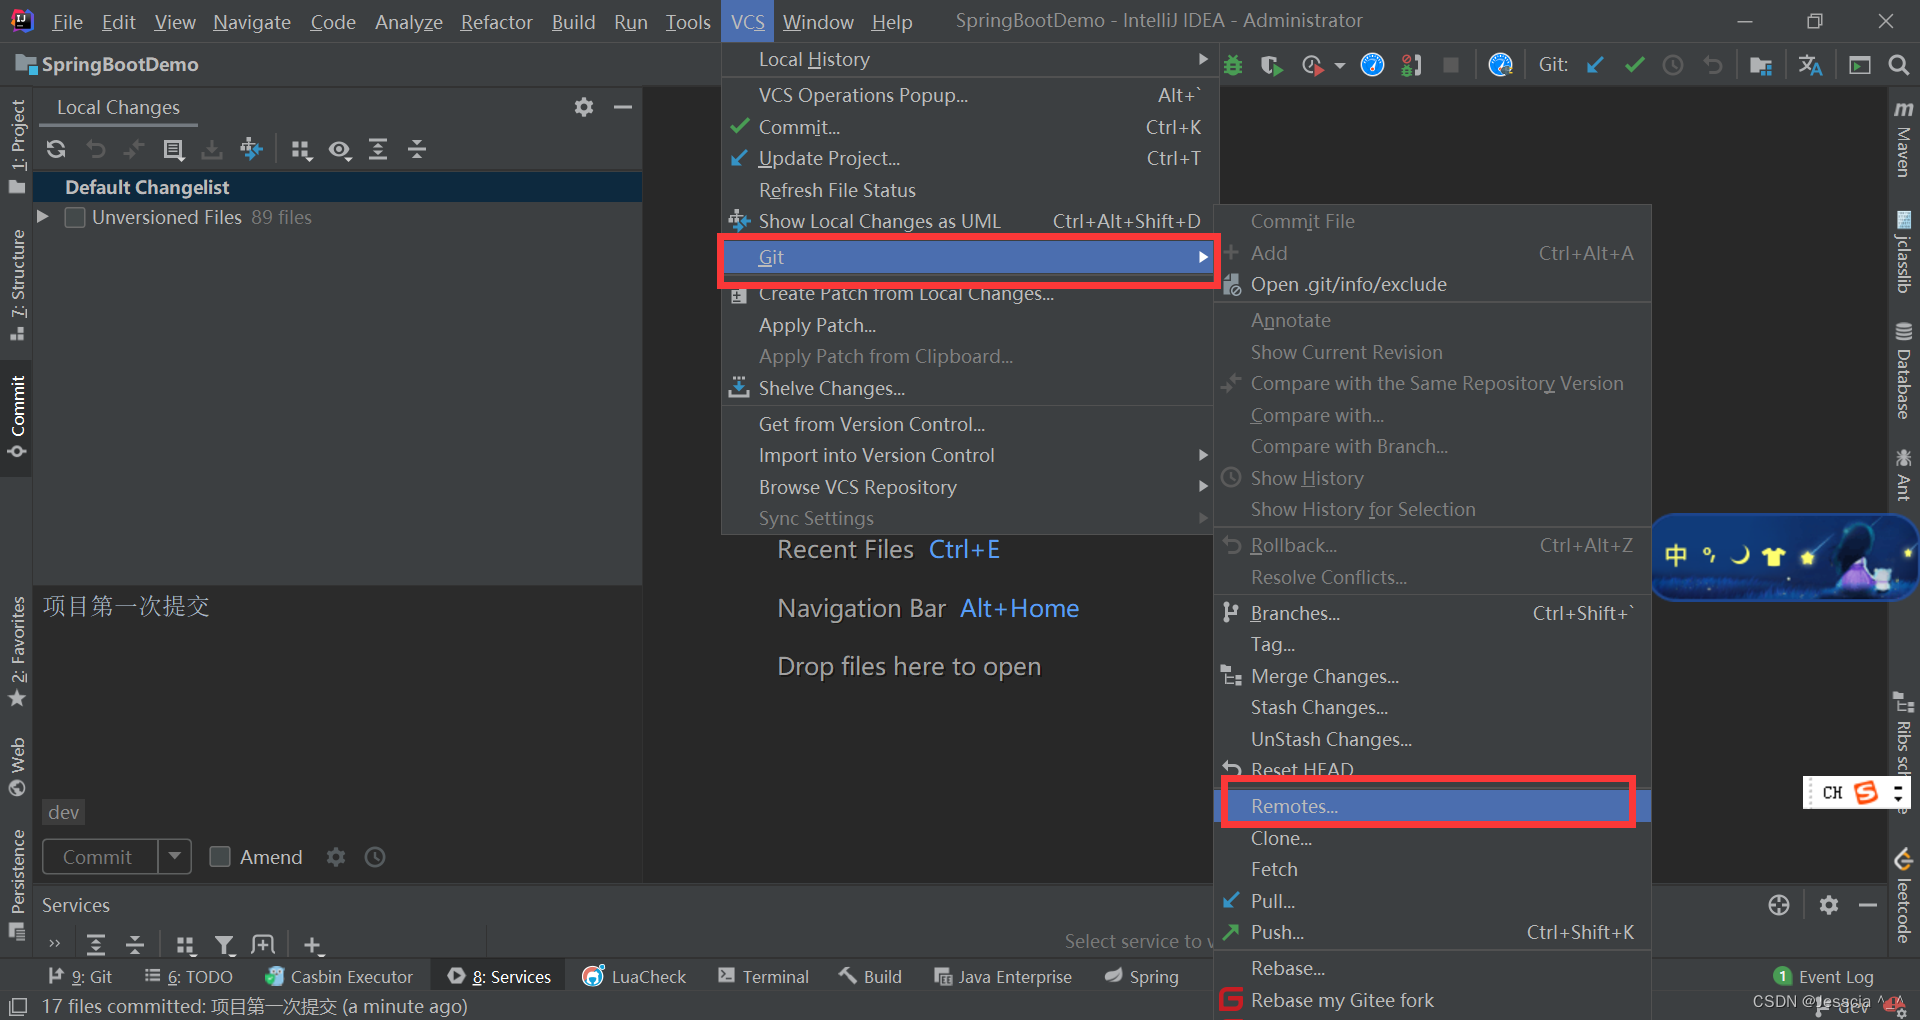
32、将远程项目地址的URL贴过来,注意:这个URL的ip有可能不是本地ip,如果发现不一致,需要马上修改,输入以下命令
[root@VM-4-2-centos config]# cd  /opt/gitlab/embedded/service/gitlab-rails/config
[root@VM-4-2-centos config]# vim gitlab.yml
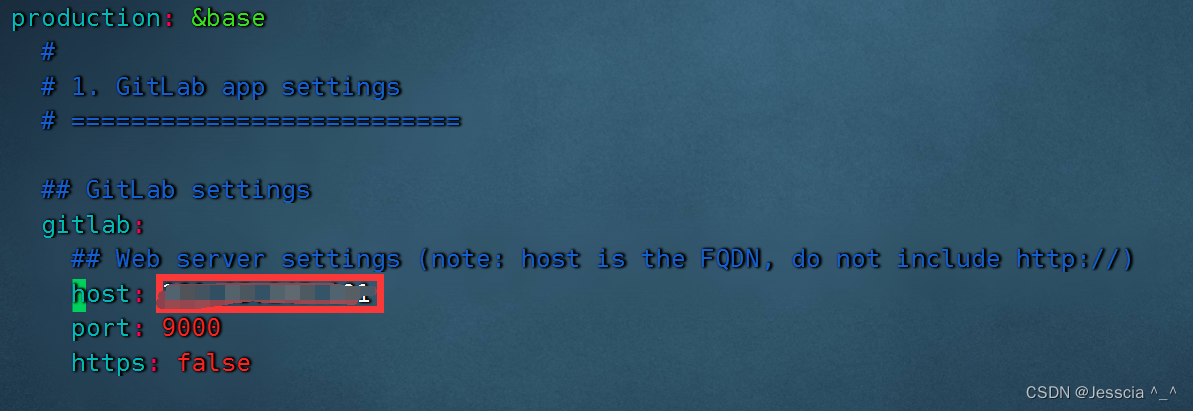
[root@VM-4-2-centos config]# gitlab-ctl restart
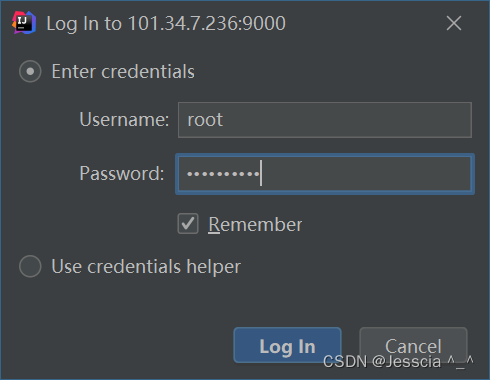
33、推送代码到远程
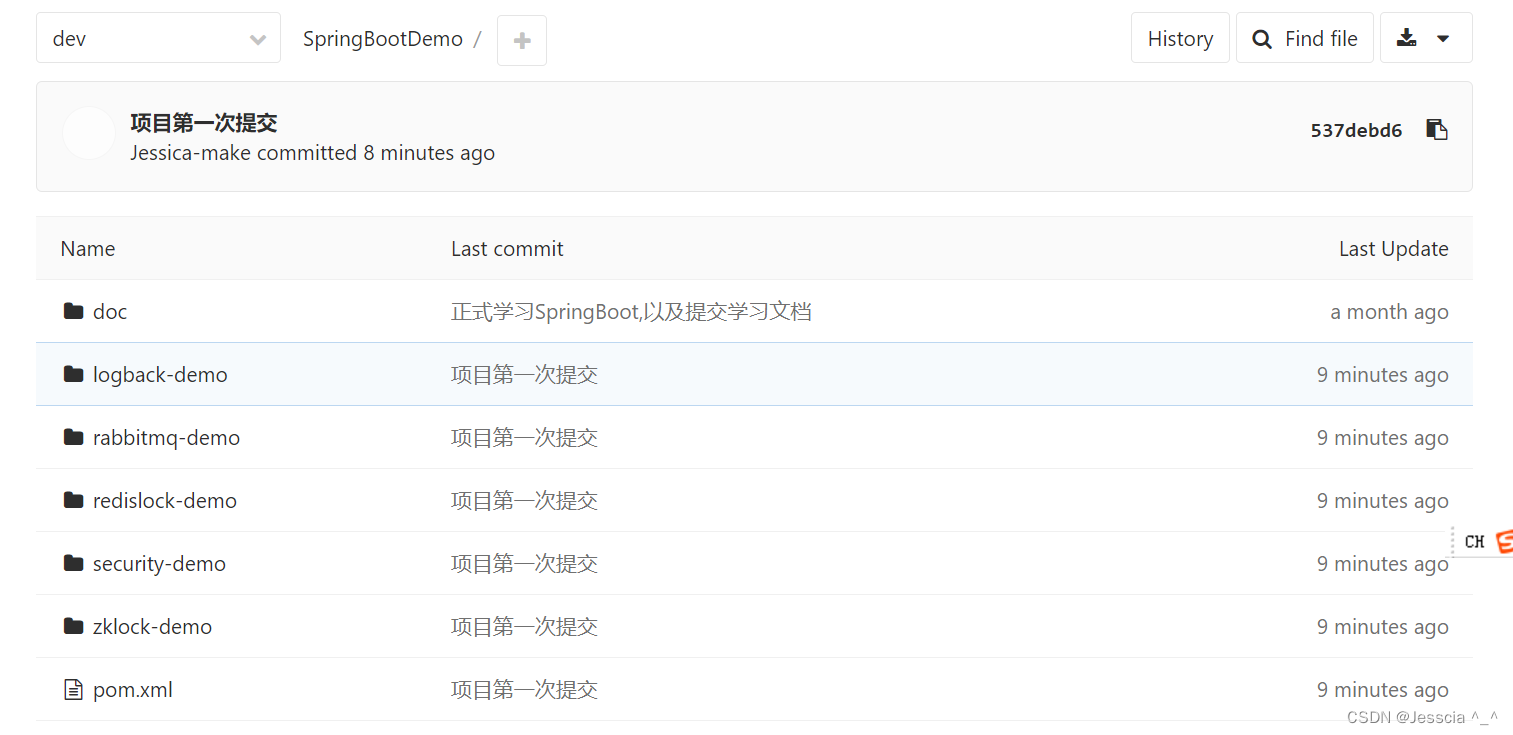
34、查看gitlab,发现代码已经提交上来,结束
35、最后,就默默的说一句,屏幕前的各位大帅逼,还有大漂亮,看到这里,麻烦给老哥一个点赞、关注、收藏三连好吗,你的支持是老哥更新最大的动力,谢谢!
本文内容由网友自发贡献,版权归原作者所有,本站不承担相应法律责任。如您发现有涉嫌抄袭侵权的内容,请联系:hwhale#tublm.com(使用前将#替换为@)