安装gitlab-ce
- 首先安装依赖:
yum install curl openssh-server openssh-clients postfix policycoreutils-python - 启动所需服务
systemctl enable sshd
systemctl start sshd
- 添加http服务到firewalld,pemmanent表示永久生效,若不加–permanent系统下次启动后就会失效
systemctl start firewalld
firewall-cmd --permanent --add-service=http
systemctl reload firewalld
- 安装gitlab-ce程序
因为gitlab-ce是社区免费开源版本,所以国内的主流镜像源都有gitlab-ce的拷贝,可以在那里下载更快,以清华镜像源举例:https://mirror.tuna.tsinghua.edu.cn/help/gitlab-ce/
新建 /etc/yum.repos.d/gitlab-ce.repo,内容为
[gitlab-ce]
name=Gitlab CE Repository
baseurl=https://mirrors.tuna.tsinghua.edu.cn/gitlab-ce/yum/el$releasever/
gpgcheck=0
enabled=1
再执行:
sudo yum makecache
sudo yum install gitlab-ce
出现下面的结果即为安装成功:
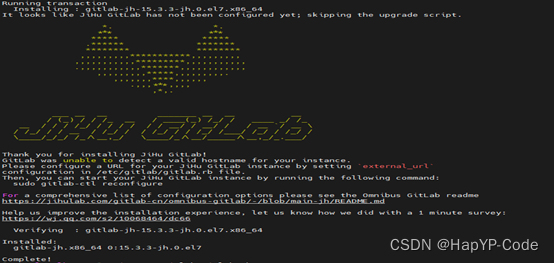
- 目前国内安装的都是gitlab-jh,即gitlab极狐,它的免费版和gitlab-ce是一样的,属于代理关系吧。
注意我没有安装postfix,即邮箱服务,这部分指导文章比较多,而且对大部分人来讲这个功能没有用,所以选择不安装
配置gitlab-ce
- 设置外部访问的url地址
vim /etc/gitlab/gitlab.rb
修改:external_url 'http://192.168.109.128:9090'  # http://ip:port格式,这里的port要注意,接下来有个步骤要用到。
然后重新加载配置:gitlab-ctl reconfigure
重新加载过程中可能会遇到卡死的情况(至少卡1分钟才视为卡死),可以尝试打开另一个窗口执行:
/opt/gitlab/embedded/bin/runsv
然后等gitlab-ctl reconfigure执行完毕后,ctrl+c关闭这个runsv程序即可。
重启gitlab-ce程序: gitlab-ctl restart
- 在同一局域网的一台windows机器上使用浏览器输入地址:http://ip:port访问gitlab-ce,如果发现地址不可访问,尝试以下方法:
firewall-cmd --zone=public --add-port=9090/tcp –permanent
此命令开启9090端口,允许外部主机通过tcp连接。
可以使用以下命令查看端口是否打开:firewall-cmd --query-port=9090/tcp

如果仍然无法访问,使用gitlab-ctl tail查看日志发现bind 9090 fail,可以执行
gitlab-ctl reconfigure
gitlab-ctl stop
gitlab-ctl start
重新启动gitlab,有可能解决问题。
然后就可以使用浏览器访问了:

gitlab常用命令
sudo gitlab-ctl start    # 启动所有 gitlab 组件;
sudo gitlab-ctl stop        # 停止所有 gitlab 组件;
sudo gitlab-ctl restart        # 重启所有 gitlab 组件;
sudo gitlab-ctl status        # 查看服务状态;
sudo gitlab-ctl reconfigure        # 启动服务;
sudo vim /etc/gitlab/gitlab.rb        # 修改默认的配置文件;
gitlab-rake gitlab:check SANITIZE=true --trace    # 检查gitlab;
本文内容由网友自发贡献,版权归原作者所有,本站不承担相应法律责任。如您发现有涉嫌抄袭侵权的内容,请联系:hwhale#tublm.com(使用前将#替换为@)