环境说明
主机系统:win10 x64
虚拟机管理器:Virtualbox 版本 6.1.0 r135406 (Qt5.6.2)
虚拟机系统:ubuntu-18.04.2-desktop-amd64
准备docker环境
官方指南
中文安装教程
使用 Docker 仓库进行安装
- 设置仓库
- 更新 apt 包索引
sudo apt-get update
- 安装 apt 依赖包,用于通过HTTPS来获取仓库
sudo apt-get install \
    apt-transport-https \
    ca-certificates \
    curl \
    gnupg-agent \
    software-properties-common
- 添加 Docker 的官方 GPG 密钥
curl -fsSL https://download.docker.com/linux/ubuntu/gpg | sudo apt-key add -

- 通过搜索指纹
9DC8 5822 9FC7 DD38 854A E2D8 8D81 803C 0EBF CD88的后8个字符,即0EBFCD88,验证您现在是否拥有带有指纹的密钥sudo apt-key fingerprint 0EBFCD88

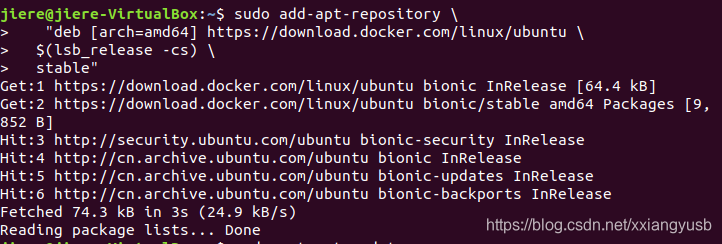
- 使用以下指令设置稳定版仓库
sudo add-apt-repository \
   "deb [arch=amd64] https://download.docker.com/linux/ubuntu \
  $(lsb_release -cs) \
  stable"
- 安装 Docker Engine-Community
运行第一个容器
运行镜像
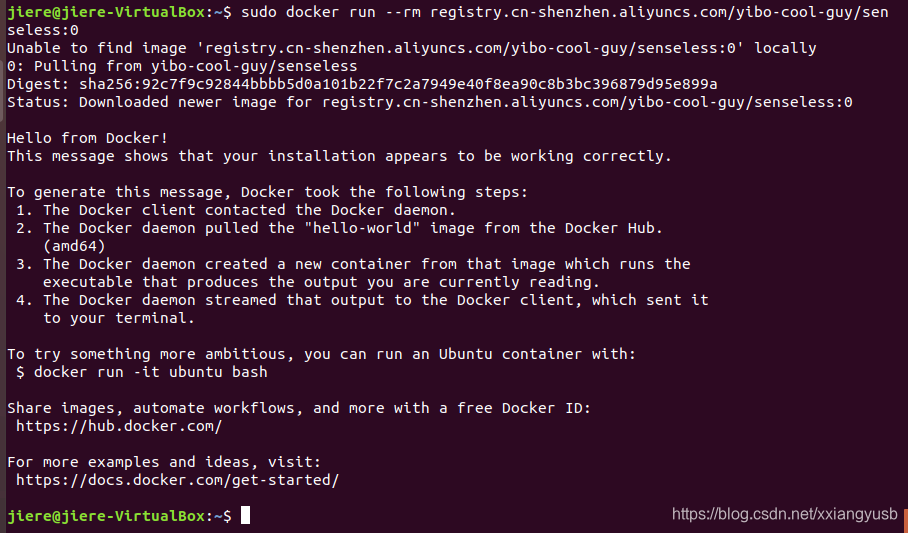
sudo docker run hello-world

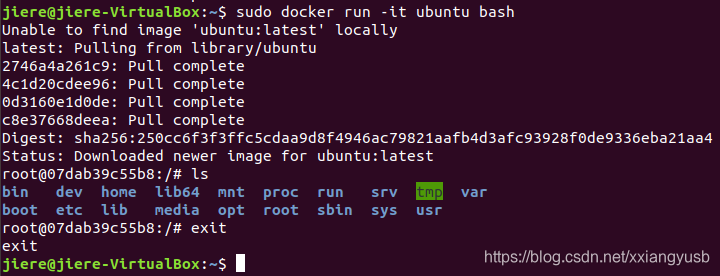
sudo docker run -it ubuntu bash
Docker基本操作
-
显示本地镜像库内容
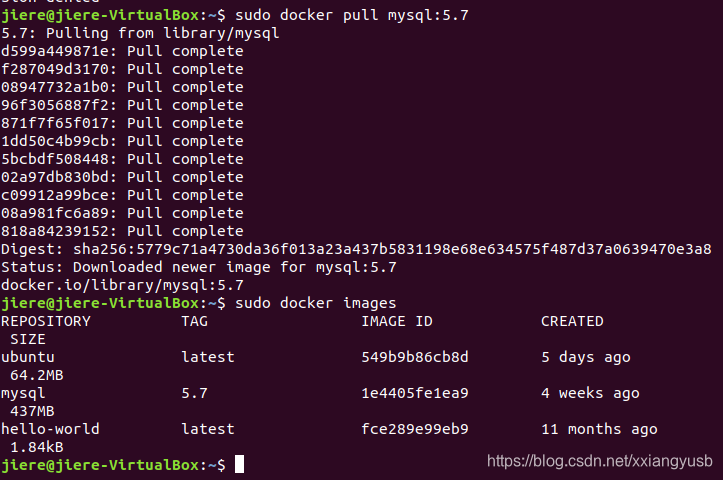
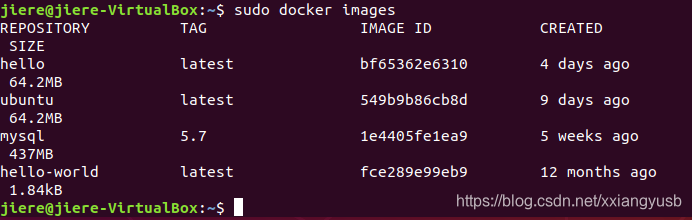
sudo docker images

-
获得帮助
sudo docker --help
输出如下结果:
Usage: docker [OPTIONS] COMMAND
A self-sufficient runtime for containers
Options:
--config string Location of client config files (default
"/home/jiere/.docker")
-c, --context string Name of the context to use to connect to the
daemon (overrides DOCKER_HOST env var and
default context set with "docker context use")
-D, --debug Enable debug mode
-H, --host list Daemon socket(s) to connect to
-l, --log-level string Set the logging level
("debug"|"info"|"warn"|"error"|"fatal")
(default "info")
--tls Use TLS; implied by --tlsverify
--tlscacert string Trust certs signed only by this CA (default
"/home/jiere/.docker/ca.pem")
--tlscert string Path to TLS certificate file (default
"/home/jiere/.docker/cert.pem")
--tlskey string Path to TLS key file (default
"/home/jiere/.docker/key.pem")
--tlsverify Use TLS and verify the remote
-v, --version Print version information and quit
Management Commands:
builder Manage builds
config Manage Docker configs
container Manage containers
context Manage contexts
engine Manage the docker engine
image Manage images
network Manage networks
node Manage Swarm nodes
plugin Manage plugins
secret Manage Docker secrets
service Manage services
stack Manage Docker stacks
swarm Manage Swarm
system Manage Docker
trust Manage trust on Docker images
volume Manage volumes
Commands:
attach Attach local standard input, output, and error streams to a running container
build Build an image from a Dockerfile
commit Create a new image from a container's changes
cp Copy files/folders between a container and the local filesystem
create Create a new container
diff Inspect changes to files or directories on a container's filesystem
events Get real time events from the server
exec Run a command in a running container
export Export a container's filesystem as a tar archive
history Show the history of an image
images List images
import Import the contents from a tarball to create a filesystem image
info Display system-wide information
inspect Return low-level information on Docker objects
kill Kill one or more running containers
load Load an image from a tar archive or STDIN
login Log in to a Docker registry
logout Log out from a Docker registry
logs Fetch the logs of a container
pause Pause all processes within one or more containers
port List port mappings or a specific mapping for the container
ps List containers
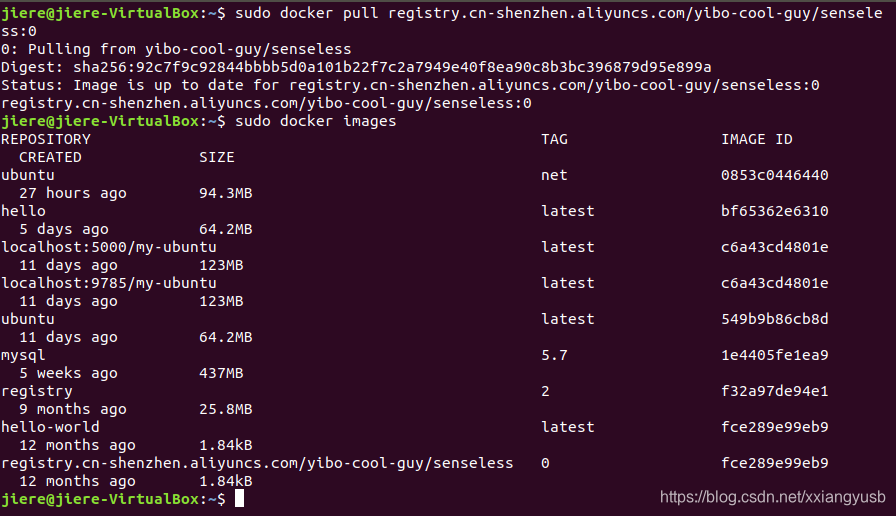
pull Pull an image or a repository from a registry
push Push an image or a repository to a registry
rename Rename a container
restart Restart one or more containers
rm Remove one or more containers
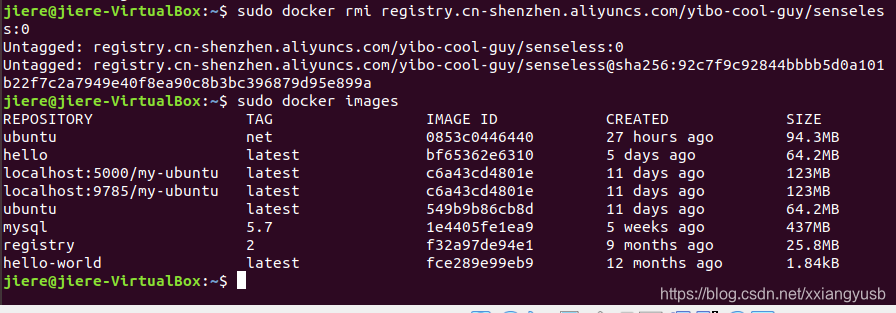
rmi Remove one or more images
run Run a command in a new container
save Save one or more images to a tar archive (streamed to STDOUT by default)
search Search the Docker Hub for images
start Start one or more stopped containers
stats Display a live stream of container(s) resource usage statistics
stop Stop one or more running containers
tag Create a tag TARGET_IMAGE that refers to SOURCE_IMAGE
top Display the running processes of a container
unpause Unpause all processes within one or more containers
update Update configuration of one or more containers
version Show the Docker version information
wait Block until one or more containers stop, then print their exit codes
Run 'docker COMMAND --help' for more information on a command.
-
显示运行中容器
sudo docker ps

-
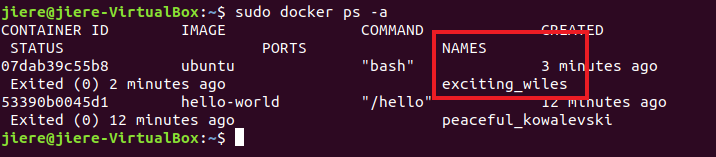
显示所有容器(包含已中止)
sudo docker ps -a
-
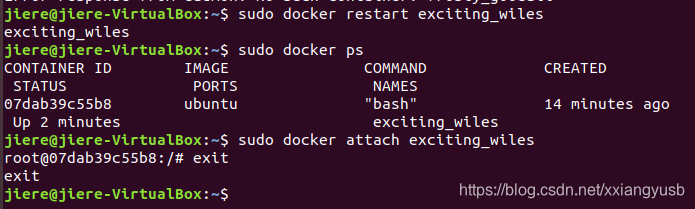
继续运行原容器并进入
sudo docker restart exciting_wiles
MySQL与容器化
拉取MySQL镜像
构建docker镜像
- 编辑dockerfile
mkdir mydock && cd mydock
vim dockerfile
在文件中输入以下内容:FROM ubuntu
ENTRYPOINT ["top", "-b"]
CMD ["-c"]
- 构建镜像
sudo docker build . -t hello

- 运行镜像
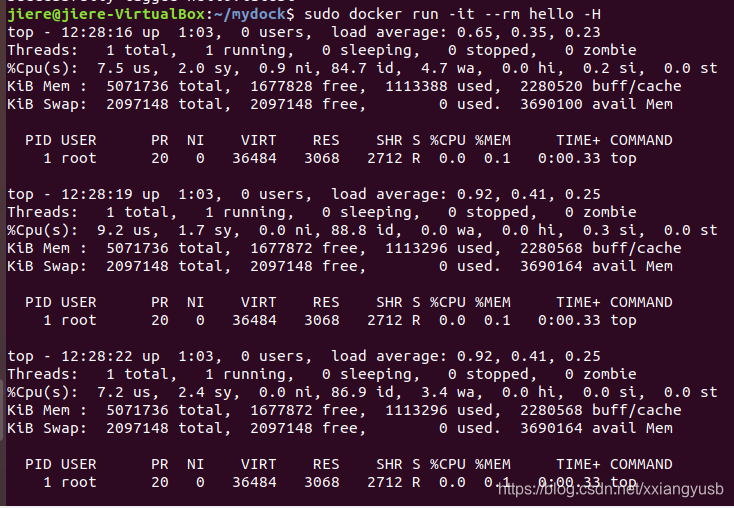
sudo docker run -it --rm hello -H
MySQL容器使用
-
启动服务器
sudo docker run -p 3306:3306 --name mysql2 -e MYSQL_ROOT_PASSWORD=root -d mysql:5.7


-
启动MySQL客户端
sudo docker run -it --net host mysql:5.7 "sh"
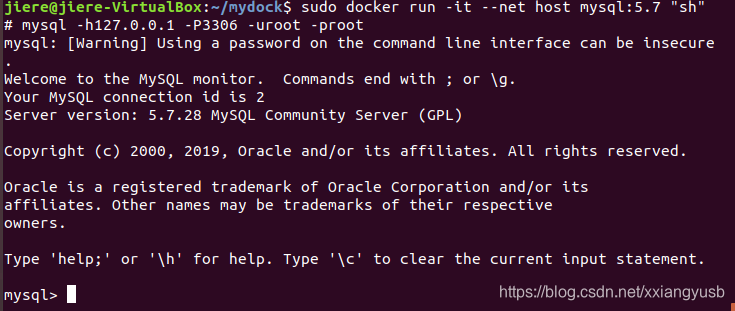
MySQL客户端的基本操作可参考潘老师的博客
-
数据库文件位置:
$ sudo docker exec -it mysql2 bash
# ls /var/lib/mysql
事实上,每次启动MySQL容器,docker就会创建一个文件卷挂载在/var/lib/mysql位置,而这个卷在主机的/var/lib/docker/volumes/目录下

-
dockerfile的VOLUME /var/lib/mysql 的含义
-
sudo docker container prune -f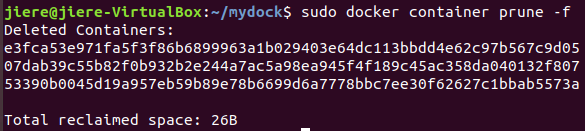
-
docker volume prune -f

-
sudo docker volume ls

-
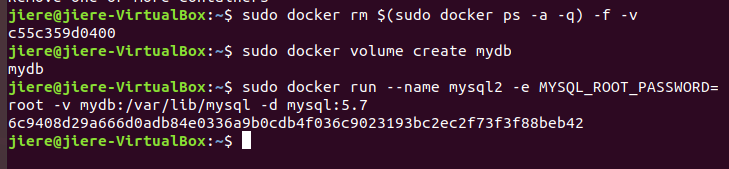
创建卷并挂载(挂载到/var/lib/mysql)
sudo docker rm $(sudo docker ps -a -q) -f -v
sudo docker volume create mydb
sudo docker run --name mysql2 -e MYSQL_ROOT_PASSWORD=root -v mydb:/var/lib/mysql -d mysql:5.7
-
启动客户端连接服务器
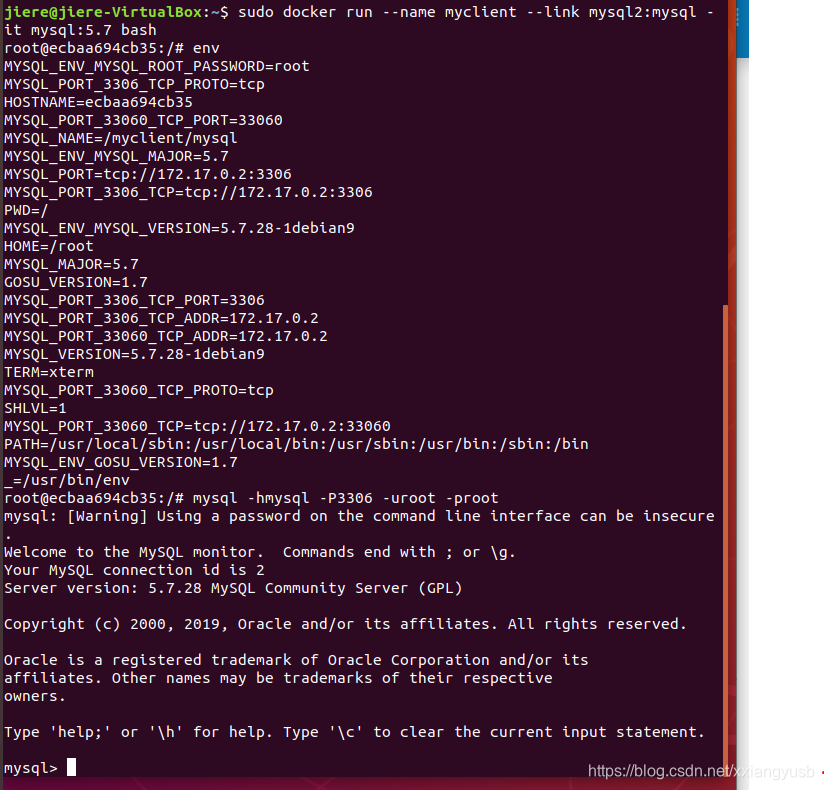
$ sudo docker run --name myclient --link mysql2:mysql -it mysql:5.7 bash
/# env
/# mysql -hmysql -P3306 -uroot -proot
说明:这里使用了--link连接两个容器;客户端容器内可以使用mysql这个别名访问
-
挂载现有数据库
其中,
-
--user(或-u):提供用户名(或UID),格式为<name|uid> : <group|gid>
-
--name:为容器指定一个别名
-
-e(或--env):设置环境变量
-
-d(或--datch):在后台运行容器,并在终端打印容器的ID
更多参数说明可参考官方手册

-
修改容器配置(例如修改密码和别名)
sudo docker run --name web-sql -v /my/custom:/etc/mysql/conf.d -e MYSQL_ROOT_PASSWORD=0805 -d mysql:5.7
-
--name:为容器重新指定一个别名
-
-v(或--volume):挂载卷
-
-e(或--env):设置环境变量
-
-d(或--datch):在后台运行容器,并在终端打印容器的ID
更多参数说明可参考官方手册

Docker compose与多容器应用自动化部署
-
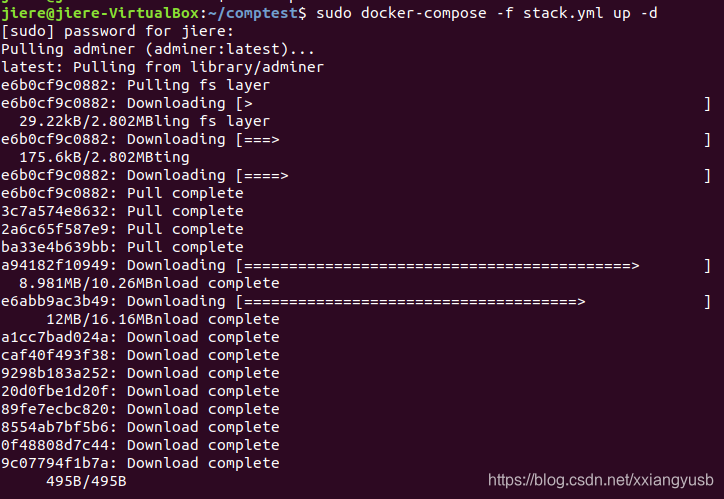
下载docker-compose(容器编排的原型):
sudo apt install docker-compose
-
编写stack.yml如下:
version: '3.1'
services:
 db:
  image: mysql:5.7
  command: --default-authentication-plugin=mysql_native_password
  restart: always
  environment:
   MYSQL_ROOT_PASSWORD: 19970805
 adminer:
  image: adminer
  restart: always
  ports:
   - 8080:8080
-
启动服务
sudo docker-compose -f stack.yml up -d
docker网络
docker默认网络:
- 容器通过桥(docker0)相连
-
IP-Forward通过NAT访问外面
- 端口映射使外面访问容器
容器网络管理
- 容器默认使用网络:
docker0(桥接)
- 容器支持网络与类型
-
bridge(本机内网络)
-
host(主机网卡)
-
overlay(跨主机网络)
none-
Custom(网络插件)
- 管理容器网络
sudo docker network ls
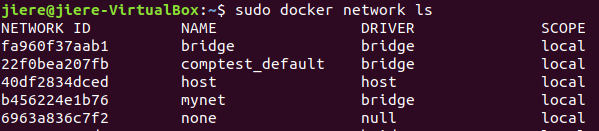
说明:docker-compose为每个应用建立自己的网络
自定义容器网络
-
备制支持ifconfig和ping命令的ubuntu容器
sudo docker run --name unet -it --rm ubuntu bash
apt-get update
apt-get install net-tools
apt-get install iputils-ping -y
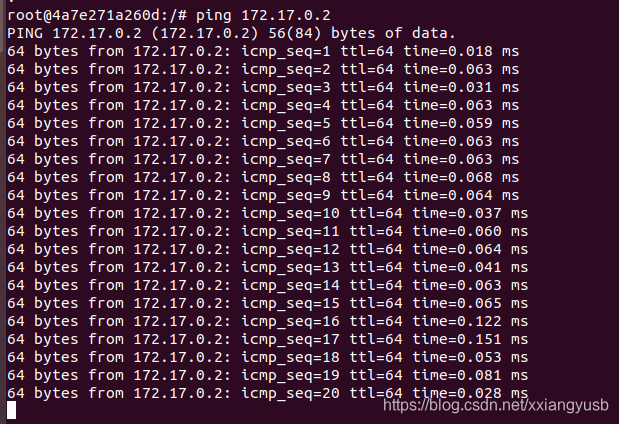
ifconfig

根据上面得到的ip地址,ping 172.17.0.2
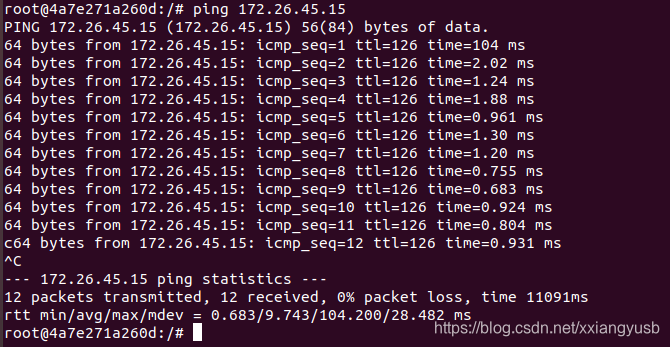
ping主机:ping 172.26.45.15
-
打开另一个终端窗口,由容器制作镜像
sudo docker commit unet ubuntu:net

-
创建自定义网络
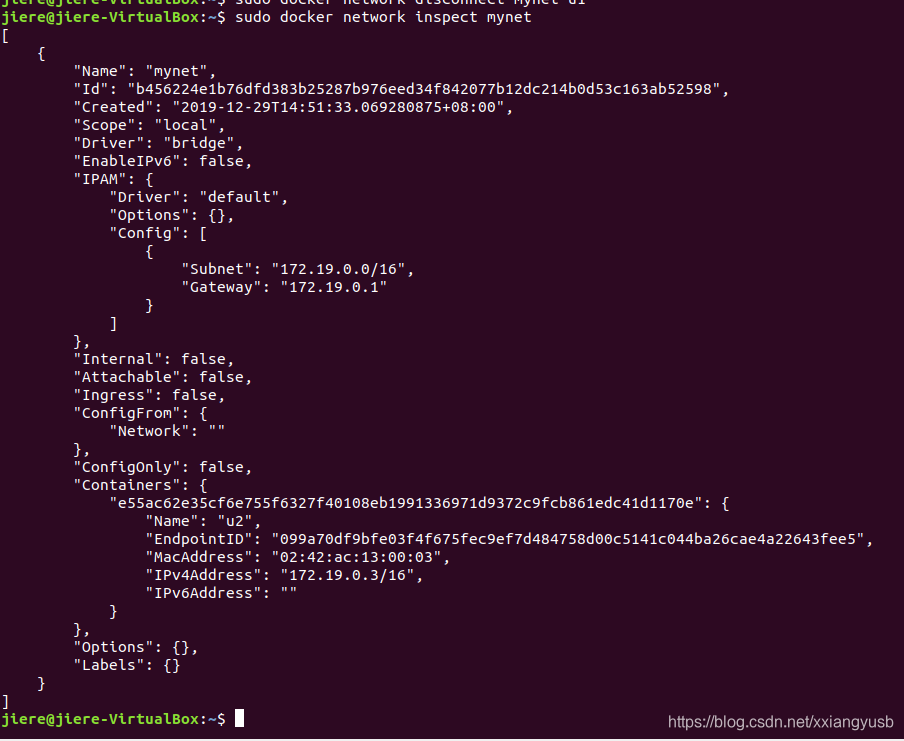
sudo docker network create mynet
-
在另外两个窗口分别创建u1,u2容器网络,并使用以下命令:
sudo docker run --name u1 -it -p 8080:80 --net mynet --rm ubuntu:net bash
sudo docker run --name u2 --net mynet -it --rm ubuntu:net bash
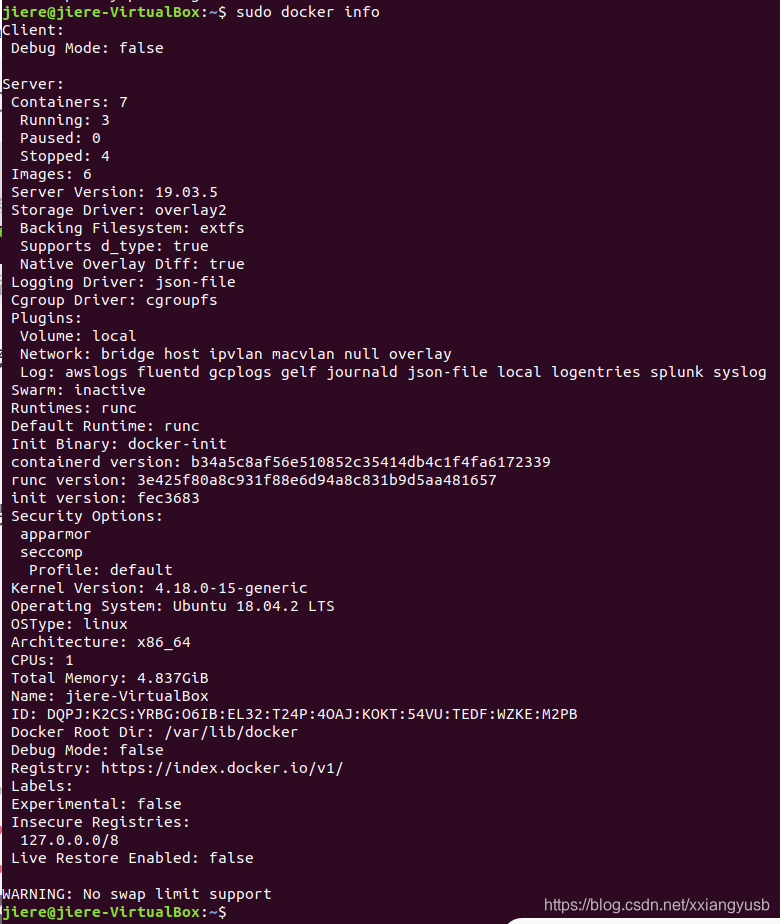
sudo docker info
sudo docker network connect bridge u1
sudo docker network disconnect mynet u1
有关docker网络更详细的介绍可参考官方手册 network,亦或参考文章 Docker - 网络使用详解2(创建自定义网络:user-defined)
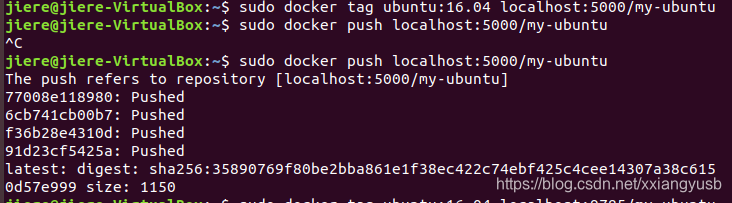
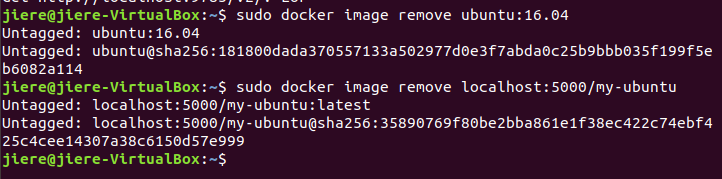
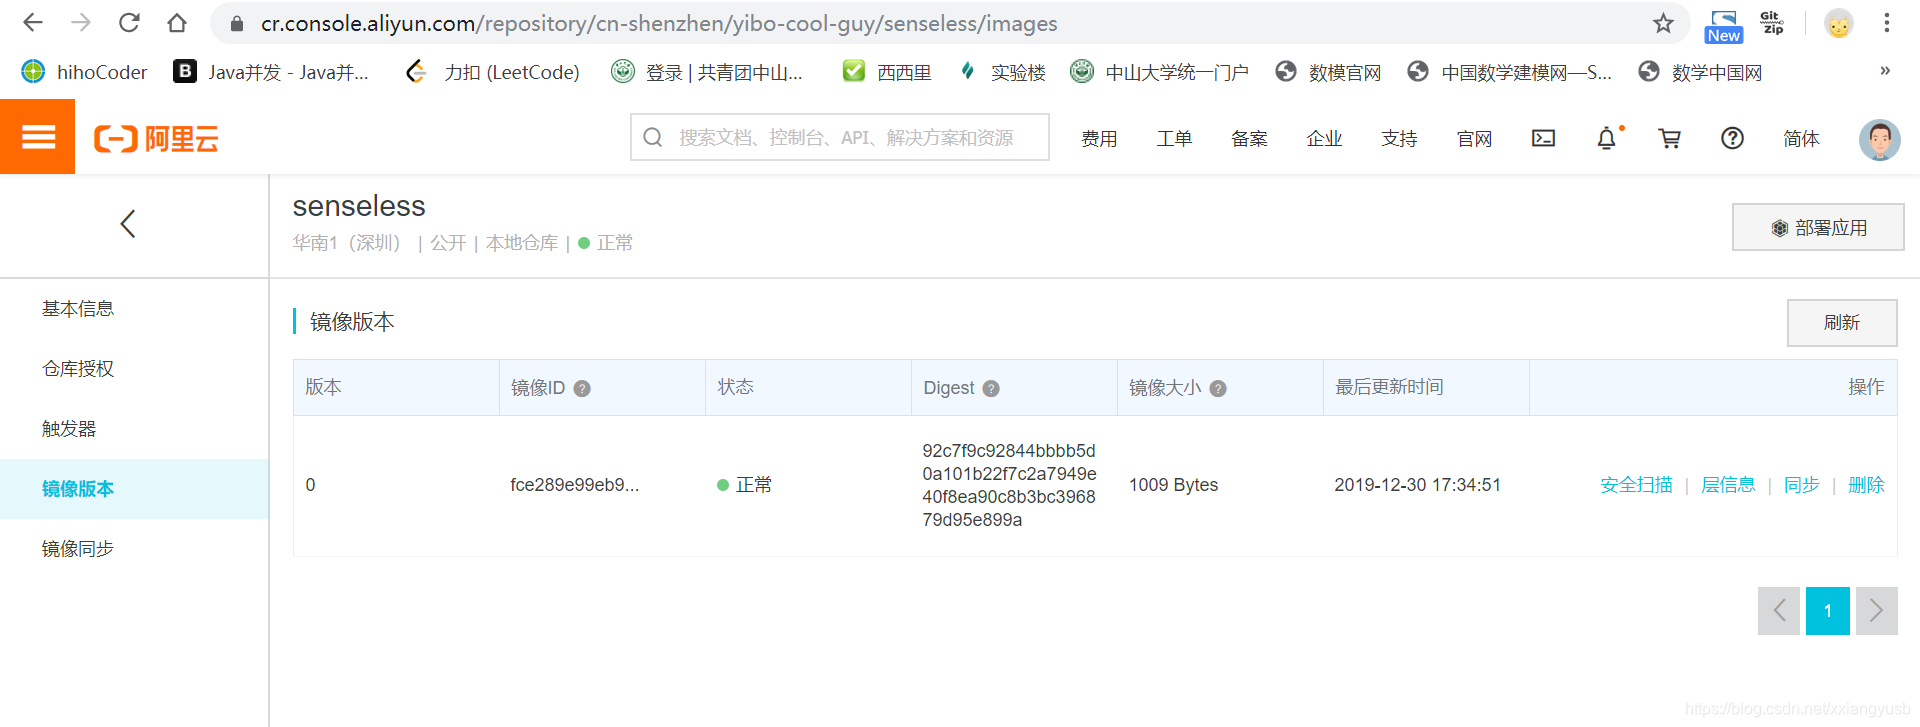
docker仓库(Registry)
容器仓库在cnf技术栈中属于供给层
- 公共容器仓库服务
- 私有容器仓库工具
- Docker Registry 2
- Vmware Harbor
- Sonatype Nexus 3
私有容器仓库搭建
根据官方指南进行实践:
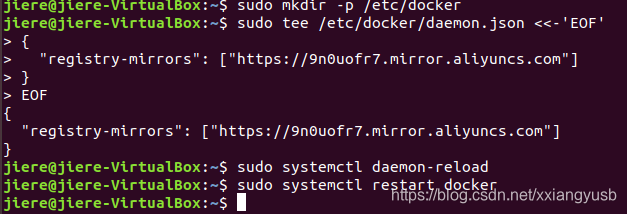
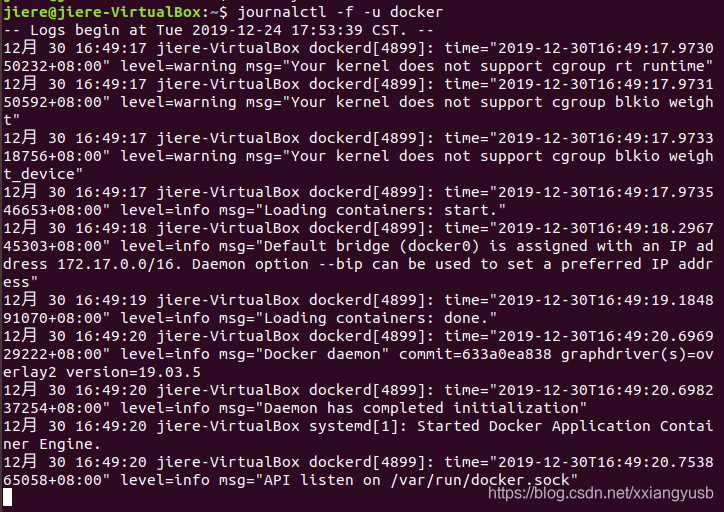
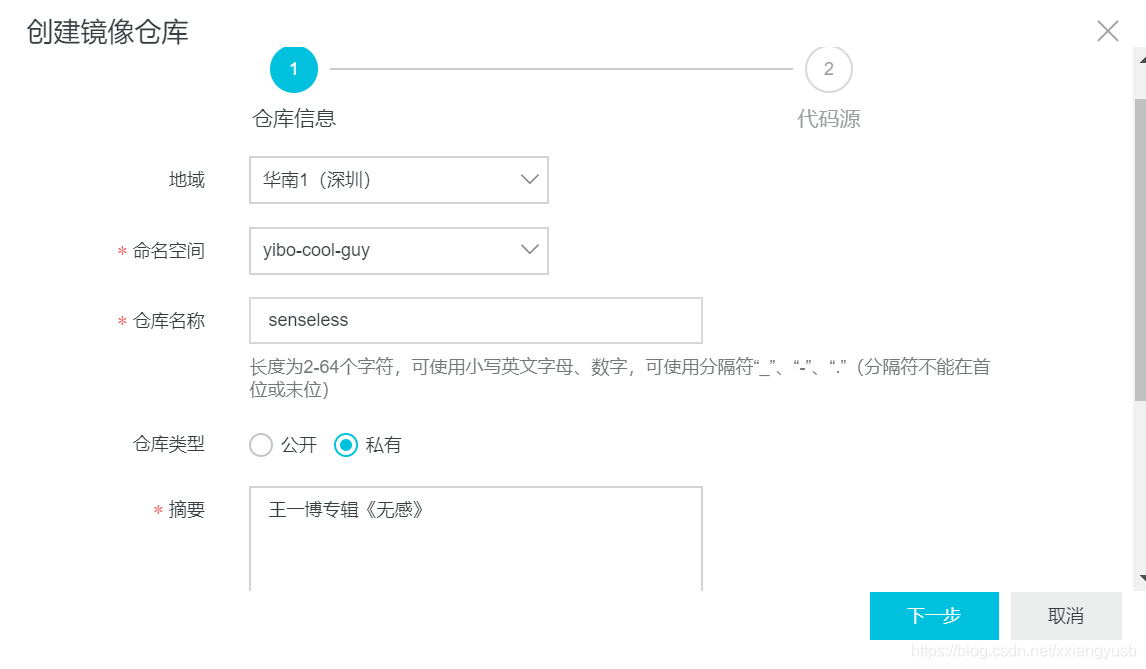
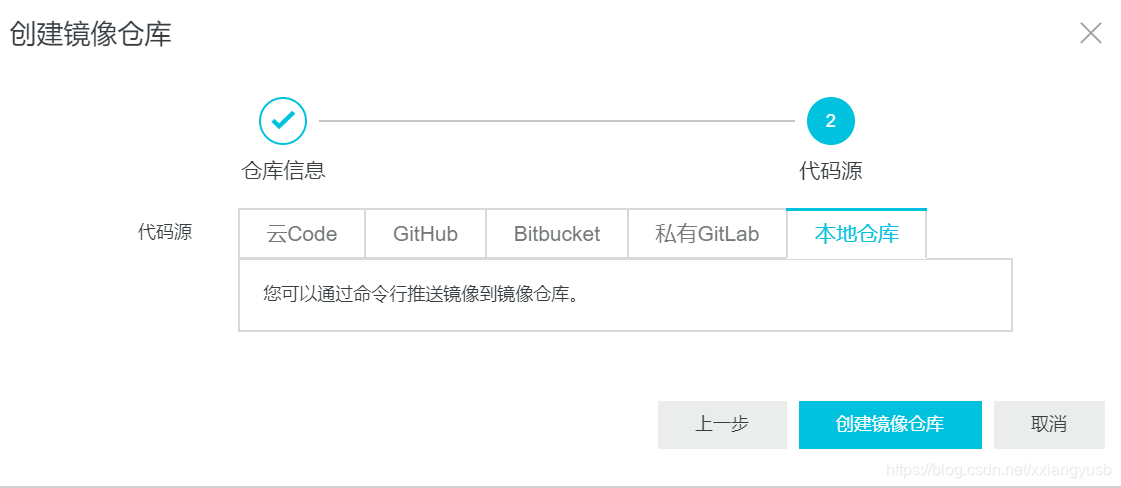
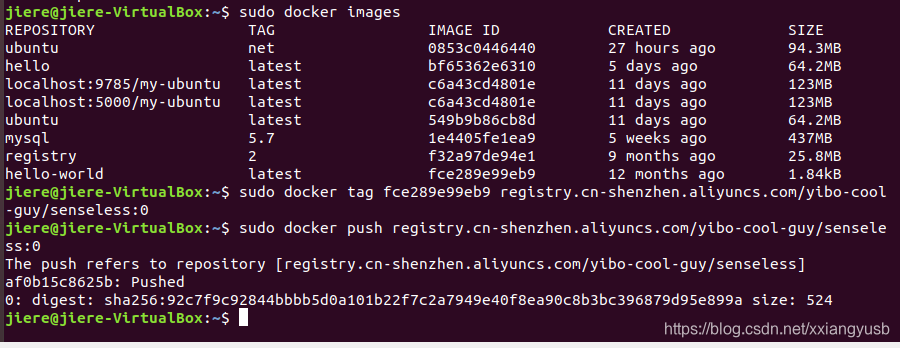
阿里云容器镜像服务实践
其他参考资料
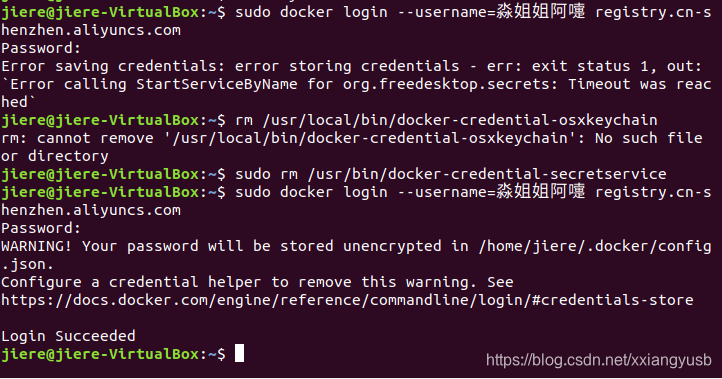
Docker login问题