人工智能
- python,大数据,机器学习,深度学习,计算机视觉
-
六、机器学习算法篇(一)数据清洗、回归(含实践)
-
- 目录
- 算法热身
-
- 理论知识 ---- 纯干货
-
- ==梯度下降算法(重点)==
- 实践
- 例1. 广告花费 与 销售额 的关系
- 例2. 预测商品销售量 ----- Lasso回归
- 例3. 回归比较
- 例4. ROC曲线
python,大数据,机器学习,深度学习,计算机视觉
六、机器学习算法篇(一)数据清洗、回归(含实践)
前言
前面博文机器学习导论篇说过,
如果结果y值连续 ------ 回归
如果结果y值离散 ------ 分类
附:
		   X  --------->  f ----------> Y
		自变量			函数		      因变量		   -----(初中)
		定义域			映射		       值域		   -----(高中)
		特征			    模型		       结果		   -----(机器学习)
目录
-
线性回归
-
Logistic回归
-
多分类:Softmax回归
-
技术点
算法热身
判断是否是素数,几种算法的性能比较
import numpy as np
from time import time
import math
def is_prime(x):
return 0 not in [x%i for i in range(2, int(math.sqrt(x))+1)]
def is_prime3(x):
flag = True
for p in p_list2:
if math.sqrt(x) <p:
break
if x%p == 0:
flag = False
break
if flag:
p_list2.append(x)
return x
if __name__ == "__main__":
a = 2
b = 100000
t_start = time()
p = [p for p in range(a, b) if 0 not in [p%d for d in range(2, int(math.sqrt(p))+1)]]
print(time()-t_start)
print(p)
t_start = time()
p = list(filter(is_prime, range(a, b)))
print(time()-t_start)
print(p)
t_start = time()
is_prime2 = (lambda x: 0 not in [x%i for i in range(2, int(math.sqrt(x))+1)])
p = list(filter(is_prime2, range(a, b)))
print(time()-t_start)
print(p)
t_start = time()
p_list = []
for i in range(2, b):
flag = True
for p in p_list:
if math.sqrt(i) < p:
break
if i%p == 0:
flag = False
break
if flag:
p_list.append(i)
print(time()-t_start)
print(p_list)
t_start = time()
p_list2 = []
p_list2 = list(filter(is_prime3, range(2, b)))
print(time()-t_start)
print(p_list2)
运行结果:
C:\Python\Anaconda3\python.exe C:/AI/AnacondaProject/1_numpy.py
1.8530809879302979
[2, 3, 5, 7, 11, 13, 17, 19, 23, 29, 31, 37, 41, 43, 47, 53, 59, 61, 67, 71, 73, 79, 83, 89, 97, 101, 103, 107, (省略)
1.9677658081054688
[2, 3, 5, 7, 11, 13, 17, 19, 23, 29, 31, 37, 41, 43, 47, 53, 59, 61, 67, 71, 73, 79, 83, 89, 97, 101, 103, 107, (省略)
2.1472527980804443
[2, 3, 5, 7, 11, 13, 17, 19, 23, 29, 31, 37, 41, 43, 47, 53, 59, 61, 67, 71, 73, 79, 83, 89, 97, 101, 103, 107, (省略)
0.44384026527404785
[2, 3, 5, 7, 11, 13, 17, 19, 23, 29, 31, 37, 41, 43, 47, 53, 59, 61, 67, 71, 73, 79, 83, 89, 97, 101, 103, 107, (省略)
0.37399816513061523
[2, 3, 5, 7, 11, 13, 17, 19, 23, 29, 31, 37, 41, 43, 47, 53, 59, 61, 67, 71, 73, 79, 83, 89, 97, 101, 103, 107, (省略)
结论:
可以看出 使用filter()会提高效率,但用lambda效率几乎没变,效率最高的是方法5,其核心思想是方法4,方法5是在方法4的基础上加了filter()。
附:
关于python3中filter的使用,引用菜鸟教程的实例,如下:

注:
- python的filter筛选,即查找。filter(函数fun, 列表list) # 将list的元素一个一个的放到函数fun里执行。用函数fun来筛选list。
- 相当于php中的回调函数:
- 查找 array_filter():array_filter($arr, “fun”)
- 插入 array_walk():array_walk($arr, “fun”)
- 替换 array_map():array_map(“fun”, $arr)
拓展:
其实求素数最高效的是埃氏筛法 ----- Eratosthenes埃拉托色尼筛选法,下面代码了解下:
def _int_iter():
n = 1
while True:
n = n + 2
yield n
def _not_divisible(n):
return lambda x:x % n > 0
def primes():
yield 2
it = _int_iter()
while True:
n = next(it)
yield n
it = filter(_not_divisible(n), it)
for n in primes():
if n < 1000:
print(n)
else:
break
理论知识 ---- 纯干货

AUC越接近1越好,如果算出AUC值接近0.5则相当于白算了(还不如随机选呢)。(AUC后续再说,不容易解释)
线性回归公式推导:
两个变量:y = ax + b
多个变量:
h
θ
(
x
)
h_\theta~(x)
hθ (x) =
θ
0
\theta_0
θ0 +
θ
1
x
1
\theta_1x_1
θ1x1 +
θ
2
x
2
\theta_2x_2
θ2x2 + … +
θ
n
x
n
\theta_nx_n
θnxn 。
记
θ
\theta
θ = [
θ
1
\theta_1
θ1,
θ
2
\theta_2
θ2, …,
θ
n
\theta_n
θn],特征x = 对角阵,如下:

则:
h
θ
(
x
)
h_\theta~(x)
hθ (x) =
θ
T
\theta^T
θTx, 再加上误差,进一步地:

由于误差服从高斯分布,故误差的概率:


梯度下降算法(重点)


 特征选择:1次方,2次方,3次方,选哪个好呢,次数高或许能全拟合上,但有可能造成过拟合,并不是说次数越高越好。


上面:R2只是一个记号,R2有可能为负值。
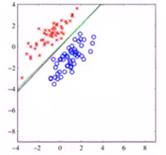
sigmoid函数:g(x) = 1/(1+e-x),如下,可推出其导数 g’(x) = g(x)*(1-g(x))。
Logistic回归:g(
θ
\theta
θTx) = 1/(1 + exp(-
θ
\theta
θTx))
 附:高数知识

注:将上面函数上移0.5个单位即得到sigmoid函数。
可以反着推,假设发生的概率P和不发生的概率1-P的比值再取对数,是线性的。由此可推出概率P恰好是sigmoid函数。如下:


混淆矩阵:

俗话说:“随机过程随机过,混淆矩阵易混淆。”
下面,我通过一个简单的例子说明白上面概念。不负此博文
举例:是否生病?
-
(1)
实际:正 ---- 生病
预测:P是 ---- 生病
预测结果:T ---- 预测的正确
记为:TP
-
(2)
实际:正 ---- 生病
预测:N否 ------ 未生病
预测结果:F ---- 预测的错误
记为:TN
-
(3)
实际:负 ---- 未生病
预测:P是 ----- 生病
预测结果:F ----- 预测错了
-
(4)
实际:负 ----- 未生病
预测:N否 ----- 未生病
预测结果:T ----- 预测正确
注:P是又称为阳性,N否又称为阴性 ------ 来自于医学。
-
TPR=TP Rate:
实际生病的情况,诊断成生病的概率。— 诊断对
TPR越高越好,最好接近于1。
应用:实际生病了要求我们必须给诊断出来。
-
FPR= FR Rate:
实际没生病,诊断成生病的概率。 ----- 误诊
FPR越低越好,最好接近于0
应用:实际没生病要求我们必须不能误诊。
所以TPR和FPR这两个很重要!
ROC曲线 和 AUC面积(Area Under Curve):

ROC曲线下的面积,即AUC(Area Under ROC Curve):AUC反映的是分类器对样本的分类排序能力。AUC越大,分类器模型对样本分类的效果就越好(见下面小图)。AUC是衡量学习器优劣的一种性能指标。
AUC面积范围应该在[0.5, 1]之间才有价值,越接近于1说明模型越的好。
- 若AUC = 1,则是完美分类器。
- 若低于0.5则没价值(模型没有预测价值):因为若诊断预测正确的概率低于0.5这个模型就没价值了,比如我来诊断是否生病 我不用模型随机猜像抛硬币一样还有0.5的概率蒙对呢。


实践
例1. 广告花费 与 销售额 的关系
import csv
import numpy as np
import matplotlib as mpl
import matplotlib.pyplot as plt
import pandas as pd
from sklearn.model_selection import train_test_split
from sklearn.linear_model import LinearRegression
from pprint import pprint
if __name__ == "__main__":
path = 'Advertising.csv'
data = pd.read_csv(path)
x = data[['TV', 'Radio']]
y = data['Sales']
print(x)
print(y)
mpl.rcParams['font.sans-serif'] = [u'simHei']
mpl.rcParams['axes.unicode_minus'] = False
plt.figure(facecolor='w')
plt.plot(data['TV'], y, 'ro', label='TV')
plt.plot(data['Radio'], y, 'g^', label='Radio')
plt.plot(data['Newspaper'], y, 'mv', label='Newspaer')
plt.legend(loc='lower right')
plt.xlabel(u'广告花费', fontsize=16)
plt.ylabel(u'销售额', fontsize=16)
plt.title(u'广告花费与销售额对比数据', fontsize=20)
plt.grid()
plt.show()
plt.figure(facecolor='w', figsize=(9, 10))
plt.subplot(311)
plt.plot(data['TV'], y, 'ro')
plt.title('TV')
plt.grid()
plt.subplot(312)
plt.plot(data['Radio'], y, 'g^')
plt.title('Radio')
plt.grid()
plt.subplot(313)
plt.plot(data['Newspaper'], y, 'b*')
plt.title('Newspaper')
plt.grid()
plt.tight_layout()
plt.show()
x_train, x_test, y_train, y_test = train_test_split(x, y, train_size=0.8, random_state=1)
print(type(x_test))
print(x_train.shape, y_train.shape)
linreg = LinearRegression()
model = linreg.fit(x_train, y_train)
print(model)
print(linreg.coef_, linreg.intercept_)
order = y_test.argsort(axis=0)
y_test = y_test.values[order]
x_test = x_test.values[order, :]
y_hat = linreg.predict(x_test)
mse = np.average((y_hat - np.array(y_test)) ** 2)
rmse = np.sqrt(mse)
print('MSE = ', mse,)
print('RMSE = ', rmse)
print('R2 = ', linreg.score(x_train, y_train))
print('R2 = ', linreg.score(x_test, y_test))
plt.figure(facecolor='w')
t = np.arange(len(x_test))
plt.plot(t, y_test, 'r-', linewidth=2, label=u'真实数据')
plt.plot(t, y_hat, 'g-', linewidth=2, label=u'预测数据')
plt.legend(loc='upper right')
plt.title(u'线性回归预测销量', fontsize=18)
plt.grid(b=True)
plt.show()
运行结果:
C:\Python\Anaconda3\python.exe C:/AI/AnacondaProject/8.regression/8.1.Advertising.py
        TV  Radio
0    230.1   37.8
1     44.5   39.3
2     17.2   45.9
3    151.5   41.3
4    180.8   10.8
..     ...    ...
195   38.2    3.7
196   94.2    4.9
197  177.0    9.3
198  283.6   42.0
199  232.1    8.6

[200 rows x 2 columns]
0      22.1
1      10.4
2       9.3
3      18.5
4      12.9
       ...
195     7.6
196     9.7
197    12.8
198    25.5
199    13.4
Name: Sales, Length: 200, dtype: float64


上面是线性回归预测的商品销售量,下面用Lasso回归来预测
例2. 预测商品销售量 ----- Lasso回归
文件8.2.LinearRegression_CV.py
完整代码如下:
import numpy as np
import pandas as pd
import matplotlib as mpl
import matplotlib.pyplot as plt
from sklearn.model_selection import train_test_split
from sklearn.linear_model import Lasso, Ridge
from sklearn.model_selection import GridSearchCV
if __name__ == "__main__":
data = pd.read_csv('Advertising.csv')
x = data[['TV', 'Radio', 'Newspaper']]
y = data['Sales']
print(x)
print(y)
"""
train_test_split()生成训练数据,测试数据。 ----- 来自开头的sklearn包
参数:
random_state=1 表每次取的训练数据是相同的,测试数据也是相同的。这句话也可以不加
train_size=0.75 表75%的当训练数据,剩下的25%当测试数据。也可用固定值, train_size=100(100个当训练数据,剩余的当测试数据)
或者也可用test_size=0.25 表25%当测试数据
"""
x_train, x_test, y_train, y_test = train_test_split(x, y, random_state=1)
model = Lasso()
alpha_can = np.logspace(-3, 2, 10)
np.set_printoptions(suppress=True)
print('alpha_can =', alpha_can)
lasso_model = GridSearchCV(model, param_grid={'alpha': alpha_can}, cv=5)
lasso_model.fit(x_train, y_train)
print('超参数:\n', lasso_model.best_params_)
order = y_test.argsort(axis=0)
y_test = y_test.values[order]
x_test = x_test.values[order, :]
y_hat = lasso_model.predict(x_test)
print(lasso_model.score(x_test, y_test))
mse = np.average((y_hat - np.array(y_test))**2)
rmse = np.sqrt(mse)
print(mse, rmse)
t = np.arange(len(x_test))
mpl.rcParams['font.sans-serif'] = [u'simHei']
mpl.rcParams['axes.unicode_minus'] = False
plt.figure(facecolor='w')
plt.plot(t, y_test, 'r-', linewidth=2, label=u'真实数据')
plt.plot(t, y_hat, 'g-', linewidth=2, label=u'预测数据')
plt.title(u'线性回归预测销量', fontsize=18)
plt.legend(loc='upper right')
plt.grid()
plt.show()
运行结果:
C:\Python\Anaconda3\python.exe C:/AI/AnacondaProject/8.regression/8.2.linearRegression_CV.py
        TV  Radio  Newspaper
0    230.1   37.8       69.2
1     44.5   39.3       45.1
2     17.2   45.9       69.3
3    151.5   41.3       58.5
4    180.8   10.8       58.4
..     ...    ...        ...
195   38.2    3.7       13.8
196   94.2    4.9        8.1
197  177.0    9.3        6.4
198  283.6   42.0       66.2
199  232.1    8.6        8.7

[200 rows x 3 columns]
0      22.1
1      10.4
2       9.3
3      18.5
4      12.9
       ...
195     7.6
196     9.7
197    12.8
198    25.5
199    13.4
Name: Sales, Length: 200, dtype: float64
alpha_can = [  0.001        0.00359381   0.0129155    0.04641589   0.16681005
   0.59948425   2.15443469   7.74263683  27.82559402 100.        ]
超参数:
 {'alpha': 0.5994842503189409}
0.9147734784738105
1.992871866305969 1.4116911370076561

例3. 回归比较
文件8.3.ElasticNet.py
完整代码如下:
import numpy as np
from sklearn.linear_model import LinearRegression, RidgeCV, LassoCV, ElasticNetCV
from sklearn.preprocessing import PolynomialFeatures
from sklearn.pipeline import Pipeline
from sklearn.exceptions import ConvergenceWarning
import matplotlib.pyplot as plt
import matplotlib as mpl
import warnings
def xss(y, y_hat):
y = y.ravel()
y_hat = y_hat.ravel()
tss = ((y - np.average(y)) ** 2).sum()
rss = ((y_hat - y) ** 2).sum()
ess = ((y_hat - np.average(y)) ** 2).sum()
r2 = 1 - rss / tss
tss_list.append(tss)
rss_list.append(rss)
ess_list.append(ess)
ess_rss_list.append(rss + ess)
corr_coef = np.corrcoef(y, y_hat)[0, 1]
return r2, corr_coef
if __name__ == "__main__":
warnings.filterwarnings("ignore", category=FutureWarning, module="sklearn")
warnings.filterwarnings(action='ignore', category=ConvergenceWarning)
np.random.seed(0)
np.set_printoptions(linewidth=1000)
N = 9
x = np.linspace(0, 6, N) + np.random.randn(N)
x = np.sort(x)
y = x**2 - 4*x - 3 + np.random.randn(N)
x.shape = -1, 1
y.shape = -1, 1
models = [Pipeline([
('poly', PolynomialFeatures()),
('linear', LinearRegression(fit_intercept=False))]),
Pipeline([
('poly', PolynomialFeatures()),
('linear', RidgeCV(alphas=np.logspace(-3, 2, 50), fit_intercept=False))]),
Pipeline([
('poly', PolynomialFeatures()),
('linear', LassoCV(alphas=np.logspace(-3, 2, 50), fit_intercept=False))]),
Pipeline([
('poly', PolynomialFeatures()),
('linear', ElasticNetCV(alphas=np.logspace(-3, 2, 50), l1_ratio=[.1, .5, .7, .9, .95, .99, 1],
fit_intercept=False))])
]
mpl.rcParams['font.sans-serif'] = [u'simHei']
mpl.rcParams['axes.unicode_minus'] = False
np.set_printoptions(suppress=True)
plt.figure(figsize=(18, 12), facecolor='w')
d_pool = np.arange(1, N, 1)
m = d_pool.size
clrs = []
for c in np.linspace(11119999, 255, m, dtype=int):
clrs.append('#%06x' % c)
line_width = np.linspace(5, 2, m)
titles = u'线性回归', u'Ridge回归', u'LASSO回归', u'ElasticNet回归'
tss_list = []
rss_list = []
ess_list = []
ess_rss_list = []
for t in range(4):
model = models[t]
plt.subplot(2, 2, t+1)
plt.plot(x, y, 'ro', ms=10, zorder=N)
for i, d in enumerate(d_pool):
model.set_params(poly__degree=d)
model.fit(x, y.ravel())
lin = model.get_params('linear')['linear']
output = u'%s:%d阶,系数为:' % (titles[t], d)
if hasattr(lin, 'alpha_'):
idx = output.find(u'系数')
output = output[:idx] + (u'alpha=%.6f,' % lin.alpha_) + output[idx:]
if hasattr(lin, 'l1_ratio_'):
idx = output.find(u'系数')
output = output[:idx] + (u'l1_ratio=%.6f,' % lin.l1_ratio_) + output[idx:]
print(output, lin.coef_.ravel())
x_hat = np.linspace(x.min(), x.max(), num=100)
x_hat.shape = -1, 1
y_hat = model.predict(x_hat)
s = model.score(x, y)
r2, corr_coef = xss(y, model.predict(x))
z = N - 1 if (d == 2) else 0
label = u'%d阶,$R^2$=%.3f' % (d, s)
if hasattr(lin, 'l1_ratio_'):
label += u',L1 ratio=%.2f' % lin.l1_ratio_
plt.plot(x_hat, y_hat, color=clrs[i], lw=line_width[i], alpha=0.75, label=label, zorder=z)
plt.legend(loc='upper left')
plt.grid(True)
plt.title(titles[t], fontsize=18)
plt.xlabel('X', fontsize=15)
plt.ylabel('Y', fontsize=15)
plt.suptitle(u'多项式曲线拟合比较', fontsize=22)
plt.tight_layout(pad=5, h_pad=4)
plt.show()
y_max = max(max(tss_list), max(ess_rss_list)) * 1.05
plt.figure(figsize=(9, 7), facecolor='w')
t = np.arange(len(tss_list))
plt.plot(t, tss_list, 'ro-', lw=2, label=u'TSS(Total Sum of Squares)')
plt.plot(t, ess_list, 'mo-', lw=1, label=u'ESS(Explained Sum of Squares)')
plt.plot(t, rss_list, 'bo-', lw=1, label=u'RSS(Residual Sum of Squares)')
plt.plot(t, ess_rss_list, 'go-', lw=2, label=u'ESS+RSS')
plt.ylim((0, y_max))
plt.legend(loc='center right')
plt.xlabel(u'实验:线性回归/Ridge/LASSO/Elastic Net', fontsize=15)
plt.ylabel(u'XSS值', fontsize=15)
plt.title(u'总平方和TSS=?', fontsize=18)
plt.grid(True)
plt.show()
运行结果:
C:\Python\Anaconda3\python.exe C:/AI/AnacondaProject/regression/8.3.ElasticNet.py
线性回归:1阶,系数为: [-12.12113792   3.05477422]
线性回归:2阶,系数为: [-3.23812184 -3.36390661  0.90493645]
线性回归:3阶,系数为: [-3.90207326 -2.61163034  0.66422328  0.02290431]
线性回归:4阶,系数为: [-8.20599769  4.20778207 -2.85304163  0.73902338 -0.05008557]
线性回归:5阶,系数为: [ 21.59733285 -54.12232017  38.43116219 -12.68651476   1.98134176  -0.11572371]
线性回归:6阶,系数为: [ 14.73304785 -37.87317494  23.67462342  -6.07037979   0.42536833   0.06803132  -0.00859246]
线性回归:7阶,系数为: [ 314.30344622 -827.89446924  857.33293186 -465.46543638  144.21883851  -25.67294678    2.44658612   -0.09675941]
线性回归:8阶,系数为: [-1189.50149198  3643.69109456 -4647.92941149  3217.22814712 -1325.87384337   334.32869072   -50.57119119     4.21251817    -0.148521  ]
Ridge回归:1阶,alpha=0.109854,系数为: [-11.21592213   2.85121516]
Ridge回归:2阶,alpha=0.138950,系数为: [-2.90423989 -3.49931368  0.91803171]
Ridge回归:3阶,alpha=0.068665,系数为: [-3.47165245 -2.85078293  0.69245987  0.02314415]
Ridge回归:4阶,alpha=0.222300,系数为: [-2.84560266 -1.99887417 -0.40628792  0.33863868 -0.02674442]
Ridge回归:5阶,alpha=1.151395,系数为: [-1.68160373 -1.52726943 -0.8382036   0.2329258   0.03934251 -0.00663323]
Ridge回归:6阶,alpha=0.001000,系数为: [ 0.53724068 -6.00552086 -3.75961826  5.64559118 -2.21569695  0.36872911 -0.0222134 ]
Ridge回归:7阶,alpha=0.033932,系数为: [-2.38021238 -2.26383055 -1.47715232  0.00763115  1.12242917 -0.52769633  0.09199202 -0.00560197]
Ridge回归:8阶,alpha=0.138950,系数为: [-2.19287493 -1.9189901  -1.21620537 -0.19324078  0.49303633  0.05458084 -0.09693178  0.02114898 -0.00140213]
LASSO回归:1阶,alpha=0.222300,系数为: [-10.41556797   2.66199326]
LASSO回归:2阶,alpha=0.001000,系数为: [-3.29932625 -3.31989869  0.89878903]
LASSO回归:3阶,alpha=0.013257,系数为: [-4.83524033 -1.48721929  0.29726322  0.05804667]
LASSO回归:4阶,alpha=0.002560,系数为: [-5.08513199 -1.41147772  0.3380565   0.0440427   0.00099807]
LASSO回归:5阶,alpha=0.042919,系数为: [-4.11853758 -1.8643949   0.2618319   0.07954732  0.00257481 -0.00069093]
LASSO回归:6阶,alpha=0.001000,系数为: [-4.53546398 -1.70335188  0.29896515  0.05237738  0.00489432  0.00007551 -0.00010944]
LASSO回归:7阶,alpha=0.001000,系数为: [-4.51456835 -1.58477275  0.23483228  0.04900369  0.00593868  0.00044879 -0.00002625 -0.00002132]
LASSO回归:8阶,alpha=0.001000,系数为: [-4.62623251 -1.37717809  0.17183854  0.04307765  0.00629505  0.00069171  0.0000355  -0.00000875 -0.00000386]
ElasticNet回归:1阶,alpha=0.021210,l1_ratio=0.100000,系数为: [-10.74762959   2.74580662]
ElasticNet回归:2阶,alpha=0.013257,l1_ratio=0.100000,系数为: [-2.95099269 -3.48472703  0.91705013]
ElasticNet回归:3阶,alpha=0.013257,l1_ratio=1.000000,系数为: [-4.83524033 -1.48721929  0.29726322  0.05804667]
ElasticNet回归:4阶,alpha=0.010481,l1_ratio=0.950000,系数为: [-4.8799192  -1.5317438   0.3452403   0.04825571  0.00049763]
ElasticNet回归:5阶,alpha=0.004095,l1_ratio=0.100000,系数为: [-4.07916291 -2.18606287  0.44650232  0.05102669  0.00239164 -0.00048279]
ElasticNet回归:6阶,alpha=0.001000,l1_ratio=1.000000,系数为: [-4.53546398 -1.70335188  0.29896515  0.05237738  0.00489432  0.00007551 -0.00010944]
ElasticNet回归:7阶,alpha=0.001000,l1_ratio=1.000000,系数为: [-4.51456835 -1.58477275  0.23483228  0.04900369  0.00593868  0.00044879 -0.00002625 -0.00002132]
ElasticNet回归:8阶,alpha=0.001000,l1_ratio=0.500000,系数为: [-4.53761647 -1.45230301  0.18829714  0.0427561   0.00619739  0.00068209  0.00003506 -0.00000869 -0.00000384]


例4. ROC曲线
import numbers
import numpy as np
import scipy as sp
import pandas as pd
import matplotlib as mpl
import matplotlib.pyplot as plt
from sklearn.linear_model import LogisticRegression, LogisticRegressionCV
from sklearn.svm import SVC
from sklearn.preprocessing import label_binarize
from numpy import interp
from sklearn import metrics
from itertools import cycle
import warnings
if __name__ == '__main__':
warnings.filterwarnings("ignore", category=FutureWarning, module="sklearn")
np.random.seed(0)
pd.set_option('display.width', 300)
np.set_printoptions(suppress=True)
n = 300
x = np.random.randn(n, 50)
y = np.array([0]*100+[1]*100+[2]*100)
n_class = 3
alpha = np.logspace(-3, 3, 7)
clf = LogisticRegression(penalty='l2', C=1)
clf.fit(x, y)
y_score = clf.decision_function(x)
y = label_binarize(y, classes=np.arange(n_class))
colors = cycle('gbc')
fpr = dict()
tpr = dict()
auc = np.empty(n_class+2)
mpl.rcParams['font.sans-serif'] = u'SimHei'
mpl.rcParams['axes.unicode_minus'] = False
plt.figure(figsize=(7, 6), facecolor='w')
for i, color in zip(np.arange(n_class), colors):
fpr[i], tpr[i], thresholds = metrics.roc_curve(y[:, i], y_score[:, i])
auc[i] = metrics.auc(fpr[i], tpr[i])
plt.plot(fpr[i], tpr[i], c=color, lw=1.5, alpha=0.7, label=u'AUC=%.3f' % auc[i])
fpr['micro'], tpr['micro'], thresholds = metrics.roc_curve(y.ravel(), y_score.ravel())
auc[n_class] = metrics.auc(fpr['micro'], tpr['micro'])
plt.plot(fpr['micro'], tpr['micro'], c='r', lw=2, ls='-', alpha=0.8, label=u'micro,AUC=%.3f' % auc[n_class])
fpr['macro'] = np.unique(np.concatenate([fpr[i] for i in np.arange(n_class)]))
tpr_ = np.zeros_like(fpr['macro'])
for i in np.arange(n_class):
tpr_ += interp(fpr['macro'], fpr[i], tpr[i])
tpr_ /= n_class
tpr['macro'] = tpr_
auc[n_class+1] = metrics.auc(fpr['macro'], tpr['macro'])
print(auc)
print('Macro AUC:', metrics.roc_auc_score(y, y_score, average='macro'))
plt.plot(fpr['macro'], tpr['macro'], c='m', lw=2, alpha=0.8, label=u'macro,AUC=%.3f' % auc[n_class+1])
plt.plot((0, 1), (0, 1), c='#808080', lw=1.5, ls='--', alpha=0.7)
plt.xlim((-0.01, 1.02))
plt.ylim((-0.01, 1.02))
plt.xticks(np.arange(0, 1.1, 0.1))
plt.yticks(np.arange(0, 1.1, 0.1))
plt.xlabel('False Positive Rate', fontsize=13)
plt.ylabel('True Positive Rate', fontsize=13)
plt.grid(b=True)
plt.legend(loc='lower right', fancybox=True, framealpha=0.8, fontsize=12)
plt.title(u'ROC和AUC', fontsize=17)
plt.show()
运行结果:

本文内容由网友自发贡献,版权归原作者所有,本站不承担相应法律责任。如您发现有涉嫌抄袭侵权的内容,请联系:hwhale#tublm.com(使用前将#替换为@)