列表视图控制器,用起来很方便,不仅可以实现分组列表,连tem都有很多定义好的样式,使用时基本上不需要有大的自定义的部分,这里做一些简单的尝试
1.新建MyTableViewController的.h/.m文件
几个主要方法:
- (NSInteger)numberOfSectionsInTableView:(UITableView *)tableView {
#warning Incomplete implementation, return the number of sections
return 1;
}
- (NSInteger)tableView:(UITableView *)tableView numberOfRowsInSection:(NSInteger)section {
#warning Incomplete implementation, return the number of rows
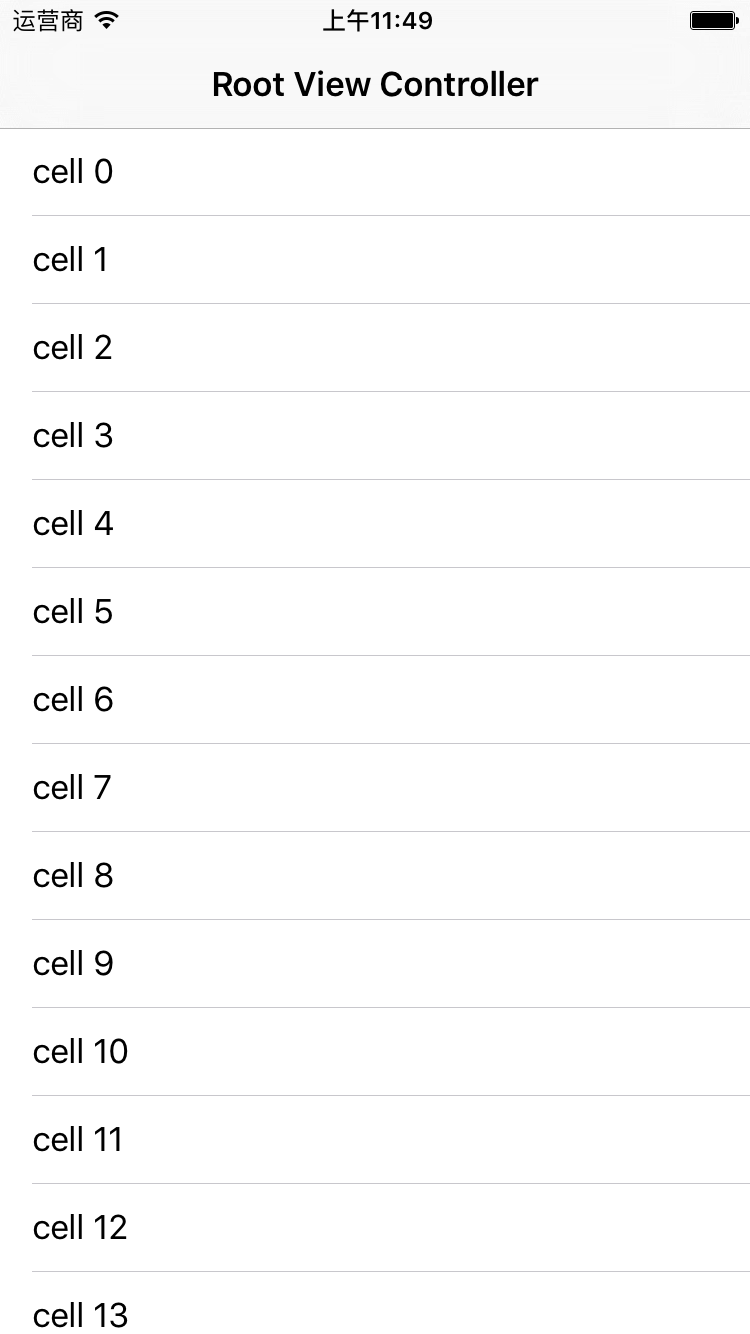
return 15;
}
- (UITableViewCell *)tableView:(UITableView *)tableView cellForRowAtIndexPath:(NSIndexPath *)indexPath {
UITableViewCell *cell = [tableView dequeueReusableCellWithIdentifier:@"myTableViewCell" forIndexPath:indexPath];
cell.textLabel.text = [NSString stringWithFormat:@"%@ %ld",@"cell",(long)indexPath.row];
return cell;
}
效果:
记住:
主要操作方法:section个数,row个数,row布局实现
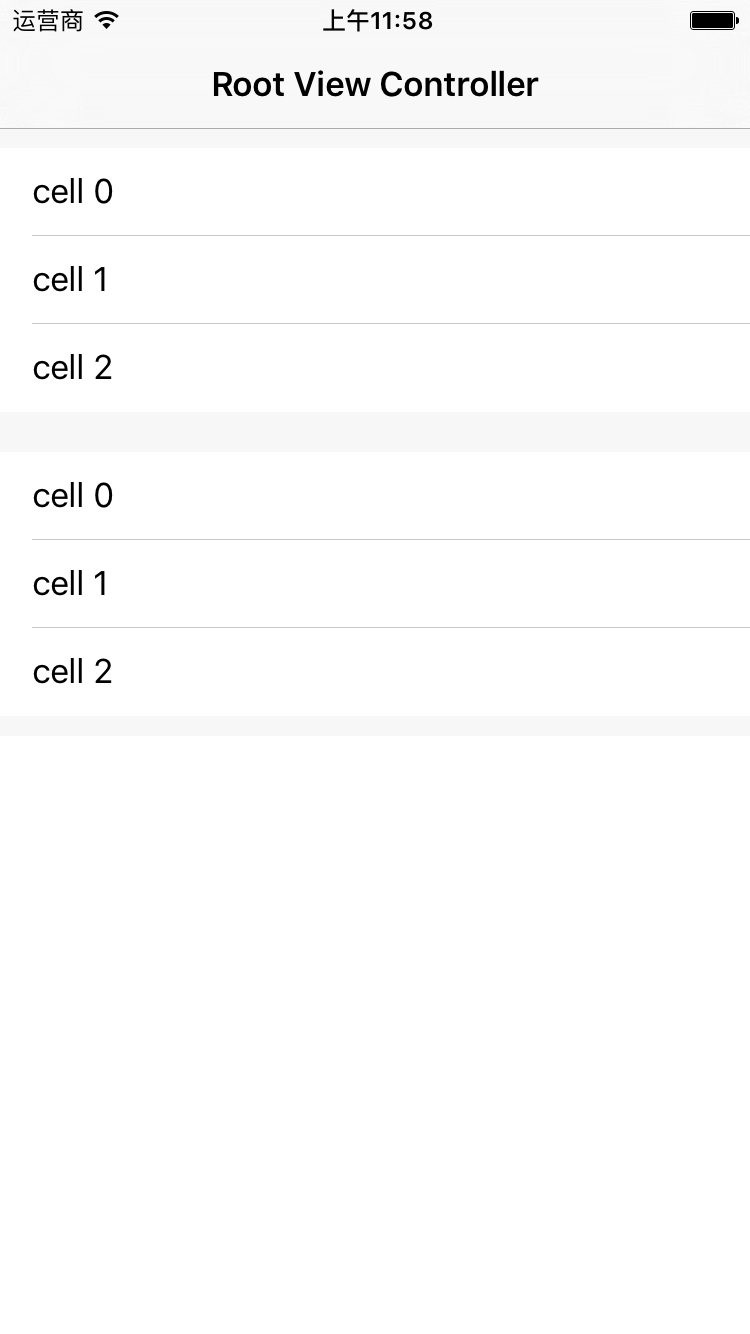
2.把section个数改为2,row为3,试试,这里要设置section的头和脚的高度
- (CGFloat)tableView:(UITableView *)tableView heightForFooterInSection:(NSInteger)section{
    return 10;
}

- (CGFloat)tableView:(UITableView *)tableView heightForHeaderInSection:(NSInteger)section{
    return 10;
}
可以看到分组效果:
3.dequeueReusableCellWithIdentifier
TableVIew的实现原理是没有显示在屏幕上的item会被回收,当滚动时会使用旧的,所以要更新item的内容;在每个cellForRowAtIndexPath里使用dequeueReusableCellWithIdentifier
4.Cell的辅助类型:accessoryType,accessoryView
//1.右侧添加叹号的圆心按钮,可点击,即查看详情
cell.accessoryType = UITableViewCellAccessoryDetailButton;
效果:

//2.右侧添加箭头引导,点击图片无效果
cell.accessoryType = UITableViewCellAccessoryDisclosureIndicator;
效果:

//3.右侧圆心按钮+箭头,可点击
cell.accessoryType = UITableViewCellAccessoryDetailDisclosureButton;
效果

//4.右侧添加对号,点击图片无效果
cell.accessoryType = UITableViewCellAccessoryCheckmark;
效果:

//自定义视图
UIImageView *iv = [[UIImageView alloc]initWithImage:[UIImage imageNamed:@"ic_download"]];
cell.accessoryView =iv;
效果:

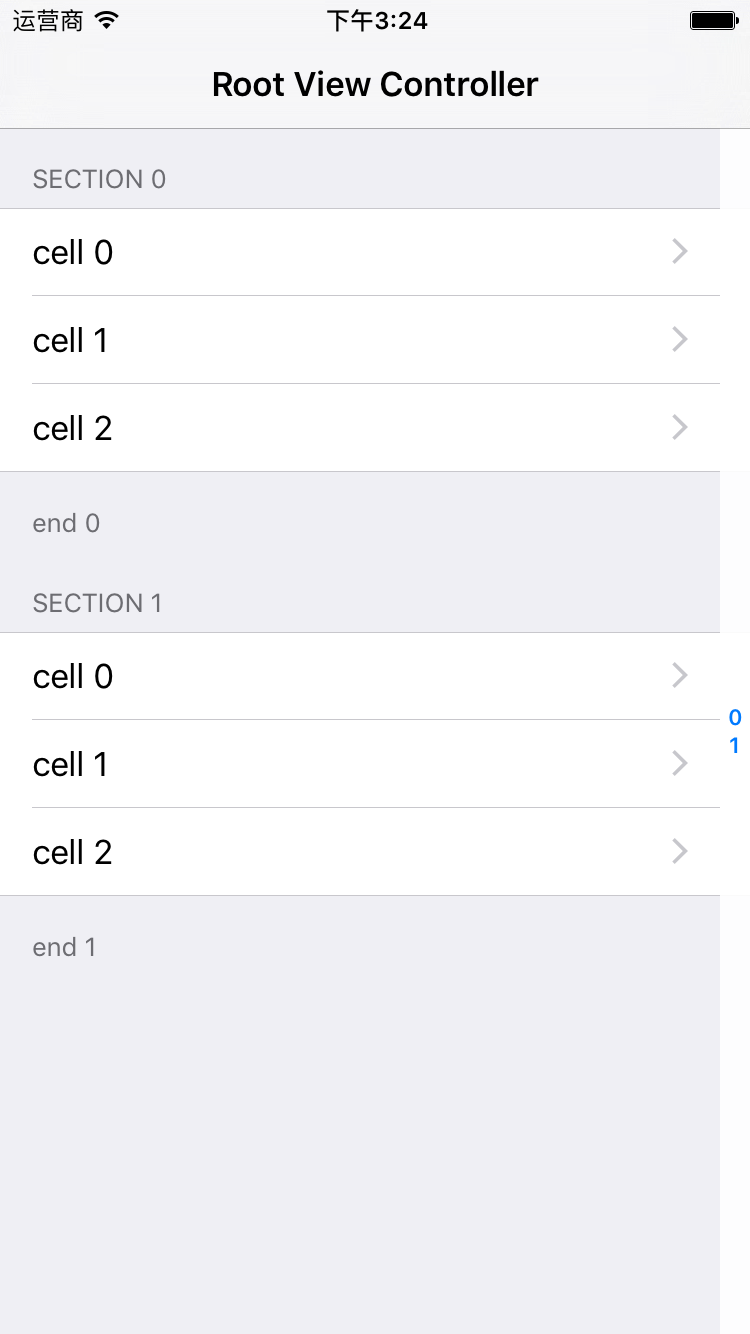
5.设置每组标题,尾部说明,右侧索引
#pragma mark 返回每组头标题名称
-(NSString *)tableView:(UITableView *)tableView titleForHeaderInSection:(NSInteger)section{

    NSString *str = [NSString stringWithFormat:@"section %ld",(long)section];
    return str;
}

#pragma mark 返回每组尾部说明
-(NSString *)tableView:(UITableView *)tableView titleForFooterInSection:(NSInteger)section{
    NSString *str = [NSString stringWithFormat:@"end %ld",(long)section];
    return str;
}

#pragma mark 返回每组标题索引
-(NSArray *)sectionIndexTitlesForTableView:(UITableView *)tableView{
    int num = tableView.numberOfSections;
    NSMutableArray *indexs = [[NSMutableArray alloc] init];
    for (int i=0; i<num; i++) {
        NSString *str = [NSString stringWithFormat:@"%d",i];
        [indexs addObject:str];
    }
    return indexs;
}
效果:
本文内容由网友自发贡献,版权归原作者所有,本站不承担相应法律责任。如您发现有涉嫌抄袭侵权的内容,请联系:hwhale#tublm.com(使用前将#替换为@)