一 前言
用maven我们能做什么,有什么好处?
用maven,我们可以方便统一的进行jar包管理,jar包版本升级,快速项目构建以及分模块开发等相关功能。maven使用得好,项目开发速度就会成倍的提升。总之,项目越大,越能体现maven的优势。
二 软件环境
Eclipse JavaEE IDE,版本代号:Mars.2Release (4.5.2)
apache-maven-3.3.9
JDK1.7
apache-tomcat-7.0.29。
三maven安装配置
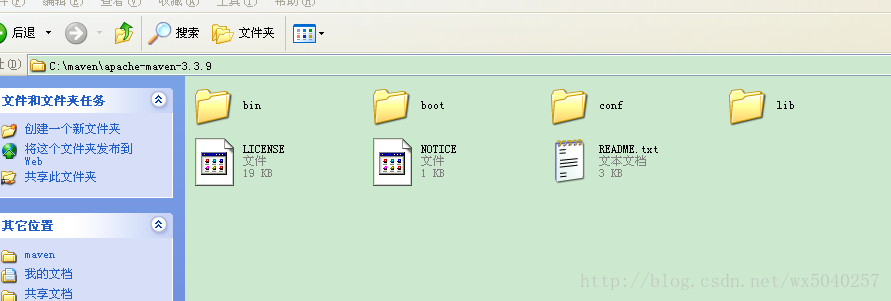
解压缩apache-maven-3.3.9-bin.tar.gz到本地,如图所示:
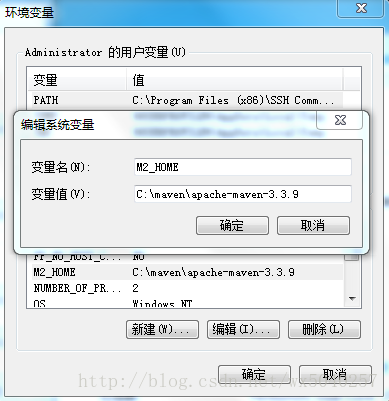
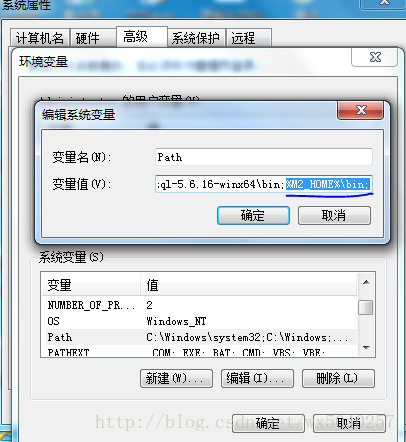
配置环境变量(如果你不想脱离开发环境运行项目,此处非必须):
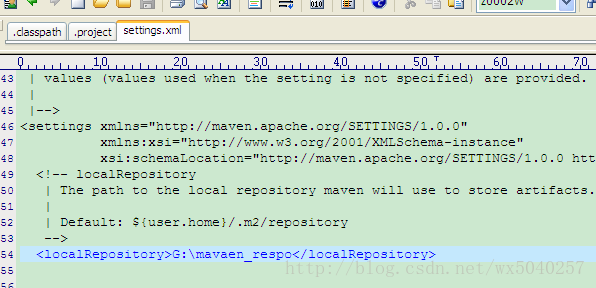
打开conf/settings.xml文件做如下配置
(1)配置本地仓库,如图
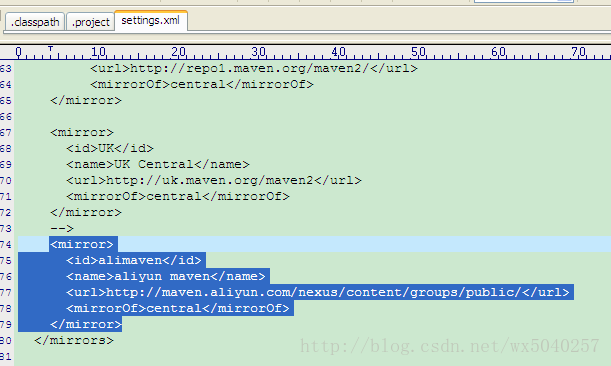
(2)配置中央仓库,即配置jar包的下载镜像(建议配置阿里巴巴的镜像,下载速度超快),如图
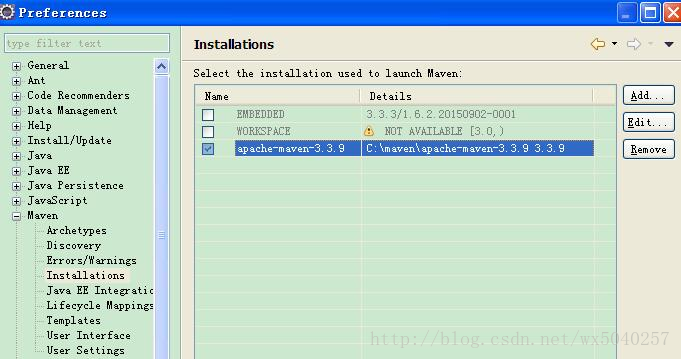
(3)打开eclipse,设置maven相关参数
首先添加一个本地maven,如图所示:
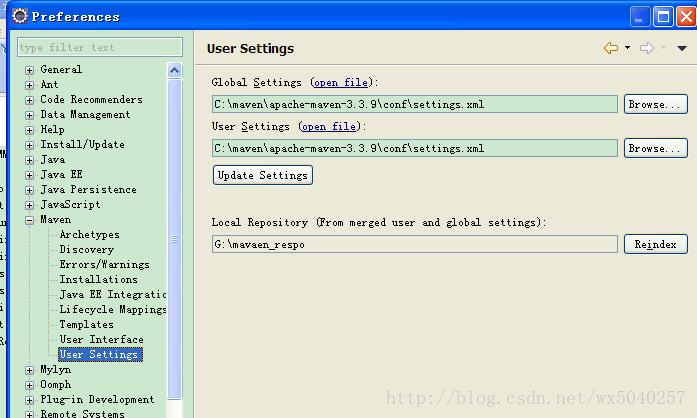
然后配置UserSettings:
接下来,配置tomcat(通过add按钮去找tomcat的本地安装目录),如图所示
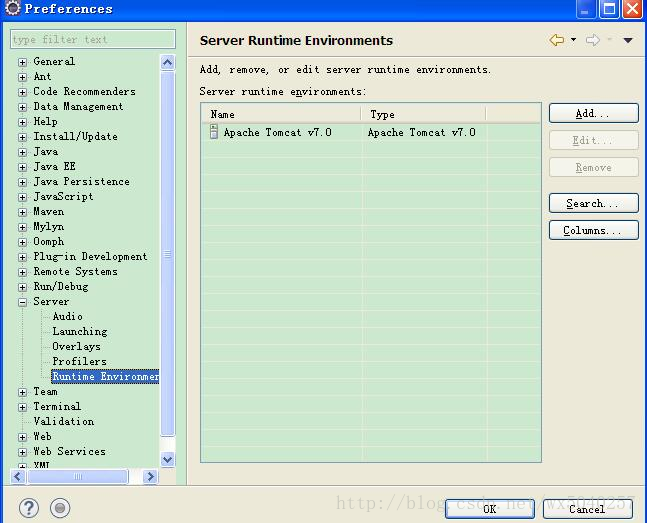
Ok,配置工作就此结束
四 Eclipse+Maven创建webapp项目
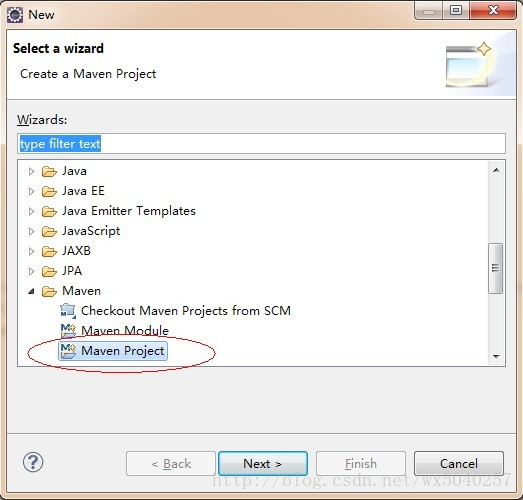
1、开启eclipse,右键new——》other,如下图找到maven project
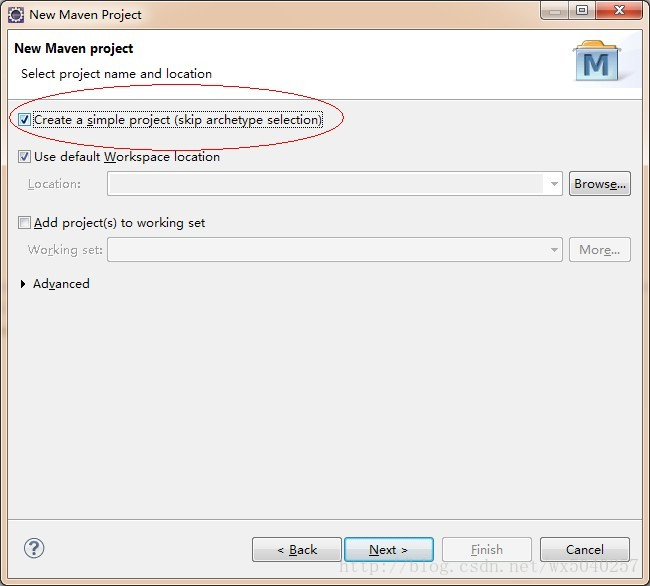
2、选择maven project,显示创建maven项目的窗口,勾选如图所示,Create a simple project括号后面的skip archetype selection表示跳过骨架,骨架表示一些创建模板,这里我们不使用模板更加简单。
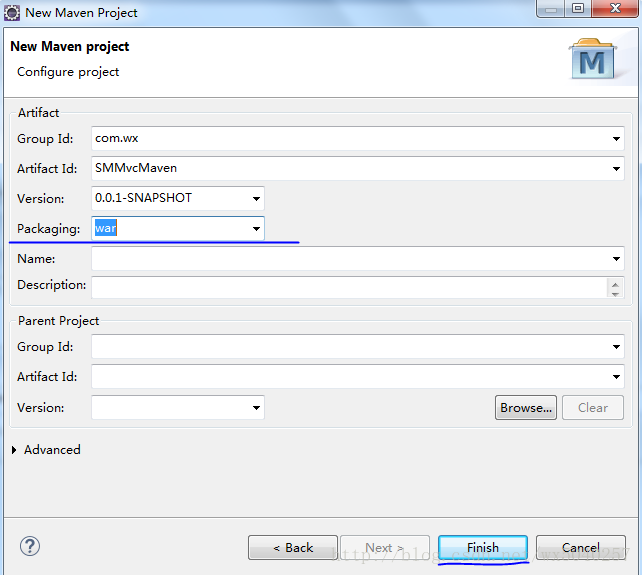
3、输入maven项目的基本信息,如果是web工程,在Packaging栏我们要选择war,如下图所示:
4、完成maven项目的创建,生成相应的maven项目结果,如下所示:
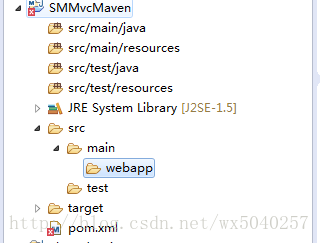
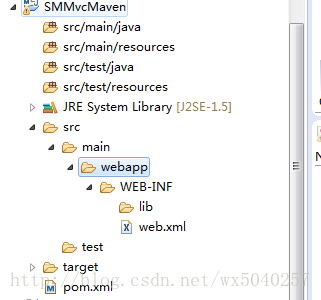
创建完成之后项目会报错,报错是因为webapp目录下没有web.xml。我们随便从其它web工程里面拷贝WEB-INF目录过来即可,完成后如图:
错误立马消失。
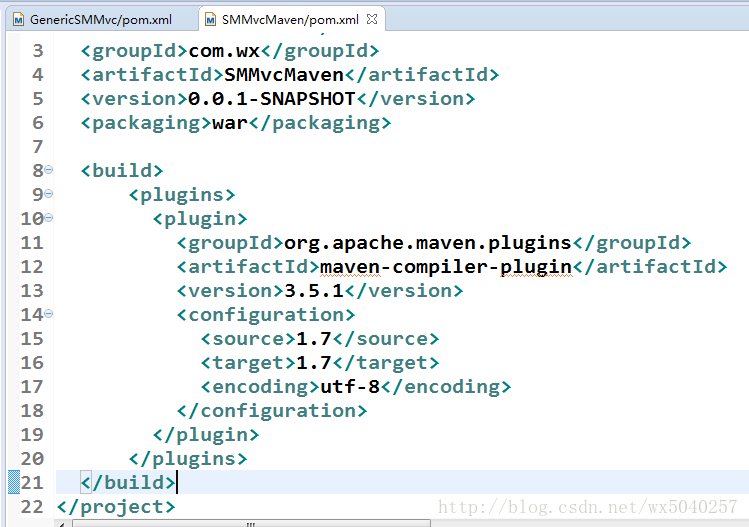
5、接下来拷贝下面这段代码到pom.xml里面,用来确定项目的jdk编译版本:
<build>
<plugins>
<plugin>
<groupId>org.apache.maven.plugins</groupId>
<artifactId>maven-compiler-plugin</artifactId>
<version>3.5.1</version>
<configuration>
<source>1.7</source>
<target>1.7</target>
<encoding>utf-8</encoding>
</configuration>
</plugin>
</plugins>
</build>
如图所示:
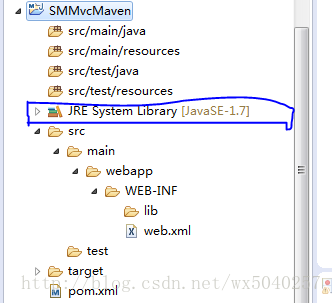
这时候,项目又会报错,我们配置完成后,需要执行一次更新项目配置的动作。选中项目 --> 右键 -->Maven --> Update Project(eclipseluna 版本,helios 或indigo 版本选择 Update Project Configuration)。更新完成之后,错误消失,jdk版本也更改过来了,如图所示:
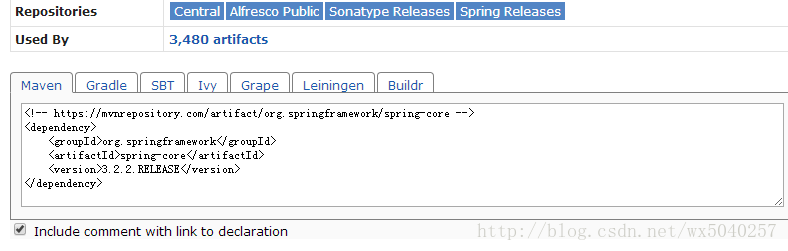
6、在pom.xml中添加jar包依赖
例如添加spring-core,应该是
<dependency>
<groupId>org.springframework</groupId>
<artifactId>spring-core</artifactId>
<version>3.2.2.RELEASE</version>
</dependency>
不知道写怎么办? 百度搜索maven spring-core repository 然后选择旁边的版本号,如图所示:
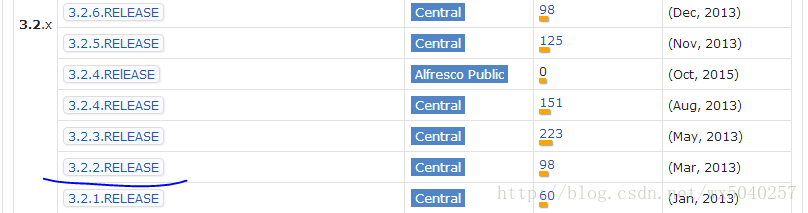
点击3.2.2,就可以直接复制出来了
附录:spring+springmvc+mybatis整合开发包依赖配置
===========================================================
<dependencies>
<!--spring3.2.2 start-->
<dependency>
<groupId>org.springframework</groupId>
<artifactId>spring-core</artifactId>
<version>3.2.2.RELEASE</version>
</dependency>
<dependency>
<groupId>org.springframework</groupId>
<artifactId>spring-beans</artifactId>
<version>3.2.2.RELEASE</version>
</dependency>
<dependency>
<groupId>org.springframework</groupId>
<artifactId>spring-context</artifactId>
<version>3.2.2.RELEASE</version>
</dependency>
<dependency>
<groupId>org.springframework</groupId>
<artifactId>spring-aop</artifactId>
<version>3.2.2.RELEASE</version>
</dependency>
<dependency>
<groupId>org.springframework</groupId>
<artifactId>spring-expression</artifactId>
<version>3.2.2.RELEASE</version>
</dependency>
<dependency>
<groupId>org.springframework</groupId>
<artifactId>spring-web</artifactId>
<version>3.2.2.RELEASE</version>
</dependency>
<dependency>
<groupId>org.springframework</groupId>
<artifactId>spring-webmvc</artifactId>
<version>3.2.2.RELEASE</version>
</dependency>
<dependency>
<groupId>org.springframework</groupId>
<artifactId>spring-tx</artifactId>
<version>3.2.2.RELEASE</version>
</dependency>
<dependency>
<groupId>org.springframework</groupId>
<artifactId>spring-jdbc</artifactId>
<version>3.2.2.RELEASE</version>
</dependency>
<dependency>
<groupId>aopalliance</groupId>
<artifactId>aopalliance</artifactId>
<version>1.0</version>
</dependency>
<dependency>
<groupId>org.aspectj</groupId>
<artifactId>aspectjweaver</artifactId>
<version>1.6.2</version>
</dependency>
<!-- spring3.2.2end-->
<!-- 日志包start -->
<dependency>
<groupId>org.slf4j</groupId>
<artifactId>slf4j-api</artifactId>
<version>1.7.5</version>
</dependency>
<dependency>
<groupId>org.slf4j</groupId>
<artifactId>slf4j-log4j12</artifactId>
<version>1.7.5</version>
</dependency>
<dependency>
<groupId>log4j</groupId>
<artifactId>log4j</artifactId>
<version>1.2.17</version>
</dependency>
<dependency>
<groupId>commons-logging</groupId>
<artifactId>commons-logging</artifactId>
<version>1.1.3</version>
</dependency>
<!-- 日志包end -->
<!-- mybatis相关包 start -->
<dependency>
<groupId>org.mybatis</groupId>
<artifactId>mybatis</artifactId>
<version>3.2.2</version>
</dependency>
<dependency>
<groupId>org.mybatis</groupId>
<artifactId>mybatis-spring</artifactId>
<version>1.2.0</version>
</dependency>
<dependency>
<groupId>asm</groupId>
<artifactId>asm</artifactId>
<version>3.3.1</version>
</dependency>
<dependency>
<groupId>cglib</groupId>
<artifactId>cglib</artifactId>
<version>2.2.2</version>
</dependency>
<!-- mybatis相关包 end -->
<!-- mysql连接驱动包 -->
<dependency>
<groupId>mysql</groupId>
<artifactId>mysql-connector-java</artifactId>
<version>5.1.26</version>
</dependency>
<!-- jstl标签库 -->
<dependency>
<groupId>jstl</groupId>
<artifactId>jstl</artifactId>
<version>1.2</version>
</dependency>
<!-- 字节码解析 -->
<dependency>
<groupId>org.javassist</groupId>
<artifactId>javassist</artifactId>
<version>3.17.1-GA</version>
</dependency>
<!-- 阿里巴巴json解析包 -->
<dependency>
<groupId>com.alibaba</groupId>
<artifactId>fastjson</artifactId>
<version>1.1.15</version>
</dependency>
<!-- 阿里巴巴druid连接池 -->
<dependency>
<groupId>com.alibaba</groupId>
<artifactId>druid</artifactId>
<version>1.0.9</version>
</dependency>
<!-- jsp and servlet start -->
<dependency>
<groupId>javax.servlet</groupId>
<artifactId>servlet-api</artifactId>
<version>2.5</version>
<scope>provided</scope>
</dependency>
<dependency>
<groupId>javax.servlet.jsp</groupId>
<artifactId>jsp-api</artifactId>
<version>2.1</version>
<scope>provided</scope>
</dependency>
<!--jsp and servlet end -->
</dependencies>
==============================================================
完成如上配置后,maven webapp项目就配置好了。
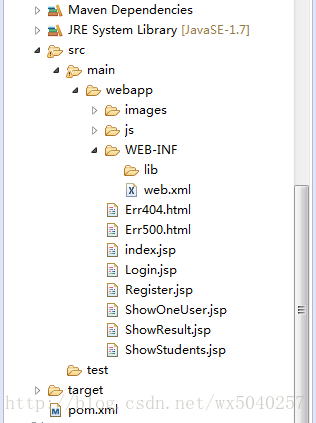
7.编写源代码及配置文件,完成后结构如图所示:

页面代码在下面:
大功告成,接下来启动tomcat运行:右击servers栏,选择Add and Remove…,如图所示:

启动tomcat,没报错就可以在地址栏运行了。