上文讲解了如何下载安装ubuntu,https://blog.csdn.net/weixin_47491957/article/details/128839639
ubuntu在安装完成后,是不能进行ssh登录、且没有root账号,本文带来如何配置ssh登录及root账号
在做这些设置之前,我们要确定ip固定且能联网
配置固定ip
这里对网络不多做叙述,如果对虚拟机的网络不懂的移步 https://blog.csdn.net/weixin_47491957/article/details/128104385
也可以参考centos一开始对vmware的配置 (只看配置固定ip目录就可以了)https://blog.csdn.net/weixin_47491957/article/details/128049430
vm我们配置了 NAT 模式子网ip为 192.168.10.0 、子网掩码255.255.255.0、网关为192.168.10.2,接下来让我们配置ubuntu
sudo gedit /etc/netplan/01-network-manager-all.yaml
在弹出的页面中,修改为以下内容
# Let NetworkManager manage all devices on this system
network:
    ethernets:
        ens33:
            addresses: [192.168.10.200/24]
            gateway4: 192.168.10.2
            dhcp4: no
            nameservers:
               addresses: [114.114.114.114, 8.8.8.8]
    version: 2
    renderer: NetworkManager
保存退出后,重启网络 sudo netplan apply
测试网络连接 ping www.baidu.com

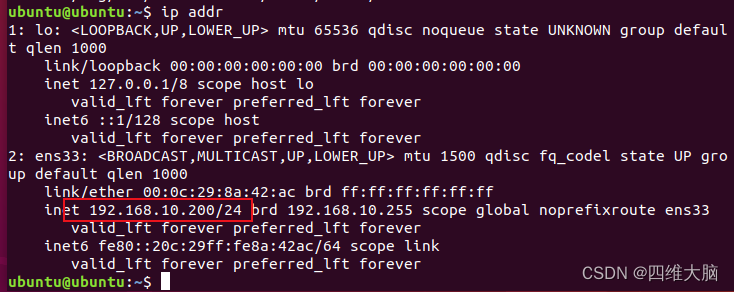
查看ip地址 ip addr
配置ssh登录
安装openssh-server服务
终端运行命令:sudo apt-get install openssh-server
检查是否安装成功:ps -e|grep ssh
安装成功后可以用ssh工具进行连接
配置root账号
先安装vim方便编辑
sudo apt-get install vim
设置root账号密码、然后输入两次密码
sudo passwd root
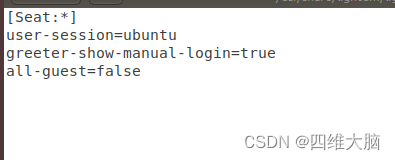
修改文件内容如下 sudo gedit /usr/share/lightdm/lightdm.conf.d/50-ubuntu.conf
[Seat:*]
user-session=ubuntu
greeter-show-manual-login=true
all-guest=false
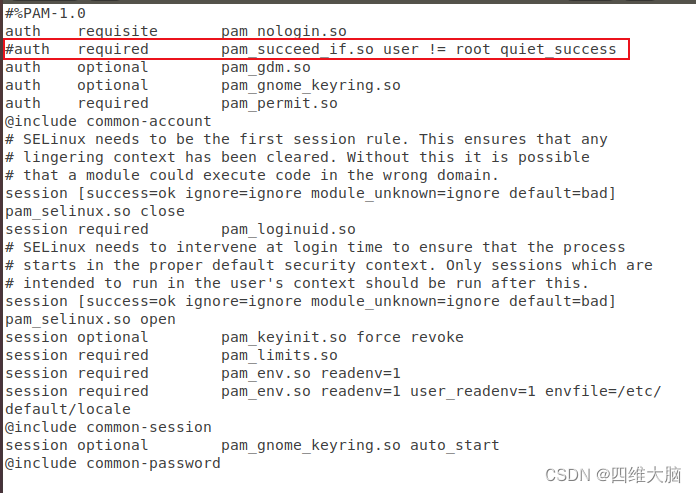
修改文件 sudo gedit /etc/pam.d/gdm-autologin
注释掉划圈的那一行
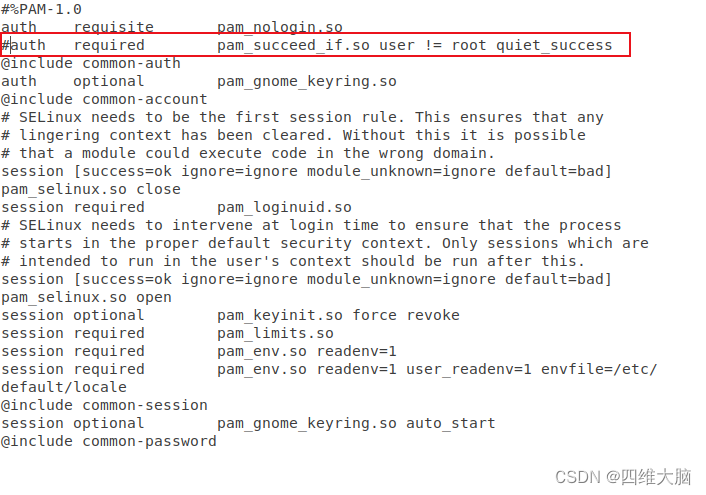
修改文件 sudo gedit /etc/pam.d/gdm-password
注释掉划圈的那一行
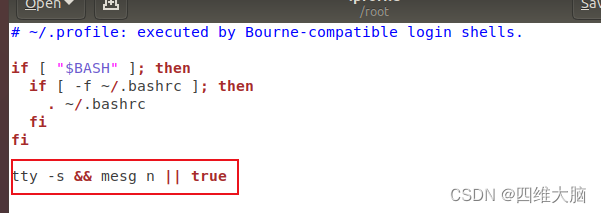
修改文件 sudo gedit /root/.profile
最后一行改为 tty -s && mesg n || true
打开ssh配置文件 sudo vim /etc/ssh/sshd_config
添加 PermitRootLogin yes
重启ssh服务 sudo /etc/init.d/ssh restart
重启虚拟机 reboot
可以使用root账号进行登录了