使用python通过opc ua连接plc
使用的软件
KEPServerEX 6
kepserverex中可以创建虚拟plc
kepserver设置
操作步骤:
安全策略设置
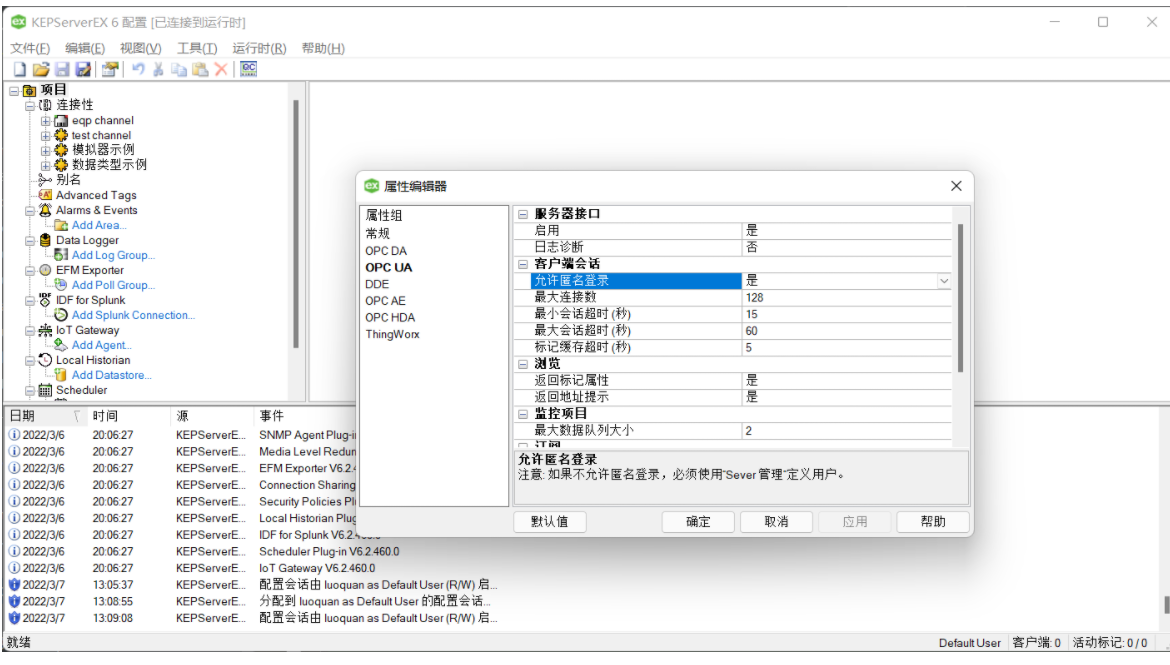
右键KepServer主窗口中项目,选择属性,点击OPC UA,允许匿名登陆 选择 是
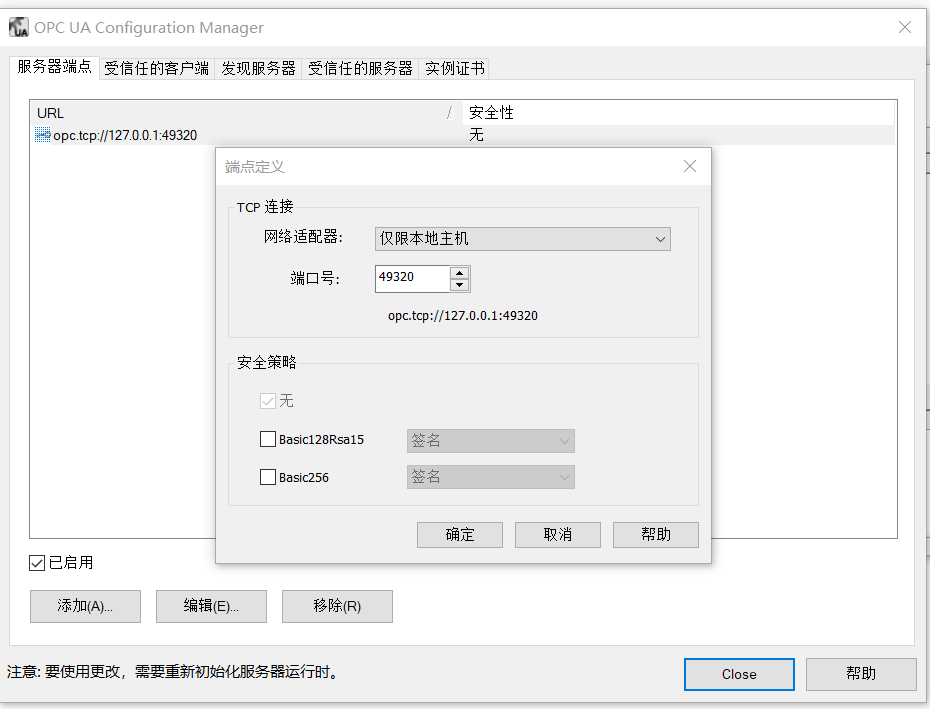
右键托盘中的图标,点击OPC UA配置
(如果第一次安装 托盘中没有出现图标,则索引到KepServer快捷方式位置,点击server_admin.exe即可)
设置安全策略,这里先设置为无需安全验证
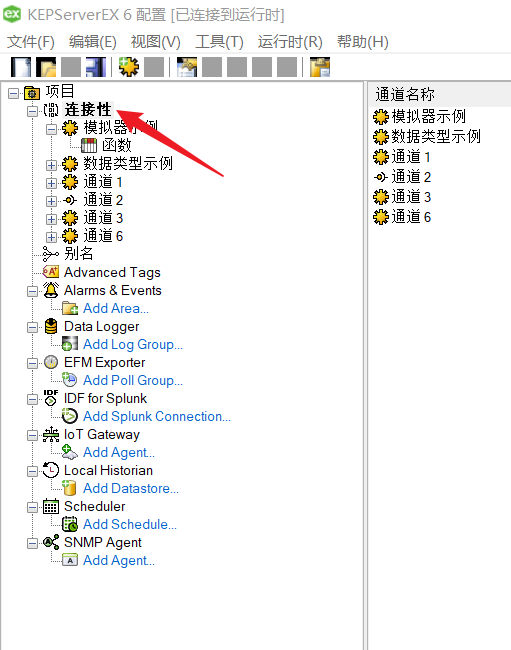
创建KepServer模拟器
Simulator 驱动程序是基于内存的驱动程序,能为演示提供静态数据和变化数据
右键连接性,新建通道
通道类型选择为Simulator

设置通道名字
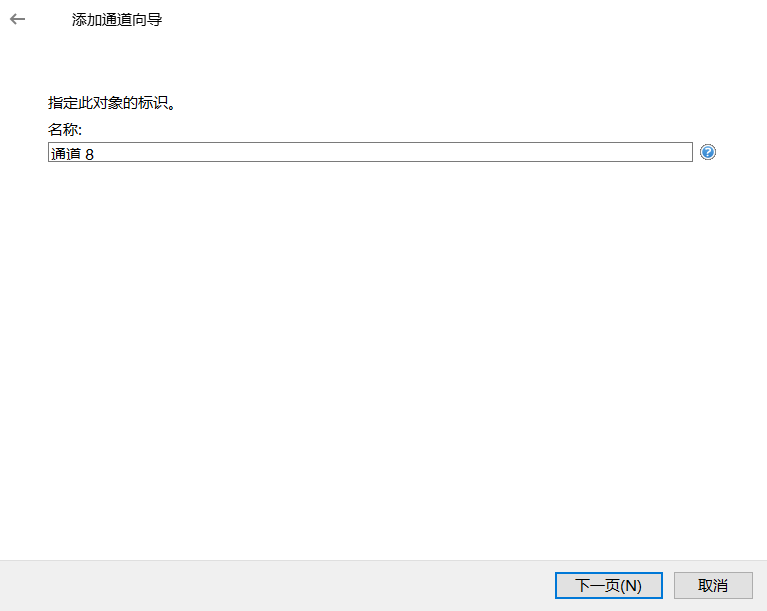
后面一直默认点击下一页,直到通道创建完成
添加设备

设置设备名称

后面一直默认点击下一页,直到设备添加完成
添加标记
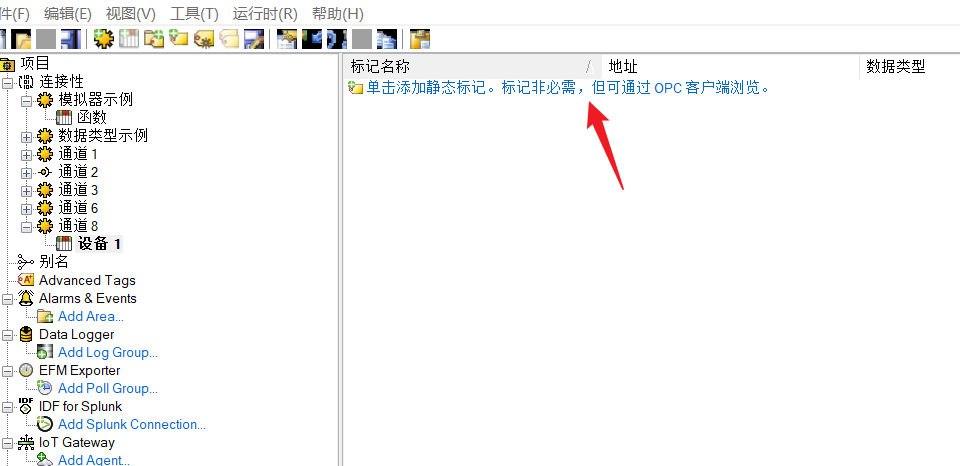
设置名称、属性
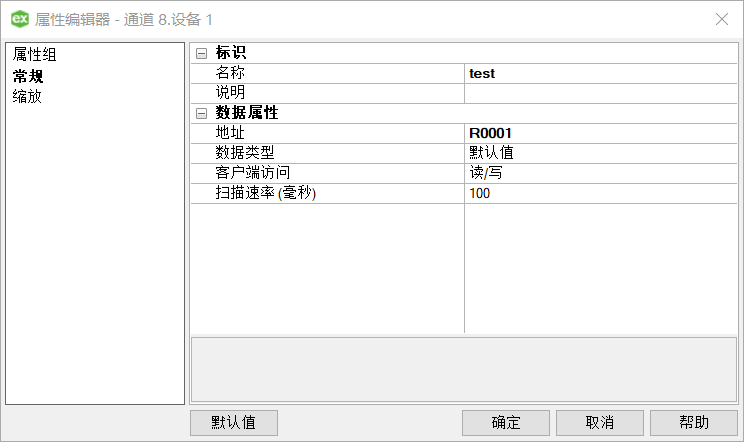
这里我们选用R0001
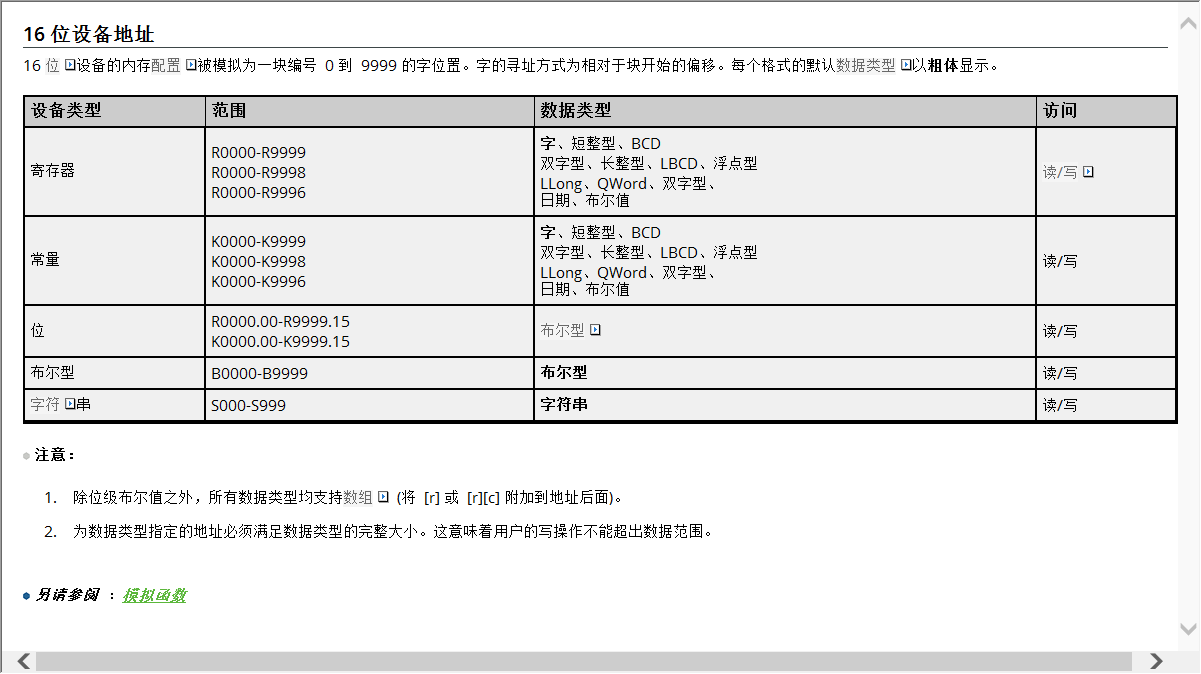
这里地址值说明如下
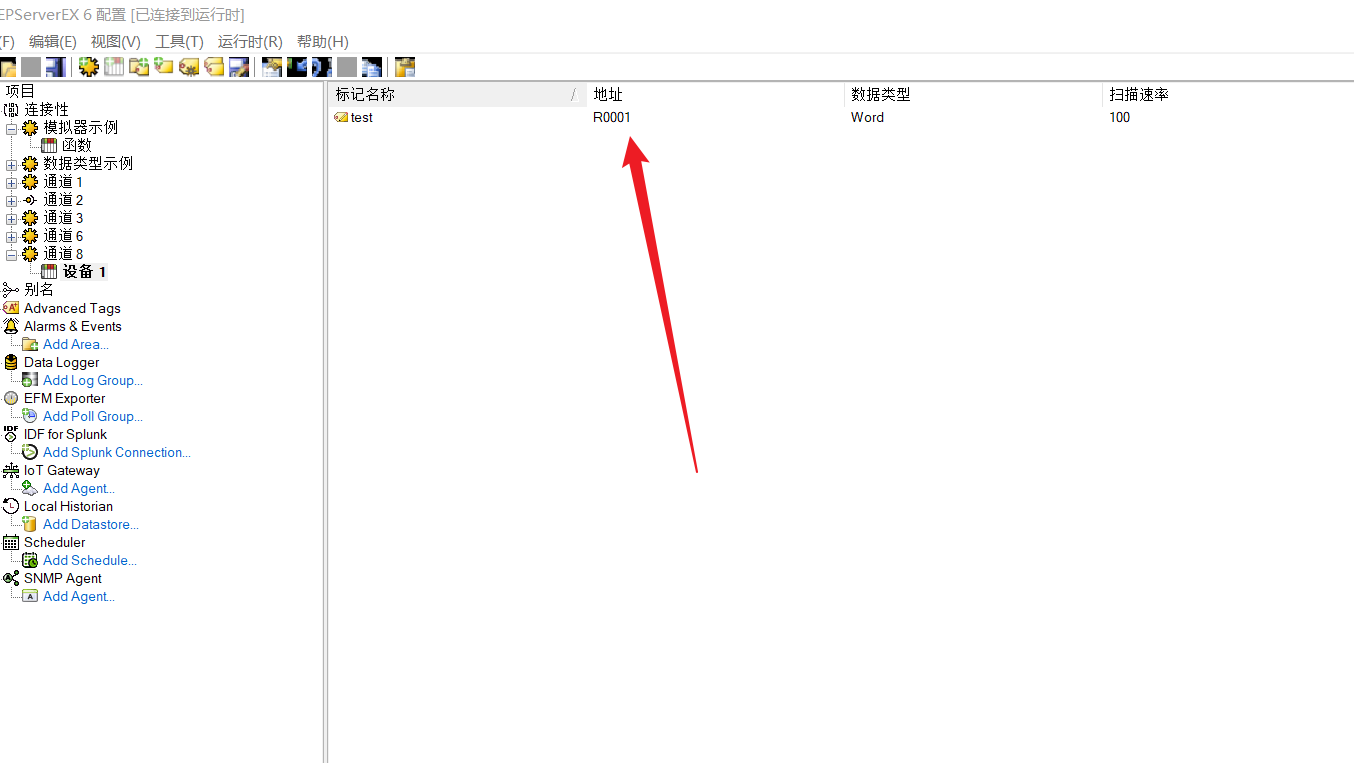
添加成功后可以看到如下:
运行opc quick client
点击工具栏中 [工具] -> [启动OPC Quick Client],使用kepserver的client工具来对数据进行读写
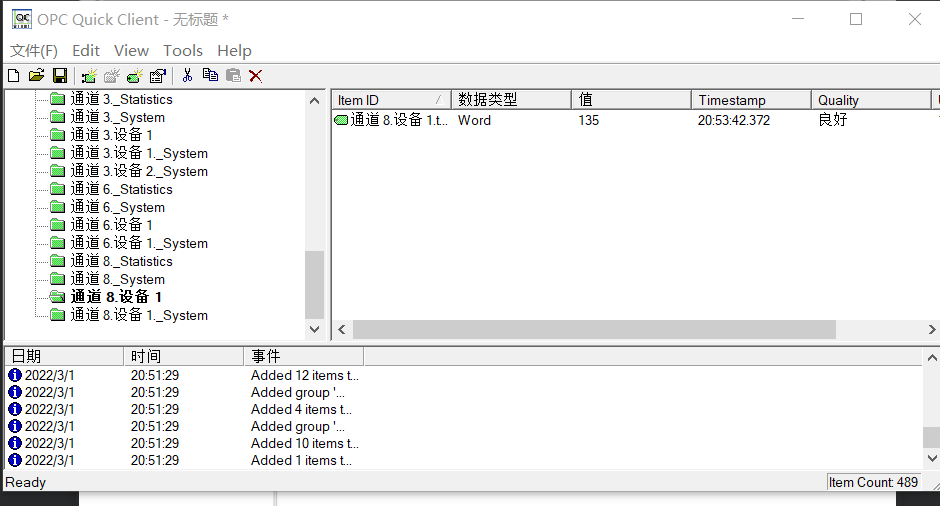
进入opc quick client界面,可以查看当前标签的值和状态
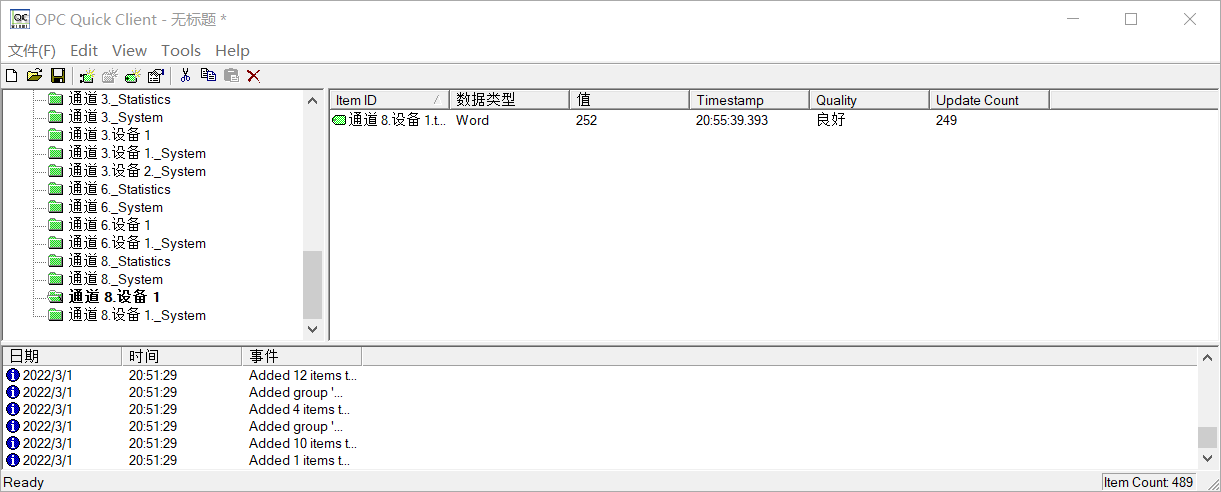
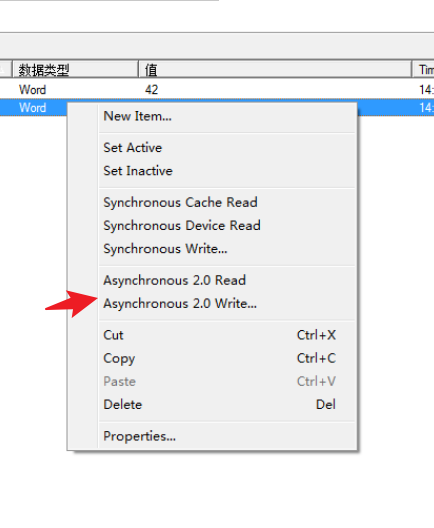
18、选中标签右击,可以对当前标签的值进行修改
python代码2
from queue import PriorityQueue
import time

from opcua import Client, ua


class SubHandler(object):
    def datachange_notification(self, node, val, data):
        print("Python: New data change event", node, val, data)


client = Client('opc.tcp://127.0.0.1:49320/', timeout=10)
# client.set_user('will')
# client.set_password('123456') # 需要在连接前调用
# client.set_security_string(r"Basic256,SignAndEncrypt,C:\Users\42082\Desktop\certificate-example.der,C:\Users\42082\Desktop\private-key-example.pem") # 只支持Basic128Rsa15, Basic256 or Basic256Sha256三种生成证书的方法
client.connect()
objects = client.get_objects_node()
print("objects:")
print(objects)
print("\n")

root = client.get_root_node()
print("children node:")
print(root.get_children()[0].get_children())
print("\n")

namespaces = client.get_namespace_array()
print("namespaces:")
print(namespaces)
print("\n")
endpoints = client.get_endpoints()
print("endpoints")
print(endpoints)
print("\n")
snode = client.get_server_node()
print("snode:")
print(snode)
print("\n")
try:
    node = client.get_node('ns=2;s=通道 1.设备 1.tag1')
    print("\n")
    print(node.get_value())
    dv = ua.DataValue(ua.Variant(200.0, ua.VariantType.Float))
    node.set_value(dv)
    handler = SubHandler()
    sub = client.create_subscription(500, handler)
    sub.subscribe_data_change(node)
    time.sleep(1000)
except Exception as e:
    print(e)
finally:
    client.disconnect()