1. vscode 安装 c++ 扩展
在vscode中创建一个后缀为 01.cpp 的程序,程序文件如下,vscode会自动提示安装 c++ 扩展,点击进行安装。
// 01.cpp
# include <iostream>

using namespace std;

int main()
{
    cout << "hello" << endl;
    return 0;
}

2. 安装C++编译器
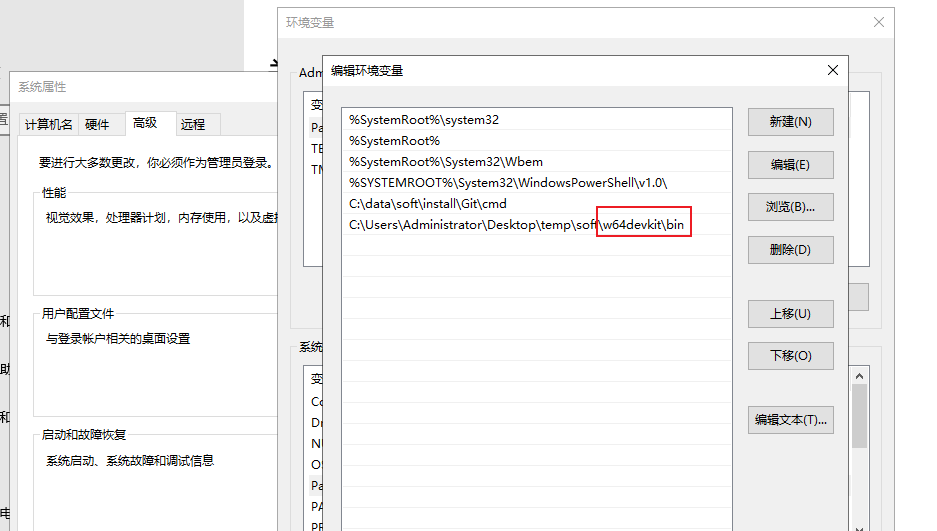
编译器下载地址:https://github.com/skeeto/w64devkit/releases
编译器下载完成后,解压到目录中,并将目录下的 bin 目录添加到环境变量中。

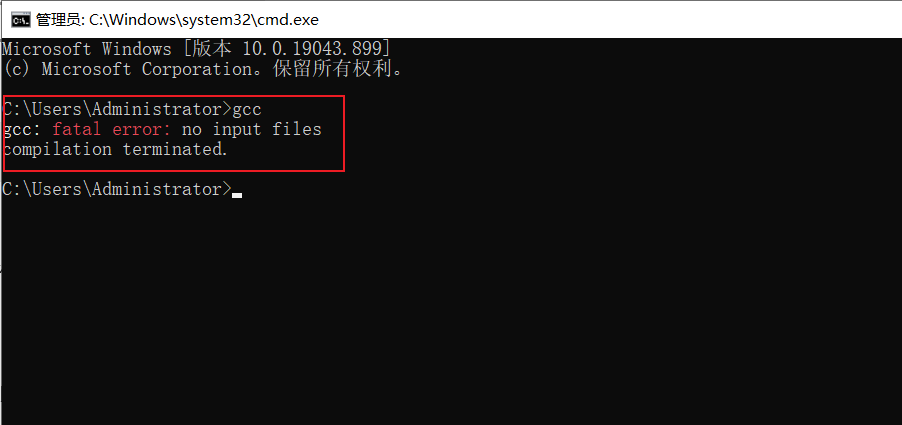
然后在 CMD 中输入 gcc ,显示下面字样则编译器安装成功。
3. vscode 中为 C++ 拓展添加 C++ 编译器
回到 vscode 打开的 01.cpp 界面,选择右下角的 Win32 点击,在顶上弹出的框中选择 编辑配置(UI),进入 C++ 拓展配置界面。

在 C++ 拓展配置界面中填入编译器路径,编译器路径为 第二步中下载解压的目录中的 bin\gcc.exe 文件。

4. 运行 C++ 程序
4.1 通过 Code Runner 运行 C++
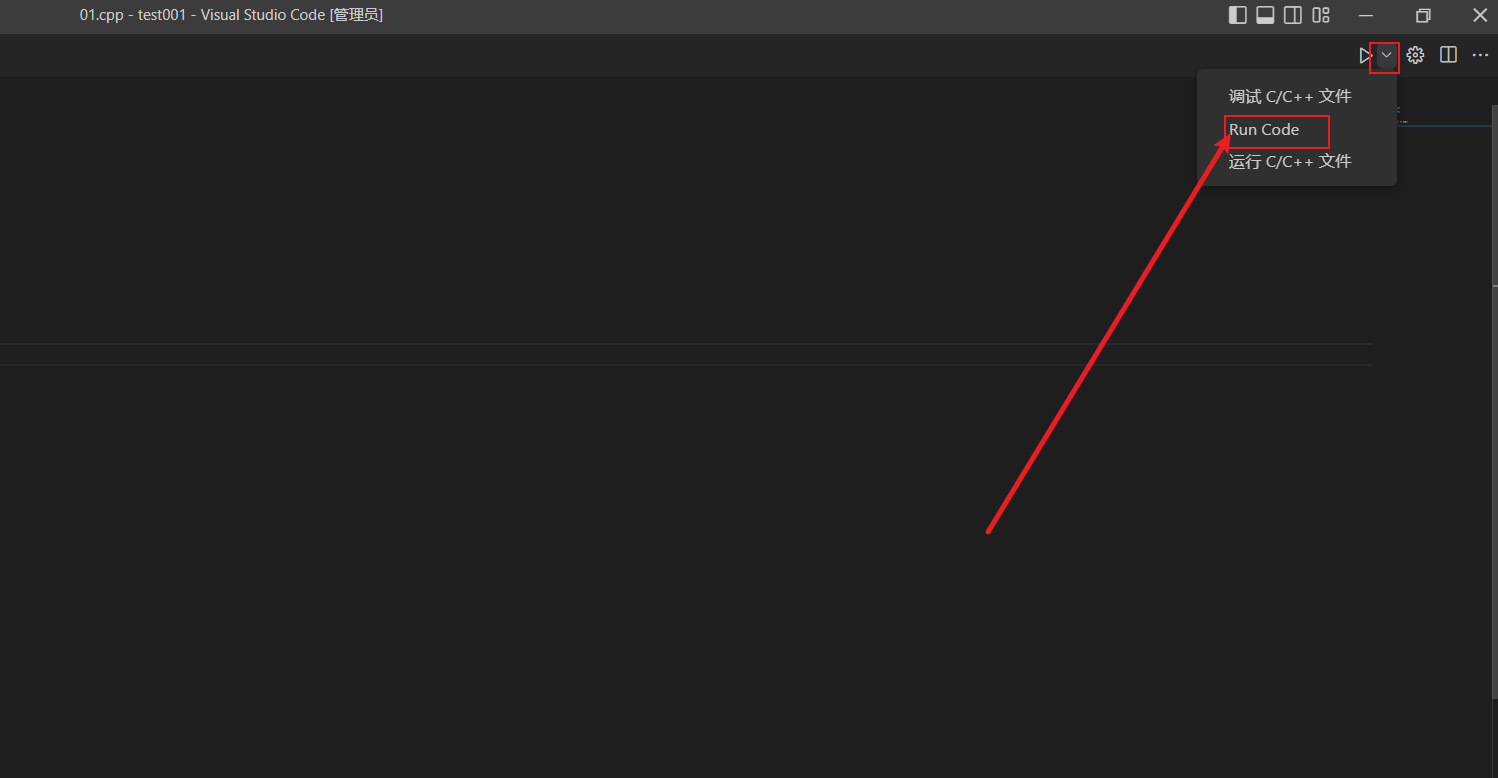
安装扩展 Code Runner ,回到 vscode 打开的 01.cpp 界面,之后点击 vscode 右上角的运行按钮,run code,或者右击鼠标 Run Code 运行 C++ 程序.
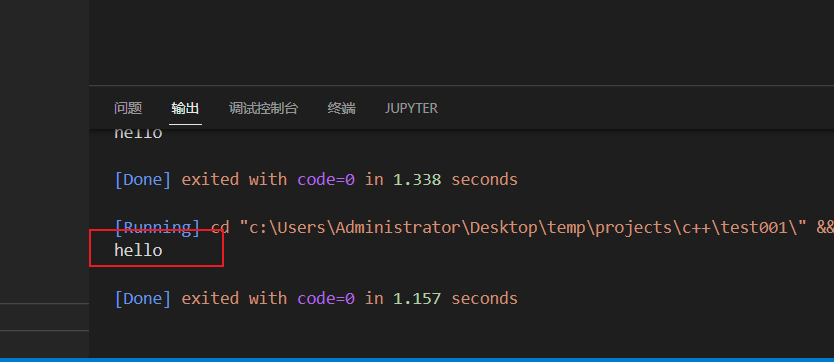
若此时无法运行或运行报错,可能是环境变量未生效导致,重启 vscode 重试即可。运行结果展示如下:

4.2 使用原生运行 C++
回到 vscode 打开的 01.cpp 界面,之后点击 vscode 右上角的运行按钮,选择 运行C/C++文件 运行 C++ 程序.

注意:需要命令行输出参数的 C++ 程序暂时只能使用 原生方式运行。
至此,vscode 已能正常运行 C++ 程序。
本文首发于本人博客:https://blog.gitnote.cn/post/vscode_run_cpp
版权信息: CC BY-NC-SA 4.0 (自由转载-非商用-相同方式共享-保持署名)
本文内容由网友自发贡献,版权归原作者所有,本站不承担相应法律责任。如您发现有涉嫌抄袭侵权的内容,请联系:hwhale#tublm.com(使用前将#替换为@)