本文承接ROS调用USB双目摄像头模组
目录
- 先完成单目标定
- 双目标定
- 生成可用于ORB-SLAM2的yaml文件
- 生成可用于ORB-SLAM3的yaml文件
- 参考
按照上面链接配置好后,执行
rostopic list
你应该可以找到两个比较关键的节点:/left_cam/image_raw 和 /right_cam/image_raw

先完成单目标定
然后你需要准备黑白棋盘格:
http://www.vision.caltech.edu/bouguetj/calib_doc/htmls/pattern.pdf

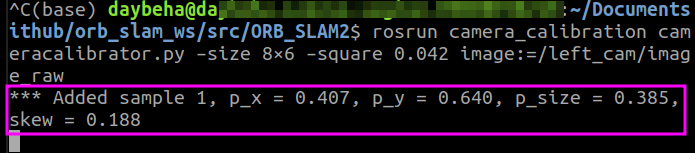
接下来启动相机标定程序
rosrun camera_calibration cameracalibrator.py –size 8×6 –square 0.042 image:=/left_cam/image_raw
–size表示要识别的黑白格阵列的大小;
–square指定方格的尺寸,单位m。我是直接用另一个显示屏打开该黑白格文件,设置尺寸为42 mm=0.042 m;
image表示使用的是来哪个Topic的图像数据。左目相机为**/left_cam/image_raw**, 右目为**/right_cam/image_raw**
打开下面的界面后,立即开始标定。你需要左右,上下,前后,对角方向移动摄像头(或标定板)。

类似下面系统会自动探测并保存图像。
当使得标定界面右边X,Y,Size,Skew都变成绿色后

点击早已变成蓝色的CALIBRATE按钮,等待系统计算。

计算完成后,SAVE(保存)和COMMIT(提交)都可以点击

当你点击SAVE之后,命令行显示
这个时候应该是可以点击commit的,但我没成功过……感兴趣的可以去原文看看
我的做法是,找到**/tmp/calibrationdata.tar.gz**,
解压tar -zxvf calibrationdata.tar.gz(也可以右键解压)
打开找到ost.yaml,内容类似下面

然后右目摄像头类似,改成**/right_cam/image_raw**即可
双目标定
由于双目标定需要左右相机同时拍照,所以我们要另行拍照了。
我的双目相机是合并图像的,所以只开一个VideoCapture 即可
这里有分开图像的双目相机拍摄代码
capture.cpp
#include<iostream>
#include<string>
#include<opencv2/opencv.hpp>
#include <boost/format.hpp>
using namespace std;
using namespace cv;
boost::format left_imgs("./1_left/left%03d.jpg");
boost::format right_imgs("./2_right/right%03d.jpg");
int main(int argc, const char** argv)
{
string command;
if (access("left", 0) == -1){
command = "mkdir -p left";
system(command.c_str());
}
if (access("right", 0) == -1){
command = "mkdir -p right";
system(command.c_str());
}
VideoCapture cap(0);
cap.set(CV_CAP_PROP_FRAME_WIDTH, 2560);
cap.set(CV_CAP_PROP_FRAME_HEIGHT, 720);
if (!cap.isOpened())
{
cout << "摄像头打开失败!" << endl;
return -1;
}
Mat frame, frame_L,frame_R;
cap >> frame;
Mat grayImage;
double fScale = 1;
Size dsize = Size(frame.cols*fScale, frame.rows*fScale);
Mat imagedst = Mat(dsize, CV_32S);
resize(frame, imagedst, dsize);
char key;
int count = 0;
while (true)
{
key = waitKey(50);
cap >> frame;
resize(frame, imagedst, dsize);
imshow("Stereo Video", frame);
frame_L = imagedst(Rect(0, 0, int(frame.cols/2), frame.rows));
frame_R = imagedst(Rect(int(frame.cols/2), 0, int(frame.cols/2), frame.rows));
if (key == 27)
break;
if (key == 32)
{
imwrite((left_imgs % count).str(), frame_L);
imwrite((right_imgs % count).str(), frame_R);
count++;
}
}
return 0;
}
运行后按空格拍照,按ESC退出
然后是双目标定的代码:
stereo_calibrator.cpp
#include <vector>
#include <string>
#include <algorithm>
#include <iostream>
#include <iterator>
#include <boost/format.hpp>
#include <opencv2/opencv.hpp>
using namespace std;
using namespace cv;
boost::format left_imgs("./1_left/left%03d.jpg");
boost::format right_imgs("./2_right/right%03d.jpg");
const int frameNumber = 51;
const int squareSize = 42;
const int imageWidth = 1280;
const int imageHeight = 720;
const int boardWidth = 8;
const int boardHeight = 6;
const int boardCorner = boardWidth * boardHeight;
const Size boardSize = Size(boardWidth, boardHeight);
Size imageSize = Size(imageWidth, imageHeight);
Mat R, T, E, F;
vector<Mat> rvecs;
vector<Mat> tvecs;
vector<vector<Point2f>> imagePointL;
vector<vector<Point2f>> imagePointR;
vector<vector<Point3f>> objRealPoint;
vector<Point2f> cornerL;
vector<Point2f> cornerR;
Mat rgbImageL, grayImageL;
Mat rgbImageR, grayImageR;
Mat Rl, Rr, Pl, Pr, Q;
Mat mapLx, mapLy, mapRx, mapRy;
Rect validROIL, validROIR;
Mat cameraMatrixL = (Mat_<double>(3, 3) << 996.62773, 0. , 723.74872,
0. , 991.38498, 307.46763,
0. , 0. , 1. );
Mat distCoeffL = (Mat_<double>(5, 1) << 0.274795, -0.241477, -0.009914, 0.033414, 0.000000);
Mat cameraMatrixR = (Mat_<double>(3, 3) << 861.43065, 0. , 647.48681,
0. , 853.88712, 282.7715 ,
0. , 0. , 1. );
Mat distCoeffR = (Mat_<double>(5, 1) << 0.205708, -0.287710, 0.003034, 0.007459, 0.000000);
void calRealPoint(vector<vector<Point3f>>& obj, int boardwidth, int boardheight, int imgNumber, int squaresize)
{
vector<Point3f> imgpoint;
for (int rowIndex = 0; rowIndex < boardheight; rowIndex++)
{
for (int colIndex = 0; colIndex < boardwidth; colIndex++)
{
imgpoint.emplace_back(Point3f(rowIndex * squaresize, colIndex * squaresize, 0));
}
}
for (int imgIndex = 0; imgIndex < imgNumber; imgIndex++)
{
obj.push_back(imgpoint);
}
}
void outputCameraParam()
{
FileStorage fs("intrinsics.yml", FileStorage::WRITE);
if (fs.isOpened())
{
fs << "cameraMatrixL" << cameraMatrixL << "cameraDistcoeffL" << distCoeffL << "cameraMatrixR" << cameraMatrixR << "cameraDistcoeffR" << distCoeffR;
fs.release();
cout << "cameraMatrixL=:" << cameraMatrixL << endl << "cameraDistcoeffL=:" << distCoeffL << endl << "cameraMatrixR=:" << cameraMatrixR << endl << "cameraDistcoeffR=:" << distCoeffR << endl;
}
else
{
cout << "Error: can not save the intrinsics!!!!!" << endl;
}
fs.open("extrinsics.yml", FileStorage::WRITE);
if (fs.isOpened())
{
fs << "R" << R << "T" << T << "Rl" << Rl << "Rr" << Rr << "Pl" << Pl << "Pr" << Pr << "Q" << Q;
cout << "R=" << R << endl << "T=" << T << endl << "Rl=" << Rl << endl << "Rr=" << Rr << endl << "Pl=" << Pl << endl << "Pr=" << Pr << endl << "Q=" << Q << endl;
fs.release();
}
else
cout << "Error: can not save the extrinsic parameters\n";
}
int main(int argc, char* argv[])
{
Mat img;
int goodFrameCount = 0;
while (goodFrameCount < frameNumber)
{
char filename[100];
rgbImageL = imread((left_imgs % goodFrameCount).str(), CV_LOAD_IMAGE_COLOR);
cvtColor(rgbImageL, grayImageL, CV_BGR2GRAY);
rgbImageR = imread((left_imgs % goodFrameCount).str(), CV_LOAD_IMAGE_COLOR);
cvtColor(rgbImageR, grayImageR, CV_BGR2GRAY);
bool isFindL, isFindR;
isFindL = findChessboardCorners(rgbImageL, boardSize, cornerL);
isFindR = findChessboardCorners(rgbImageR, boardSize, cornerR);
if (isFindL && isFindR)
{
cornerSubPix(grayImageL, cornerL, Size(5, 5), Size(-1, -1), TermCriteria(CV_TERMCRIT_EPS | CV_TERMCRIT_ITER, 20, 0.1));
drawChessboardCorners(rgbImageL, boardSize, cornerL, isFindL);
imshow("chessboardL", rgbImageL);
imagePointL.push_back(cornerL);
cornerSubPix(grayImageR, cornerR, Size(5, 5), Size(-1, -1), TermCriteria(CV_TERMCRIT_EPS | CV_TERMCRIT_ITER, 20, 0.1));
drawChessboardCorners(rgbImageR, boardSize, cornerR, isFindR);
imshow("chessboardR", rgbImageR);
imagePointR.push_back(cornerR);
goodFrameCount++;
cout << "The image" << goodFrameCount << " is good" << endl;
}
else
{
cout << "The image is bad please try again" << endl;
}
if (waitKey(10) == 'q')
{
break;
}
}
calRealPoint(objRealPoint, boardWidth, boardHeight, frameNumber, squareSize);
cout << "cal real successful" << endl;
double rms = stereoCalibrate(objRealPoint, imagePointL, imagePointR,
cameraMatrixL, distCoeffL,
cameraMatrixR, distCoeffR,
Size(imageWidth, imageHeight),R, T,E, F, CALIB_USE_INTRINSIC_GUESS,
TermCriteria(TermCriteria::COUNT + TermCriteria::EPS, 100, 1e-5));
cout << "Stereo Calibration done with RMS error = " << rms << endl;
stereoRectify(cameraMatrixL, distCoeffL, cameraMatrixR, distCoeffR, imageSize, R, T, Rl, Rr, Pl, Pr, Q,
CALIB_ZERO_DISPARITY, -1, imageSize, &validROIL, &validROIR);
initUndistortRectifyMap(cameraMatrixL, distCoeffL, Rl, Pr, imageSize, CV_32FC1, mapLx, mapLy);
initUndistortRectifyMap(cameraMatrixR, distCoeffR, Rr, Pr, imageSize, CV_32FC1, mapRx, mapRy);
Mat rectifyImageL, rectifyImageR;
cvtColor(grayImageL, rectifyImageL, CV_GRAY2BGR);
cvtColor(grayImageR, rectifyImageR, CV_GRAY2BGR);
imshow("Rectify Before", rectifyImageL);
cout << "按Q1退出 ..." << endl;
Mat rectifyImageL2, rectifyImageR2;
remap(rectifyImageL, rectifyImageL2, mapLx, mapLy, INTER_LINEAR);
remap(rectifyImageR, rectifyImageR2, mapRx, mapRy, INTER_LINEAR);
cout << "按Q2退出 ..." << endl;
imshow("rectifyImageL", rectifyImageL2);
imshow("rectifyImageR", rectifyImageR2);
outputCameraParam();
Mat canvas;
double sf;
int w, h;
sf = 600. / MAX(imageSize.width, imageSize.height);
w = cvRound(imageSize.width * sf);
h = cvRound(imageSize.height * sf);
canvas.create(h, w * 2, CV_8UC3);
Mat canvasPart = canvas(Rect(w * 0, 0, w, h));
resize(rectifyImageL2, canvasPart, canvasPart.size(), 0, 0, INTER_AREA);
Rect vroiL(cvRound(validROIL.x*sf), cvRound(validROIL.y*sf),
cvRound(validROIL.width*sf), cvRound(validROIL.height*sf));
rectangle(canvasPart, vroiL, Scalar(0, 0, 255), 3, 8);
cout << "Painted ImageL" << endl;
canvasPart = canvas(Rect(w, 0, w, h));
resize(rectifyImageR2, canvasPart, canvasPart.size(), 0, 0, INTER_LINEAR);
Rect vroiR(cvRound(validROIR.x * sf), cvRound(validROIR.y*sf),
cvRound(validROIR.width * sf), cvRound(validROIR.height * sf));
rectangle(canvasPart, vroiR, Scalar(0, 255, 0), 3, 8);
cout << "Painted ImageR" << endl;
for (int i = 0; i < canvas.rows; i += 16)
line(canvas, Point(0, i), Point(canvas.cols, i), Scalar(0, 255, 0), 1, 8);
imshow("rectified", canvas);
cout << "wait key" << endl;
waitKey(0);
return 0;
}
之后你会得到外参文件extrinsics.yml和内参文件intrinsics.yml
标定结果:

生成可用于ORB-SLAM2的yaml文件
首先找到ORB-SLAM2的EuRoC.yaml作为参照
%YAML:1.0
Camera.fx: 435.2046959714599
Camera.fy: 435.2046959714599
Camera.cx: 367.4517211914062
Camera.cy: 252.2008514404297
//
这个是 双目相机的参数不是单个的做相机的相机中心跟焦距。
其对应:extrinsics.yml中的 Pr:
例如我的是
Pr: !!opencv-matrix
rows: 3
cols: 4
dt: d
data: [ 2.8559499458758660e+02, 0., 2.7029193305969238e+02,
-3.9636548646706200e+04, 0., 2.8559499458758660e+02,
2.8112063348293304e+02, 0., 0., 0., 1., 0. ]
对应的修改焦距和相机中心如下:
Camera.fx: 2.8559499458758660e+02
Camera.fy: 2.8559499458758660e+02
Camera.cx: 2.7029193305969238e+02
Camera.cy: 2.8112063348293304e+02
//
Camera.k1: 0.0
Camera.k2: 0.0
Camera.p1: 0.0
Camera.p2: 0.0
//
默认不改,因代码中已做畸变纠正。故均为0.
//
Camera.width: 752
Camera.height: 480
//
相机的图像大小:
我的修改为:
Camera.width: 1280
Camera.height: 720
//
Camera.fps: 30.0
Camera.bf: 47.90639384423901
//
这个参数是个大坑,其为相机的基线×相机的焦距。
orbslam的参数文件中单位是m
而opencv标定文件中的单位是mm
其数值同样可以在Pr: 中找出 定位在下面矩阵中的-3.9636548646706200e+04 这个数
Pr: !!opencv-matrix
rows: 3
cols: 4
dt: d
data: [ 2.8559499458758660e+02, 0., 2.7029193305969238e+02,
-3.9636548646706200e+04, 0., 2.8559499458758660e+02,
2.8112063348293304e+02, 0., 0., 0., 1., 0. ]
-3.9636548646706200e+04 就是要填入上面的参数,毫米转为米,求绝对值,填入Camera.bf: 3.9636548646706200e+01
//
Camera.RGB: 1
ThDepth: 35
//
深度阈值,不是一个精确的数值,大概预估的,可以不改动,要改的话参考下述公式
自己粗略估计一个相机可以良好显示的最大距离值为s = 10 如果fx = 100 Camera.bf = 20
那么 ThDepth = s*fx/Camera.bf = 10 *100 /20 = 50
将你自己的参数带入上述公式 可以得到大概的阈值。
//
LEFT.height: 480
LEFT.width: 752
//
调整为你自己的相机大小
//
LEFT.D: !!opencv-matrix
rows: 1
cols: 5
dt: d
data:[-0.28340811, 0.07395907, 0.00019359, 1.76187114e-05, 0.0]
//
位于intrinsics.yml中的
cameraDistcoeffL: !!opencv-matrix
rows: 5
cols: 1
dt: d
data: [ -2.8632659642339481e-01, 6.6994801733091039e-02,
-5.4763802000265397e-04, -1.4767993829858197e-03,
-6.1039950504068767e-03 ]
填入上面的 LEFT.D: 即可 左图像畸变参数
//
LEFT.K: !!opencv-matrix
rows: 3
cols: 3
dt: d
data: [458.654, 0.0, 367.215, 0.0, 457.296, 248.375, 0.0, 0.0, 1.0]
//
左图像相机内参,可在intrinsics.yml 的cameraMatrixL:找到:
cameraMatrixL: !!opencv-matrix
rows: 3
cols: 3
dt: d
data: [ 2.8424872262658977e+02, 0., 3.3099977082276723e+02, 0.,
2.8535010886794362e+02, 2.5230877864759117e+02, 0., 0., 1. ]
填入LEFT.K:
//
LEFT.R: !!opencv-matrix
rows: 3
cols: 3
dt: d
data: [0.999966347530033, -0.001422739138722922, 0.008079580483432283, 0.001365741834644127, 0.9999741760894847, 0.007055629199258132, -0.008089410156878961, -0.007044357138835809, 0.9999424675829176]
//
左相机旋转矩阵:extrinsics.yml 中的 Rl:
Rl: !!opencv-matrix
rows: 3
cols: 3
dt: d
data: [ 9.9750705548699170e-01, 3.5207065558213610e-02,
6.1156657760632900e-02, -3.5691910468923047e-02,
9.9933934145707581e-01, 6.8533308118298173e-03,
-6.0874968425042433e-02, -9.0190437917577089e-03,
9.9810465136093429e-01 ]
填入上面的LEFT.R:
//
LEFT.P: !!opencv-matrix
rows: 3
cols: 4
dt: d
data: [435.2046959714599, 0, 367.4517211914062, 0, 0, 435.2046959714599, 252.2008514404297, 0, 0, 0, 1, 0]
//
3x4的投影矩阵 (P' = K(RP + t) = KTP):
extrinsics.yml 中的 Pl:
Pl: !!opencv-matrix
rows: 3
cols: 4
dt: d
data: [ 2.8559499458758660e+02, 0., 2.7029193305969238e+02, 0., 0.,
2.8559499458758660e+02, 2.8112063348293304e+02, 0., 0., 0., 1.,
0. ]
填入上面的 LEFT.P:
下面的右侧相机参数配置同上述左侧相机参数配置 orb特征点的参数此处不做叙述。
//
RIGHT.height: 480
RIGHT.width: 752
RIGHT.D: !!opencv-matrix
rows: 1
cols: 5
dt: d
data:[-0.28368365, 0.07451284, -0.00010473, -3.555907e-05, 0.0]
RIGHT.K: !!opencv-matrix
rows: 3
cols: 3
dt: d
data: [457.587, 0.0, 379.999, 0.0, 456.134, 255.238, 0.0, 0.0, 1]
RIGHT.R: !!opencv-matrix
rows: 3
cols: 3
dt: d
data: [0.9999633526194376, -0.003625811871560086, 0.007755443660172947, 0.003680398547259526, 0.9999684752771629, -0.007035845251224894, -0.007729688520722713, 0.007064130529506649, 0.999945173484644]
RIGHT.P: !!opencv-matrix
rows: 3
cols: 4
dt: d
data: [435.2046959714599, 0, 367.4517211914062, -47.90639384423901, 0, 435.2046959714599, 252.2008514404297, 0, 0, 0, 1, 0]
//
RIGHT相机的设置与LEFT一致,唯一不同的就是RIGHT.P: 参数,
extrinsics.yml 中的 Pr:如下:
Pr: !!opencv-matrix
rows: 3
cols: 4
dt: d
data: [ 2.8559499458758660e+02, 0., 2.7029193305969238e+02,
-3.9636548646706200e+04, 0., 2.8559499458758660e+02,
2.8112063348293304e+02, 0., 0., 0., 1., 0. ]
对其进行修改,也就是data中的第4个值,需要转化单位从mm转为m。
所以应该填入RIGHT.P: 的数值为:
data: [ 2.8559499458758660e+02, 0., 2.7029193305969238e+02,
-3.9636548646706200e+01, 0., 2.8559499458758660e+02,
2.8112063348293304e+02, 0., 0., 0., 1., 0. ]
ORB Parameter 没什么争议,较为明了,暂不介绍。
//
ORBextractor.nFeatures: 1200
ORBextractor.scaleFactor: 1.2
ORBextractor.nLevels: 8
ORBextractor.iniThFAST: 20
ORBextractor.minThFAST: 7
Viewer.KeyFrameSize: 0.05
Viewer.KeyFrameLineWidth: 1
Viewer.GraphLineWidth: 0.9
Viewer.PointSize:2
Viewer.CameraSize: 0.08
Viewer.CameraLineWidth: 3
Viewer.ViewpointX: 0
Viewer.ViewpointY: -0.7
Viewer.ViewpointZ: -1.8
Viewer.ViewpointF: 500
下面我们用ORB-SLAM2测试一下
生成可用于ORB-SLAM3的yaml文件
ORB-SLAM3貌似对ORB-SLAM2的yaml做了简化,方便了许多。
也是找到ORB-SLAM3的EuRoC.yaml作为参照
内容差不多,不做重复注释了:
%YAML:1.0
File.version: "1.0"
Camera.type: "PinHole"
Camera1.fx: 458.654
Camera1.fy: 457.296
Camera1.cx: 367.215
Camera1.cy: 248.375
Camera1.k1: -0.28340811
Camera1.k2: 0.07395907
Camera1.p1: 0.00019359
Camera1.p2: 1.76187114e-05
Camera2.fx: 457.587
Camera2.fy: 456.134
Camera2.cx: 379.999
Camera2.cy: 255.238
Camera2.k1: -0.28368365
Camera2.k2: 0.07451284
Camera2.p1: -0.00010473
Camera2.p2: -3.55590700e-05
Camera.width: 752
Camera.height: 480
Camera.fps: 20
Camera.RGB: 1
Stereo.ThDepth: 60.0
Stereo.T_c1_c2: !!opencv-matrix
rows: 4
cols: 4
dt: f
data: [0.999997256477797,-0.002317135723275,-0.000343393120620,0.110074137800478,
0.002312067192432,0.999898048507103,-0.014090668452683,-0.000156612054392,
0.000376008102320,0.014089835846691,0.999900662638081,0.000889382785432,
0,0,0,1.000000000000000]
ORBextractor.nFeatures: 1200
ORBextractor.scaleFactor: 1.2
ORBextractor.nLevels: 8
ORBextractor.iniThFAST: 20
ORBextractor.minThFAST: 7
Viewer.KeyFrameSize: 0.05
Viewer.KeyFrameLineWidth: 1.0
Viewer.GraphLineWidth: 0.9
Viewer.PointSize: 2.0
Viewer.CameraSize: 0.08
Viewer.CameraLineWidth: 3.0
Viewer.ViewpointX: 0.0
Viewer.ViewpointY: -0.7
Viewer.ViewpointZ: -1.8
Viewer.ViewpointF: 500.0
Viewer.imageViewScale: 1.0
参考
【ROS实践入门(八)ROS使用USB视觉传感器相机】
ROS&OpenCV下单目和双目摄像头的标定与使用
双目相机标定和orbslam2双目参数详解
基于Opencv实现双目摄像头拍照程序
opencv 双目标定操作完整版
本文内容由网友自发贡献,版权归原作者所有,本站不承担相应法律责任。如您发现有涉嫌抄袭侵权的内容,请联系:hwhale#tublm.com(使用前将#替换为@)