-
1.修改/etc/neutron/neutron.conf配置
[root@linux-node1 ~]# vim /etc/neutron/neutron.conf
[defalut]
...
core_plugin = ml2
service_plugins = router    <==之前是等于空,开启路由插件
allow_overlapping_ips = Ture    <==允许重叠ip

[root@linux-node1 ~]# vim /etc/neutron/plugins/ml2/ml2_conf.ini  <==启用vxlan[ml2]
type_drivers = flat,vlan,vxlan   <==驱动类型
tenant_network_types = vxlan     <==租户网络类型为vxlan
mechanism_drivers = linuxbridge,l2population  <==启用linuxbridge ml2机制
[ml2_type_vxlan]
vni_ranges=1:1000 <==为私有网络配置Vxlan网络识别范围

配置linuxbridge代理
[root@linux-node1 ~]# vim /etc/neutron/plugins/ml2/linuxbridge_agent.ini
[vxlan]
enable_vxlan = True
local_ip = 192.168.56.11
l2_population = True

配置layer-3代理(网络层)做路由
[root@linux-node1 ~]# vim /etc/neutron/l3_agent.ini

在``[DEFAULT]``部分,配置Linuxbridge接口驱动和外部网络网桥:

interface_driver = neutron.agent.linux.interface.BridgeInterfaceDriver

OVS(open vswitch)==>用于公有云    linuxbridge==>私有云
vim /etc/neutron/plugins/ml2/linuxbridge_agent.ini
[vxlan]
enable_vxlan = True
local_ip = 192.168.56.12
l2_population = True
[root@linux-node1 ~]# systemctl restart neutron-server neutron-linuxbridge-agent neutron-l3-agent
[root@linux-node2 ~]# systemctl restart neutron-linuxbridge-agent
①获取demo凭证
[root@linux-node1 ~]# source demo-openstack

②创建自服务网络
[root@linux-node1 ~]# openstack network create selfservice
+-------------------------+--------------------------------------+
| Field                   | Value                                |
+-------------------------+--------------------------------------+
| admin_state_up          | UP                                   |
| availability_zone_hints |                                      |
| availability_zones      |                                      |
| created_at              | 2017-12-14T02:20:57Z                 |
| description             |                                      |
| headers                 |                                      |
| id                      | 24bfcb74-238b-4709-bd4c-010983329266 |
| ipv4_address_scope      | None                                 |
| ipv6_address_scope      | None                                 |
| mtu                     | 1450                                 |
| name                    | selfservice                          |
| port_security_enabled   | True                                 |
| project_id              | 02aaf7ba97114238b1d8169fedabb9be     |
| project_id              | 02aaf7ba97114238b1d8169fedabb9be     |
| revision_number         | 3                                    |
| router:external         | Internal                             |
| shared                  | False                                |
| status                  | ACTIVE                               |
| subnets                 |                                      |
| tags                    | []                                   |
| updated_at              | 2017-12-14T02:20:57Z                 |
+-------------------------+--------------------------------------+
③创建子网
[root@linux-node1 ~]# openstack subnet create --network selfservice \
>   --dns-nameserver 192.168.56.2 --gateway 172.16.1.1 \
>   --subnet-range 172.16.1.0/24 selfservice-subnet
+-------------------+--------------------------------------+
| Field             | Value                                |
+-------------------+--------------------------------------+
| allocation_pools  | 172.16.1.2-172.16.1.254              |
| cidr              | 172.16.1.0/24                        |
| created_at        | 2017-12-14T02:21:34Z                 |
| description       |                                      |
| dns_nameservers   | 192.168.56.2                         |
| enable_dhcp       | True                                 |
| gateway_ip        | 172.16.1.1                           |
| headers           |                                      |
| host_routes       |                                      |
| id                | 01941fd0-4cfa-44a6-8a09-df56a5e4314b |
| ip_version        | 4                                    |
| ipv6_address_mode | None                                 |
| ipv6_ra_mode      | None                                 |
| name              | selfservice-subnet                   |
| network_id        | 24bfcb74-238b-4709-bd4c-010983329266 |
| project_id        | 02aaf7ba97114238b1d8169fedabb9be     |
| project_id        | 02aaf7ba97114238b1d8169fedabb9be     |
| revision_number   | 2                                    |
| service_types     | []                                   |
| subnetpool_id     | None                                 |
| updated_at        | 2017-12-14T02:21:34Z                 |
+-------------------+--------------------------------------+
①获取admin凭证
[root@linux-node1 ~]# source admin-openstack

②更新public的网络
[root@linux-node1 ~]# neutron net-update public --router:external
Updated network: public

③获取demo凭证
[root@linux-node1 ~]# source demo-openstack

④创建路由
[root@linux-node1 ~]# openstack router create router
+-------------------------+--------------------------------------+
| Field                   | Value                                |
+-------------------------+--------------------------------------+
| admin_state_up          | UP                                   |
| availability_zone_hints |                                      |
| availability_zones      |                                      |
| created_at              | 2017-12-14T02:26:26Z                 |
| description             |                                      |
| external_gateway_info   | null                                 |
| flavor_id               | None                                 |
| headers                 |                                      |
| id                      | 1a189a9c-c8e3-4110-a51b-ae408dcbd830 |
| name                    | router                               |
| project_id              | 02aaf7ba97114238b1d8169fedabb9be     |
| project_id              | 02aaf7ba97114238b1d8169fedabb9be     |
| revision_number         | 3                                    |
| routes                  |                                      |
| status                  | ACTIVE                               |
| updated_at              | 2017-12-14T02:26:26Z                 |
+-------------------------+--------------------------------------+

⑤给路由器添加一个私网子网的接口
[root@linux-node1 ~]# neutron router-interface-add router selfservice-subnet
Added interface 5c3b3398-ccf0-4091-bed5-0580f99f2cc0 to router router.

⑥给路由器设置公共网络网关
[root@linux-node1 ~]# neutron router-gateway-set router public
Set gateway for router router

⑦打开neutron网络,并重启httpd服务

[root@linux-node1 ~]# vim /etc/openstack-dashboard/local-setting

OPENSTACK_NEUTRON_NETWORK = {
    'enable_router': True,
    'enable_quotas': True,
    'enable_ipv6': True,
    'enable_distributed_router': True,
    'enable_ha_router': True,
    'enable_lb': True,
    'enable_firewall': True,
    'enable_***': True,
    'enable_fip_topology_check': True,

[root@linux-node2 ~]# systemctl restart httpd

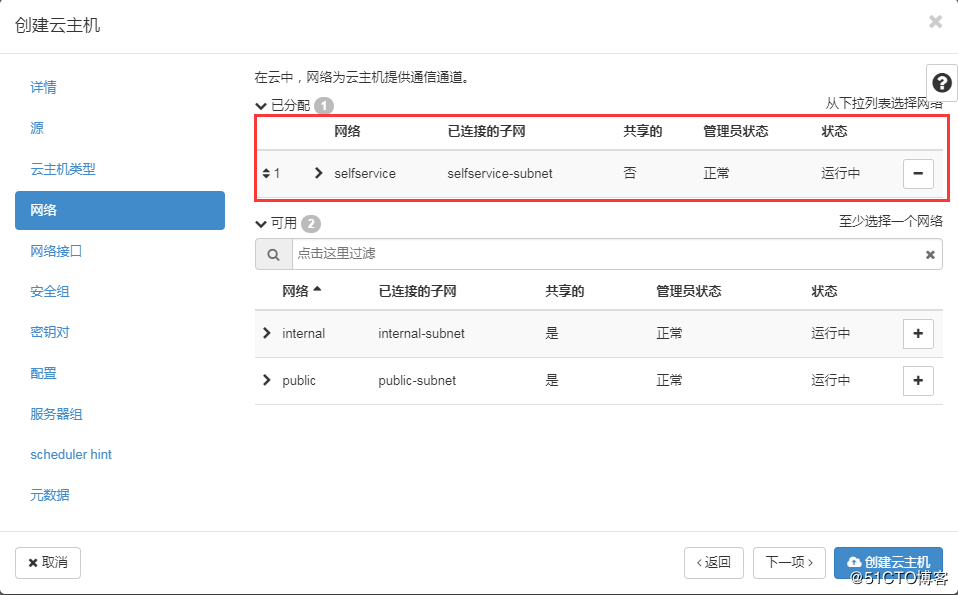
网络选项:选择selfservice-subnet
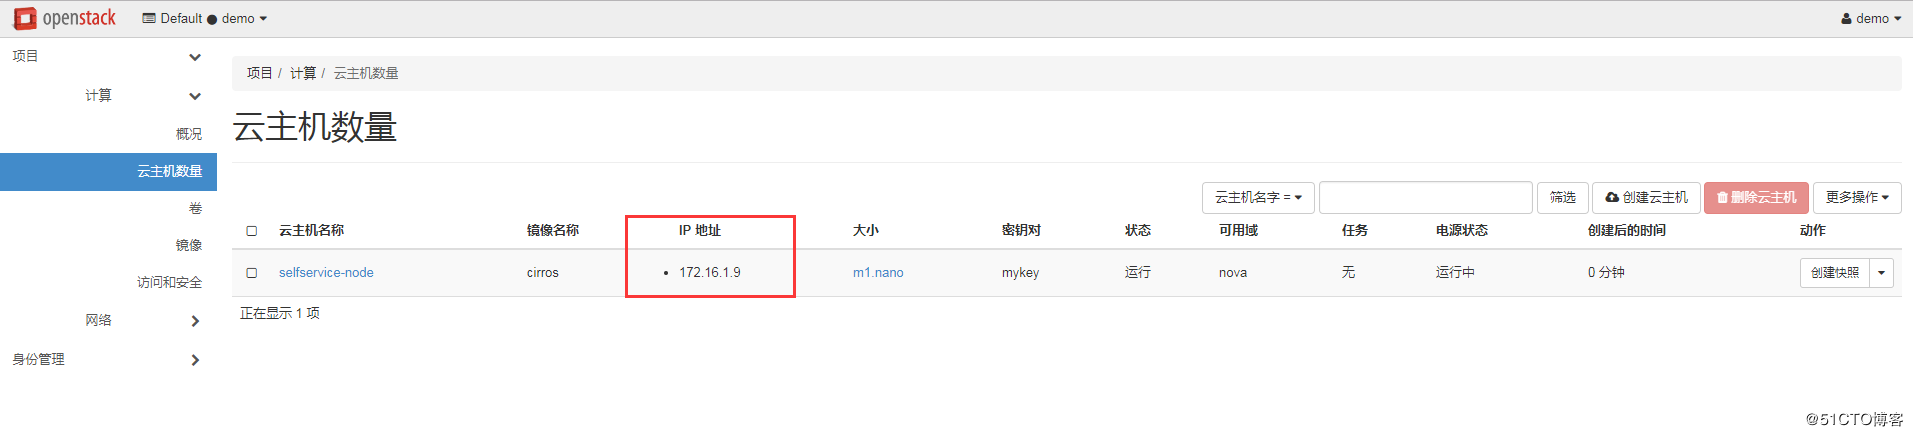
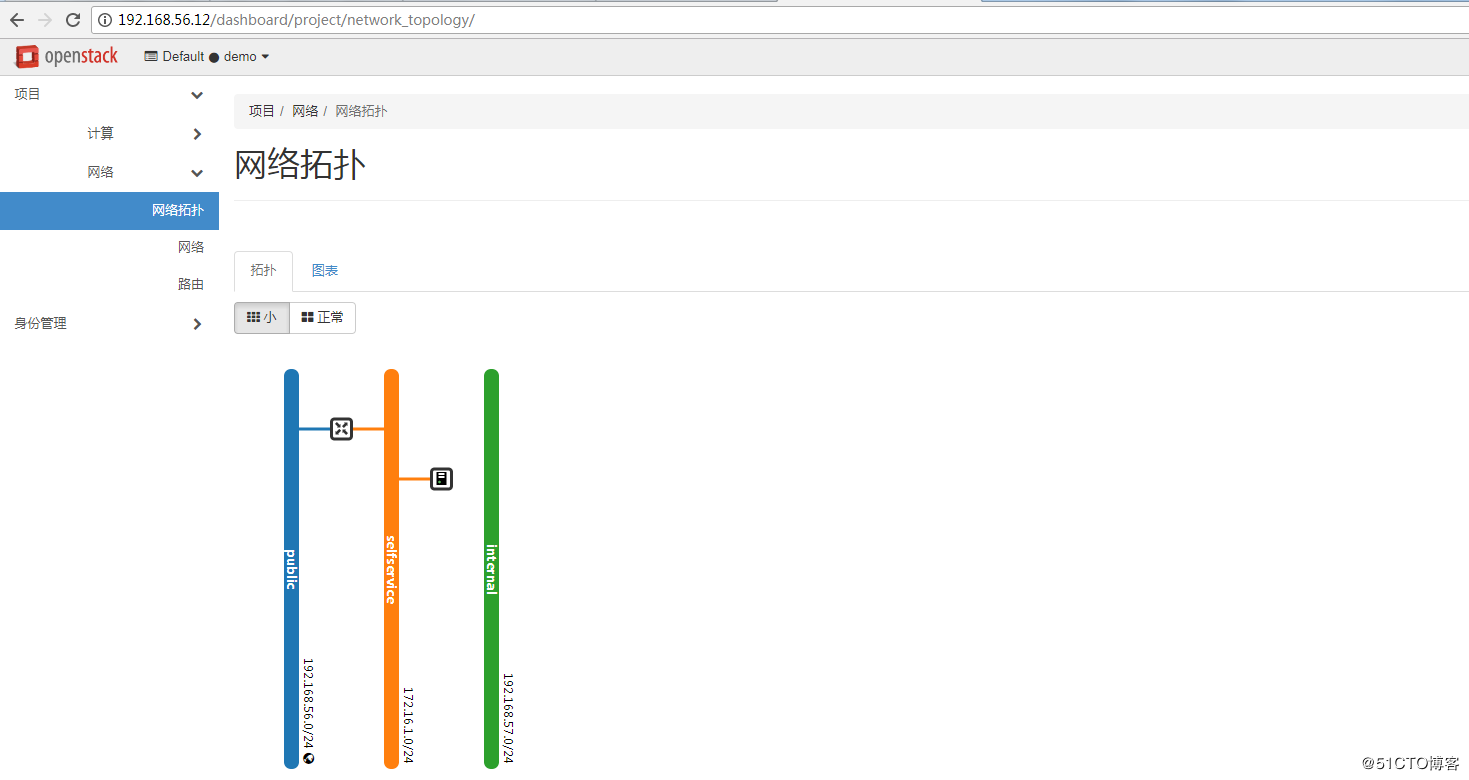
此时,创建的云主机的ip:172.16.1.9是无法通过外网进行访问的,需要对其增加一个浮动ip,相当于一个外网ip的映射,通过路由器进行连接,如图:
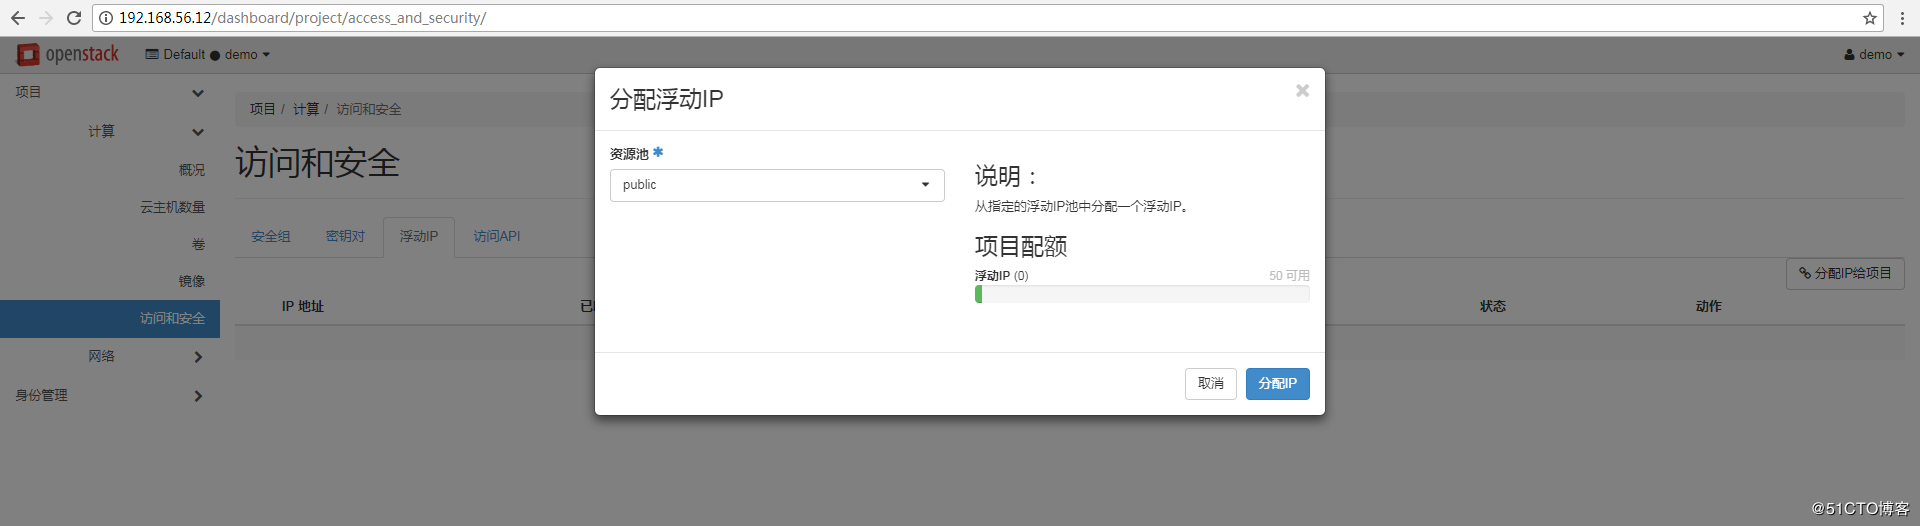
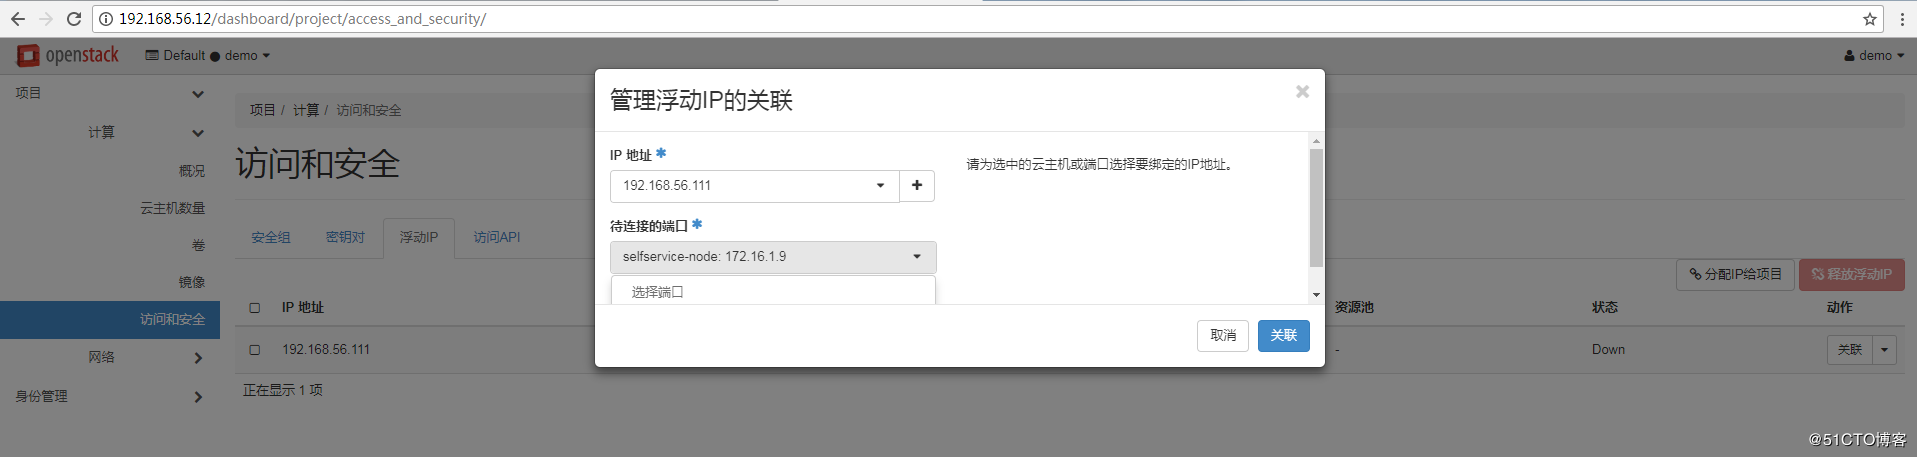
浮动ip绑定:"计算"-->"访问安全"-->"浮动ip"-->"分配给项目" 创建完毕后 "关联"到自服务网络的项目
查看网络拓扑结构:云主机连接自服务网络(selfservice),再连接路由器,路由器连接到公有网络
直接ping云主机内部ip:172.16.1.9是无法ping通的
[root@linux-node1 ~]# ping 172.16.1.9
PING 172.16.1.9 (172.16.1.9) 56(84) bytes of data.
^C
--- 172.16.1.9 ping statistics ---
4 packets transmitted, 0 received, 100% packet loss, time 3010ms
增加浮动ip后,可以ping通,并且可以通过ssh远程登录
[root@linux-node1 ~]# ping 192.168.56.111
PING 192.168.56.111 (192.168.56.111) 56(84) bytes of data.
64 bytes from 192.168.56.111: icmp_seq=1 ttl=63 time=1.19 ms
64 bytes from 192.168.56.111: icmp_seq=2 ttl=63 time=1.26 ms
^C
--- 192.168.56.111 ping statistics ---
2 packets transmitted, 2 received, 0% packet loss, time 1001ms
rtt min/avg/max/mdev = 1.199/1.234/1.269/0.035 ms
[root@linux-node1 ~]# ssh cirros@192.168.56.111
The authenticity of host '192.168.56.111 (192.168.56.111)' can't be established.
RSA key fingerprint is SHA256:JGnicOkiSuFIvu5hea2od5L3CsPJwDbBxdqRjQ7zqaw.
RSA key fingerprint is MD5:b8:b8:62:f3:36:e5:a9:af:46:ab:b7:3a:00:d6:0c:7e.
Are you sure you want to continue connecting (yes/no)? yes
Warning: Permanently added '192.168.56.111' (RSA) to the list of known hosts.
$ ifconfig
eth0      Link encap:Ethernet  HWaddr FA:16:3E:37:6B:72
          inet addr:172.16.1.9  Bcast:172.16.1.255  Mask:255.255.255.0
          inet6 addr: fe80::f816:3eff:fe37:6b72/64 Scope:Link
          UP BROADCAST RUNNING MULTICAST  MTU:1450  Metric:1
          RX packets:140 errors:0 dropped:0 overruns:0 frame:0
          TX packets:166 errors:0 dropped:0 overruns:0 carrier:0
          collisions:0 txqueuelen:1000
          RX bytes:17275 (16.8 KiB)  TX bytes:17482 (17.0 KiB)
lo        Link encap:Local Loopback
          inet addr:127.0.0.1  Mask:255.0.0.0
          inet6 addr: ::1/128 Scope:Host
          UP LOOPBACK RUNNING  MTU:16436  Metric:1
          RX packets:0 errors:0 dropped:0 overruns:0 frame:0
          TX packets:0 errors:0 dropped:0 overruns:0 carrier:0
          collisions:0 txqueuelen:0
          RX bytes:0 (0.0 B)  TX bytes:0 (0.0 B)