文章目录
- 简介
- 安装
- 常用功能
-
- 常用插件
- 通用
-
- C/C++
- Python
- LaTex
- Markdown
- 其它
-
简介
与Sublime Text相比,vscode免费开源、自带比较优秀的代码对比、调试功能,功能略强于Sublime,但功能多了略显得臃肿,速度也相对慢些,界面没那么清爽。有关Sublime Text的安装配置参见超级文本编辑器Sublime Text3
安装
vscode的安装访问主页下载安装即可。其插件可以通过点击File–>Preference–>Extensions,在其中搜索插件名安装。另一种方式是在官方Extensions里搜索插件下载.vsix格式文件,然后点击File–>Preference–>Extensions,在弹出界面寻找图标...导入文件安装。
常用功能
杂
- 官方教程网址
- Ctrl + Shift + P:调出控制面板,用于更改配置(包含插件),执行功能(包含插件)等
- 按住Ctrl + Shift + P ,在搜索框中输入
setting,选择Preference: Open User Settings(JSON) 可以直接以编辑json文件的方式更改插件配置 - Ctrl+Click:该功能可在
多光标选择,转到定义间切换。调出控制面板,输入cursor 选择 Toggle cursor - 更改页面布局,将同一个文件划分到多个区域显示

文件对比
在左侧 Explorer 下, 右击文件1, 选择Select for Compare, 然后右击文件2, 选择Compare with Selected, 出现类似如下对比界面

它还具有文件夹对比功能,可以自己取尝试.
常用插件
通用
快捷键
用惯了sublime快捷键的同学可以搜索安装 Sublime Text Keymap and Settings Importer插件。
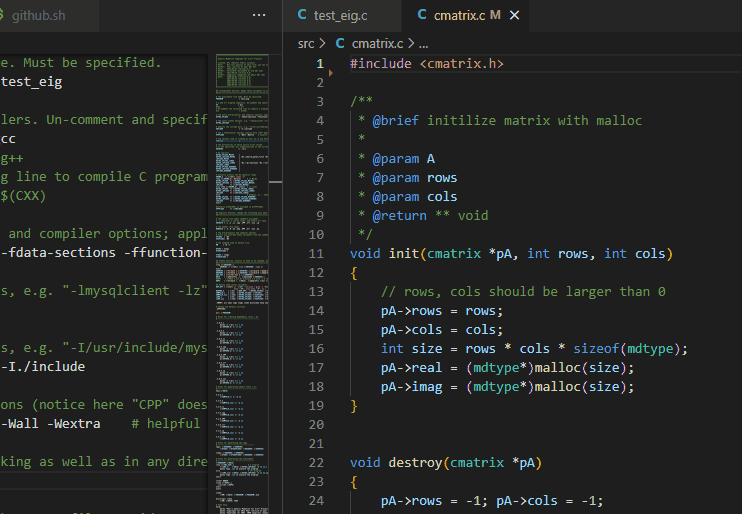
文件头注释
搜索安装 File Header Comment插件,参考官方教程配置即可,或者参考我的配置, 见下面的代码。使用时,按Ctrl + Shift + P 调出控制面板,然后按动图操作:
配置内容,可以自己仿照着自定义。
    "fileHeaderComment.parameter":{
        "*":{
            "author": "Zhi Liu",
            "year": "2013",
            "email": "zhiliu.mind@gmail.com",
            "homepage": "http://iridescent.ink",
            "version": "0.0",
            "note": "",

            "license_gpl":[
                "The GNU General Public License (GPL)",
                " Copyright (C) ${year}- ${author}",
                "",

                "This program is free software: you can redistribute it and/or modify",
                "it under the terms of the GNU General Public License as published by",
                "the Free Software Foundation, either version 3 of the License, or",
                "(at your option) any later version.",
                "",
                "This program is distributed in the hope that it will be useful,",
                "but WITHOUT ANY WARRANTY; without even the implied warranty of",
                "MERCHANTABILITY or FITNESS FOR A PARTICULAR PURPOSE.  See the",
                "GNU General Public License for more details.",
                "",
                "You should have received a copy of the GNU General Public License",
                "along with this program. If not, see <https://www.gnu.org/licenses/>.",
            ],
            "license_mit":[
                "The MIT License (MIT)",
                " Copyright (C) ${year}- ${author}",
                "",
                " Permission is hereby granted, free of charge, to any person obtaining a copy of this software",
                " and associated documentation files (the \"Software\"), to deal in the Software without restriction,",
                " including without limitation the rights to use, copy, modify, merge, publish, distribute, sublicense,",
                " and/or sell copies of the Software, and to permit persons to whom the Software is furnished to do so,",
                " subject to the following conditions:",
                "",
                " The above copyright notice and this permission notice shall be included in all copies or substantial",
                " portions of the Software.",
                "",
                " THE SOFTWARE IS PROVIDED \"AS IS\", WITHOUT WARRANTY OF ANY KIND, EXPRESS OR IMPLIED, INCLUDING BUT NOT LIMITED",
                " TO THE WARRANTIES OF MERCHANTABILITY, FITNESS FOR A PARTICULAR PURPOSE AND NONINFRINGEMENT. IN NO EVENT SHALL",
                " THE AUTHORS OR COPYRIGHT HOLDERS BE LIABLE FOR ANY CLAIM, DAMAGES OR OTHER LIABILITY, WHETHER IN AN ACTION OF CONTRACT,",
                " TORT OR OTHERWISE, ARISING FROM, OUT OF OR IN CONNECTION WITH THE SOFTWARE OR THE USE OR OTHER DEALINGS IN THE SOFTWARE."
            ],
            "license_apache":[
                "The Apache 2.0 License",
                " Copyright (C) ${year}- ${author}",
                "",
                "Licensed under the Apache License, Version 2.0 (the \"License\");",
                "you may not use this file except in compliance with the License.",
                "You may obtain a copy of the License at",
                "",
                    "http://www.apache.org/licenses/LICENSE-2.0",
                "",
                "Unless required by applicable law or agreed to in writing, software",
                "distributed under the License is distributed on an \"AS IS\" BASIS,",
                "WITHOUT WARRANTIES OR CONDITIONS OF ANY KIND, either express or implied.",
                "See the License for the specific language governing permissions and",
                "limitations under the License.",
            ]
        }
    },
    "fileHeaderComment.template":{
        "simple_without_bash_header":[
            "${commentbegin}",
            "${commentprefix} @file      : ${filename}",
            "${commentprefix} @author    : ${author}",
            "${commentprefix} @email     : ${email}",
            "${commentprefix} @homepage  : ${homepage}",
            "${commentprefix} @date      : ${date}",
            "${commentprefix} @version   : ${version}",
            "${commentprefix} @license   : ",
            "${commentprefix} @note      : ${note}",
            "${commentprefix} ",
            "${commentend}"
        ],
        "simple_with_bash_header":[
            "${commentbegin}!/usr/bin/env python",
            "${commentbegin}-*- coding: utf-8 -*-",
            "${commentprefix} @file      : ${filename}",
            "${commentprefix} @author    : ${author}",
            "${commentprefix} @email     : ${email}",
            "${commentprefix} @homepage  : ${homepage}",
            "${commentprefix} @date      : ${date}",
            "${commentprefix} @version   : ${version}",
            "${commentprefix} @license   : ",
            "${commentprefix} @note      : ${note}",
            "${commentprefix} ",
            "${commentend}"
        ],
        "gpl_without_bash_header":[
            "${commentbegin}",
            "${commentprefix} @file      : ${filename}",
            "${commentprefix} @author    : ${author}",
            "${commentprefix} @email     : ${email}",
            "${commentprefix} @homepage  : ${homepage}",
            "${commentprefix} @date      : ${date}",
            "${commentprefix} @version   : ${version}",
            "${commentprefix} @license   : GNU General Public License (GPL)",
            "${commentprefix} @note      : ${note}",
            "${commentprefix} ",
            "${commentprefix} ${license_gpl}",
            "${commentend}"
        ],
        "gpl_with_bash_header":[
            "${commentbegin}!/usr/bin/env python",
            "${commentbegin}-*- coding: utf-8 -*-",
            "${commentprefix} @file      : ${filename}",
            "${commentprefix} @author    : ${author}",
            "${commentprefix} @email     : ${email}",
            "${commentprefix} @homepage  : ${homepage}",
            "${commentprefix} @date      : ${date}",
            "${commentprefix} @version   : ${version}",
            "${commentprefix} @license   : GNU General Public License (GPL)",
            "${commentprefix} @note      : ${note}",
            "${commentprefix} ",
            "${commentprefix} ${license_gpl}",
            "${commentend}"
        ],
        "mit_without_bash_header":[
            "${commentbegin}",
            "${commentprefix} @file      : ${filename}",
            "${commentprefix} @author    : ${author}",
            "${commentprefix} @email     : ${email}",
            "${commentprefix} @homepage  : ${homepage}",
            "${commentprefix} @date      : ${date}",
            "${commentprefix} @version   : v${version}",
            "${commentprefix} @license   : The MIT License (MIT)",
            "${commentprefix} @note      : ${note}",
            "${commentprefix} ",
            "${commentprefix} ${license_mit}",
            "${commentend}"
        ],

        "mit_with_bash_header":[
            "${commentbegin}!/usr/bin/env python",
            "${commentbegin}-*- coding: utf-8 -*-",
            "${commentprefix} @file      : ${filename}",
            "${commentprefix} @author    : ${author}",
            "${commentprefix} @email     : ${email}",
            "${commentprefix} @homepage  : ${homepage}",
            "${commentprefix} @date      : ${date}",
            "${commentprefix} @version   : ${version}",
            "${commentprefix} @license   : The MIT License (MIT)",
            "${commentprefix} @note      : ${note}",
            "${commentprefix} ",
            "${commentprefix} ${license_mit}",
            "${commentend}"
        ],
        "apache_without_bash_header":[
            "${commentbegin}",
            "${commentprefix} @file      : ${filename}",
            "${commentprefix} @author    : ${author}",
            "${commentprefix} @email     : ${email}",
            "${commentprefix} @homepage  : ${homepage}",
            "${commentprefix} @date      : ${date}",
            "${commentprefix} @version   : v${version}",
            "${commentprefix} @license   : The Apache License 2.0",
            "${commentprefix} @note      : ${note}",
            "${commentprefix} ",
            "${commentprefix} ${license_apache}",
            "${commentend}"
        ],

        "apache_with_bash_header":[
            "${commentbegin}!/usr/bin/env python",
            "${commentbegin}-*- coding: utf-8 -*-",
            "${commentprefix} @file      : ${filename}",
            "${commentprefix} @author    : ${author}",
            "${commentprefix} @email     : ${email}",
            "${commentprefix} @homepage  : ${homepage}",
            "${commentprefix} @date      : ${date}",
            "${commentprefix} @version   : ${version}",
            "${commentprefix} @license   : The Apache License 2.0",
            "${commentprefix} @note      : ${note}",
            "${commentprefix} ",
            "${commentprefix} ${license_apache}",
            "${commentend}"
        ],
    },
C/C++
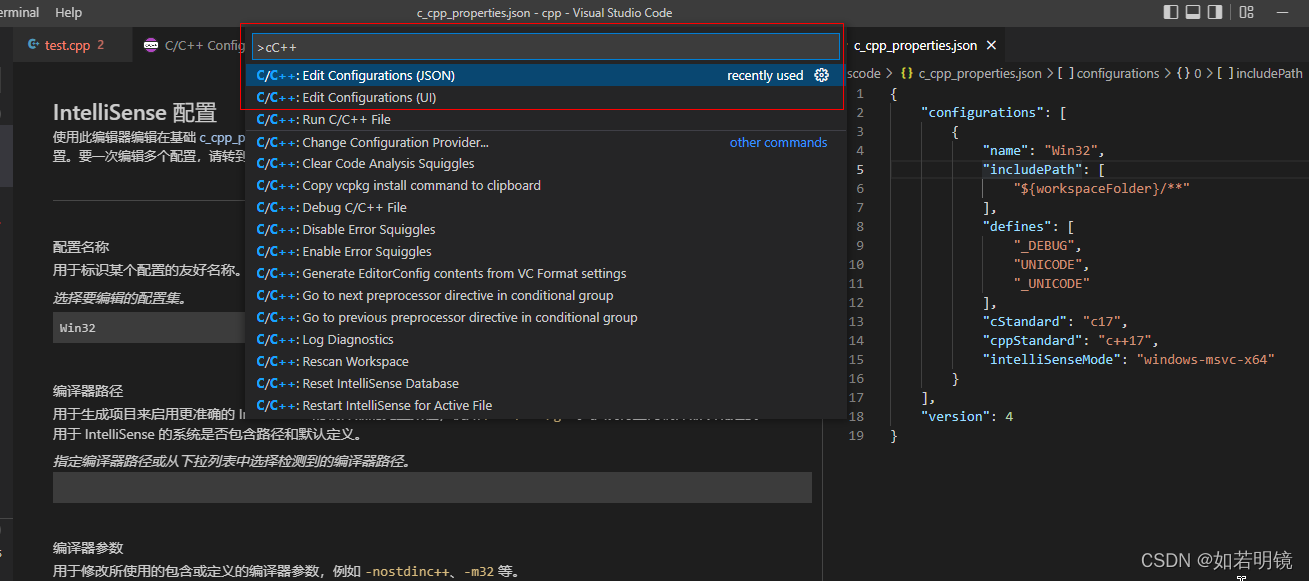
搜索安装 C/C++ 插件,可实现定义跳转,编译、调试运行等功能。按住Ctrl + Shift + P,输入CC++,可选择GUI可视化配置或者JSON文件配置,如下图所示。
由于C++有不同的实现,如GNU C,Visual C,因而配置也略微不同。
目前该插件还不支持多文件编译和调试,想实现多文件编译,请参考本文 “C++”多文件编译 章节。
Python
主要安装 Python,autoDocstring,前者用于语法高亮、运行与调试,后者用于自动生成注释文档,关于Sphinx文档的介绍可参考本人撰写的教程。
如下图所示,安装完成后,按住Ctrl + Shift + P调出控制面板,输入python,可更改相关选项,如选择解释器。当你安装有多个版本的Python时可以用它选择使用那个版本运行代码,注意需要将各个版本的python解释器路径添加到PATH环境变量。
图中sum函数的注释文档是通过输入""" 按回车后自动生成的。

LaTex
搜索安装 LaTeX Workshop,注意如果没有你需要的工具,可以自己添加,如biber,一个是tools,另一个是recipes。
按住Ctrl + Shift + P ,在搜索框中输入setting,选择Preference: Open User Settings(JSON) ,添加如下配置:
    "latex-workshop.latex.autoBuild.run": "never",
    "latex-workshop.message.error.show": true,
    "latex-workshop.message.warning.show": true,
    "latex-workshop.synctex.afterBuild.enabled": true,
    "latex-workshop.latex.autoClean.run": "never",

    "latex-workshop.latex.tools": [
        {
            "name": "latexmk",
            "command": "latexmk",
            "args": [
              "-synctex=1",
              "-interaction=nonstopmode",
              "-file-line-error",
              "-pdf",
              "-outdir=%OUTDIR%",
              "%DOC%"
            ],
            "env": {}
        },
        {
            "name": "xelatex",
            "command": "xelatex",
            "args": [
                "-synctex=1",
                "-interaction=nonstopmode",
                "-file-line-error",
                "%DOC%"
            ]
        },
        {
            "name": "pdflatex",
            "command": "pdflatex",
            "args": [
                "-synctex=1",
                "-interaction=nonstopmode",
                "-file-line-error",
                "%DOC%"
            ]
        },
        {
            "name": "bibtex",
            "command": "bibtex",
            "args": [
                "%DOCFILE%"
            ]
        },
        {
            "name": "biber",
            "command": "biber",
            "args": [
                "%DOCFILE%"
            ]
        }
    ],

    "latex-workshop.latex.recipes": [
        {
            "name": "latexmk",
            "tools": [
              "latexmk"
            ]
        },
        {
            "name": "xelatex",
            "tools": [
                "xelatex"
            ],
        },
        {
            "name": "pdflatex",
            "tools": [
                "pdflatex"
            ]
        },
        {
            "name": "bibtex",
            "tools": [
                "bibtex"
            ],
        },
        {
            "name": "biber",
            "tools": [
                "biber"
            ]
        },
        {
            "name": "xelatex -> bibtex -> xelatex * 2",
            "tools": [
                "xelatex",
                "bibtex",
                "xelatex",
                "xelatex"
            ]
        },
        {
            "name": "pdflatex -> bibtex -> pdflatex * 2",
            "tools": [
              "pdflatex",
              "bibtex",
              "pdflatex",
              "pdflatex"
            ]
        },
        {
            "name": "xelatex -> biber -> xelatex * 2",
            "tools": [
                "xelatex",
                "biber",
                "xelatex",
                "xelatex"
            ]
        },
        {
            "name": "pdflatex -> biber -> pdflatex * 2",
            "tools": [
                "pdflatex",
                "biber",
                "pdflatex",
                "pdflatex"
            ]
        }
    ],
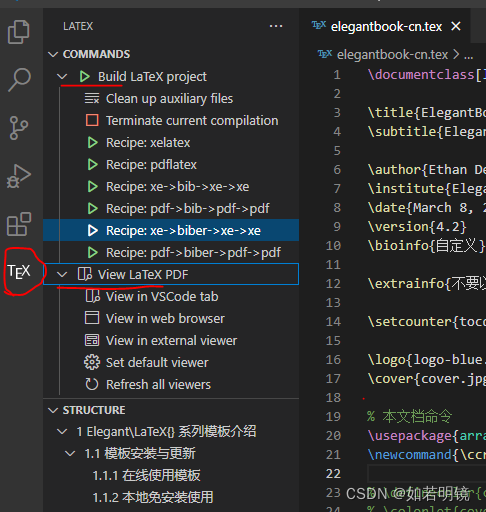
然后重启vscode,在左侧工具栏可以看到 TEX图标,点击展开后可以看到添加的选项,如下图所示,另外通过View LaTex PDF功能可以设置在哪里预览PDF,建议选VSCode tab,这样可以较方便实现反向搜索(Ctrl+Double Click):
如果想向Sublime Text一样,按 Ctrl+B键实现代码编译,请参考下述 快捷键小结。
Markdown
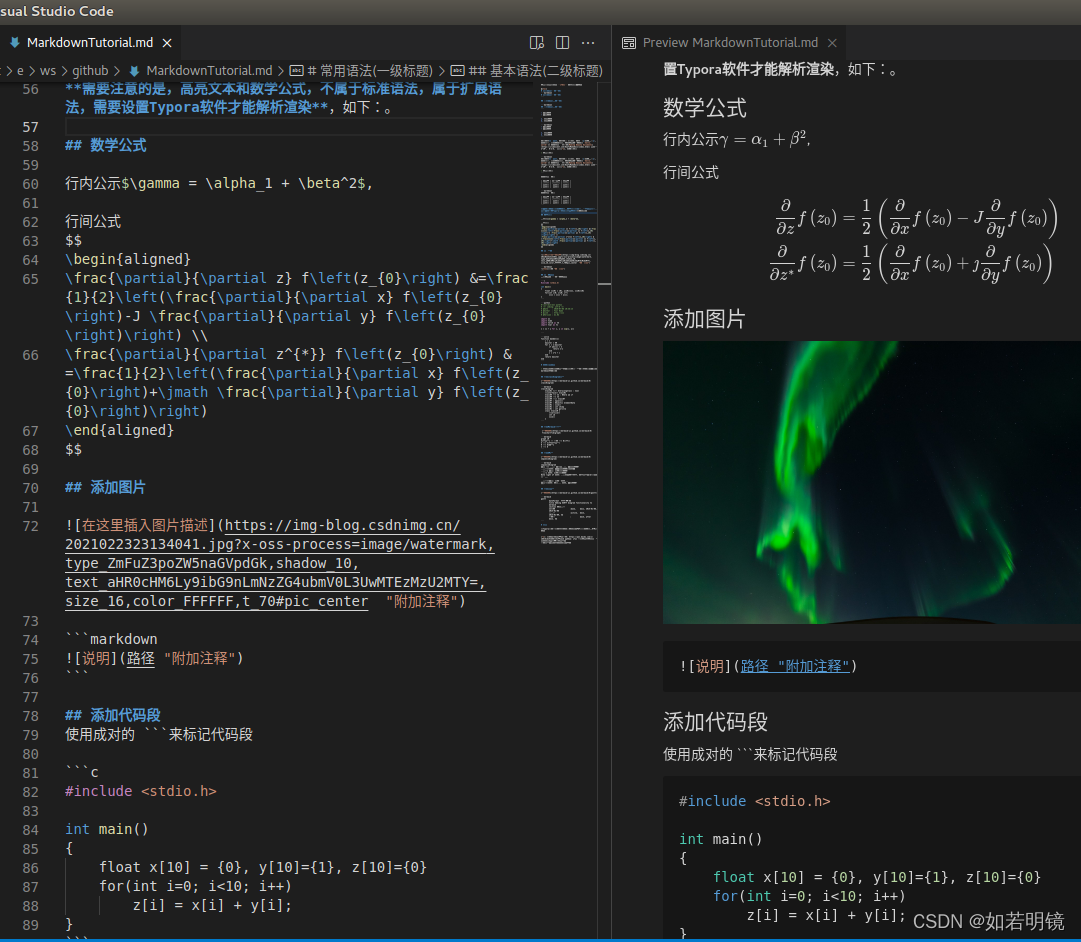
搜索安装 Markdown All in One,预览结果如下, 该插件还支持自动生成目录的功能, 按住Ctrl + Shift + P调出控制面板,输入markdown all in one, 选择 Create Table of Contents 即可生成,其它功能,请自行探索.
其它
C/C++多文件编译运行
可以直接安装使用C/C++ Runner插件,也可以借助 Code Runner 插件和Make工具实现。使用C/C++ Runner插件比较简单,本人也推荐使用该插件,基本都是傻瓜化操作,这里不做过多介绍。下面介绍使用Code Runner 插件如何实现多文件的编译。
由于Windows不自带make,故在Windows上需要安装,可以在这里 下载,按说明安装。但实际上安装了GNU 的C/C++编译工具MinGW 或 TDM-GCC后,在TDM-GCC\bin 目录下可以找到 mingw32-make.exe,复制一个并重命名为make.exe,并在环境变量PATH里添加make.exe所在路径即可。
然后需要配置一下CodeRunner,只有c cpp 两行,如下,被注释掉的为默认配置。
{
"code-runner.runInTerminal": true,
"code-runner.ignoreSelection": true,
"code-runner.executorMap": {
"javascript": "node",
"java": "cd $dir && javac $fileName && java $fileNameWithoutExt",
"c": "cd $dir && make && $dir$fileNameWithoutExt",
"cpp": "cd $dir && make && $dir$fileNameWithoutExt",
"objective-c": "cd $dir && gcc -framework Cocoa $fileName -o $fileNameWithoutExt && $dir$fileNameWithoutExt",
"php": "php",
"python": "python -u",
"perl": "perl",
"perl6": "perl6",
"ruby": "ruby",
"go": "go run",
"lua": "lua",
"groovy": "groovy",
"powershell": "powershell -ExecutionPolicy ByPass -File",
"bat": "cmd /c",
"shellscript": "bash",
"fsharp": "fsi",
"csharp": "scriptcs",
"vbscript": "cscript //Nologo",
"typescript": "ts-node",
"coffeescript": "coffee",
"scala": "scala",
"swift": "swift",
"julia": "julia",
"crystal": "crystal",
"ocaml": "ocaml",
"r": "Rscript",
"applescript": "osascript",
"clojure": "lein exec",
"haxe": "haxe --cwd $dirWithoutTrailingSlash --run $fileNameWithoutExt",
"rust": "cd $dir && rustc $fileName && $dir$fileNameWithoutExt",
"racket": "racket",
"scheme": "csi -script",
"ahk": "autohotkey",
"autoit": "autoit3",
"dart": "dart",
"pascal": "cd $dir && fpc $fileName && $dir$fileNameWithoutExt",
"d": "cd $dir && dmd $fileName && $dir$fileNameWithoutExt",
"haskell": "runhaskell",
"nim": "nim compile --verbosity:0 --hints:off --run",
"lisp": "sbcl --script",
"kit": "kitc --run",
"v": "v run",
"sass": "sass --style expanded",
"scss": "scss --style expanded",
"less": "cd $dir && lessc $fileName $fileNameWithoutExt.css",
"FortranFreeForm": "cd $dir && gfortran $fileName -o $fileNameWithoutExt && $dir$fileNameWithoutExt",
"fortran-modern": "cd $dir && gfortran $fileName -o $fileNameWithoutExt && $dir$fileNameWithoutExt",
"fortran_fixed-form": "cd $dir && gfortran $fileName -o $fileNameWithoutExt && $dir$fileNameWithoutExt",
"fortran": "cd $dir && gfortran $fileName -o $fileNameWithoutExt && $dir$fileNameWithoutExt",
"sml": "cd $dir && sml $fileName"
},
}
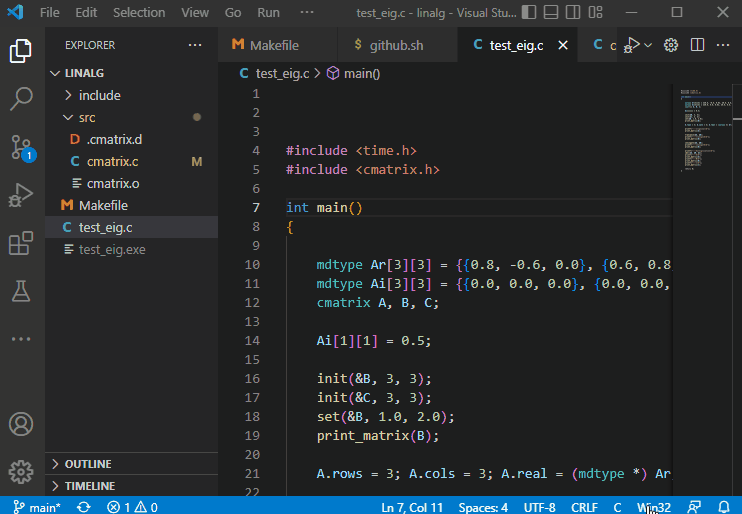
然后从本人编写的代码库这里的 c/linalg 文件夹下拷贝 Makefile文件,放入你的目录,打开并修改PROGRAM字段为你main函数所在文件的名字。在你的目录下新建文件夹include 和 src,将所有.h和.c/.cpp文件对应放进去即可。
配置好后就可以直接用CodeRunner进行多文件的编译与运行了。效果图如下:
代码运行
用过sublime的童鞋可能都比较喜欢使用 Ctrl+B快捷键运行程序, 而vscode则没有类似功能. 可以通过安装 Code Runner 插件, 并修改其快捷键实现. 假设已经安装了该插件, 然后依次点击File–>Preference–>Keyboard Shotcuts 打开快捷键设置界面,输入 alt+ctrl+n搜索code runner的快捷键, 然后点击铅笔图标,在弹出的对话框中按Ctrl+B并回车修改快捷键即可.

另外,如果想CodeRunner运行完,显示输出结果自动滑动到末尾,可以点击下图所示图标

Code Runner目前支持的语言有限,不过支持自定义扩展,下面以LaTex为例 假设想实现 pdflatex-->bibtex -->pdflatex-->pdflatex 的编译流程,只需按住Ctrl + Shift + P ,在搜索框中输入setting,选择Preference: Open User Settings(JSON) 打开用户配置文件,增加如下内容即可
"code-runner.executorMapByFileExtension": {
".tex": "cd $dir && pdflatex -synctex=1 -interaction=nonstopmode -file-line-error $fileNameWithoutExt && bibtex $fileNameWithoutExt || true && pdflatex -synctex=1 -interaction=nonstopmode -file-line-error $fileNameWithoutExt && pdflatex -synctex=1 -interaction=nonstopmode -file-line-error $fileNameWithoutExt",
},
或者
"code-runner.executorMap": {
"latex": "cd $dir && pdflatex -synctex=1 -interaction=nonstopmode -file-line-error $fileNameWithoutExt && bibtex $fileNameWithoutExt || true && pdflatex -synctex=1 -interaction=nonstopmode -file-line-error $fileNameWithoutExt && pdflatex -synctex=1 -interaction=nonstopmode -file-line-error $fileNameWithoutExt",
},
本文内容由网友自发贡献,版权归原作者所有,本站不承担相应法律责任。如您发现有涉嫌抄袭侵权的内容,请联系:hwhale#tublm.com(使用前将#替换为@)