(添加echo模块)配置
1.先去github或者gitee中找到nginx_module_echo-master.zip包
2.将原来的ngin-1.20.1删除,重新编译安装
[root@host src]
debug kernels nginx-1.20.1.tar.gz wujunze-nginx_module_echo-master.zip
[root@host src]
[root@host src]
Archive: wujunze-nginx_module_echo-master.zip
cc5135fd7a7c87ccac48fd05509396443c71c065
creating: nginx_module_echo/
extracting: nginx_module_echo/.gitignore
inflating: nginx_module_echo/LICENSE
inflating: nginx_module_echo/README.md
inflating: nginx_module_echo/README_zh.md
inflating: nginx_module_echo/config
creating: nginx_module_echo/src/
inflating: nginx_module_echo/src/ngx_http_echo_module.c
[root@host src]
[root@host src]
debug kernels nginx-1.20.1 nginx-1.20.1.tar.gz nginx_module_echo wujunze-nginx_module_echo-master.zip
[root@host ~]
nginx version: nginx/1.20.1
built by gcc 8.5.0 20210514 (Red Hat 8.5.0-2) (GCC)
built with OpenSSL 1.1.1k FIPS 25 Mar 2021
TLS SNI support enabled
configure arguments: --prefix=/usr/local/nginx --user=nginx --group=nginx --with-debug --with-http_ssl_module --with-http_realip_module --with-http_image_filter_module --with-http_gunzip_module --with-http_gzip_static_module --with-http_stub_status_module --http-log-path=/var/log/nginx/access.log --error-log-path=/var/log/nginx/error.log
[root@host nginx-1.20.1]
可以发现现在多了一个objs目录
[root@host nginx-1.20.1]
auto CHANGES CHANGES.ru conf configure contrib html LICENSE Makefile man objs README src
[root@host nginx-1.20.1]
[root@host nginx-1.20.1]
addon autoconf.err Makefile ngx_auto_config.h ngx_auto_headers.h ngx_modules.c src
[root@host nginx-1.20.1]
addon Makefile nginx.8 ngx_auto_headers.h ngx_modules.o
autoconf.err nginx ngx_auto_config.h ngx_modules.c src
替换nginx文件
[root@host nginx-1.20.1]
[root@host nginx-1.20.1]
nginx version: nginx/1.20.1
built by gcc 8.5.0 20210514 (Red Hat 8.5.0-2) (GCC)
built with OpenSSL 1.1.1k FIPS 25 Mar 2021
TLS SNI support enabled
configure arguments: --prefix=/usr/local/nginx --user=nginx --group=nginx --with-debug --with-http_ssl_module --with-http_realip_module --with-http_image_filter_module --with-http_gunzip_module --with-http_gzip_static_module --with-http_stub_status_module --http-log-path=/var/log/nginx/access.log --error-log-path=/var/log/nginx/error.log --add-module=../nginx_module_echo
location应用
| 修饰符 | 功能 |
|---|
| = | 精确匹配 |
| ~ | 正则表达式模式匹配,区分大小写 |
| ~* | 正则表达式模式匹配,不区分大小写 |
| ^~ | 前缀匹配,类似于无修饰符的行为,也是以指定模块开始,不同的是,如果模式匹配,那么就停止搜索其他模式了,不支持正则表达式 |
| @ | 定义命名location区段,这些区段客户端不能访问,只可以由内部产生的请求来访问,如try_files或error_page等 |
- ( location = 路径 ) --> ( location ^~ 路径 ) --> ( location ~ 正则 ) --> ( location ~* 正则 ) --> ( location 路径 )
[root@host ~]
......
location /abc {
echo "hehe";
}
......
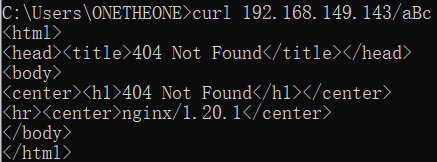
用windows的cmd查看


精确查找
[root@host ~]
......
location = /abc {
echo "hehe";
}
......

正则表达式模式匹配,区分大小写
[root@host ~]
......
location ~ /abc {
echo "hehe";
}
......

正则表达式模式匹配,不区分大小写
[root@host ~]
......
location ~* /abc {
echo "xx";
}
......

前缀匹配 (+上$表示匹配的项以$前面的为结尾)
[root@host ~]
......
location ~ ^/abc$ {
echo "bb";
}
......

访问控制
禁用一定要在运行前面,否则无效
这里只是禁用这个ip不能去访问主页但是其它的还是可以访问的
[root@host ~]
......
location / {
deny 192.168.149.143;
allow 192.168.149.0/24;
root html;
index index.html index.htm;
}
......
[root@host ~]
[root@host ~]
<html>
<head><title>403 Forbidden</title></head>
<body>
<center><h1>403 Forbidden</h1></center>
<hr><center>nginx/1.20.1</center>
</body>
</html>
[root@host ~]
bb
用户认证
安装apache的工具包
[root@host ~]
[root@host ~]
/usr/bin/htpasswd
[root@host ~]
New password:
Re-type new password:
Adding password for user xx
[root@host ~]
xx:$apr1$qB8xdQeD$FEwzzuJXpT6vutlvaKmKs1
(忘记密码时可以用命令重新生成)
[root@host ~]
......
location / {
auth_basic "yh"; 这个只是注释
auth_basic_user_file /usr/local/nginx/conf/.auth_pass; 写入存放文件路径
root html;
index index.html index.htm;
}
......
[root@host ~]

输入密码或用户名错误时

https配置
CA生成一对密钥
[root@host ~]
[root@host ~]
[root@host CA]
[root@host CA]
Generating RSA private key, 2048 bit long modulus (2 primes)
...........................................................................................................................................+++++
.........................+++++
e is 65537 (0x010001)
CA生成自签署证书
[root@host CA]
You are about to be asked to enter information that will be incorporated
into your certificate request.
What you are about to enter is what is called a Distinguished Name or a DN.
There are quite a few fields but you can leave some blank
For some fields there will be a default value,
If you enter '.', the field will be left blank.
-----
Country Name (2 letter code) [XX]:CN
State or Province Name (full name) []:HB
Locality Name (eg, city) [Default City]:WU
Organization Name (eg, company) [Default Company Ltd]:xialuo
Organizational Unit Name (eg, section) []:xialuo
Common Name (eg, your name or your server's hostname) []:xialuo.example.com
Email Address []:1@1.com
生成密钥
[root@host CA]# mkdir certs newcerts crl
[root@host CA]# touch index.txt && echo 01 > serial
创一个存放密钥的目录
[root@host ~]# cd /usr/local/nginx/
[root@host nginx]# ls
client_body_temp conf fastcgi_temp html logs proxy_temp sbin scgi_temp uwsgi_temp
[root@host nginx]# mkdir ssl
[root@host ssl]# (umask 077;openssl genrsa -out nginx.key 2048)
Generating RSA private key, 2048 bit long modulus (2 primes)
.......+++++
...................................+++++
e is 65537 (0x010001)
客户端生成证书签署请求
[root@host ssl]# openssl req -new -key nginx.key -days 365 -out nginx.csr
Ignoring -days; not generating a certificate
You are about to be asked to enter information that will be incorporated
into your certificate request.
What you are about to enter is what is called a Distinguished Name or a DN.
There are quite a few fields but you can leave some blank
For some fields there will be a default value,
If you enter '.', the field will be left blank.
-----
Country Name (2 letter code) [XX]:CN
State or Province Name (full name) []:HB
Locality Name (eg, city) [Default City]:WH
Organization Name (eg, company) [Default Company Ltd]:xialuo
Organizational Unit Name (eg, section) []:xialuo
Common Name (eg, your name or your server's hostname) []:xialuo.example.com
Email Address []:
Please enter the following 'extra' attributes
to be sent with your certificate request
A challenge password []:
An optional company name []:
CA签署客户端提交上来的证书
[root@host ssl]
Using configuration from /etc/pki/tls/openssl.cnf
Check that the request matches the signature
Signature ok
Certificate Details:
Serial Number: 1 (0x1)
Validity
Not Before: Jun 26 09:42:34 2021 GMT
Not After : Jun 26 09:42:34 2022 GMT
Subject:
countryName = CN
stateOrProvinceName = HB
organizationName = xialuo
organizationalUnitName = xialuo
commonName = xialuo.example.com
X509v3 extensions:
X509v3 Basic Constraints:
CA:FALSE
Netscape Comment:
OpenSSL Generated Certificate
X509v3 Subject Key Identifier:
C7:A8:24:25:FE:BC:26:A8:8B:7A:DC:17:3A:74:26:EF:10:CC:1C:67
X509v3 Authority Key Identifier:
keyid:B1:2C:84:A3:82:50:F6:87:F4:C7:1B:B1:60:2C:DF:3D:16:79:7D:6C
Certificate is to be certified until Jun 26 09:42:34 2022 GMT (365 days)
Sign the certificate? [y/n]:y
1 out of 1 certificate requests certified, commit? [y/n]y
Write out database with 1 new entries
Data Base Updated
[root@host ssl]
nginx.crt nginx.csr nginx.key
[root@host ~]
108 server {
109 listen 443 ssl;
110 server_name xialuo.example.com;
111
112 ssl_certificate /usr/local/nginx/ssl/nginx.crt;
113 ssl_certificate_key /usr/local/nginx/ssl/nginx.key;
114
115 ssl_session_cache shared:SSL:1m;
116 ssl_session_timeout 5m;
117
118 ssl_ciphers HIGH:!aNULL:!MD5;
119 ssl_prefer_server_ciphers on;
120
121 location / {
122 root html;
123 index index.html index.htm;
124 }
125 }
126
127 }
[root@host ~]
[root@host ~]
State Recv-Q Send-Q Local Address:Port Peer Address:Port Process
LISTEN 0 128 0.0.0.0:80 0.0.0.0:*
LISTEN 0 128 0.0.0.0:22 0.0.0.0:*
LISTEN 0 128 0.0.0.0:443 0.0.0.0:*
LISTEN 0 128 [::]:22 [::]:*

zabbix监控nginx状态页面
开启状态页面
[root@host ~]
......
location /status {
stub_status on;
}
......
[root@host ~]

状态设置
[root@host ~]
......
location /status {
stub_status on;
allow 192.168.149.1/32;
deny all;
}
......
[root@host ~]

| 状态码 | 表示的意义 |
|---|
| Active connections | 当前所有处于打开状态的连接数 |
| accepts | 总共处理了多少个连接 |
| handled | 成功创建多少握手 |
| requests | 总共处理了多少个请求 |
| Reading | nginx读取到客户端的Header信息数,表示正处于接收请求状态的连接数 |
| Writing | nginx返回给客户端的Header信息数,表示请求已经接收完成,
且正处于处理请求或发送响应的过程中的连接数 |
| Waiting | 开启keep-alive的情况下,这个值等于active - (reading + writing),
意思就是Nginx已处理完正在等候下一次请求指令的驻留连接 |
| zabbix_server | 192.168.149.133 |
|---|
| zabbix_agentd | 192.168.149.143 |
[root@host ~]
[root@host ~]
HOST="192.168.149.143"
PORT="80"
function ping {
/sbin/pidof nginx | wc -l
}
function active {
/usr/bin/curl "http://$HOST:$PORT/status/" 2>/dev/null| grep 'Active' | awk '{print $NF}'
}
function reading {
/usr/bin/curl "http://$HOST:$PORT/status/" 2>/dev/null| grep 'Reading' | awk '{print $2}'
}
function writing {
/usr/bin/curl "http://$HOST:$PORT/status/" 2>/dev/null| grep 'Writing' | awk '{print $4}'
}
function waiting {
/usr/bin/curl "http://$HOST:$PORT/status/" 2>/dev/null| grep 'Waiting' | awk '{print $6}'
}
function accepts {
/usr/bin/curl "http://$HOST:$PORT/status/" 2>/dev/null| awk NR==3 | awk '{print $1}'
}
function handled {
/usr/bin/curl "http://$HOST:$PORT/status/" 2>/dev/null| awk NR==3 | awk '{print $2}'
}
function requests {
/usr/bin/curl "http://$HOST:$PORT/status/" 2>/dev/null| awk NR==3 | awk '{print $3}'
}
$1
开启自定义
[root@host ~]
UnsafeUserParameters=1
UserParameter=check_status[*],/bin/bash /scripts/check_status.sh $1
服务端测试:
[root@host ~]
1
本文内容由网友自发贡献,版权归原作者所有,本站不承担相应法律责任。如您发现有涉嫌抄袭侵权的内容,请联系:hwhale#tublm.com(使用前将#替换为@)


