摘要1:https://blog.csdn.net/yxxxiao/article/details/94602614?utm_medium=distribute.pc_relevant_t0.none-task-blog-BlogCommendFromMachineLearnPai2-1.channel_param&depth_1-utm_source=distribute.pc_relevant_t0.none-task-blog-BlogCommendFromMachineLearnPai2-1.channel_param#%E4%BA%8C%E3%80%81%E6%96%AD%E8%A8%80
一、pytest 生成测试报告
本文讲述pytest如何生成测试报告。
首先准备一段测试代码:
import py.test

class TestCase(object):
    def test_eq_set(self):
        assert set([0, 10, 11, 12]) == set([0, 20, 21])

    def test_eq_dict(self):
        assert {'a': 0, 'b': 1, 'c': 0} == {'a': 0, 'b': 2, 'd': 0}

    def test_eq_list(self):
        assert [0, 1, 2] == [0, 1, 3]

    def test_eq_longer_list(self):
        assert [1,2] == [1,2,3]
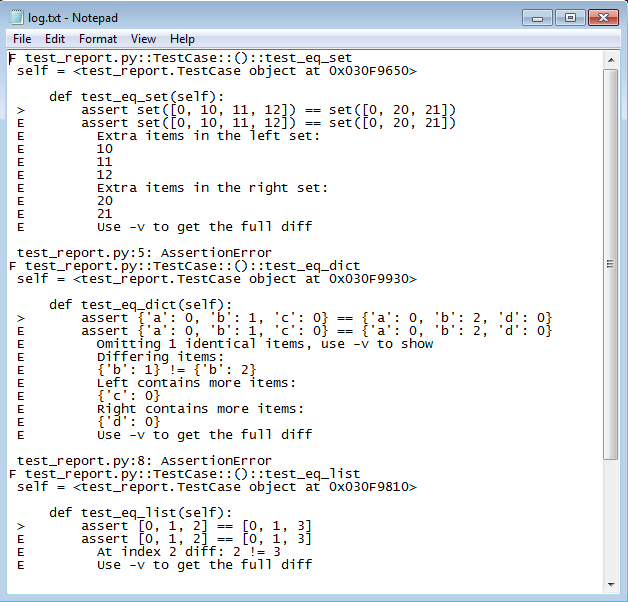
1、文本格式的报告
py.test test_report.py --resultlog=d:\log.txt
指定当前路径下生成log.txt文件,打开文件,内容如下:
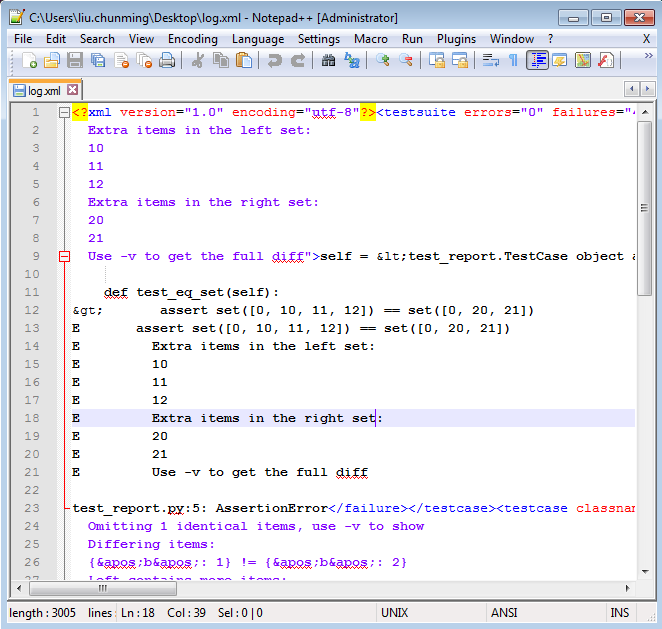
2、生成JUnitXml格式报告
该格式方便与CI服务器进行集成
py.test test_report.py --junitxml=d:\log.xml
打开生成的log.xml,内容如下:
3、将测试报告发送到pastebin服务器
py.test test_report.py --pastebin=all
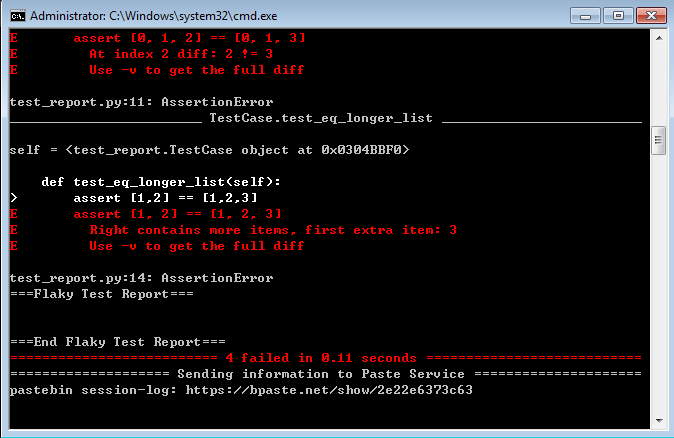
点击生成的网址,内容如下:

当然,你可以只将失败的报告发送到pastebin服务器
py.test test_report.py --pastebin=failed
4、生成Html格式报告
这个需要安装pytest的第三方插件pytest-html:
pip install -U pytest-html
执行测试:
py.test test_report.py --html=d:\log.html
打开生成的测试报告log.html:

本文内容由网友自发贡献,版权归原作者所有,本站不承担相应法律责任。如您发现有涉嫌抄袭侵权的内容,请联系:hwhale#tublm.com(使用前将#替换为@)