烧录资料下载:https://gitee.com/hihope_iot/docs/tree/master/HiSpark-AI-Camera-Developer-Kit/Software/tools
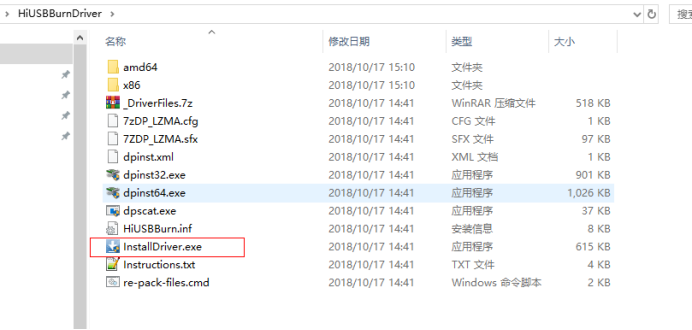
第一步:安装好hitool usb 烧写的驱动
安装方式:解压后,双击InstallDriver.exe,默认下一步,点击完成即可
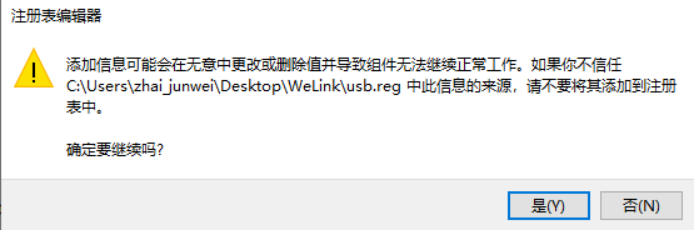
第二步:双击注册表文件,见末尾附件,点击是即可

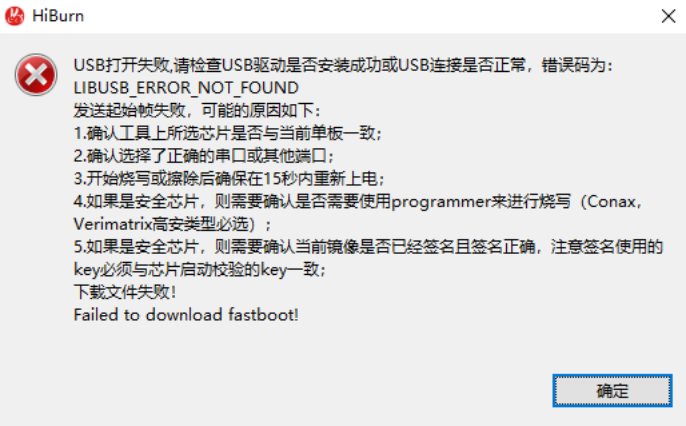
未安装会出现如图所示错误:
烧写步骤:
1、将3516开发板串口线插到电脑USB口上
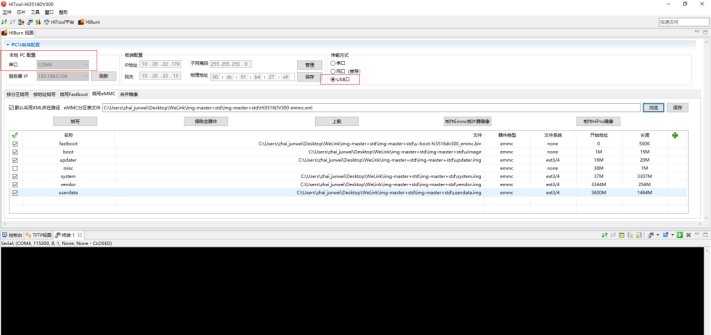
2、因为是USB烧写方式,所以选择USB口,如图
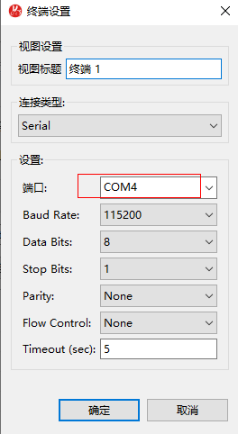
注意:串口是哪个要选对了,还有终端串口配置的串口要和PC与板端配置下面的串口要一致
Ps:USB烧写不需要连网线,也不需要插上电源线(带开关按钮的),只需要将一端有typeC口插上3516开发板背面,还有一端是USB口插在主机USB口上,这条线就相当于电源线。
关键操作
(1)先断电:意思就是将插在主机上的USB线拔掉
(2)点击烧写
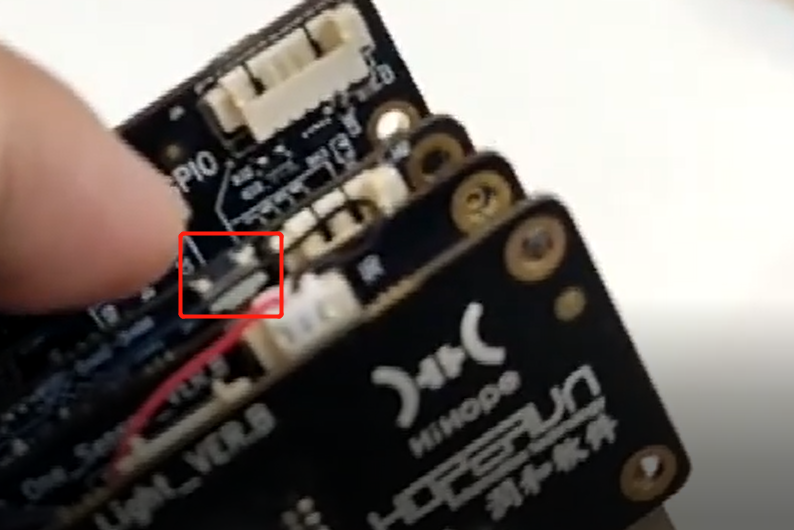
(3)按住3516开发板上的update键不放,update键如图(黑色小点)
(4)上电:意思是将刚刚拔掉的USB线再插到主机上,注意是同一个USB口,别插错了
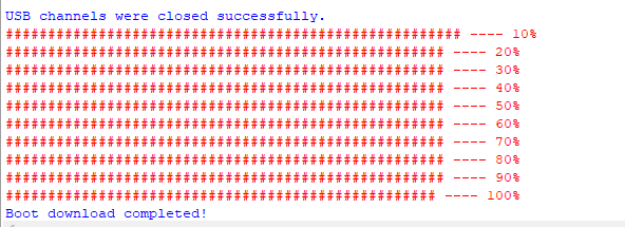
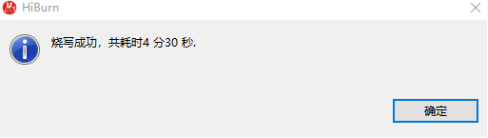
(5)松开reset键,点击控制台出现如图场景,就代表已经在烧写了
启动参数
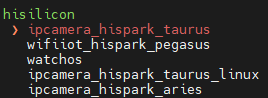
目前 润和Hi3516开发板 支持3种系统,分别是:
(1)小型系统(liteos-a内核)
(2)小型系统(Linux内核)
(3)标准系统
小型系统(liteos-a内核)
小型系统liteos-a内核编译,hb set选择 ipcamera_hispark_taurus
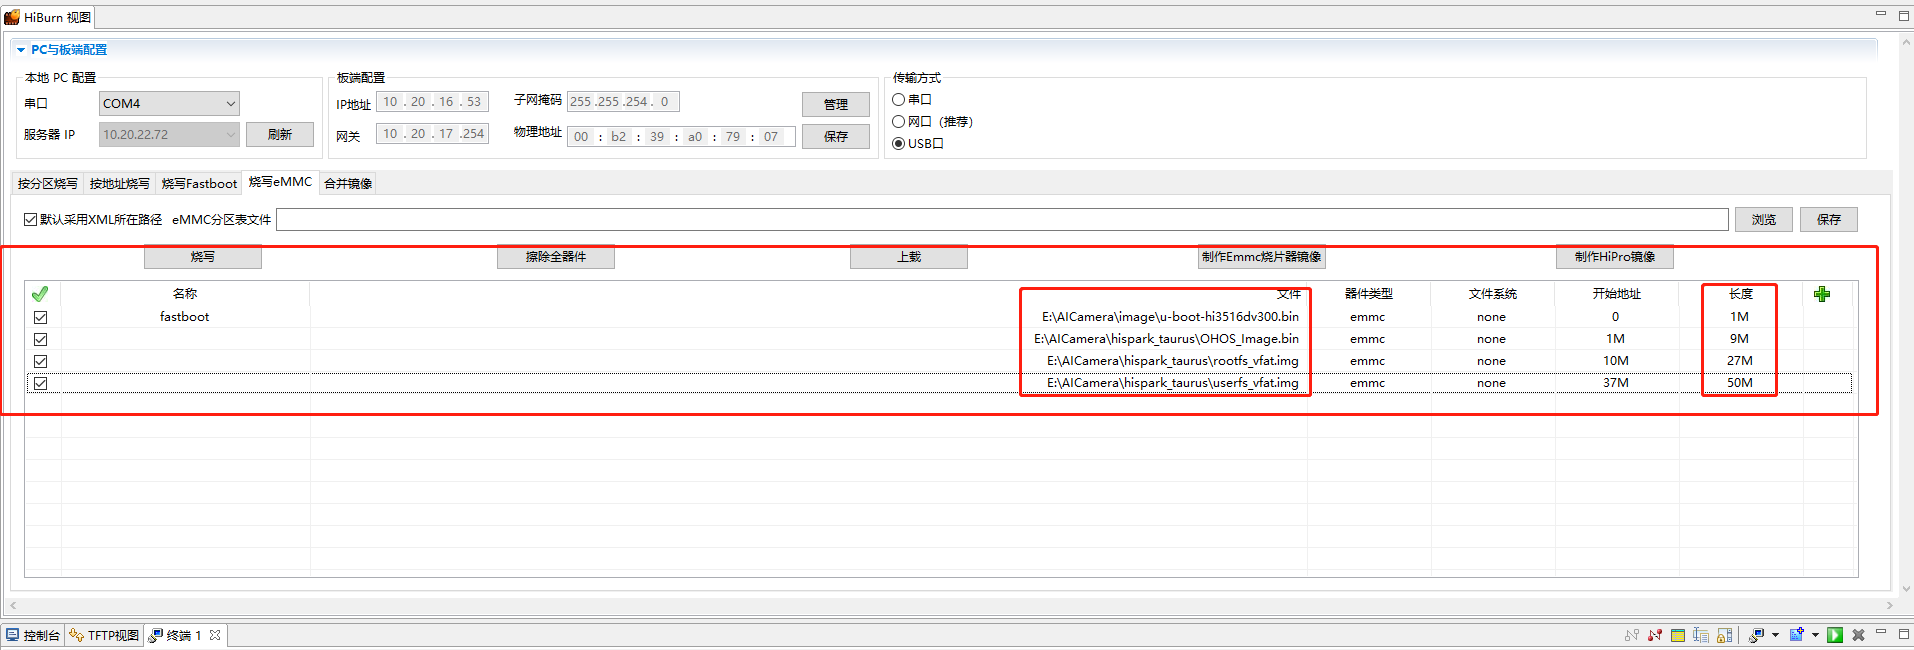
烧录指导图:
,设置好服务器IP、开发板IP、启动参数。
setenv serverip 192.168.3.60
setenv ipaddr 192.168.3.100

setenv bootcmd "mmc read 0x0 0x80000000 0x800 0x4800; go 0x80000000";

setenv bootargs "console=ttyAMA0,115200n8 root=emmc fstype=vfat rootaddr=10M rootsize=30M rw";

saveenv
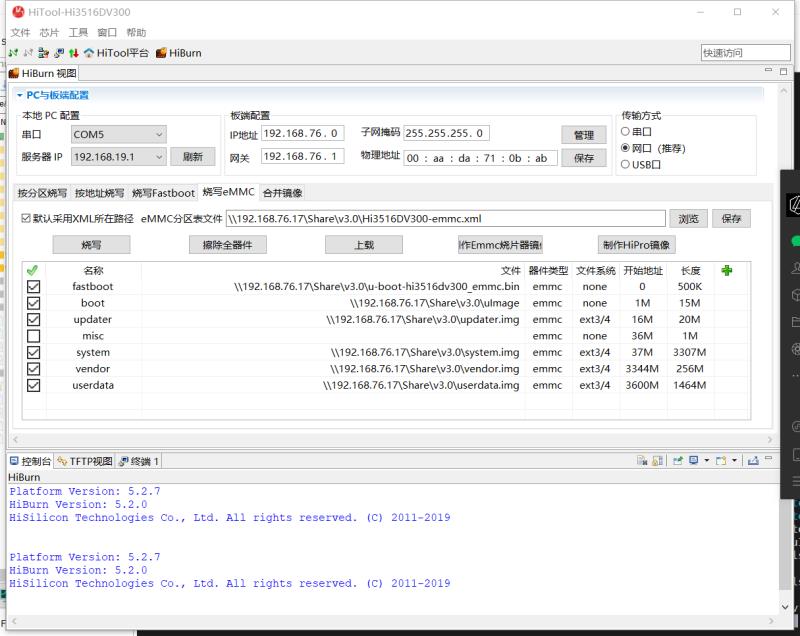
配置如下:选择网口烧录、注意修改服务器IP、IP地址、网关,选择emmc烧录,
小型系统(linux内核)
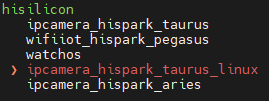
hb set选择 ipcamera_hispark_taurus_linux
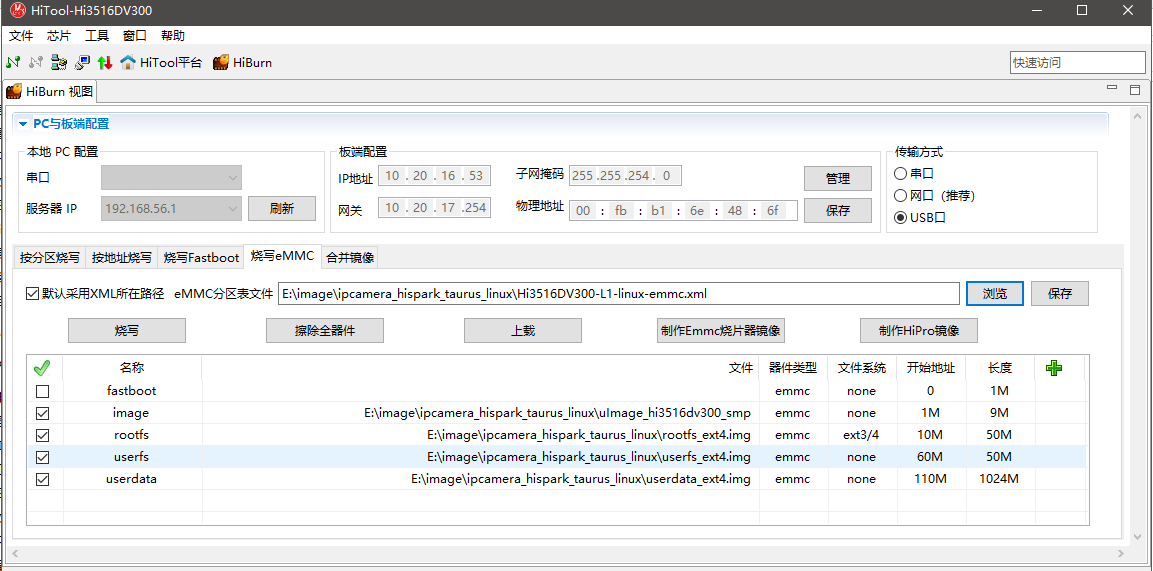
烧录指导图:
,设置好服务器IP、开发板IP、启动参数。
setenv serverip 192.168.3.60
setenv ipaddr 192.168.3.100

setenv bootargs "mem=128M console=ttyAMA0,115200 root=/dev/mmcblk0p3 rw rootfstype=ext4 rootwait blkdevparts=mmcblk0:1M(boot),9M(kernel),50M(rootfs),50M(userfs),1024M(userdata)"
setenv bootcmd "mmc read 0x0 0x82000000 0x800 0x4800;mw 0x10FF0044 0X600;mw 0x120D2010 0x00000000;mw 0x120D2400 0x000000ff;mw 0x120D2010 0x00000000;bootm 0x82000000"

saveenv
配置如下:选择网口烧录、注意修改服务器IP、IP地址、网关,选择emmc烧录
标准系统
编译命令:./build.sh --product-name Hi3516DV300 --ccache
,设置好服务器IP、开发板IP、启动参数。
setenv serverip 192.168.3.60
setenv ipaddr 192.168.3.100

setenv bootargs 'mem=640M console=ttyAMA0,115200 mmz=anonymous,0,0xA8000000,384M clk_ignore_unused androidboot.selinux=permissive skip_initramfs rootdelay=10 init=/init root=/dev/mmcblk0p5 rootfstype=ext4 rw blkdevparts=mmcblk0:1M(boot),15M(kernel),20M(updater),1M(misc),3307M(system),256M(vendor),-(userdata)'

setenv bootcmd "mmc read 0x0 0x80000000 0x800 0x4800; bootm 0x80000000"

saveenv

reset
配置如下:选择网口烧录、注意修改服务器IP、IP地址、网关,选择emmc烧录