1. 前言
目前我们熟知的SpringBoot 打包方式,一共分为两种,一种是打jar 包(内置tomcat 方式,yml 里的配置参数生效包括端口,和servlet 的context-path
server:
  port: 443
  servlet:
    context-path: /api
),另外一种是打war 包部署到tomcat , 这种方式使用外部的tomcat ,此时端口号和路径要根据外部tomcat 配置,才能生效。
2. SpringBoot 打 jar 包
- 配置maven
<parent>
    <artifactId>wcx_pay_service</artifactId>
    <groupId>com.dechnic</groupId>
    <version>0.0.1-SNAPSHOT</version>
</parent>
<modelVersion>4.0.0</modelVersion>
<packaging>jar</packaging>
<artifactId>admin</artifactId>
- spring-boot-starter-web 里面不用做任何改动
 <!--web-->
 <dependency>
      <groupId>org.springframework.boot</groupId>
      <artifactId>spring-boot-starter-web</artifactId>
 </dependency>
- build 里面添加 spring-boot-maven-plugin 插件
<build>
        <plugins>
            <plugin>
                <artifactId>maven-compiler-plugin</artifactId>
                <configuration>
                    <source>1.8</source>
                    <target>1.8</target>
                </configuration>
            </plugin>
            <plugin>
                <groupId>org.springframework.boot</groupId>
                <artifactId>spring-boot-maven-plugin</artifactId>
                <executions>
                    <execution>
                        <goals>
                            <goal>repackage</goal>
                        </goals>
                    </execution>
                </executions>

            </plugin>
          </plugins>
    </build>
- 主启动类不用做任何配置改动
- cmd 项目根目录执行
mvn clean package
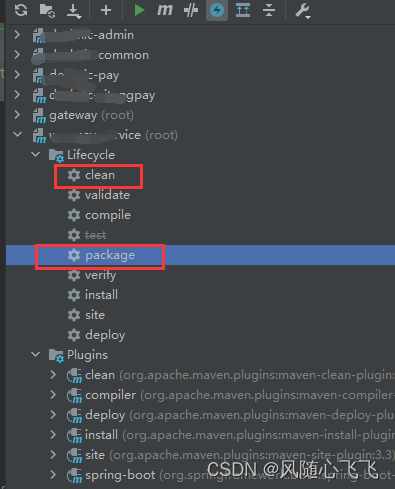
或者 idea 里 maven 先执行clean ,再执行package
3. SpringBoot 打 war 包
- maven 配置
<parent>
        <artifactId>wcx_pay_service</artifactId>
        <groupId>com.dechnic</groupId>
        <version>0.0.1-SNAPSHOT</version>
    </parent>
    <modelVersion>4.0.0</modelVersion>
    <packaging>war</packaging>
    <artifactId>admin</artifactId>
- 排除内置的tomcat,添加tomcat依赖,或者添加servlet-api依赖,二者用其一,本人使用是添加tomcat依赖
<!--web-->
        <dependency>
            <groupId>org.springframework.boot</groupId>
            <artifactId>spring-boot-starter-web</artifactId>
            <!--去掉SpringBoot内置的tomcat, 打jar包需要去掉-->
            <exclusions>
                <exclusion>
                    <groupId>org.springframework.boot</groupId>
                    <artifactId>spring-boot-starter-tomcat</artifactId>
                </exclusion>
            </exclusions>
        </dependency>
        <!-- 这里指定打war包的时不再需要tomcat相关的包,但是本地运行时必须注释掉,否则会报错-->
        <dependency>
            <groupId>org.springframework.boot</groupId>
            <artifactId>spring-boot-starter-tomcat</artifactId>
            <scope>provided</scope>
        </dependency>
备注:另附添加servlet-api依赖方式:
<!-- 添加servlet-api的依赖-->
<dependency>
    <groupId>org.apache.tomcat</groupId>
    <artifactId>tomcat-servlet-api</artifactId>
    <version>xxx</version>
    <scope>provided</scope>
</dependency>
<plugin>
    <groupId>org.apache.maven.plugins</groupId>
    <artifactId>maven-war-plugin</artifactId>
    <version>3.0.0</version>
    <configuration>
        <failOnMissingWebXml>false</failOnMissingWebXml>
    </configuration>
</plugin>
如果不添加 ,打包时会报错提示
Failed to execute goal org.apache.maven.plugins:maven-war-plugin:2.2:war (default-war) on project fitdegree: Error assembling WAR: webxml attribute is required (or pre-existing WEB-INF/web.xml if executing in update mode)
中文注释:org.apache.maven.plugins:maven-war-plugin:2.2:war (default-war)在项目fitdegree上:错误组装war: webxml属性是必需的(或预先存在的WEB-INF/web.xml如果在更新模式下执行)
完整配置如下:
 <build>
        <plugins>
            <plugin>
                <groupId>org.springframework.boot</groupId>
                <artifactId>spring-boot-maven-plugin</artifactId>
                <version>${spring.boot.version}</version>
                <configuration>
                    <excludes>
                        <exclude>
                            <groupId>org.project.lombok</groupId>
                            <artifactId>lombok</artifactId>
                        </exclude>
                    </excludes>
                </configuration>
                <executions>
                    <execution>
                        <goals>
                            <goal>repackage</goal>
                        </goals>
                    </execution>
                </executions>
            </plugin>
            <plugin>
                <groupId>org.apache.maven.plugins</groupId>
                <artifactId>maven-compiler-plugin</artifactId>
                <version>3.8.1</version>
                <configuration>
                    <source>${java.version}</source>
                    <target>${java.version}</target>
                    <encoding>${project.build.sourceEncoding}</encoding>
                    <compilerArguments>
                        <verbose />
                        <bootclasspath>${java.home}/lib/rt.jar;${java.home}/lib/jce.jar</bootclasspath>
                    </compilerArguments>
                </configuration>
            </plugin>
            <plugin>
                <groupId>org.apache.maven.plugins</groupId>
                <artifactId>maven-war-plugin</artifactId>
                <version>3.0.0</version>
                <configuration>
                    <failOnMissingWebXml>false</failOnMissingWebXml>
                </configuration>
            </plugin>
        </plugins>
    </build>
- 主启动类继承 SpringBootServletInitializer,再重写 configure 方法
@SpringBootApplication(exclude = MongoAutoConfiguration.class,scanBasePackages = {"com.dechnic"})
@EnableJpaRepositories(basePackages = "com.dechnic.common.repository")
public class AppMain extends SpringBootServletInitializer {
    public static void main(String[] args) {
        ConfigurableApplicationContext run = SpringApplication.run(AppMain.class, args);
    }

    @Override
    protected SpringApplicationBuilder configure(SpringApplicationBuilder builder) {
        // 参数为当前springboot 启动类,构建新资源
        return builder.sources(AppMain.class);
    }
}
- cmd 项目根目录 mvn clean package
或者 idea 里 maven 先执行clean ,再执行package
大功告成!!!
4.小结
通过第二种打war包的配置方式,可以兼容本地开发时启动SpringBoot 服务,打包时只需要修改 package 为jar 或 war 即可,其他配置不用动。