基础知识
css样式
- hexo/themes/next/source/css/: 是next主题的样式文件,决定主题的外观。
- hexo/themes/next/source/css/main.styl:汇总css文件夹中所有的样式。
- hexo/themes/next/source/css/ _custom/custom.styl:是空的,专门让开发者扩展。
修改css
进入网页,F12进入调试模式(本次以谷歌浏览器为例,注意点击箭头指向的小箭头)。

通过观察可以发现整个头部是包裹在一个header里而且大家把鼠标放上去也可以很清楚的看到标签包裹的是哪些部分,那么通过开发工具可以看到右边对应的是生成在这个标签上class里的一些样式设置。
点击需要自己DIY的模块,我们可以暂时直接在更改对应数值进行更改样式,直到得到自己满意的效果,最后才去next里的一些文件进行部分的添加和修改来达到我们的目的。
注意箭头的几个点即可,改好之后记得copy下代码。

修改代码:找到你主题文件夹里的对应位置D:\hexo\blog\themes\next\source\css里面有5个文件夹和一个styl文件,
main.styl主要用于打包CSS代码输出成CSS样式的main.css文件。
注意:本人不提倡去修改除了_custom下的其他4个文件里的源代码,可能后面出问题不好还原。
注释使用 // 而不是 # 。
给文章首页摘要添加阴影效果
打开blog\themes\next\source\css\_custom\custom.styl,添加
// Custom styles.
//首页文章阴影样式
.post {
    margin-top: 60px;
    margin-bottom: 60px;
    padding: 25px;
    -webkit-box-shadow: 0 0 14px rgba(202, 203, 203, .5);
    -moz-box-shadow: 0 0 14px rgba(202, 203, 204, .5);
}
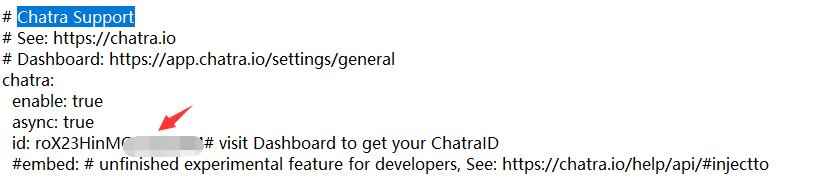
添加在线聊天
在主题配置文件,搜索下图关键字。在注释对应网址注册账号,左侧Set up & customize获取ChatraID以及进行样式定制


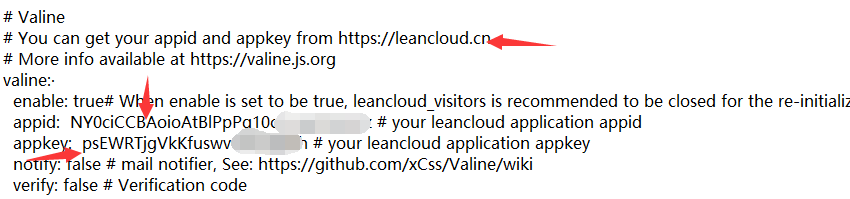
添加评论系统
打开主题配置文件,在对应网站注册。设置,创建应用,应用名为 Counter(不可更改),并获取key,安全中心填写自己的域名。

安全中心:web安全域名添加自己域名。注意前缀https://

注意配置完的网页菜单栏每个系统都加了评论,要选择删除需要到对应的文件夹里面的 index.md 都添加comments: false语句。


下方栏添加评分
主题配置文件,搜索Rating ,根据上方提示注册账号获取key。
需要注意的是:
- 可以配置评分方式,侧栏 > Rating > Setting,建议用 IP address 或 Device(cookie),免登录,毕竟 Socials 里面的选项几乎都被墙,不适合国内网络环境。
- 建议 侧栏 > Site > Setting 中勾选 Private 选项。
- 上面两步勾选后别忘了点击页面右下方的 SAVE SETTING 绿色按钮保存。
经过上面的配置,默认最下面只会显示 5 颗小星星,简洁但不明了 ,怎么加上文字说明呢?
首先打开文件(~/blog/themes/next/layout/_macro/post.swig):
{% if theme.rating.enable %}
<div class="wp_rating">
+ <div style="color: rgba(0, 0, 0, 0.75); font-size:13px; letter-spacing:3px">(>看完记得五星好评哦亲<)</div>
<div id="wpac-rating"></div>
</div>
{% endif %}
侧栏加入已运行的时间
打开文件(~/blog/themes/next/layout/_custom/sidebar.swig),加入以下代码。
<div id="days"></div>
<script>
function show_date_time(){
window.setTimeout("show_date_time()", 1000);
BirthDay=new Date("05/27/2017 15:13:14");
today=new Date();
timeold=(today.getTime()-BirthDay.getTime());
sectimeold=timeold/1000
secondsold=Math.floor(sectimeold);
msPerDay=24*60*60*1000
e_daysold=timeold/msPerDay
daysold=Math.floor(e_daysold);
e_hrsold=(e_daysold-daysold)*24;
hrsold=setzero(Math.floor(e_hrsold));
e_minsold=(e_hrsold-hrsold)*60;
minsold=setzero(Math.floor((e_hrsold-hrsold)*60));
seconds=setzero(Math.floor((e_minsold-minsold)*60));
document.getElementById('days').innerHTML="已运行 "+daysold+" 天 "+hrsold+" 小时 "+minsold+" 分 "+seconds+" 秒";
}
function setzero(i){
if (i<10)
{i="0" + i};
return i;
}
show_date_time();
</script>
如果感觉上下留白太多,咋整?浏览器 F12 找元素,调成自己喜欢的值,然后 Copy 到 custom.styl 即可.

点击侧栏头像回到博客首页
首先要在主题配置文件中配置好,比如我把头像avatar.png放在~/blog/source/uploads/下。
然后编辑文件(~/blog/themes/next/layout/_macro/sidebar.swig),搜索site-author-image,添加两句代码即可。
这里注意图片格式需要保持一致。
 <a href="/">
          <img class="site-author-image" itemprop="image"
               src="{{ url_for( theme.avatar | default(theme.images + '/avatar.gif') ) }}"
               alt="{{ theme.author }}" />
 </a>
文章摘要配图
修改 /themes/next/layout/ _macro/post.swig ,在 if is_index 与 if post.description and theme.excerpt_description 之间添加以下代码(大约在283行)。

{% if post.images %}
    <div class="out-img-topic">
        <img src={{ post.images }} class="img-topic">
    </div>
{% endif %}

添加鼠标点击爱心效果
在/themes/next/source/js/src下新建文件clicklove.js,接着把该链接下的代码拷贝粘贴到clicklove.js文件中。
!function(e,t,a){function n(){c(".heart{width: 10px;height: 10px;position: fixed;background: #f00;transform: rotate(45deg);-webkit-transform: rotate(45deg);-moz-transform: rotate(45deg);}.heart:after,.heart:before{content: '';width: inherit;height: inherit;background: inherit;border-radius: 50%;-webkit-border-radius: 50%;-moz-border-radius: 50%;position: fixed;}.heart:after{top: -5px;}.heart:before{left: -5px;}"),o(),r()}function r(){for(var e=0;e<d.length;e++)d[e].alpha<=0?(t.body.removeChild(d[e].el),d.splice(e,1)):(d[e].y--,d[e].scale+=.004,d[e].alpha-=.013,d[e].el.style.cssText="left:"+d[e].x+"px;top:"+d[e].y+"px;opacity:"+d[e].alpha+";transform:scale("+d[e].scale+","+d[e].scale+") rotate(45deg);background:"+d[e].color+";z-index:99999");requestAnimationFrame(r)}function o(){var t="function"==typeof e.onclick&&e.onclick;e.onclick=function(e){t&&t(),i(e)}}function i(e){var a=t.createElement("div");a.className="heart",d.push({el:a,x:e.clientX-5,y:e.clientY-5,scale:1,alpha:1,color:s()}),t.body.appendChild(a)}function c(e){var a=t.createElement("style");a.type="text/css";try{a.appendChild(t.createTextNode(e))}catch(t){a.styleSheet.cssText=e}t.getElementsByTagName("head")[0].appendChild(a)}function s(){return"rgb("+~~(255*Math.random())+","+~~(255*Math.random())+","+~~(255*Math.random())+")"}var d=[];e.requestAnimationFrame=function(){return e.requestAnimationFrame||e.webkitRequestAnimationFrame||e.mozRequestAnimationFrame||e.oRequestAnimationFrame||e.msRequestAnimationFrame||function(e){setTimeout(e,1e3/60)}}(),n()}(window,document);
修改_layout.swig,在\themes\next\layout\_layout.swig文件末尾添加:
<!-- 页面点击小红心 -->
<script type="text/javascript" src="/js/src/clicklove.js"></script>
添加网页标题崩溃欺骗搞怪特效
实现效果


在next\source\js\src文件夹下创建crash_cheat.js,添加代码
<!--崩溃欺骗-->
 var OriginTitle = document.title;
 var titleTime;
 document.addEventListener('visibilitychange', function () {
     if (document.hidden) {
         $('[rel="icon"]').attr('href', "/img/TEP.ico");
         document.title = '?你应该是一场梦';
         clearTimeout(titleTime);
     }
     else {
         $('[rel="icon"]').attr('href', "/favicon.ico");
         document.title = '☀我应该是一阵风' + OriginTitle;
         titleTime = setTimeout(function () {
             document.title = OriginTitle;
         }, 2000);
     }
 });
在next\layout\_layout.swig文件中,添加引用(注:在swig末尾添加):
<!--崩溃欺骗-->
<script type="text/javascript" src="/js/src/crash_cheat.js"></script>
参考文章:Yang ZiHao、易 象 辞、asdfv1929