1.安装
在vscode中的插件管理输入如下后下载
GitLens — Git supercharged

2.配置
点击文件--首选项--设置
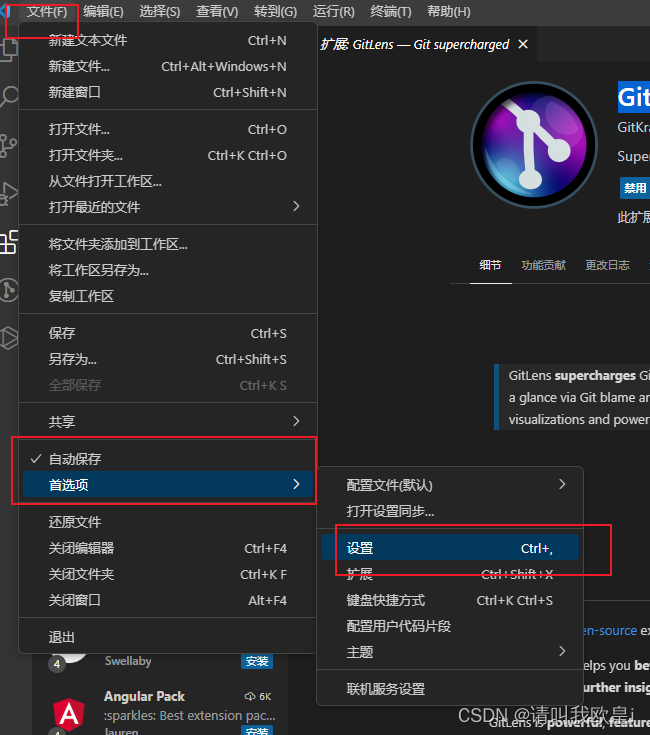
点击右上角设置小图标


3.github使用
首先仓库文件一定是要git init是git所管理的
1.在代码文件夹下使用git init创建仓库


2.打开vscode的git管理

3.点击添加暂存区,再点击提交,可以输入提交内容
单个提交

全部提交到暂存区

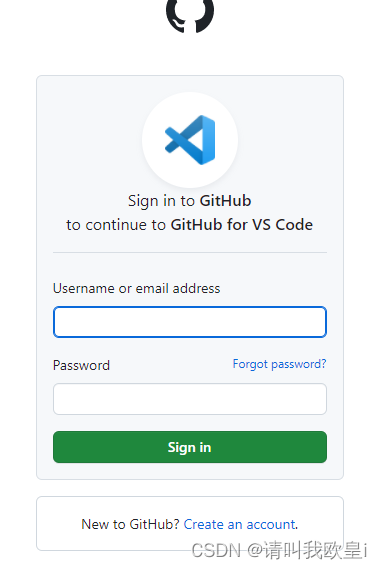
4.第一次提交默认会让你绑定github,如果你已经登录了,授权下就行了,没有登录gitbuh会弹出如下:
5.绑定完成后会提示要你输入仓库名,并且是私有仓库还是公有仓库,自行选择
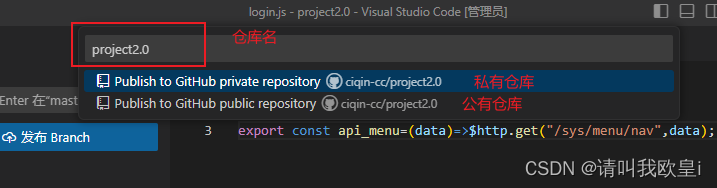 输入完成后
输入完成后

6.上传成功

7.验证上传成功

4.其他仓库网站使用,比如gitee
1.把第一次上传gitee操作都在git bash的弹窗中实现
2.把创建好的仓库拖到vscode中开始编写代码,只要是更新的了页面就会出现在git管理中,可以全部添加暂存也可以单个文件添加暂存,添加暂存后再点提交到git就自动提交到gitee仓库了
5.多人协调开发
如果是多人协调的话,写代码之前记得拉一下代码,还有很多操作,都可以研究下

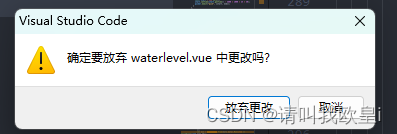
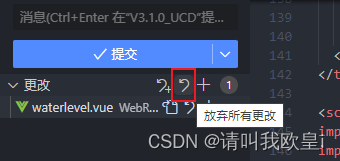
6.撤销
使用场景:如果你更改内容查看数据啊,console.log什么的,看完之后又不想保存上传,可以选择撤销操作
单个撤销:

全部撤销:
文章到此结束,希望对你有所帮助~