原文:https://rebootcat.com/2020/09/19/nextphotowall/
前言
一直没有时间来整理下博客搭建的一些事情,现在补上一篇,给 Hexo Next 博客添加一个相册功能,使用瀑布流的方式。
原理说明
- 使用 github 作为仓库存储图片文件(图床)
- 使用 jsdelivr 进行图片 CDN 加速
优点
此种方式的优点是免费,不需要购买其他的对象存储产品;并且使用的是 github 作为图床,图片不会丢失。
早期的博文使用的是七牛云的免费存储,结果后来被他们删掉了。。。结果造成文中的一些图片链接都是 404,有兴趣的可以翻一翻我早期的博客。
缺点
由于采用的是 github 仓库存储图片,但是 github 对单仓库有 50MB 的大小限制,所以单仓库可能不能够存储太多的文件;
解决方法就是建立很多的图片仓库(稍微有点费劲,不过是行得通的);另外上传的单张图片大小最好不要太大。
还有个缺点就是得折腾啊,且看我后文。
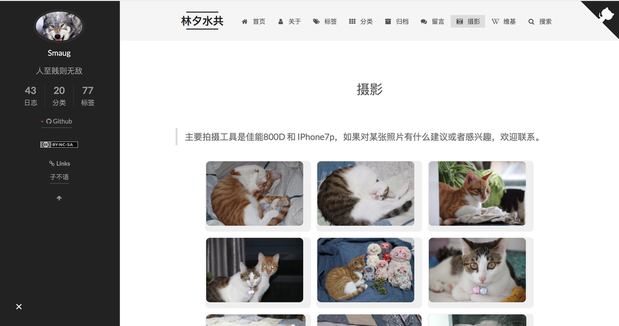
各位可以参考下我的相册瀑布流: 摄影
开始搭建相册瀑布流
开始之前,需要简单介绍一下,我参考的是 Hexo NexT 博客增加瀑布流相册页面 这篇文章,文中涉及到的脚本主要都是 js 实现;与他不同的是,由于我对 js 的掌握远远不及我对 Python 的掌握,故部分脚本我采用了 Python 实现。
所以在开始操作之前,你可以根据自己的技能,选择不同的方式。如果你擅长 python,那么跟着我来吧。
新建 photo 页面
去到博客根目录:
mkdir -p source/photos
然后进入 photos 目录:
cd source/photos
vim index.md
把下面的粘贴保存:
---
title: 摄影
type: photos
---

<!-- CSS Code -->
<style>
.MyGrid{width:100%;max-width:1040px;margin:0 auto;text-align:center}.card{overflow:hidden;transition:.3s ease-in-out;border-radius:8px;background-color:#efefef;padding:1.4px}.ImageInCard img{padding:0;border-radius:8px}
@media(prefers-color-scheme:dark){.card{background-color:#333;}}
</style>
<!-- CSS Code End -->


<div class="MyGrid"></div>
修改 Next 主题配置文件
添加了 photos 页面后,需要在 next 配置文件中修改:
vim themes/next/_config.yml
找到 menu 项,填入如下:
photos: /photos || fas fa-camera-retro
比如我的是这样的:
menu:
  home: / || home
  about: /about/ || user
  tags: /tags/ || tags
  categories: /categories/ || th
  archives: /archives/ || archive
  #schedule: /schedule/ || calendar
  #sitemap: /sitemap.xml || sitemap
  #commonweal: /404/ || heartbeat
  guestbook: /guestbook || fas fa-comments
  photos: /photos || fas fa-camera-retro
  wiki: /wiki/ || wikipedia-w
完成之后还需要修改一下这个文件:
vim themes/next/languages/zh-CN.yml
找到 menu 项,加入如下一行:
photos: 摄影
比如我的是这样的:
menu:
  home: 首页
  archives: 归档
  categories: 分类
  tags: 标签
  about: 关于
  search: 搜索
  schedule: 日程表
  sitemap: 站点地图
  commonweal: 公益 404
  guestbook: 留言
  photos: 摄影
  wiki: 维基
OK,到这里应该能看到这个 摄影 页面了,你可以现在本地测试一下看:
hexo s -g
添加 js 脚本
首先需要在 source 目录下新建一个 js 目录,用来保存自定义的一些 js 脚本;
mkdir -p source/js
然后新建 mygrid.js 文件,粘贴下面的一段代码:
// 获取网页不含域名的路径
var windowPath = window.location.pathname;
// 图片信息文件路径
var imgDataPath = '/photos/photoslist.json';
// 图片显示数量
var imgMaxNum = 50;
// 获取窗口宽度(以确定图片显示宽度)
var windowWidth = window.innerWidth
|| document.documentElement.clientWidth
|| document.body.clientWidth;
if (windowWidth < 768) {
    var imageWidth = 145; // 图片显示宽度(手机)
} else {
    var imageWidth = 215; // 图片显示宽度
}
// 腾讯云图片处理样式(根据图片显示宽度)
var imgStyle = '!' + imageWidth + 'x';


// 图片卡片(照片页面)
if (windowPath.indexOf('photos') > 0 ) {
    var LinkDataPath = imgDataPath;
    photo = {
        page: 1,
        offset: imgMaxNum,
        init: function () {
            var that = this;
            $.getJSON(LinkDataPath, function (data) {
                that.render(that.page, data);
            });
        },
        render: function (page, data) {
            var begin = (page - 1) * this.offset;
            var end = page * this.offset;
            if (begin >= data.length) return;
            var html, imgNameWithPattern, imgName, imageSize, imageX, imageY, li = "";
            for (var i = begin; i < end && i < data.length; i++) {
                imgNameWithPattern = data[i].split(';')[1];  // a.png
                imgName = imgNameWithPattern.split('.')[0]  // a
                imageSize = data[i].split(';')[0]; // length.height
                imageX = imageSize.split('.')[0]; //  length
                imageY = imageSize.split('.')[1]; // height

							  cdn_url       = data[i].split(';')[2]; // 原图 cdn url
							  small_cdn_url = data[i].split(';')[3]; // 缩略图 cdn url

                li += '<div class="card" style="width:' + imageWidth + 'px" >' +
                        '<div class="ImageInCard" style="height:'+ imageWidth * imageY / imageX + 'px">' +
                            '<a data-fancybox="gallery" href="' + cdn_url + '" data-caption="' + imgName + '" title="' +  imgName + '">' +
                                '<img data-src="' + small_cdn_url + '" src="' + small_cdn_url + '" data-loaded="true">' +
                            '</a>' +
                        '</div>' +
                      '</div>'
            }
            $(".MyGrid").append(li);
            this.minigrid();
        },
        minigrid: function() {
            var grid = new Minigrid({
                container: '.MyGrid',
                item: '.card',
                gutter: 12
            });
            grid.mount();
            $(window).resize(function() {
                grid.mount();
            });
        }
    }
    photo.init();
}
或者你可以直接在我的博客上找到: rebootcat.com/mygrid.js
wget https://rebootcat.com/js/mygrid.js -O source/js/mygrid.js
新建图片信息文件
我们再次回到 photos 目录,创建文件 photoslist.json:
vim source/photos/photoslist.json
然后输入如下的内容:
[
  "1080.1920;WechatIMG114.jpeg;https://cdn.jsdelivr.net/gh/smaugx/MyblogImgHosting/rebootcat/photowall/cat/WechatIMG114.jpeg;https://cdn.jsdelivr.net/gh/smaugx/MyblogImgHosting/rebootcat/photowall/cat/WechatIMG114_small.jpeg",
  "3024.4032;WechatIMG25834.jpeg;https://cdn.jsdelivr.net/gh/smaugx/MyblogImgHosting/rebootcat/photowall/cat/WechatIMG25834.jpeg;https://cdn.jsdelivr.net/gh/smaugx/MyblogImgHosting/rebootcat/photowall/cat/WechatIMG25834_small.jpeg"
]
OK, 到现在应该你能从博客上看到这两张图片了:
hexo s -g
本地测试一下,如果你能看到在博客的 摄影 页面看到这两张图片,那么说明你的配置没问题,你可以进行接下来的操作了;如果你不能正确显示,说明前面的步骤出了问题,自己研究调试一下;如果你还不能解决,欢迎联系我。
使用 python 脚本生成 photoslist.json
上面可以看到,photoslist.json 存放的是图片的信息,mygrid.js 解析 photoslist.json 这个文件,然后在 photos 页面添加 dom.
所以核心的部分在于 photoslist.json 文件,我们可以分析下这个文件:
1080.1920;WechatIMG114.jpeg;https://cdn.jsdelivr.net/gh/smaugx/MyblogImgHosting/rebootcat/photowall/cat/WechatIMG114.jpeg;https://cdn.jsdelivr.net/gh/smaugx/MyblogImgHosting/rebootcat/photowall/cat/WechatIMG114_small.jpeg
photoslist.json 保存的是一个 list,list 中每一行是一张图片的信息,包括原始图片大小、文件名、原始图片cdn链接、缩略图cdn链接。
前面已经提到,我们的图片是使用了 github 作为图床(仓库),然后使用 jsdelivr 进行 cdn 加速。所以我们应该准备好图片文件,然后上传到仓库。
新建 github 仓库,用来存放图片文件
在 https://github.com 上创建图片仓库。
当仓库容量超过 50MB 之后需要重新再新建一个仓库
本地克隆仓库,然后把图片放入仓库,上传(这里以我的仓库为例)
git clone git@github.com:smaugx/MyblogImgHosting_2.git blogimg_2
cd blogimg_2

# put some image in this dir

...
git push
生成 photoslist.json 文件
编写 python 脚本或者直接从我的网站下载:
wget https://rebootcat.com/js/phototool.py -O phototool.py
脚本如下:
#!/usr/bin/env python
# -*- coding:utf8  -*-

import os
import glob
from PIL import Image, ExifTags
import json

config = {
        # github 存储图片的仓库(本地仓库基准目录)
        'github_img_host_base': '/Users/smaug/blogimg_2',
        # 会对这个目录下的所有文件夹进行遍历,相同目录生成_samll 的 缩略图
        'img_path':             '/Users/smaug/blogimg_2/rebootcat/photowall',
        # cdn 前缀
        'cdn_url_prefix':       'https://cdn.jsdelivr.net/gh/smaugx/MyblogImgHosting_2',
        # hexo 博客存放 photos 信息的 json 文件
        'photo_info_json':      '/Users/smaug/blog_rebootcat/source/photos/photoslist.json',
        }

# 压缩图片到 90%(目的是为了移除一些gps 等信息,并非真的为了压缩)
def compress_img(img_path, rate = 0.99, override = False):
    support_ftype_list = ['png', 'PNG', 'jpeg', 'JPEG', 'gif', 'GIF', 'bmp']
    sp_img = img_path.split('.')
    if not sp_img or sp_img[-1] not in support_ftype_list:
        print("not support image type:{0}", img_path)
        return False
    sp_img = img_path.split('/')
    if not sp_img:
        print("please give the right image path:{0}", img_path)
        return False
    img_full_name = sp_img[-1]
    img_name = img_full_name.split('.')[0]
    img_type = img_full_name.split('.')[1]
    img_path_prefix = img_path[:-len(img_full_name)]

    # 覆盖原图或者另存为
    compress_img_path = ''
    if override:
        compress_img_path = img_path
    else:
        compress_img_path = '{0}{1}_com.{2}'.format(img_path_prefix, img_name, img_type)

    img = Image.open(img_path)
    try:
        for orientation in ExifTags.TAGS.keys() :
            if ExifTags.TAGS[orientation]=='Orientation' : break
        exif=dict(img._getexif().items())
        if   exif[orientation] == 3 :
            img=img.rotate(180, expand = True)
        elif exif[orientation] == 6 :
            img=img.rotate(270, expand = True)
        elif exif[orientation] == 8 :
            img=img.rotate(90, expand = True)
    except Exception as e:
        print("catch exception:{0}",e)

    try:
        original_size = img.size
        length = original_size[0]
        height = original_size[1]
        new_length = int(length * rate)
        new_height = int(height * rate)
        print("originla length:{0} height:{1}", length, height)
        print("after compress length:{0} height:{1}", new_length, new_height)
        img = img.resize((new_length, new_height), Image.ANTIALIAS)
        img.save(compress_img_path, img_type)
        print("save compress img {0}".format(compress_img_path))
        return True
    except Exception as e:
        print("catch exception:{0}",e)

    return False


# 对 img_path 目录下的文件夹递归生成缩略图保存到同目录下
def thumbnail_pic(github_img_host_base, img_path, cdn_url_prefix):
    # 删除最后一个 '/'
    if img_path[-1] == '/':
        img_path = img_path[:-1]
    if github_img_host_base[-1] == '/':
        github_img_host_base = github_img_host_base[:-1]
    if cdn_url_prefix[-1] == '/':
        cdn_url_prefix = cdn_url_prefix[:-1]

    photo_info_list = []

    for item in os.listdir(img_path):
        print(item)
        abs_item = os.path.join(img_path, item)
        if os.path.isdir(abs_item): # sub-dir
            sub_img_path = abs_item
            print("cd dir:{0}".format(sub_img_path))
            sub_photo_info_list = thumbnail_pic(github_img_host_base, sub_img_path, cdn_url_prefix)
            photo_info_list.extend(sub_photo_info_list)
        else: # file
            ftype = item.split('.')
            if not ftype or len(ftype) != 2:
                print("error: invalid file:{0}".format(item))
                continue
            fname = ftype[0]  # a.png -> a
            ftype = ftype[1]  # a.png -> png
            support_ftype_list = ['png', 'PNG', 'jpeg', 'JPEG', 'gif', 'GIF', 'bmp']
            if ftype not in support_ftype_list:
                print("error: file type {0} not support, only support {1}".format(ftype, json.dumps(support_ftype_list)))
                continue

            abs_file = abs_item
            if item.find('_small') != -1: # 这是缩略图
                continue
            small_file = '{0}_small.{1}'.format(fname, ftype)
            abs_small_file = os.path.join(img_path, small_file)  # 缩略图绝对路径
            if os.path.exists(abs_small_file):
                # 对应的 _small 缩略图已经存在
                continue

            compress_status = compress_img(abs_file, 0.9, True)
            if not compress_status:
                print("compress_img fail:{0}", abs_file)
                continue

            im = Image.open(abs_file)
            original_size = im.size
            length = original_size[0]
            height = original_size[1]
            m = int(float(length) / 200.0)  # 计算缩小比例 (缩略图限制 200 长度)
            new_length = int(float(length) / m)
            new_height = int(float(height) / m)
            im.thumbnail((new_length, new_height))  # 生成缩略图
            im.save(abs_small_file, ftype)  # 保存缩略图
            print("save thumbnail img {0}".format(abs_small_file))

            relative_file       = abs_file[len(github_img_host_base) + 1:] # 计算相对路径,用来拼接 cdn
            relative_small_file = abs_small_file[len(github_img_host_base) + 1:]

            cdn_url_file        = '{0}/{1}'.format(cdn_url_prefix, relative_file)
            cdn_url_small_file  = '{0}/{1}'.format(cdn_url_prefix, relative_small_file)

            # 格式: 690.690;8.png;http://cdn_file_url;http://cdn_small_file_url;
            line = '{0}.{1};{2};{3};{4}'.format(length, height, item, cdn_url_file, cdn_url_small_file)
            photo_info_list.append(line)

    # end for loop
    print('dir:{0} Done!'.format(img_path))
    return photo_info_list


if __name__=='__main__':
    github_img_host_base = config.get('github_img_host_base')
    img_path             = config.get('img_path')
    cdn_url_prefix       = config.get('cdn_url_prefix')
    photo_info_json      = config.get('photo_info_json')

    photo_info_list     = []
    photo_info_list_has = []
    photo_info_list = thumbnail_pic(github_img_host_base, img_path, cdn_url_prefix)

    if os.path.exists(photo_info_json):
        with open(photo_info_json, 'r') as fin:
            photo_info_list_has = json.loads(fin.read())
            fin.close()

    photo_info_list_has.extend(photo_info_list)  # 追加此次新增的 photo info

    with open(photo_info_json, 'w') as fout:
        fout.write(json.dumps(photo_info_list_has, indent = 2))
        print("save photo_info_list to {0}".format(photo_info_json))
        fout.close()

    print("\nAll Done")
这里重点需要关注的是:
config = {
        # github 存储图片的仓库(本地仓库基准目录)
        'github_img_host_base': '/Users/smaug/blogimg_2',
        # 会对这个目录下的所有文件夹进行遍历,相同目录生成_samll 的 缩略图
        'img_path':             '/Users/smaug/blogimg_2/rebootcat/photowall',
        # cdn 前缀
        'cdn_url_prefix':       'https://cdn.jsdelivr.net/gh/smaugx/MyblogImgHosting_2',
        # hexo 博客存放 photos 信息的 json 文件
        'photo_info_json':      '/Users/smaug/blog_rebootcat/source/photos/photoslist.json',
        }
简单解释一下这个脚本:
- github_img_host_base: 这个目录也就是本地的仓库目录,绝对路径(上面克隆的仓库对应的本地文件夹路径)
- img_path: 我单独新建了 rebootcat/photowall 目录存放瀑布流图片,对应本地的路径
- cdn_url_prefix:jsdelivr cdn url 前缀,只需要更改成你自己的github 用户名以及仓库名
- photo_info_json: photoslist.json 路径
上面几个参数一定要配置对了。
那么简单解释一下脚本的功能:
脚本会递归的查找 img_path 目录下的图片,然后进行一定的压缩(99%),这里的压缩目的并非真的是压缩,而是为了去除一些敏感信息,比如 GPS 信息。注意这里会覆盖掉原始图片。然后会生成图片的缩略图,同时根据上面的几个配置参数,生成两个 cdn url,一个对应的是原始图片的 cdn url,一个是缩略图的 cdn url.
然后执行:
python phototool.py
脚本执行完,就会增量生成 photoslist.json,可以先打开检查下对不对,或者把里面的 cdn url 复制出来从浏览器看能不能访问。
注意需要把本地图片仓库推送到远程。
这个 phototool.py 脚本你可以随便放在哪里,当你更新图片之后重新执行一遍就可以了。当然你也可以像我一样,跟网站源码直接放一起,所以你可以看到,我直接放到了 js 目录。
更新图片
把新图片放到本地仓库,然后执行:
python phototool.py
检查一下 photoslist.json 文件对不对,然后发布博客:
hexo d -g
发布之后,记得把本地图片仓库推送到远端,不然 jsdelivr 无法访问到。
至此,一个相册瀑布流就制作完成了!
The End
由于我是采用回忆的方式来写的博文,所以文中可能会有一些小的修改或者配置我忽略了,不过问题不大,大家如果碰到问题了可以自行研究一下,能解决的。
采用 github 作为图床来存放大量的瀑布流图片墙,方案是没问题的,只不过可能由于仓库容量的限制,需要在 github 上构建多个图片仓库。
对于我来说,github 图片仓库主要用来存放博文中涉及到的图片。至于图片墙,我再另想办法吧。
Blog:
2020-09-19 于杭州
By 史矛革
本文内容由网友自发贡献,版权归原作者所有,本站不承担相应法律责任。如您发现有涉嫌抄袭侵权的内容,请联系:hwhale#tublm.com(使用前将#替换为@)