Admin监控&Sleuth链路追踪,skywalking
Sleuth&Zipkin
一、Sleuth&Zipkin介绍
现存问题是什么?
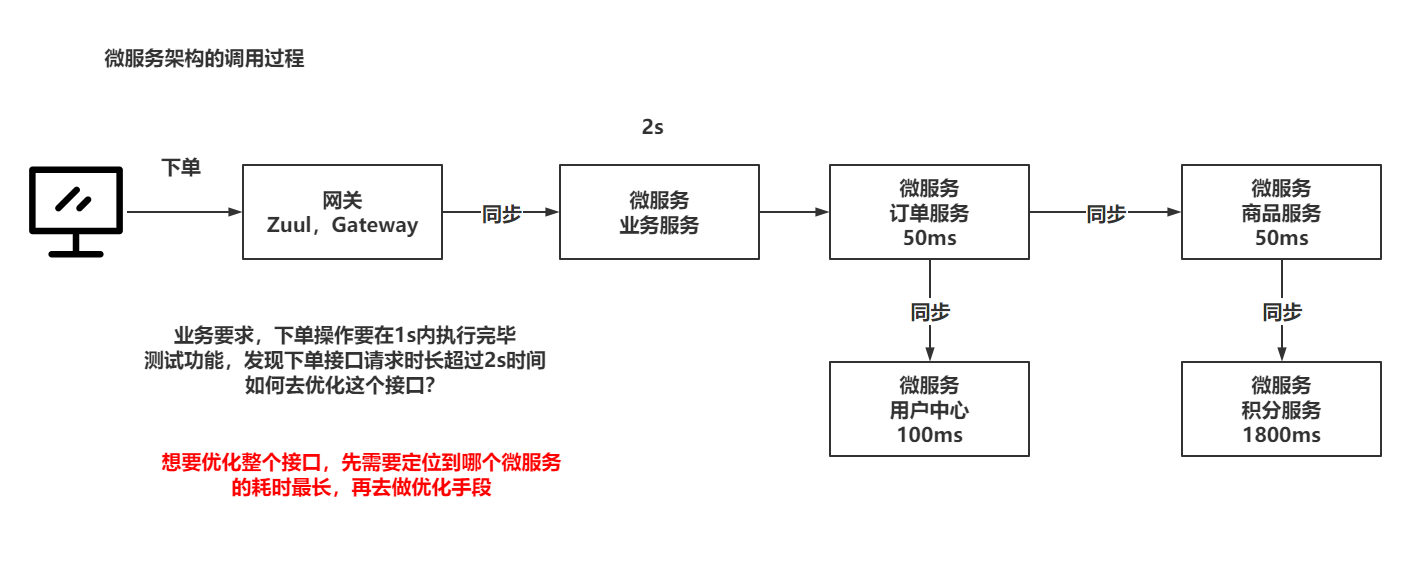
这个问题需要监控整个请求的微服务调用链过程,为了可以监控网上可以使用的工具很多:
- Sleuth&Zipkin:SpringCloud中的一个组件,专门链路追踪
- SkyWalking:Apache组织下的一个开源框架,并且是个顶级项目
- 阿里鹰眼:没玩过~~
- 美团Cat:没玩过~~
Sleuth&Zipkin对比SkyWalking
- 相同点,都是链路追踪框架
- Sleuth是收集信息,Zipkin是图形化展示。 SkyWalking一锅端~~
- SkyWalking的报表展示比Sleuth&Zipkin更丰富。
- SkyWalking支持监控类的手段,但是Sleuth&Zipkin不支持,一般要配合SpringBootAdmin做单独监控
- SkyWalking支持阈值报警,但是Sleuth&Zipkin不支持
- Sleuth&Zipkin文档丰富,网上解决问题的方式或者博客很多,但是SkyWalking相对差一内内。
二、搭建环境
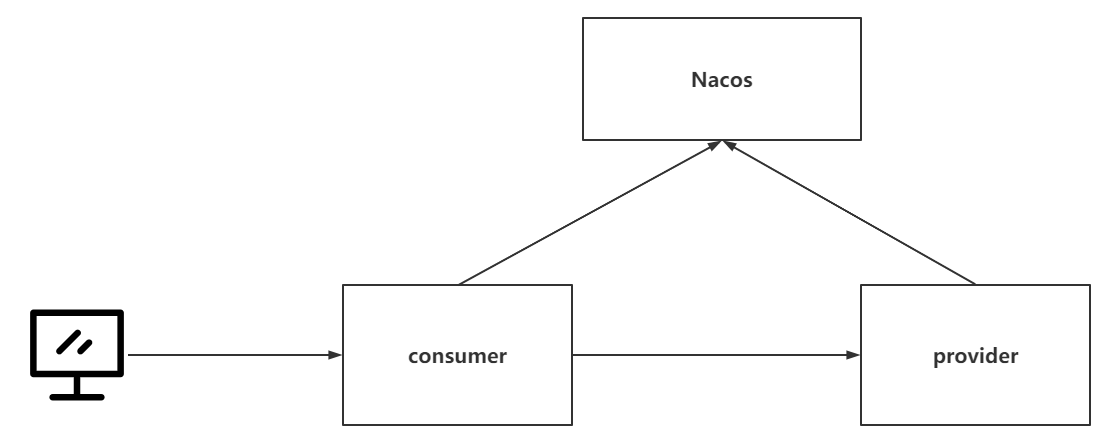
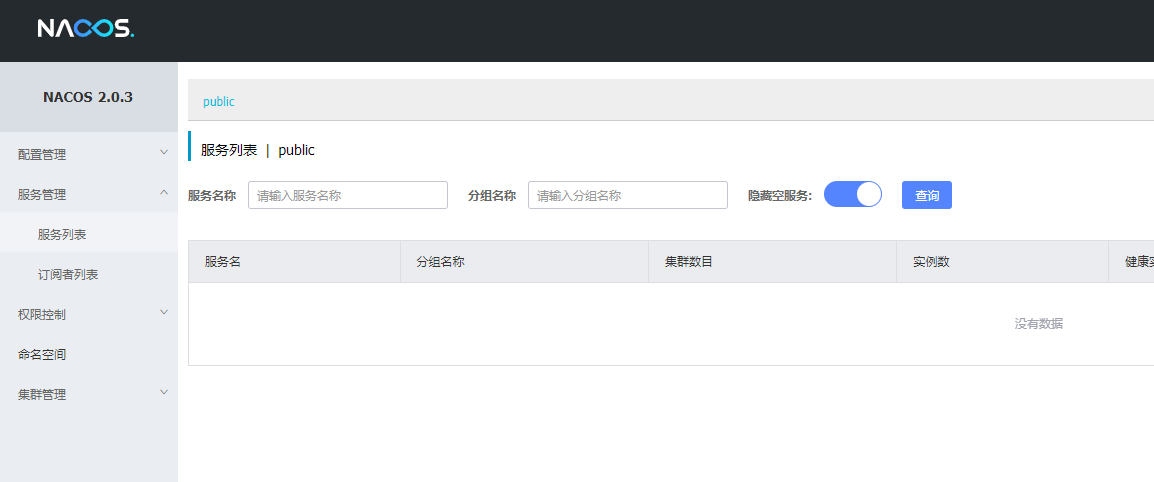
第一步:安装Nacos
第二步:准备两台服务
-
准备聚合工程,
-
管理好各个依赖的版本:https://github.com/alibaba/spring-cloud-alibaba/wiki/%E7%89%88%E6%9C%AC%E8%AF%B4%E6%98%8E
-
Alibaba依赖:https://spring.io/projects/spring-cloud-alibaba
-
Cloud依赖:https://spring.io/projects/spring-cloud
-
准备两个服务
<dependencies>
    <dependency>
        <groupId>org.springframework.boot</groupId>
        <artifactId>spring-boot-starter-web</artifactId>
    </dependency>
    <dependency>
        <groupId>com.alibaba.cloud</groupId>
        <artifactId>spring-cloud-starter-alibaba-nacos-discovery</artifactId>
    </dependency>
    <dependency>
        <groupId>org.springframework.cloud</groupId>
        <artifactId>spring-cloud-starter-openfeign</artifactId>
    </dependency>
</dependencies>
添加好启动类和各个配置
@SpringBootApplication
@EnableDiscoveryClient
#-----------------------------
server:
  port: 端口

spring:
  application:
    name: 服务名
  cloud:
    nacos:
      discovery:
        server-addr: 192.168.11.32:8848
中间处理了几个小BUG~~~
三、Sleuth入门操作
Sleuth是要在服务内部收集信息一个框架。将收集的信息交给Zipkin做图形化界面展示
官网滴干活:
再次访问consumer到provider后,可以看到日志中多了一些信息
- consumer:[consumer, db108ebea9c15ea1, db108ebea9c15ea1, true]
- provider: [provider, db108ebea9c15ea1, 847d0be306bc1395, true]
[服务名,总链路ID,子链路ID,信息发送其他系统了]
可以看到整体是一个链路信息。
四、Zipkin搭建及操作
前面Sleuth已经收集到信息了。
Zipkin需要单独安装,本身也是一个Java编写的Web项目。
官网滴干活:https://zipkin.io/
采用docker-compose.yml文件的方式去安装Zipkin
version: "3.1"
services:
  zipkin:
   image: openzipkin/zipkin
   restart: always
   container_name: zipkin
   ports:
     - 9411:9411
docker-compose up -d启动即可
查看到图形化界面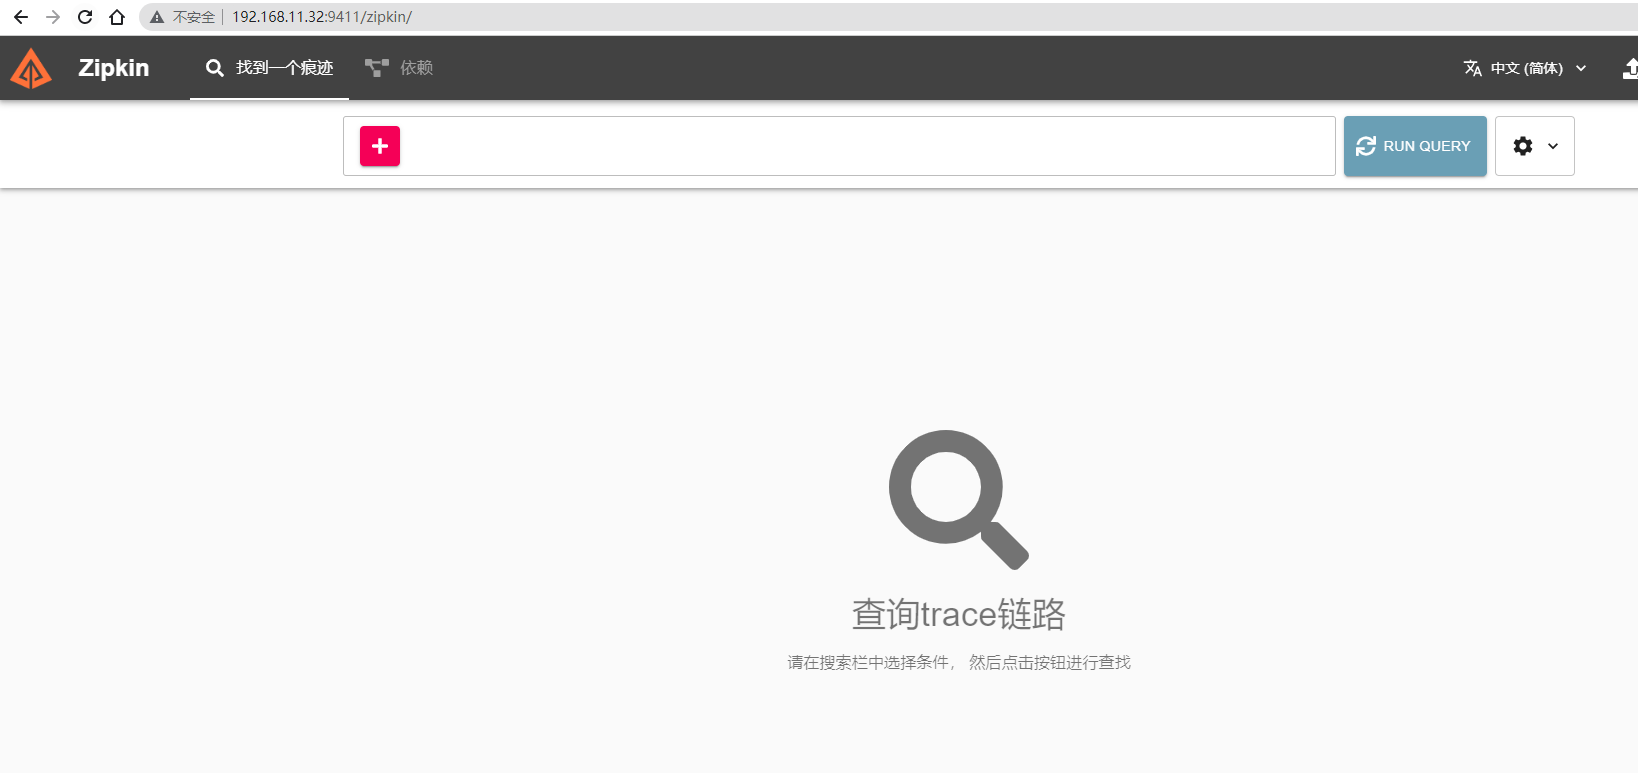
让Sleuth收集的日志信息发送到Zipkin上
需要让服务做导入一些依赖并且写入一些配置
- 导入依赖
<dependency>
    <groupId>org.springframework.cloud</groupId>
    <artifactId>spring-cloud-starter-zipkin</artifactId>
</dependency>
- 编写配置
spring:
  sleuth:
    sampler:
      probability: 100  # 设置Sleuth手机信息的百分比
  zipkin:
    sender:
      type: web    # 信息发送方式
    base-url: http://192.168.11.32:9411/     # Zipkin地址
访问几次请求链路后,查看Zipkin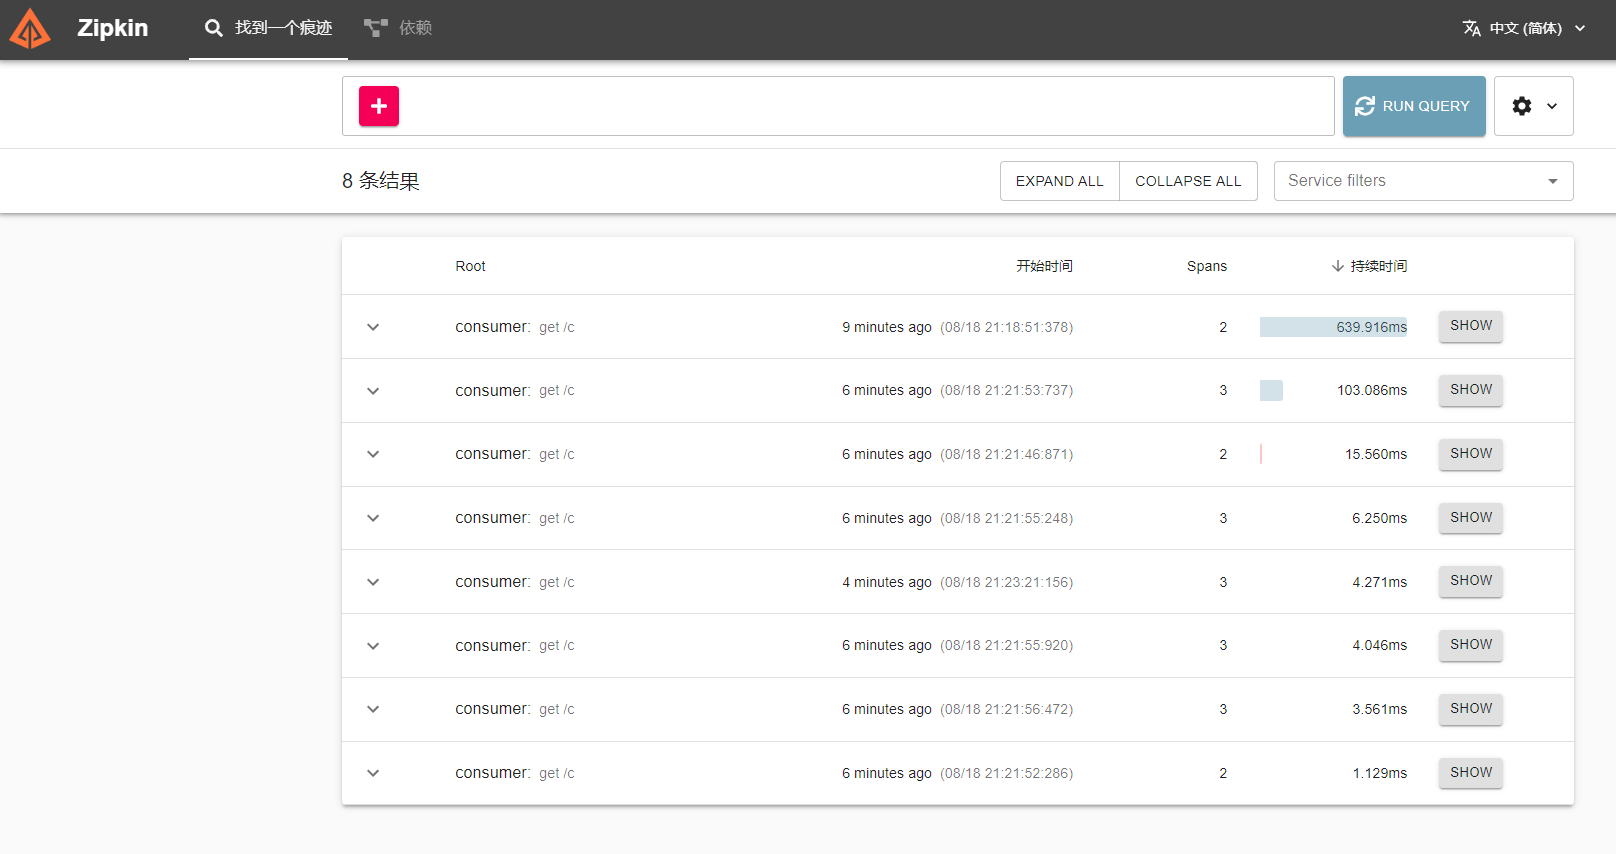
五、RabbitMQ方式发送信息
如果日志量足够大,如果每次都让服务以HTTP的方式传输给Zipkin,成本有点高。
所以可以让服务将Sleuth收集的日志推给MQ,让Zipkin去监控MQ的信息,通过MQ的队列获取到服务的信息
如果日志量足够大,其实一般推荐使用Kafka。
准备RabbitMQ服务。
version: "3.1"
services:
  rabbitmq:
    image: daocloud.io/library/rabbitmq:3.8.5
    container_name: rabbitmq
    restart: always
    volumes:
      - ./data/:/var/lib/rabbitmq/
    ports:
      - 5672:5672
      - 15672:15672
第一件事:需要服务将消息扔到RabbitMQ。
- 导入依赖
<dependency>
    <groupId>org.springframework.boot</groupId>
    <artifactId>spring-boot-starter-amqp</artifactId>
</dependency>
- 编写配置
spring:
  zipkin:
    sender:
      type: rabbit
  rabbitmq:
    host: 192.168.11.32
    port: 5672
    username: guest
    password: guest
    virtual-host: /
第二件事:需要Zipkin从RabbitMQ中获取消息。
https://github.com/openzipkin/zipkin/tree/master/zipkin-collector/rabbitmq
修改docker-compose.yml文件,并重新构建容器
version: "3.1"
services:
  zipkin:
   image: openzipkin/zipkin
   restart: always
   container_name: zipkin
   ports:
     - 9411:9411
   environment:
     - RABBIT_ADDRESSES=192.168.11.32:5672
     - RABBIT_USER=guest
六、Elasticsearch持久化
Zipkin容器重启之后,存储的链路信息全丢了。
刚刚发现Zipkin重启后,之前的链路信息全丢了,默认应当是内存存储。
为了可以保留一定Zipkin的链路信息,可以让Zipkin将链路信息持久化。
持久化操作支持很多种DB、
因为采用了最新的Zipkin:latest,那么ES就需要7.x版本。
Docker安装7.6.2的es
准备Zipkin的配置:https://github.com/openzipkin/zipkin/tree/master/zipkin-server
修改docker-compose.yml
version: "3.1"
services:
  zipkin:
   image: openzipkin/zipkin
   restart: always
   container_name: zipkin
   ports:
     - 9411:9411
   environment:
     - STORAGE_TYPE=elasticsearch
     - ES_HOSTS=http://192.168.11.32:9200
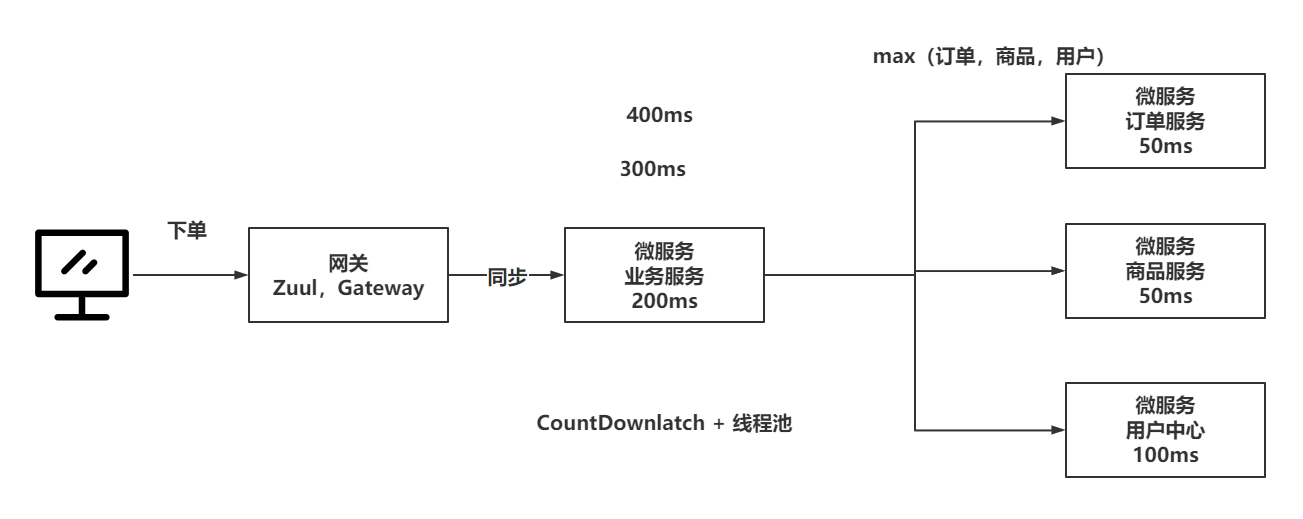
做链路跟踪的时候 说超时了 让把优化 优化思路是单线程改成多线程 请问怎么改?是把原来的代码写进run方法 然后把这样一个线程放入线程池么?是这个思路么?像这种优化思路 老师能否分享下?
SpringBootAdmin
一、Actuator介绍
SpringBoot提供的,是一个指标监控的组件。
Actuator的官方文档:https://docs.spring.io/spring-boot/docs/2.3.12.RELEASE/reference/html/production-ready-features.html#production-ready
在一个微服务架构层面下,如果某一个服务出现了问题,导致出现了一些不可控的情况。需要快速的定位出故障的服务,从而解决问题。
二、Actuator快速入门
导入依赖
<dependency>
    <groupId>org.springframework.boot</groupId>
    <artifactId>spring-boot-starter-actuator</artifactId>
</dependency>
展示全部对外暴露的端点(EndPoint)
management:
  endpoints:
    web:
      exposure:
        include: '*'
启动服务连接Nacos的时候,发现之前能跑的服务,现在连接Nacos出问题。
- Nacos服务端有木有问题……
- 网络……
- 版本问题(官网给定的版本貌似有坑)
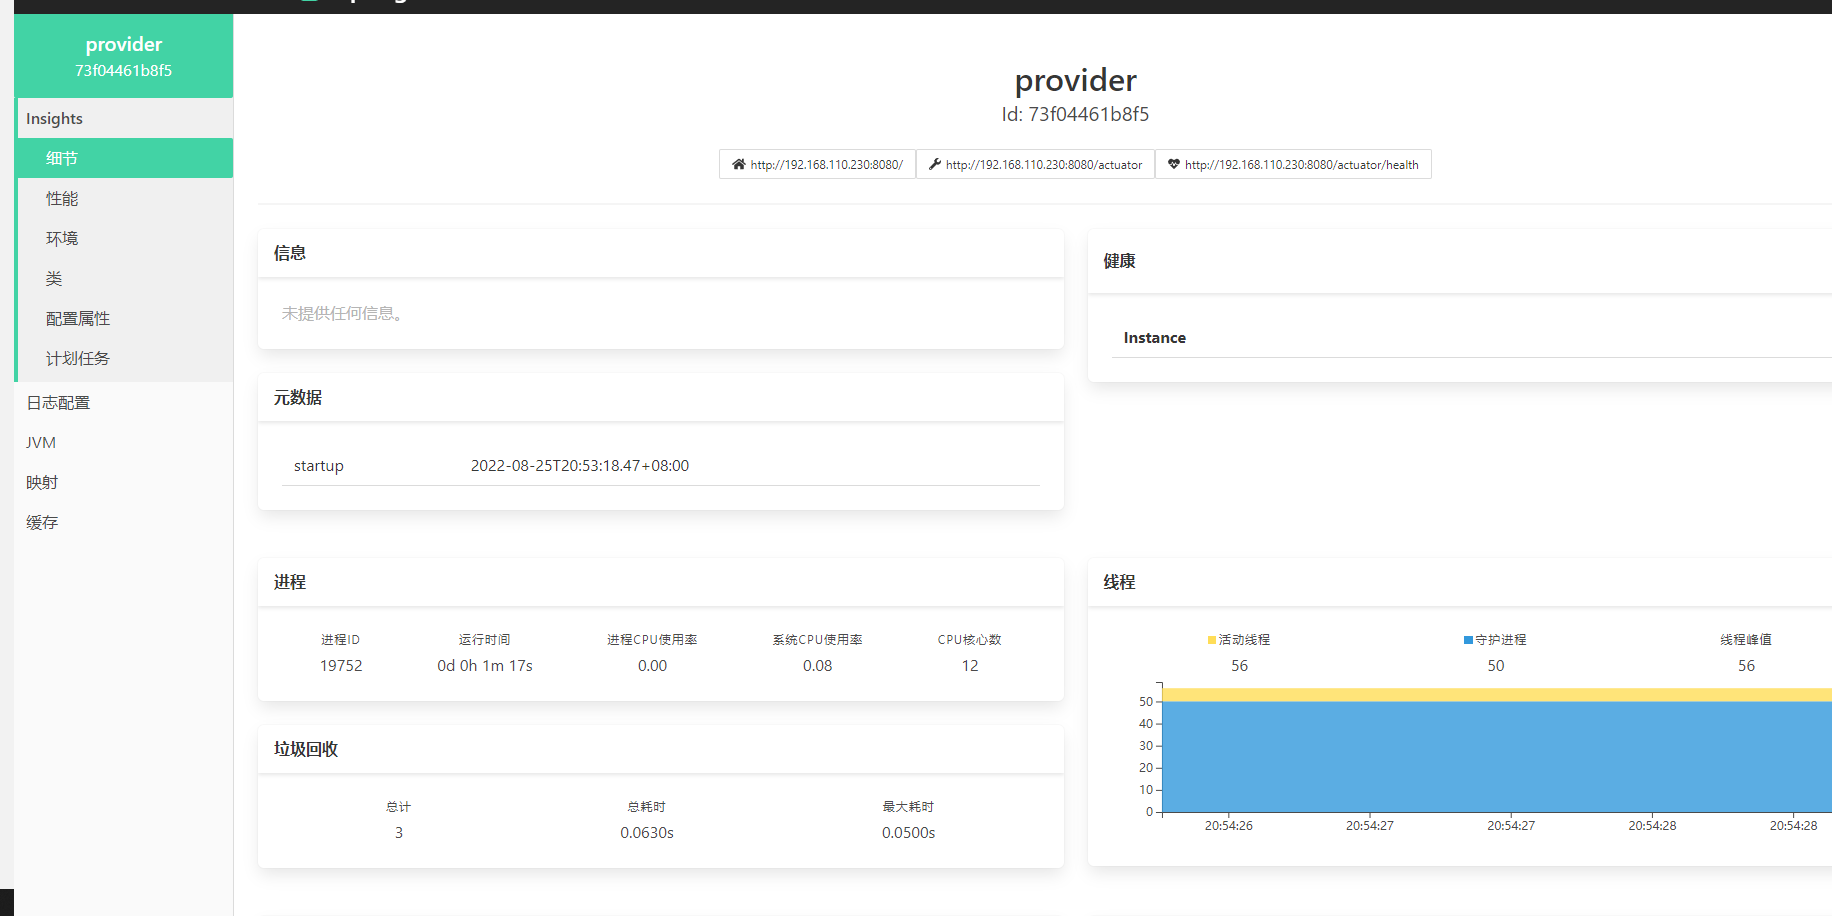
查看Actuator提供的端点信息,可以查看到服务的很多信息
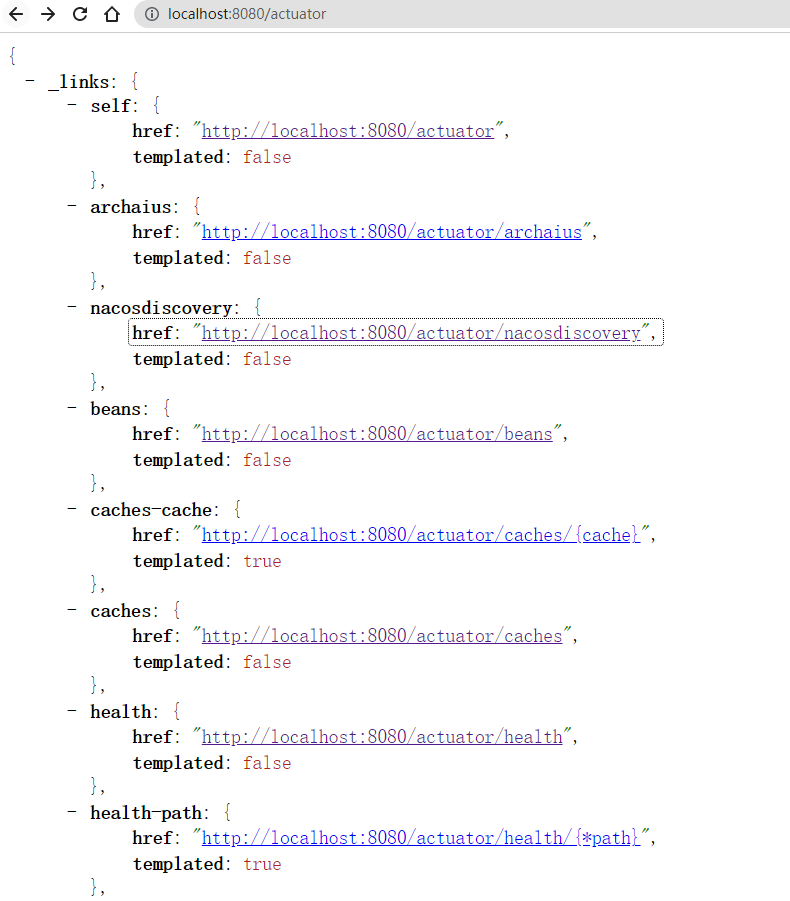
但是,这种JSON的展示形式,很难排查一些问题,此时需要一个更友好的图形化界面做展示
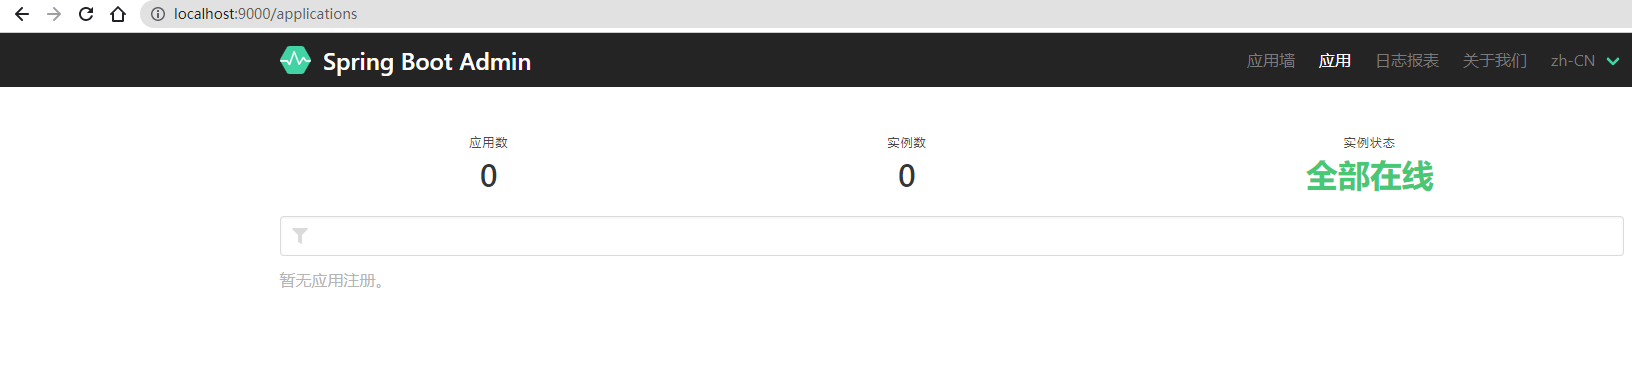
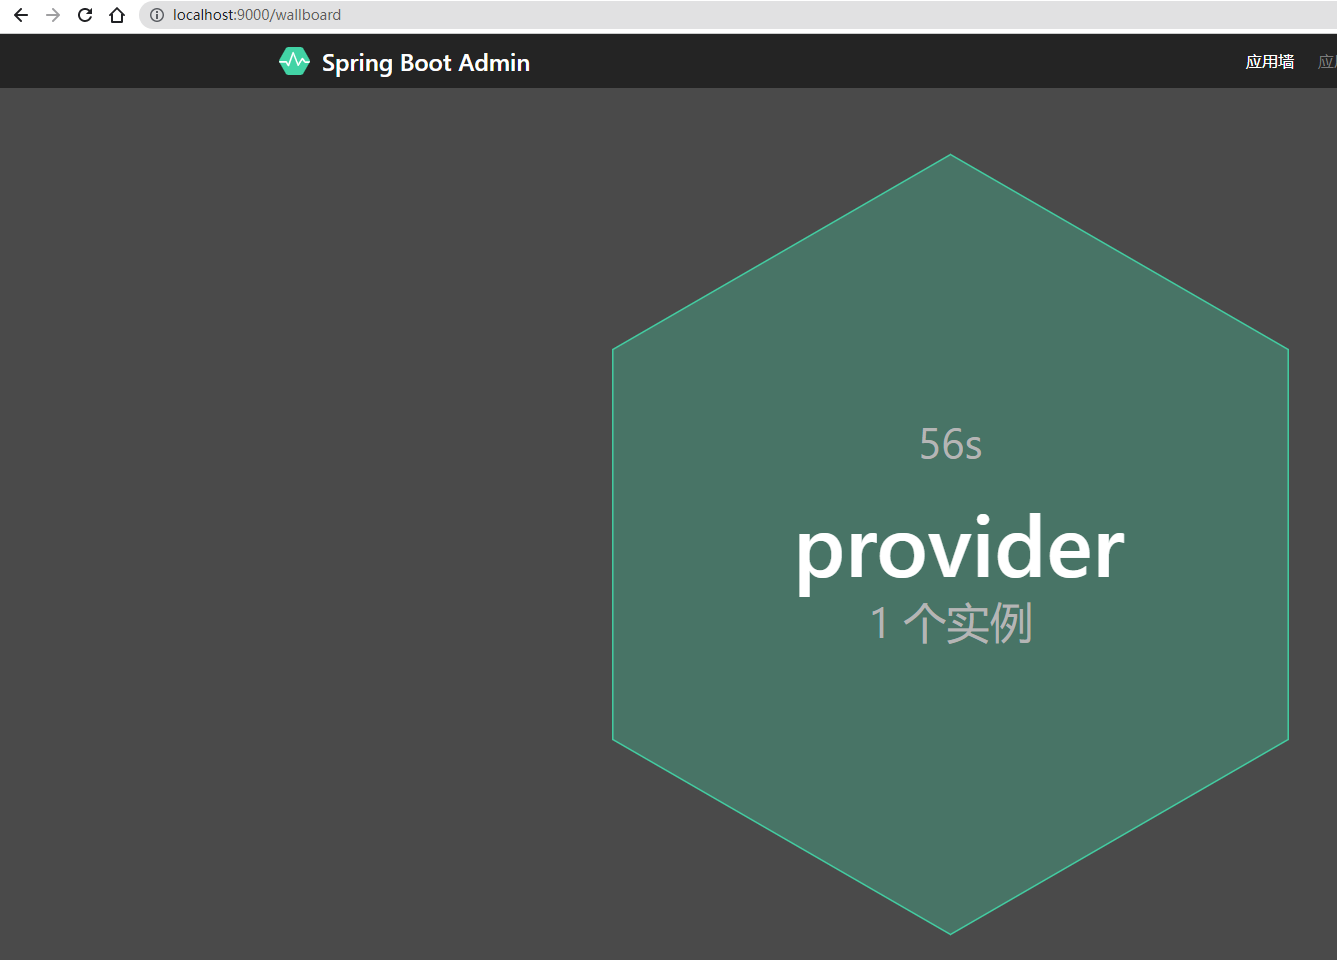
三、SpringBootAdmin介绍
Admin就是Actuator的一个图形化界面,是基于vue写的。
本质上就是Actuator的接口响应数据做图形化的展示,方便开发人员和运维人员监控信息。
SpringBootAdmin并不是Spring官方提供的,是一个github的开源项目。
SpringBootAdmin的Github地址:https://github.com/codecentric/spring-boot-admin
官网文档:https://codecentric.github.io/spring-boot-admin/2.5.1/#getting-started
在使用SpringBootAdmin时,尽量选择大版本和SpringBoot类似的。
四、SpringBootAdmin快速入门
使用方式和Eureka很像,需要先单独的搭建SpringBootAdminServer端,让各个微服务连接上AdminServer即可。
4.1 搭建AdminServer
创建项目、导入依赖、添加启动类、编写配置
<dependencies>
    <dependency>
        <groupId>de.codecentric</groupId>
        <artifactId>spring-boot-admin-starter-server</artifactId>
        <version>2.3.1</version>
    </dependency>
    <dependency>
        <groupId>org.springframework.boot</groupId>
        <artifactId>spring-boot-starter-web</artifactId>
    </dependency>
</dependencies>
@SpringBootApplication
@EnableAdminServer
public class AdminServerStarterApp {

    public static void main(String[] args) {
        SpringApplication.run(AdminServerStarterApp.class,args);
    }
}
4.2 AdminClient注册
导入依赖、编写配置
<dependency>
    <groupId>de.codecentric</groupId>
    <artifactId>spring-boot-admin-starter-client</artifactId>
    <version>2.3.1</version>
</dependency>
spring:
  boot:
    admin:
      client:
        url: http://localhost:9000
五、SpringBootAdmin安全配置
所有的微服务对外暴露了actuator的端点,这样会不会不安全?
微服务不需要暴露公网IP,服务内部通过内网去访问即可,所以Actuator端点是否安全,其实无所谓。
SpringBootAdmin需要运维人员或者开发人员放假了,回家了等等,可能需要基于外网去访问。
考虑到Admin图形化界面的安全问题。
为了保证SpringBootAdminServer的安全,需要基于官方文档提供的内容去实现
导入依赖、编写配置类
<dependency>
    <groupId>org.springframework.boot</groupId>
    <artifactId>spring-boot-starter-security</artifactId>
</dependency>
@Configuration(proxyBeanMethods = false)
public class SecuritySecureConfig extends WebSecurityConfigurerAdapter {

    private final AdminServerProperties adminServer;

    public SecuritySecureConfig(AdminServerProperties adminServer) {
        this.adminServer = adminServer;
    }

    @Override
    protected void configure(HttpSecurity http) throws Exception {
        SavedRequestAwareAuthenticationSuccessHandler successHandler = new SavedRequestAwareAuthenticationSuccessHandler();
        successHandler.setTargetUrlParameter("redirectTo");
        successHandler.setDefaultTargetUrl(this.adminServer.path("/"));

        http.authorizeRequests(
                (authorizeRequests) -> authorizeRequests.antMatchers(this.adminServer.path("/assets/**")).permitAll()
                        .antMatchers(this.adminServer.path("/login")).permitAll().anyRequest().authenticated()
        ).formLogin(
                (formLogin) -> formLogin.loginPage(this.adminServer.path("/login")).successHandler(successHandler).and()
        ).logout((logout) -> logout.logoutUrl(this.adminServer.path("/logout"))).httpBasic(Customizer.withDefaults())
                .csrf((csrf) -> csrf.csrfTokenRepository(CookieCsrfTokenRepository.withHttpOnlyFalse())
                        .ignoringRequestMatchers(
                                new AntPathRequestMatcher(this.adminServer.path("/instances"),
                                        HttpMethod.POST.toString()),
                                new AntPathRequestMatcher(this.adminServer.path("/instances/*"),
                                        HttpMethod.DELETE.toString()),
                                new AntPathRequestMatcher(this.adminServer.path("/actuator/**"))
                        ))
                .rememberMe((rememberMe) -> rememberMe.key(UUID.randomUUID().toString()).tokenValiditySeconds(1209600));
    }

    @Value("${spring.admin.user}")
    private String user;
    @Value("${spring.admin.password}")
    private String password;
    @Value("${spring.admin.role}")
    private String role;
    // Required to provide UserDetailsService for "remember functionality"
    @Override
    protected void configure(AuthenticationManagerBuilder auth) throws Exception {
        auth.inMemoryAuthentication().withUser(user).password("{noop}" +password).roles(role);
    }


}
客户端在AdminServer提供安全机制后,无法正常注册到AdminServer,此时需要在AdminClient中设置好连接的用户名和密码
spring.boot.admin.client:
   username: sba-client
   password: s3cret
六、SpringBootAdmin注册中心连接
因为一般在微服务的架构下需要使用AdminServer,但是这样话,会造成所有的微服务都需要主动去设置AdminServer的地址,从而实现监控效果。
这样一来AdminServer地址的耦合性就特别的高。
基于注册中心,来让AdminServer监控所有注册中心列表上的服务。
可以直接让AdminServer也注册到注册中心(Nacos,Eureka,Zookeeper)
别的什么都不用管,AdminServer支持注册中心监控服务的方式
导入依赖,编写配置,启动
<dependency>
    <groupId>com.alibaba.cloud</groupId>
    <artifactId>spring-cloud-starter-alibaba-nacos-discovery</artifactId>
</dependency>
编写配置文件
spring:
  boot:
    admin:
      discovery:
        ignored-services:
          - adminserver
  application:
    name: adminserver
  cloud:
    nacos:
      discovery:
        server-addr: 49.233.115.171:8848
七、定制内容监控发邮件
7.1 服务下线自动发送邮件
AdminServer提供了服务下线后,自动通知功能,通知的方向有很多
国内更多的是:JavaMail,DingDing…
导入依赖、编写配置
<dependency>
    <groupId>org.springframework.boot</groupId>
    <artifactId>spring-boot-starter-mail</artifactId>
</dependency>
spring:
  mail:
    host: smtp.126.com
    password: RPRVYYXGIAEQSFSV
    username: zjw_2301211@126.com
  boot:
    admin:
      notify:
        mail:
          to: 402424668@qq.com
          from: zjw_2301211@126.com  #出现了553的错误,发送方必须是授权的邮箱地址
7.2 制定监控的内容
查看健康信息的详细信息
management:
  endpoint:
    health:
      show-details: always

仿照他自动生成的监控信息,自己写一个~~~
找到了他实现的类

仿照这个类,玩一下。
@Component
public class MyHealthIndicator extends AbstractHealthIndicator {

    private static long time = System.currentTimeMillis() + (60 * 1000) ;

    @Override
    protected void doHealthCheck(Health.Builder builder) throws Exception {
        long currTime = System.currentTimeMillis();
        if(currTime >= time){
            // 发送邮件,给予通知
            // 如果一些通知Admin不支持,在这自己玩~~
            System.out.println("凉凉~");
            builder.down();
        }else {
            // 没什么事
            System.out.println("一切ok~~");
            builder.up();
        }
    }
}
类名别乱写,后缀要一致,默认是去掉HealthIndicator,没用前缀作为名称。
绿色健康。
红色是某个组件出问题。(可以访问到health,但是有组件凉凉~)
灰色是服务下线。(宕机,也有可能是某写组件出问题,导致无法接收请求)