实现思路: 项目有两个需求,既能在el-table实现点选又能实现鼠标框选
一. 点选实现思路: 使用el-table的cellClick方法,
1.直接给点击的cell添加类名,cell.classList.add("blue-cell");然后把获取的数据存入数组,
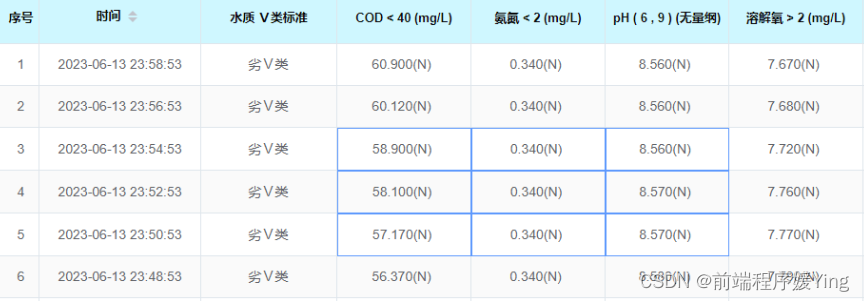
设置样式:
::v-deep .el-table td.blue-cell {
  border: 1px solid blue !important;
}
方法2.如果不添加类名,可以在cellStyle方法里通过存储的数组添加边框,如果是普通滚动可以使用行索引,如果是虚拟滚动,这里需要使用id更为准确
cellStyle({ row, column, rowIndex, columnIndex }) {
      // 对xqArr选择选区的单元格加蓝边框
      let matchObj = this.xqArr.find(
        item =>
          item.column === column.index &&
          // item.row === row.index &&
          item.rowId === row.id &&
          item.sampleTime === row.sampleTime
      );
      if (matchObj) {
        return { border: "1px solid #5E99FD" };
      }
}
二.鼠标框选实现思路: 利用鼠标按下和抬起事件,计算框的范围,框住的cell可以通过类名添加边框或者依然通过数组形式. 需要注意的是因为el-table在页面的右下方,并且数据量大,可以滚动,所以需要在计算距离的时候需要减去容器偏移的距离和滚动的高度.
              <el-table
                border
                :lazy="true"
                v-loading="loading"
                @cell-click="cellClick"
                :cell-class-name="tableCellClassName"
                @row-contextmenu="rightClick"
                @row-click="clickTableRow"
                @mousedown.native="down($event)"
                @mousemove.native="move($event)"
                @mouseup.native="up($event)"
                :data="historyDataTables"
                :highlight-current-row="true"
                :stripe="true"
                :header-cell-style="{
                  background: '#cff7ff',
                  fontWeight: 'bold',
                  color: '#080809'
                }"
                :row-height="30"
                :total="totalCount"
                :cell-style="cellStyle"
                :max-height="maxHeight1"
                @selection-change="handleSelectionChange"
                ref="multipleTable"
                :row-key="row => row.id"
                id="table"
              >
<script>
  export default {
    data() {
      return {
      // 列表集合
      historyDataTables: [],
      select: false,
      isMouseDown: true, // 是否需要(允许)处理鼠标的移动事件

      // 定义移动元素div
      rect: null,
      // 记录鼠标按下时的坐标
      downX: 0,
      downY: 0,
      // 记录鼠标抬起时候的坐标
      mouseX2: this.downX,
      mouseY2: this.downY,
      // 表格dom元素
      TableDom: null,
      tableHeaderHeight: 0,
      selectedData: [], // 鼠标框选选中的数据

      selectedCellTop: 0, // 选中单元格距离el-table顶部的距离
      selectedCellLeft: 0, // 选中单元格距离el-table左侧的距离

      tableRectTop: 0, // el-table距离window顶部的距离
      tableRectLeft: 0, // el-table距离window左侧的距离
      tableScrollTop: 0, // el-table滚动的距离
      }
  },
  mounted() {
    this.TableDom = this.$refs.multipleTable.$el; // 获取table元素

    // 获取table的位置,监听窗口变化,table的距离变化
    this.getTableMarginLeft();
    window.addEventListener("resize", this.getTableMarginLeft);

    this.clientWidth =
      document.documentElement.clientWidth || document.body.clientWidth;
    this.clientHeight =
      document.documentElement.clientHeight || document.body.cientHeight;

    this.otherHeight =
      Math.ceil($(".is-always-shadow").outerHeight()) +
      Math.ceil($(".is-top").outerHeight());

    this.maxHeight1 = this.clientHeight - this.otherHeight - 150 + "px";

    var that = this;
    window.onresize = () => {
      return (() => {
        window.clientHeight =
          document.documentElement.clientHeight || document.body.clientHeight;
        that.clientHeight = window.clientHeight;
      })();
    };
  },

  beforeDestroy() {
    window.removeEventListener("resize", this.getTableMarginLeft);
  },
  methods: {
    // 获取table距离页面左侧和上方的距离
    getTableMarginLeft() {
      const tableRect = this.TableDom.getBoundingClientRect(); // 获取el-table元素的位置信息
      this.tableRectTop = Math.ceil(tableRect.top);
      this.tableRectLeft = Math.ceil(tableRect.left);
    },

    down(event) {
      // 当允许鼠标按下时,才允许处理鼠标的移动事件,这里结合项目其他问题所以设置了判断条件
      if (this.isMouseDown) {
        this.select = true;
        this.rect = document.createElement("div");
        // 框选div 样式
        this.rect.style.cssText =
          "position:absolute;width:0px;height:0px;font-size:0px;margin:0px;padding:0px;border:1px solid #0099FF;background-color:#C3D5ED;z-index:1000;filter:alpha(opacity:60);opacity:0.6;display:none;";
        this.rect.id = "selectDiv";
        this.getTableMarginLeft();

        const container = document.querySelector(".el-table__body-wrapper"); // 获取table容器元素
        this.TableDom.appendChild(this.rect); // 添加到table元素下

        // 取得鼠标按下时的坐标位置
        this.downX =
          event.x || event.clientX + container.scrollLeft - this.tableRectLeft; // 鼠标按下时的x轴坐标 event.x 兼容火狐浏览器, event.clientX 兼容谷歌浏览器
        this.downY =
          event.y || event.clientY + container.scrollTop - this.tableRectTop; // 鼠标按下时的y轴坐标

        this.rect.style.left = this.downX + "px"; // 设置你要画的矩形框的起点位置
        this.rect.style.top = this.downY + "px"; // 设置你要画的矩形框的起点位置
        //设置你要画的矩形框的起点位置
        this.rect.style.left = this.downX; // 因为在火狐浏览器下,上面的代码不起作用,所以在这里再写一遍,为什么火狐浏览器不起作用,因为火狐浏览器下,我们的div是绝对定位的,所以我们要加上px,为什么这里没加px,因为我们下面要加上px,所以这里不用加
        this.rect.style.top = this.downY;
      } else {
        return;
      }
    },
    move(event) {
      /*
      这个部分,根据你鼠标按下的位置,和你拉框时鼠标松开的位置关系,可以把区域分为四个部分,根据四个部分的不同,
      我们可以分别来画框,否则的话,就只能向一个方向画框,也就是点的右下方画框.
      */
      if (this.select && this.isMouseDown) {
        // 取得鼠标移动时的坐标位置
        this.mouseX2 = event.clientX; // 鼠标移动时的x轴坐标
        this.mouseY2 = event.clientY; // 鼠标移动时的y轴坐标
        // 框选元素的显示与隐藏
        if (this.rect.style.display == "none") {
          this.rect.style.display = "";
        }
        // 框选元素的位置处理
        this.rect.style.left =
          Math.min(this.mouseX2, this.downX) - this.tableRectLeft + "px";

        this.rect.style.top =
          Math.min(this.mouseY2, this.downY) - this.tableRectTop + "px"; // 取得鼠标拉框时的起点坐标

        this.rect.style.width = Math.abs(this.mouseX2 - this.downX) + "px"; // 取得鼠标拉框时的宽度

        this.rect.style.height = Math.abs(this.mouseY2 - this.downY) + "px"; // 取得鼠标拉框时的高度
        // A part
        if (this.mouseX2 < this.downX && this.mouseY2 < this.downY) {
          this.rect.style.left = this.mouseX2 + this.tableRectLeft;
          this.rect.style.top = this.mouseY2 + this.tableRectTop;
        }

        // B part
        if (this.mouseX2 > this.downX && this.mouseY2 < this.downY) {
          this.rect.style.left = this.downX + this.tableRectLeft;
          this.rect.style.top = this.mouseY2 + this.tableRectTop;
        }

        // C part
        if (this.mouseX2 < this.downX && this.mouseY2 > this.downY) {
          this.rect.style.left = this.mouseX2 + this.tableRectLeft;
          this.rect.style.top = this.downY + this.tableRectTop;
        }

        // D part
        if (this.mouseX2 > this.downX && this.mouseY2 > this.downY) {
          this.rect.style.left = this.downX + this.tableRectLeft;
          this.rect.style.top = this.downY + this.tableRectTop;
        }
      } else {
        return;
      }

      this.stopEvent(event);
    },
    // 阻止默认事件
    stopEvent(event) {
      if (event.stopPropagation) {
        // 标准浏览器
        event.stopPropagation(); // 阻止事件冒泡
        event.preventDefault(); // 阻止默认事件
      } else {
        // IE浏览器
        event.cancelBubble = true;
        event.returnValue = false;
      }
    },
    // 鼠标抬起事件
    up() {
      if (this.select && this.isMouseDown) {
        const container = document.querySelector(".el-table__body-wrapper"); // 获取table容器元素
        const scrollTop = container.scrollTop; // 获取el-table的scrollTop和scrollLeft
        const scrollLeft = container.scrollLeft;

        const headerWrapper = this.TableDom.querySelector(
          ".el-table__header-wrapper"
        );
        const tableHeaderHeight = Math.ceil(
          headerWrapper.getBoundingClientRect().height
        );

        const columns = this.$refs.multipleTable.columns; // 表格的标题

        const rectLeft = this.rect.offsetLeft + scrollLeft - this.tableRectLeft;
        const rectTop =
          this.rect.offsetTop +
          scrollTop -
          this.tableRectTop -
          tableHeaderHeight;

        const tableBody = document.querySelector(".el-table__body");

        tableBody.children[1].childNodes.forEach(element => {
          for (let index = 0; index < element.childNodes.length; index++) {
            // 获取当前单元格
            const cell = element.childNodes[index];

            if (
              // 判断选中的单元格是否在鼠标拉框的范围内
              rectLeft <
                cell.offsetLeft - this.tableRectLeft + cell.offsetWidth &&
              rectLeft + this.rect.offsetWidth >
                cell.offsetLeft - this.tableRectLeft &&
              rectTop <
                cell.offsetTop - this.tableRectTop + cell.offsetHeight &&
              rectTop + this.rect.offsetHeight >
                cell.offsetTop - this.tableRectTop &&
              index >= 3 // 选中的单元格所在列的索引大于等于3
            ) {
              if (cell.className.indexOf("add") == -1) {
                // cell.style.border = "1px solid red";
                const cellText = cell.innerText;
                const rowData = this.historyDataTables[element.rowIndex]; // 获取当前单元格所在的行数据
                // 获取表格的列名的属性名property
                let columnProperty = undefined;
                // 遍历第一行数据
                 // console.log(index, '--index--'); // 框选数据所在列的索引

                for (const item of columns) {
                  if (item.index === index) {
                    columnProperty = item.property;
                    break;
                  }
                }
                // const rowIndex = element.rowIndex; // 将当前单元格所在的行数据加入到该列数据中
                const columnIndex = index;
                const time = rowData.sampleTime;

                // 选择要添加到选中行数组中的属性
                const selected = {
                  rowId: rowData.id,
                  // row: rowIndex,
                  column: columnIndex,
                  sampleTime: time,
                  factor: columnProperty,
                  tag: rowData[columnProperty + "_tag"] || "",
                  tagStatus: rowData[columnProperty + "_tag_status"] || "",
                  mark: rowData[columnProperty + "_mark"] || ""
                };

                // 将选中数据加入到状态中已有的数据中,如果已有相同的数据,则不加入
                if (
                  !this.selectedData.some(data => this.isEqual(data, selected))
                ) {
                  this.selectedData.push(selected);
                }
                // 将选中数据加入到 xqArr 中
                this.selectedData.forEach(item => {
                  // 如果 xqArr 中已有相同数据,则不加入
                  if (!this.xqArr.some(data => this.isEqual(data, item))) {
                    this.xqArr.push(item);
                  }
                });
                this.selectedData = [];
              }
            }
          }
        });

        //鼠标抬起,就不允许在处理鼠标移动事件
        this.select = false;
        //隐藏图层
        if (this.rect) {
          this.TableDom.removeChild(this.rect);
        }
      } else {
        return;
      }
    },
    // 定义方法 isEqual 来比较两个选中数据对象是否相同
    isEqual(data1, data2) {
      return (
        data1.rowId === data2.rowId &&
        data1.column === data2.column &&
        data1.sampleTime === data2.sampleTime &&
        data1.factor === data2.factor
      );
    }
  }
}