轮廓和边缘的区别
检测边缘的经典算子:sobel算子、Scharr算子、laplacian算子

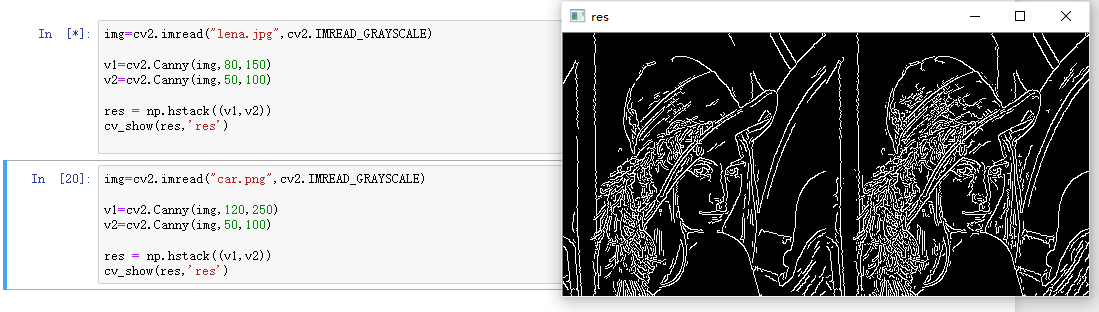
边缘检测的一套组合操作:Canny边缘检测
-
使用高斯滤波器,以平滑图像,滤除噪声。
-
计算图像中每个像素点的梯度强度和方向。
-
应用非极大值(Non-Maximum Suppression)抑制,以消除边缘检测带来的杂散响应。
-
应用双阈值(Double-Threshold)检测来确定真实的和潜在的边缘。
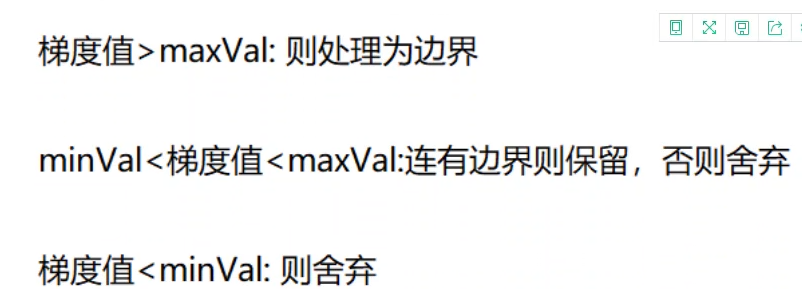 (双阈值的解释)
-
通过抑制孤立的弱边缘最终完成边缘检测。
图像轮廓是:一个整体
cv2.findContours(img,mode,method)
mode:轮廓检索模式
- RETR_EXTERNAL :只检索最外面的轮廓;
- RETR_LIST:检索所有的轮廓,并将其保存到一条链表当中;
- RETR_CCOMP:检索所有的轮廓,并将他们组织为两层:顶层是各部分的外部边界,第二层是空洞的边界;
- RETR_TREE:检索所有的轮廓,并重构嵌套轮廓的整个层次;
method:轮廓逼近方法
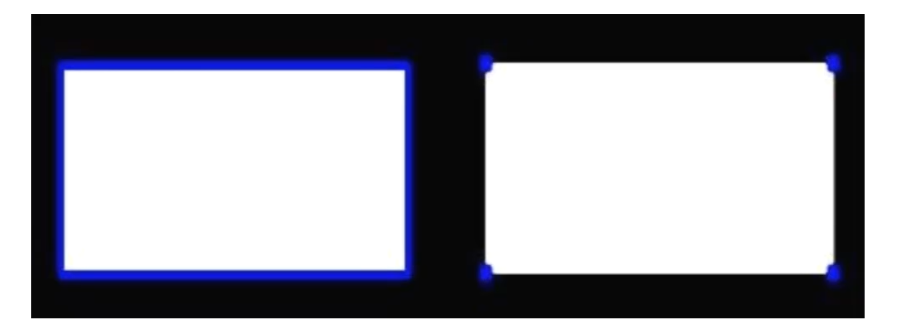
- CHAIN_APPROX_NONE:以Freeman链码的方式输出轮廓,所有其他方法输出多边形(顶点的序列)。
- CHAIN_APPROX_SIMPLE:压缩水平的、垂直的和斜的部分,也就是,函数只保留他们的终点部分。
(左边是CHAIN_APPROX_NONE,右边是CHAIN_APPROX_SIMPLE)
轮廓检测步骤
- 读入图片,并转换图片为灰度图
gray = cv2.cvtColor(img, cv2.COLOR_BGR2GRAY)
- 使用图像阈值进行二值化(为了更好的边缘检测)
ret, thresh = cv2.threshold(gray, 127, 255, cv2.THRESH_BINARY)
- 调用cv2.findContours(轮廓信息都在contours里面)
binary, contours, hierarchy = cv2.findContours(thresh, cv2.RETR_TREE, cv2.CHAIN_APPROX_NONE)
- 绘制轮廓drawContours(传入绘制图像,轮廓,轮廓索引,颜色模式,线条厚度)
res = cv2.drawContours(draw_img, contours, -1, (0, 0, 255), 2)(-1表示所有轮廓)
轮廓特征
求轮廓面积:cv2.contourArea(cnt)
求轮廓周长:cv2.arcLength(cnt,True)
其中cnt是我取的第一条轮廓。。
轮廓近似
画出第一条轮廓
img = cv2.imread('contours2.png')

gray = cv2.cvtColor(img, cv2.COLOR_BGR2GRAY)
ret, thresh = cv2.threshold(gray, 127, 255, cv2.THRESH_BINARY)
binary, contours, hierarchy = cv2.findContours(thresh, cv2.RETR_TREE, cv2.CHAIN_APPROX_NONE)
cnt = contours[0]

draw_img = img.copy()
res = cv2.drawContours(draw_img, [cnt], -1, (0, 0, 255), 2)
cv_show(res,'res')
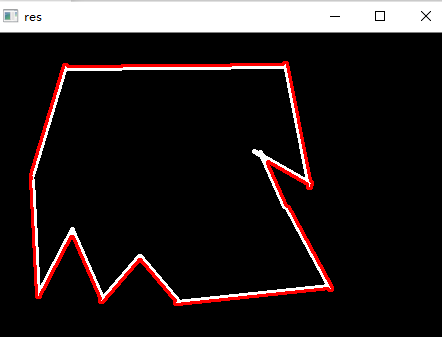
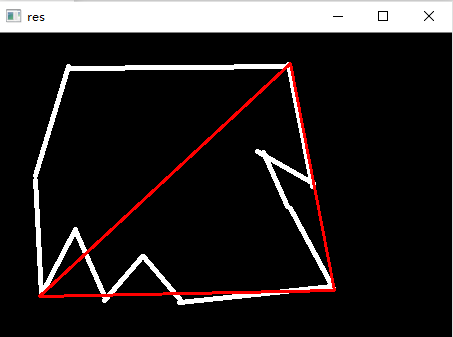
再进行轮廓近似操作(近似和0.15这个位置的数字取值有关)
epsilon = 0.15*cv2.arcLength(cnt,True)
approx = cv2.approxPolyDP(cnt,epsilon,True)

draw_img = img.copy()
res = cv2.drawContours(draw_img, [approx], -1, (0, 0, 255), 2)
cv_show(res,'res')
原理
AB的曲线用直线近似
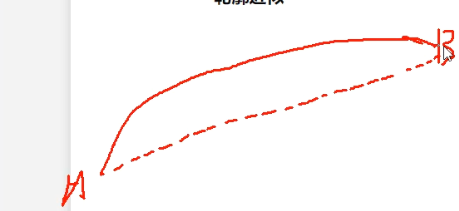
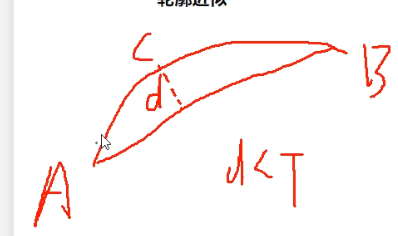
- 在曲线AB上做直线的垂线,取垂直距离最大的点为C
- 如果垂直距离小于阈值,就可以进行轮廓近似
- 如果垂线大于阈值,再进行二分法的拆分,再循环2操作。
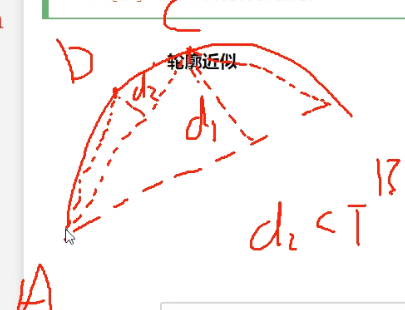
之前代码里的那个数字(0.15)就是阈值(这下就透彻了。。。)
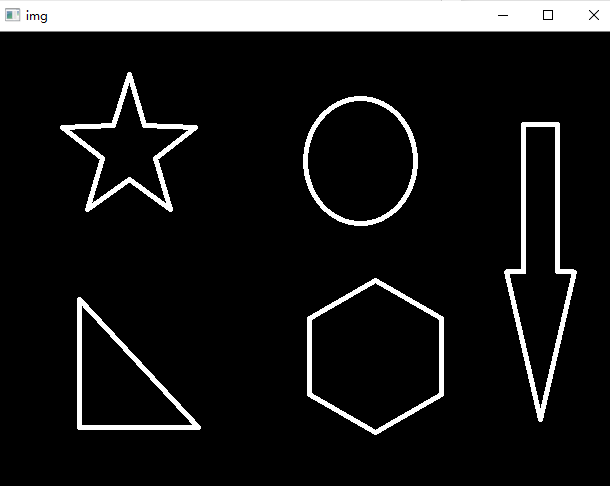
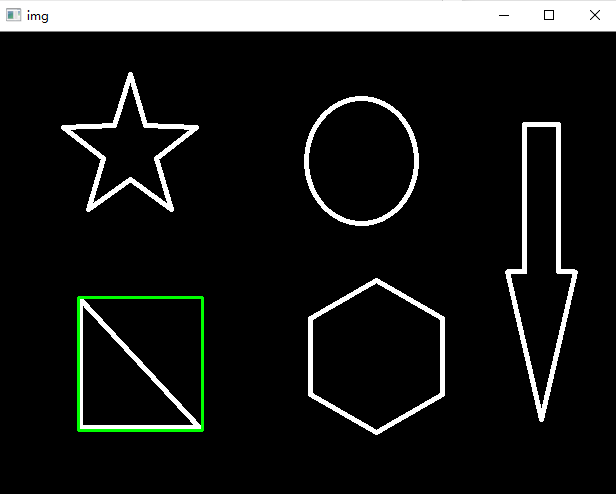
轮廓的外接矩形
cv2.boundingRect(cnt)
cv2.rectangle 这个函数的作用是在图像上绘制一个简单的矩形
img = cv2.imread('contours.png')
cv_show(img,'img')

gray = cv2.cvtColor(img, cv2.COLOR_BGR2GRAY)
ret, thresh = cv2.threshold(gray, 127, 255, cv2.THRESH_BINARY)
binary, contours, hierarchy = cv2.findContours(thresh, cv2.RETR_TREE, cv2.CHAIN_APPROX_NONE)
cnt = contours[0]

x,y,w,h = cv2.boundingRect(cnt)
img = cv2.rectangle(img,(x,y),(x+w,y+h),(0,255,0),2)
cv_show(img,'img')
轮廓的外接圆
(x,y),radius = cv2.minEnclosingCircle(cnt)
center = (int(x),int(y))
radius = int(radius)
img = cv2.circle(img2,center,radius,(0,255,0),2)
cv_show(img,'img')
