nginx常见模块
4 Nginx常见模块
4.1 四层访问控制
访问控制基于模块ngx_http_access_module实现,可以通过匹配客户端源IP地址进行限制
环境配置:
注意: 如果能在防火墙设备控制,最好就不要在nginx上配置,可以更好的节约资源
server{
	listen 80;
	server_name www.ehuo.org;
	root /data/ngnix/html/pc;
	index index.html;

	location /login {
		allow 10.0.0.0/24;
		deny all;--(受顺序影响)
	}

	ip a a/del 192.168.0,100/24 dev eth0 label eth0:1

	#按先小范围到大范围排序
4.2 Nginx账户认证功能
由 ngx_http_auth_basic_module 模块提供此功能
并不安全,容易被抓包
官方帮助:http://nginx.org/en/docs/http/ngx_http_auth_basic_module.html
htpasswd -c .httpuser NAME -----第二次不加-c 会覆盖上面的
#CentOS安装包
[root@centos8 ~]#yum -y install httpd-tools
#Ubuntu安装包
[root@Ubuntu ~]#apt -y install apache2-utils
#创建用户
#-b 非交互式方式提交密码
[root@centos8 ~]# htpasswd -cb /apps/nginx/conf/.htpasswd user1 123456
Adding password for user user1
[root@centos8 ~]# htpasswd -b /apps/nginx/conf/.htpasswd user2 123456
Adding password for user user2
[root@centos8 ~]# tail /apps/nginx/conf/.htpasswd
user1:$apr1$Rjm0u2Kr$VHvkAIc5OYg.3ZoaGwaGq/
user2:$apr1$nIqnxoJB$LR9W1DTJT.viDJhXa6wHv.
#安全加固
[root@centos8 ~]# chown nginx.nginx /apps/nginx/conf/.htpasswd
[root@centos8 ~]# chmod 600 /apps/nginx/conf/.htpasswd
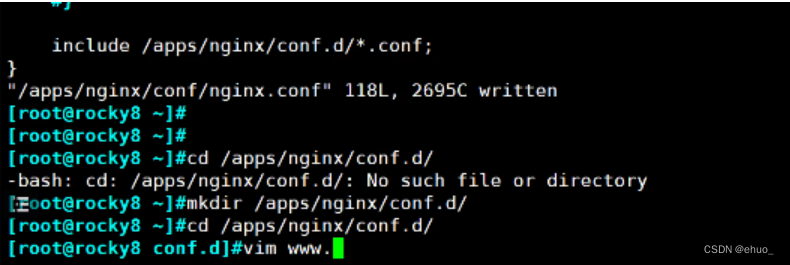
[root@centos8 ~]# vim /apps/nginx/conf/conf.d/pc.conf
location = /login/ {
root /data/nginx/html/pc;
index index.html;
auth_basic "login password";
auth_basic_user_file /apps/nginx/conf/.htpasswd;
}
#重启Nginx并访问测试
[root@centos6 ~]#curl http://user1:123456@www.magedu.org/login/
login page
[root@centos6 ~]#curl -u user2:123456 www.magedu.org/login/
login page
location /login {
auth_basic "FBI warnig.....";
auth_basic_user_file ../conf.d/.httpuser; ----(绝对路径)
}

4.3 自定义错误页面
自定义错误页,同时也可以用指定的响应状态码进行响应, 可用位置:http, server, location, if inlocation
范例: 如果404,就转到主页
302 临时跳转
301 永久

#404转为302
#error_page 404 /index.html;
error_page  404  =302 /index.html;
error_page 404 302 /index.html ;
error_page 500 502 503 504 /50x.html;
  location = /50x.html {
}
4.4 自定义错误日志
可以自定义错误日志
可以写在独立的文件中:
Syntax: error_log file [level];
Default:
error_log logs/error.log error;
Context: main, http, mail, stream, server, location
level: debug, info, notice, warn, error, crit, alert, emerg
#关闭错误日志
error_log /dev/null;
范例
[root@rocky8 ~]#cat /etc/nginx/conf.d/www.ehuo.org.conf
server {
 listen 80 default_server;
 server_name www.wang.org;
 root /data/nginx/html/pc;
 index index.html;
 error_log /apps/nginx/logs/www.wang.org-error.log; #全局配置启用错误日志路径
 location /login {
   error_log /dev/null;  #针对/login目录的错误日志不记录 其它的页面还是会记录
 }
}


# cat /etc/nginx/conf.d/www.ehuo.org.conf
server {
	listen 80;
	server_name www.wang.org;
	root /data/www;
	location / {
	index index.html;
	}
#如果出现异常,则重新定向到@error_404这个location上
	error_page 404 @error_404;
	location @error_404 {
	default_type text/html;
	charset utf8;
	return 200 '你访问的页面可走丢了!';
}
4.5 检测文件是否存在
try_files 会按顺序检查文件是否存在,返回第一个找到的文件或文件夹(结尾加斜线表示为文件夹),
如果所有文件或文件夹都找不到,会进行一个内部重定向到最后一个参数。只有最后一个参数可以引起
一个内部重定向,之前的参数只设置内部URI的指向。最后一个参数是回退URI且必须存在,否则会出现
内部500错误。
应用的场景:
一般来说,我们在输入网站时,没有完全输入正确,但还是有可能跳转到自己想要的页面,这就是可能使用了try_files 寻找文件,可以跳转到页面。
语法格式
Syntax: try_files file ... uri;
try_files file ... =code;
Default: —
Context: server, location
范例: 如果不存在页面, 就转到default.html页面
location / {
root /data/nginx/html/pc;
index index.html;
try_files $uri $uri.html $uri/index.html /index.html ;
#try_files $uri $uri/index.html $uri.html =489;
}
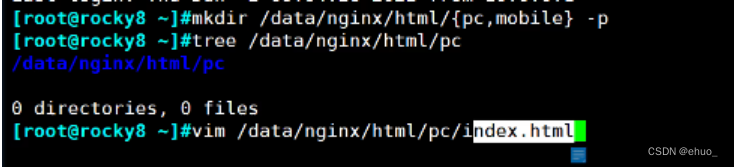
[root@centos8 ~]# echo "default page" >> /data/nginx/html/pc/about/default.html
#重启nginx并测试,当访问到http://www.ehuo.org/about/xx.html等不存在的uri会显示
default.html,如果是自定义的状态码则会显示在返回数据的状态码中
server{
listen 80;
server_name www.ehuo.org ;
root /data/nginx/html/pc ;
index index.html ;
error_log /apps/nginx/logs/www.ehuo.org-error.log;
try_files $uri $uri.html $uri/index.html /index.html ;
}
#测试信息
[root@centos ~]# curl http://www.ehuo.org/a
/data/nginx/html/pc/login/index.html
[root@centos ~]# curl http://www.ehuo.org/a
a.html
[root@centos ~]# curl http://www.ehuo.org/a
a.html
[root@centos ~]# curl http://www.ehuo.org/a
a/index.html
[root@centos ~]#
#测试要先建好目录文件
[root@rocky8 conf.d]# cd /data/nginx/html/pc
[root@rocky8 pc]# ls
a index.html login
[root@rocky8 pc]# echo a.html > a.html
[root@rocky8 pc]# ls
a a.html index.html login
[root@rocky8 pc]# echo a/index.html > a/index.html
[root@rocky8 pc]# rm -f a.html
#注释default.html行,启用上面489响应码的那一行,在其生效后再观察结果
location / {
root /data/nginx/html/pc;
index index.html;
#try_files $uri $uri.html $uri/index.html /about/default.html;
try_files $uri $uri/index.html $uri.html =489;
}
[root@centos8 ~]# curl -I http://www.ehuo.org/about/xx.html
HTTP/1.1 489 #489就是自定义的状态返回码
Server: nginx
Date: Thu, 21 Feb 2019 00:11:40 GMT
Content-Length: 0
Connection: keep-alive
Keep-Alive: timeout=65
4.6 长连接配置
持久连接: keep-alive
http1.0 不支持
Syntax: keepalive_time time;
Default:
keepalive_time 1h;
Context: http, server, location
This directive appeared in version 1.19.10.
Syntax: keepalive_timeout timeout [header_timeout];
Default:
keepalive_timeout 75s;
Context: http, server, location
keepalive_time time; #限制对一个连接中请求处理的最长时间,到时间后续的再有新的请求会断开连接,默认1h

#游戏的时长可以在这控制;比如说王者荣耀时长机制,8个小时。

keepalive_timeout timeout [header_timeout];  #设置保持空闲的连接超时时长,0表示禁止长连接,默认为75s,通常配置在http字段作为站点全局配置
keepalive_requests number;  #在一次长连接上所允许请求的资源的最大数量,默认为1000次


keepalive_requests 3;
keepalive_timeout  65 60;
#开启长连接后,返回客户端的会话保持时间为60s,单次长连接累计请求达到指定次数请求或65秒就会被断
开,第二个数字60为发送给客户端应答报文头部中显示的超时时间设置为60s:如不设置客户端将不显示超时
时间。
Keep-Alive:timeout=60  #浏览器收到的服务器返回的报文
#如果设置为0表示关闭会话保持功能,将如下显示:
Connection:close  #浏览器收到的服务器返回的报文
#使用命令测试:
[root@centos8 ~]# telnet www.ehuo.org 80
Trying 10.0.0.8...
Connected to www.ehuo.org.
Escape character is '^]'.
GET / HTTP/1.1
HOST: www.ehuo.org
#Response Headers(响应头信息):
HTTP/1.1 200 OK
Server: nginx/1.18.0
Date: Thu, 24 Sep 2020 04:35:35 GMT
Content-Type: text/html
Content-Length: 7
Last-Modified: Wed, 23 Sep 2020 14:39:21 GMT
Connection: keep-alive
Keep-Alive: timeout=60
ETag: "5c8a6b3a-7"
Accept-Ranges: bytes
4.7 作为下载服务器配置
ngx_http_autoindex_module 模块处理以斜杠字符 “/” 结尾的请求,并生成目录列表,可以做为下载服
务配置使用
相关指令
Syntax: autoindex on | off;
Default:
autoindex off;
Context: http, server, location
autoindex on | off;#自动文件索引功能,默为off
autoindex_exact_size on | off;  #计算文件确切大小(单位bytes),off 显示大概大小(单位
K、M),默认on
autoindex_localtime on | off ; #显示本机时间而非GMT(格林威治)时间,默认off
charset charset | off;  #指定字符编码,默认为off,中文会乱码,指定为utf8
autoindex_format html | xml | json | jsonp; #显示索引的页面文件风格,默认html
limit_rate rate; #限制响应客户端传输速率(除GET和HEAD以外的所有方法),单位B/s,即
bytes/second,默认值0,表示无限制,此指令由ngx_http_core_module提供
set $limit_rate 4k; #也可以通变量限速,单位B/s,同时设置,此项优级高.Rate limit can also
be set in the $limit_rate variable, however, since version 1.17.0, this method
is not recommended:
范例:实现下载站点
私有仓库拉走到自己的公有仓库
#注意:download不需要index.html文件
[root@centos8 ~]# mkdir -p /data/nginx/html/pc/download
[root@centos8 ~]# vim /apps/nginx/conf/conf.d/pc.conf
location /download {
 autoindex on;   #自动索引功能
 autoindex_exact_size  on; #计算文件确切大小(单位bytes),此为默认值,off只显示大概
大小(单位kb、mb、gb)
 autoindex_localtime  on; #on表示显示本机时间而非GMT(格林威治)时间,默为为off显示
GMT时间
 charset utf8;       #支持中文
 limit_rate 1024k;  #限速,默认不限速
 root /data/nginx/html/pc;
}
[root@centos8 ~]# cp /root/anaconda-ks.cfg /data/nginx/html/pc/download/
#重启Nginx并访问测试下载页面

#可以从清华大学镜像源同步下载实现仓库功能
[root@centos8 ~]#rsync -avz rsync://mirrors.tuna.tsinghua.edu.cn/ubuntu/download/ubuntu
可以将这个仓库设置一个虚拟主机,重新设置一个域名解析到这个IP地址;
nginx实现私有仓库yum和apt,定期自动同步互联网的共有仓库 限速限流


域名可以自我设置
#mirror.ehuo.org
server {
	listen 80 ;
	server_name mirror.ehuo.org ;
	root /data/mirror/ ;
	index index.html ;
	error_log /apps/nginx/logs/mirrors.ehuo.org-error.log;
	autoindex on ;
	autoindex_exact_size  on; #计算文件确切大小(单位bytes),此为默认值,off只显示大概大小(单位kb、mb、gb)
 	autoindex_localtime  on; #on表示显示本机时间而非GMT(格林威治)时间,默为为off显示GMT时间
	limit_rate 1024k;  #限速,默认不限速
    charset utf8;       #支持中文
}

[root@centos8 ~]#rsync -avz rsync://mirrors.tuna.tsinghua.edu.cn/ubuntu/download/ubuntu

#在DNS服务器配置域名解析
root@ubuntu2004:~# cat /etc/bind/ehuo.org.zone
$TTL 1D
@	IN SOA	master admin (
					1	; serial
					1D	; refresh
					1H	; retry
					1W	; expire
					3H )	; minimum
	        NS	 master
master      A    10.0.0.101
www     	A    10.0.0.68
m           A    10.0.0.68
mirror      A    10.0.0.68
root@ubuntu2004:~# rndc reload
server reload successful

4.8 作为上传服务器
控制上传数据
client_max_body_size 1m; #设置允许客户端上传单个文件的最大值,默认值为1m,上传文件超过此值会出413错误
client_body_buffer_size size; #用于接收每个客户端请求报文的body部分的缓冲区大小;默认16k;超出此大小时,其将被暂存到磁盘上的由client_body_temp_path指令所定义的位置
client_body_temp_path path [level1 [level2 [level3]]];
#设定存储客户端请求报文的body部分的临时存储路径及子目录结构和数量,目录名为16进制的数字,使用hash之后的值从后往前截取1位、2位、2位作为目录名
root@centos8 ~]# md5sum /data/nginx/html/pc/index.html
95f6f65f498c74938064851b1bb 96 3d 4 /data/nginx/html/pc/index.html
1级目录占1位16进制,即2^4=16个目录  0-f
2级目录占2位16进制,即2^8=256个目录 00-ff
3级目录占2位16进制,即2^8=256个目录 00-ff
#配置示例:
client_max_body_size 100m; #如果太大,上传时会出现下图的413错误,注意:如果php上传,还需要修改php.ini的相关配置
client_body_buffer_size 1024k;
client_body_temp_path  /apps/nginx/client_body_temp/ 1 2 2; #上传时,Nginx会自动创建相关目录
4.9 限流限速
4.9.1 为什么要限速
限制某个用户在一定时间内能够产生的Http请求或者限制某个用户的下载速度。防止个别用户对资源消
耗过多,导致其它用户受影响.
启用限速后,如果超过指定的阈值,则提示503过载保护
4.9.2 限速相关模块
下载限速:限制用户下载资源的速度
ngx_http_core_module
请求限制:限制用户单位时间内所产生的Http请求数
ngx_http_limit_req_module
连接限制:限制同一时间的连接数,即并发数限制
ngx_http_limit_conn_module
4.9.3 请求频率限速原理
先将请求放置缓存中,然后按指定速度持续处理。当请求速度超过了处理速度会导致缓存被占满,如果
还有没有放入缓存的请求,则会被丢弃。工作原理类似于漏斗
4.9.4 限制下载速度
# cat /etc/nginx/conf.d/mirrors.wang.conf
server {
	listen 80;
	server_name mirrors.wang.org;
	root /data/mirrors/;
	charset utf8;
	autoindex on;
	autoindex_exact_size off;
	autoindex_localtime on;
	limit_rate_after 100m;  #下载达到100MB数据后开始限速
	limit_rate 100k;     #限速100k
	location / {
		index index.html;
		}
}
4.9.5 限制请求数
限制同一个IP的同时发起的最大请求数
Syntax: limit_req_zone key zone=name:size rate=rate [sync];
Default: —
Context: http
Syntax: limit_req zone=name [burst=number] [nodelay | delay=number];
Default: —
Context: http, server, location
Syntax: limit_req_status code;
Default:
limit_req_status 503;
Context: http, server, location

#示例:
http {
 limit_req_zone $binary_remote_addr zone=one:10m rate=10r/s;
 ...
 server {
   ...
   location /search/ {
     limit_req zone=one burst=5;
     limit_req_status 500; #默认503,可以指定其它状态码
   }

   #参数说明
limit_req_zone定义在http块中,$binary_remote_addr表示以客户端IP地址的二进制形式为限流依
据的key
Zone定义IP状态及URL访问频率的共享内存区域。zone=keyword标识区域的名字,以及冒号后面跟区域大
小。8000个IP地址的状态信息约1MB,例子区域可以存储80000个IP地址。
Rate定义最大请求速率。示例中速率不能超过每秒10个请求。超过此速率的请求放入burst队列做延迟处理
burst表示队列大小,当此队列满后,会中断请求报错
nodelay表示超过请求速率并且缓存区满后不延迟处理,立即返回503错误
#可以有几个limit_req指令。例如,以下配置将限制来自单个 IP 地址的请求的处理速率,同时限制虚拟服务器的请求处理速率
#示例:
limit_req_zone $binary_remote_addr zone=perip:10m rate=1r/s;
limit_req_zone $server_name zone=perserver:10m rate=10r/s;
server {
 ...
 limit_req zone=perip burst=5 nodelay;
 limit_req zone=perserver burst=10;
}
范例: 基于来源IP对下载速率限制,限制每秒处理1次请求,缓存区请求突发队列为10个
  # http标签段定义请求限制, rate限制速率,限制一秒钟最多一个IP请求
#注意:$remote_addr和$binary_remote_addr的不同
http {
 limit_req_zone $binary_remote_addr  zone=req_one:10m rate=1r/s;
}
server {
 listen 80;
 server_name mirrors.ehuo.org;
  #请求超过1r/s,剩下的将被延迟处理,请求数超过burst定义的数量,则返回503
 limit_req zone=req_one burst=10 nodelay;
 location / {
   root /data/mirrors/;
   index index.html;
 }
}
limit_req_zone $binary_remote_addr zone=req_one:10m rate=1r/s;
#第一个参数:$binary_remote_addr表示通过这个标识来做限制,限制同一客户端ip地址。
#第二个参数:zone=req_one:10m表示生成一个大小为10M,名为req_one的内存区域用来存储访问频次信息
#第三个参数:rate=1r/s表示允许相同标识的客户端的访问频次,此处限制的是每秒1次。
limit_req zone=req_one burst=10 nodelay;
#第一个参数:zone=req_one 设置使用哪个配置区域来做限制,与上面limit_req_zone的name对应。
#第二个参数:burst=10,设置一个大小为10的缓冲区,当有大量请求过来时,超过了访问频次限制的请求可以先放到这个缓冲区内。
#第三个参数:nodelay,超过访问频次并且缓冲区也满了的时候,则会返回503,如果没有设置,则所有请求会等待
4.9.6 限制并发连接数
限制同一个IP的同时发起的最大并发连接数
例: 设置共享内存区域和给定键值的最大允许个连接数。超过此限制时服务器将返回503错误
# cat /etc/nginx/conf.d/mirrors.ehuo.org.conf
limit_conn_zone $binary_remote_addr zone=conn_zone:10m;
server {
	listen 80;
	server_name mirrors.ehuo.org;
	root /data/mirrors/;
	charset utf8;
	autoindex on;
	autoindex_exact_size off;
	autoindex_localtime on;
	limit_conn conn_zone 2; #限制并发2个连接
	limit_rate 100k;
	location / {
	index index.html;
	}
}
4.9.7 综合实战
实现百度云盘非会员限度限流功能:
- 当下载超过100M则限制下载速度为500k
- 限制web服务器请求数处理为1秒一个,触发值为5、限制用户仅可同时下载一个文件
- 如果同时下载超过2个资源,则返回提示 “请联系管理员进行会员充值” 并跳转到其他页面
[root@rocky8 conf.d]# vim mirror.ehuo.org.conf

limit_req_zone $binary_remote_addr zone=req_zone:10m rate=1r/s;
limit_conn_zone $binary_remote_addr zone=conn_zone:10m;
server {
    listen 80;
    server_name mirror.ehuo.org;
    root /data/mirror/;
    charset utf8;
    autoindex on;
    autoindex_exact_size off;
    autoindex_localtime on;
    limit_req zone=req_zone burst=5 nodelay;
    limit_conn conn_zone 2; #并发连接数
    limit_rate_after 100m;  #限流100M之后
    limit_rate 500k;
    error_page 503 @error_page;
    location @error_page {
        default_type text/html;
        return 200 '温馨提示:请联系管理员进行会员充值!';
        return https://pan.baidu.com/buy/center?tag=8&from=loginpage#/svip ;
    }
}
[root@rocky8 conf.d]# nginx -t ;nginx -s reload
nginx: the configuration file /apps/nginx/conf/nginx.conf syntax is ok
nginx: configuration file /apps/nginx/conf/nginx.conf test is successful
快速的刷几遍,即可看到
return 200 ‘温馨提示:请联系管理员进行会员充值!’;
[外链图片转存失败,源站可能有防盗链机制,建议将图片保存下来直接上传(img-083KpfUn-1654603961687)![(C:\Users\78715\AppData\Roaming\Typora\typora-user-images\image-20220607180937159.png)]](https://img-blog.csdnimg.cn/b9ec329f46be495c89f37b1ae542c2fe.png)
return https://pan.baidu.com/buy/center?tag=8&from=loginpage#/svip ;

4.10Nginx状态页
基于nginx 模块 ngx_http_stub_status_module 实现,在编译安装nginx的时候需要添加编译参数 –
with-http_stub_status_module,否则配置完成之后监测会是提示语法错误
注意: 状态页显示的是整个服务器的状态,而非虚拟主机的状态
http://nginx.org/en/docs/http/ngx_http_stub_status_module.html

Syntax: stub_status;
Default: —
Context: server, location
#配置示例:
location /nginx_status {
stub_status;
auth_basic "auth login";
auth_basic_user_file /apps/nginx/conf/.htpasswd; #设置进入密码
allow 192.168.0.0/16; #允许这个网段访问
allow 127.0.0.1;
deny all;
access_log off; #日志关闭
}
#状态页用于输出nginx的基本状态信息:
#输出信息示例:
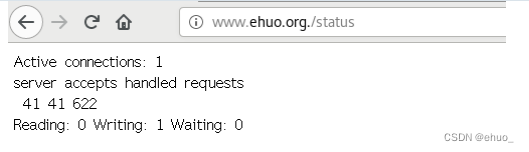
Active connections: 291
server accepts handled requests
16630948 16630948 31070465
上面三个数字分别对应accepts,handled,requests三个值
Reading: 6 Writing: 179 Waiting: 106
Active connections: #当前处于活动状态的客户端连接数,包括连接等待空闲连接=reading+writing+waiting
accepts:#统计总值,Nginx自启动后已经接受的客户端请求连接的总数。
handled:#统计总值,Nginx自启动后已经处理完成的客户端请求连接总数,通常等于accepts,除非有因worker_connections限制等被拒绝的失败连接,即失败连接数=accepts-handled
requests:#统计总值,Nginx自启动后客户端发来的总的请求数。因为长连接的原因此值大于上面的accept数
Reading:#当前状态,正在读取客户端请求报文首部的连接的连接数,数值越大,说明排队现象严重,性能不=足
Writing:#当前状态,正在向客户端发送响应报文过程中的连接数,数值越大,说明访问量很大
Waiting:#当前状态,正在等待客户端发出请求的空闲连接数,开启keep-alive时,Waiting+ reading+writing=active connections
状态页面显示
范例: 分析网站当前访问量
[root@centos7 ~]#curl -s http://wang:123456@www.wangxiaochun.com/nginx_status|awk -F: 'NR==1{print $NF}'
[root@centos7 ~]#curl http://wang:123456@www.wangxiaochun.com/nginx_status 2> /dev/null |awk '/Reading/{print $2,$4,$6}'
0 1 15
[root@centos7 ~]#curl -s  http://wang:654321@www.wangxiaochun.com/nginx_status | sed -rn '/Reading/s/Reading:(.*)Writing:(.*)Waiting:(.*)/\1\2\3/p
[root@centos7 ~]#echo "Nginx失败TCP连接数: $(curl -s http://wang:123456@www.wangxiaochun.com/nginx_status |awk 'NR==3{print$1-$2}')"
=active connections
状态页面显示

<img src="C:\Users\78715\AppData\Roaming\Typora\typora-user-images\image-20220607185651226.png" alt="image-20220607185651226" style="zoom:67%;" />

范例: 分析网站当前访问量

```sh
[root@centos7 ~]#curl -s http://wang:123456@www.wangxiaochun.com/nginx_status|awk -F: 'NR==1{print $NF}'
[root@centos7 ~]#curl http://wang:123456@www.wangxiaochun.com/nginx_status 2> /dev/null |awk '/Reading/{print $2,$4,$6}'
0 1 15
[root@centos7 ~]#curl -s  http://wang:654321@www.wangxiaochun.com/nginx_status | sed -rn '/Reading/s/Reading:(.*)Writing:(.*)Waiting:(.*)/\1\2\3/p
[root@centos7 ~]#echo "Nginx失败TCP连接数: $(curl -s http://wang:123456@www.wangxiaochun.com/nginx_status |awk 'NR==3{print$1-$2}')"