前言
有什么办法可以在不打开App的时候,也能够触发一些操作呢?比如说发送通知,解决这个需求的办法有很多种选择,比如说官方推荐的WorkManager API,可以在后台执行一次性、耗时、定时的任务,但WorkManager是严格遵循电池优化策略的,也就是并不精准,虽然你可以设置为加急任务,但也还是不能满足精准时间。
所以,想要在精准时间触发通知,就只能使用Alarm了。
前置准备
理清自己需要的闹钟类型,首先选择闹钟类型:
“经过的时间”闹钟:
从设定闹钟开始计时,经过特定的时间触发的闹钟,与时区、语言无关
实时闹钟:
基于世界协调时间(UTC),一般情况下,按照现实时间触发的闹钟,但该方法会受到用户改变系统时间时受到影响。
是否唤醒CPU
选择完闹钟类型后,还需确定闹钟是否能够唤醒设备,正常情况下,关闭屏幕后一段时间,CPU就会陷入“睡眠状态”,非唤醒闹钟会等待CPU“醒来”的时候才一起触发,唤醒闹钟则会直接唤醒CPU直接触发。
实现定时不重复闹钟
我们先来测试一个定时,能够唤醒CPU,仅此一次的闹钟,来发送一条通知
如果target SDK为31以上,且没有被加入电池优化策略白名单,则还需要在manifest文件中添加精确闹钟权限,该权限会在安装时授予。
如果target SDK为33以上,发送通知需要通知权限,该权限需要在发送通知前主动向系统请求,不然发不了通知
    <!--通知权限-->
    <uses-permission android:name="android.permission.POST_NOTIFICATIONS" />
    <!--闹钟权限-->
    <uses-permission android:name="android.permission.SCHEDULE_EXACT_ALARM" />
首先先创建一个广播接收器,这个广播接收器用来执行闹钟时间到的时候,我们需要执行的逻辑代码,例如发送一条通知(通知权限的请求本文不再书写,默认视为你已获得通知权限),本文使用的广播接收器是MyAlarmReceiver,闹钟时间到的时候,会发送一条通知,标题是My notification,内容为Hello World! 加一个随机数。
import android.Manifest;
import android.app.NotificationChannel;
import android.app.NotificationManager;
import android.app.PendingIntent;
import android.content.BroadcastReceiver;
import android.content.Context;
import android.content.Intent;
import android.content.pm.PackageManager;
import android.os.Build;
import android.util.Log;

import androidx.core.app.ActivityCompat;
import androidx.core.app.NotificationCompat;
import androidx.core.app.NotificationManagerCompat;
import androidx.core.content.ContextCompat;

import java.util.Random;


public class MyAlarmReceiver extends BroadcastReceiver {

    String CHANNEL_LOCATION_ID = "myAlarm";

    @Override
    public void onReceive(Context context, Intent intent) {
        Log.e("TAG", "onReceive: NOTIFY_ALARM" );
        int count = new Random().nextInt(100);
        NotificationManager notificationManager = ContextCompat.getSystemService(context, NotificationManager.class);
        if (Build.VERSION.SDK_INT >= Build.VERSION_CODES.O) {
            int importance = NotificationManager.IMPORTANCE_DEFAULT;
            NotificationChannel channel = new NotificationChannel(CHANNEL_LOCATION_ID, CHANNEL_LOCATION_ID, importance);
            channel.setDescription("test");
            notificationManager.createNotificationChannel(channel);
        }
        //通知的普通点按操作
        Intent intentN = new Intent(context, MainActivity.class);
        PendingIntent pendingIntent = PendingIntent.getActivity(context, 202, intentN, PendingIntent.FLAG_IMMUTABLE);
        NotificationCompat.Builder builder = new NotificationCompat.Builder(context,CHANNEL_LOCATION_ID)
                .setSmallIcon(R.drawable.notification_icon_blue)//发送通知必须指定一个smallIcon,背景需透明
                .setContentTitle("My notification")
                .setContentText("Hello World!"+ count)
                .setPriority(NotificationCompat.PRIORITY_DEFAULT)
                .setContentIntent(pendingIntent);
        //发送通知,检查权限
        if (ActivityCompat.checkSelfPermission(context, Manifest.permission.POST_NOTIFICATIONS) != PackageManager.PERMISSION_GRANTED) {
            return;
        }
        NotificationManagerCompat.from(context).notify(count, builder.build());
    }
}
当然,别忘了在AndroidManifest.xml中注册我们新增的receiver
<application>
    ...
        <receiver android:name=".MyAlarmReceiver"
            android:exported="false"
            >
        </receiver>
</application>
想要设置一个闹钟,就需要给系统的闹钟服务发送一个类似“预定”一样的意图,下面这段代码我设置在17点20分0秒的闹钟,时间到的时候,系统的闹钟服务就会发送一条广播到我们的广播接收器MyAlarmReceiver,根据接收到的广播进行对应的逻辑操作。
    private AlarmManager alarmManager;
    private PendingIntent pendingIntent;
    private String packageName;
    ...
    private void initAlarm(Context context){
        Intent intent = new Intent(context,MyAlarmReceiver.class);
        pendingIntent = PendingIntent.getBroadcast(
                context,
                0,
                intent,
                PendingIntent.FLAG_UPDATE_CURRENT | PendingIntent.FLAG_IMMUTABLE
        );
        alarmManager = (AlarmManager) context.getSystemService(Context.ALARM_SERVICE);
    }

    private void setOneAlarm(){
        Calendar calendar = Calendar.getInstance();
        calendar.set(Calendar.HOUR_OF_DAY,17);
        calendar.set(Calendar.MINUTE,20);
        calendar.set(Calendar.SECOND,0);
        Log.i("TAG", "notify time: "+new SimpleDateFormat("yyyy-MM-dd HH:mm:ss").format(calendar.getTime()));
        if (Build.VERSION.SDK_INT >= Build.VERSION_CODES.M) {
            Log.w("TAG", "alarm: must" );
         alarmManager.setExactAndAllowWhileIdle(AlarmManager.RTC_WAKEUP,calendar.getTimeInMillis(),pendingIntent);
        }else{
            Log.w("TAG", "alarm: normal" );
            alarmManager.setExact(AlarmManager.RTC_WAKEUP,calendar.getTimeInMillis(),pendingIntent);
        }
    }
好了,前置准备我们都做完了 ,只要触发setOneAlarm()方法就设定了一个闹钟,系统的闹钟服务会在17点20分0秒发送一条广播,触发MyAlarmReceiver类中的onReceive()方法,就能发送一条通知了。
但是
你的手机如果是三星或谷歌的pixel,以上方法就已经足够了。如果你的手机是国产定制化过的系统
例如小米的MIUI,华为,VIVO,OPPO等手机的话,我们还需要获取由定制系统接管的权限,拿小米的MIUI举例,这个权限叫做 自启动权限 没有这个权限的情况下不一定能触发这个闹钟(大部分时间都无法触发)
打开App的应用设置页面我们就能看到这个权限,其他系统也基本同理,不在应用信息中就在手机管家中
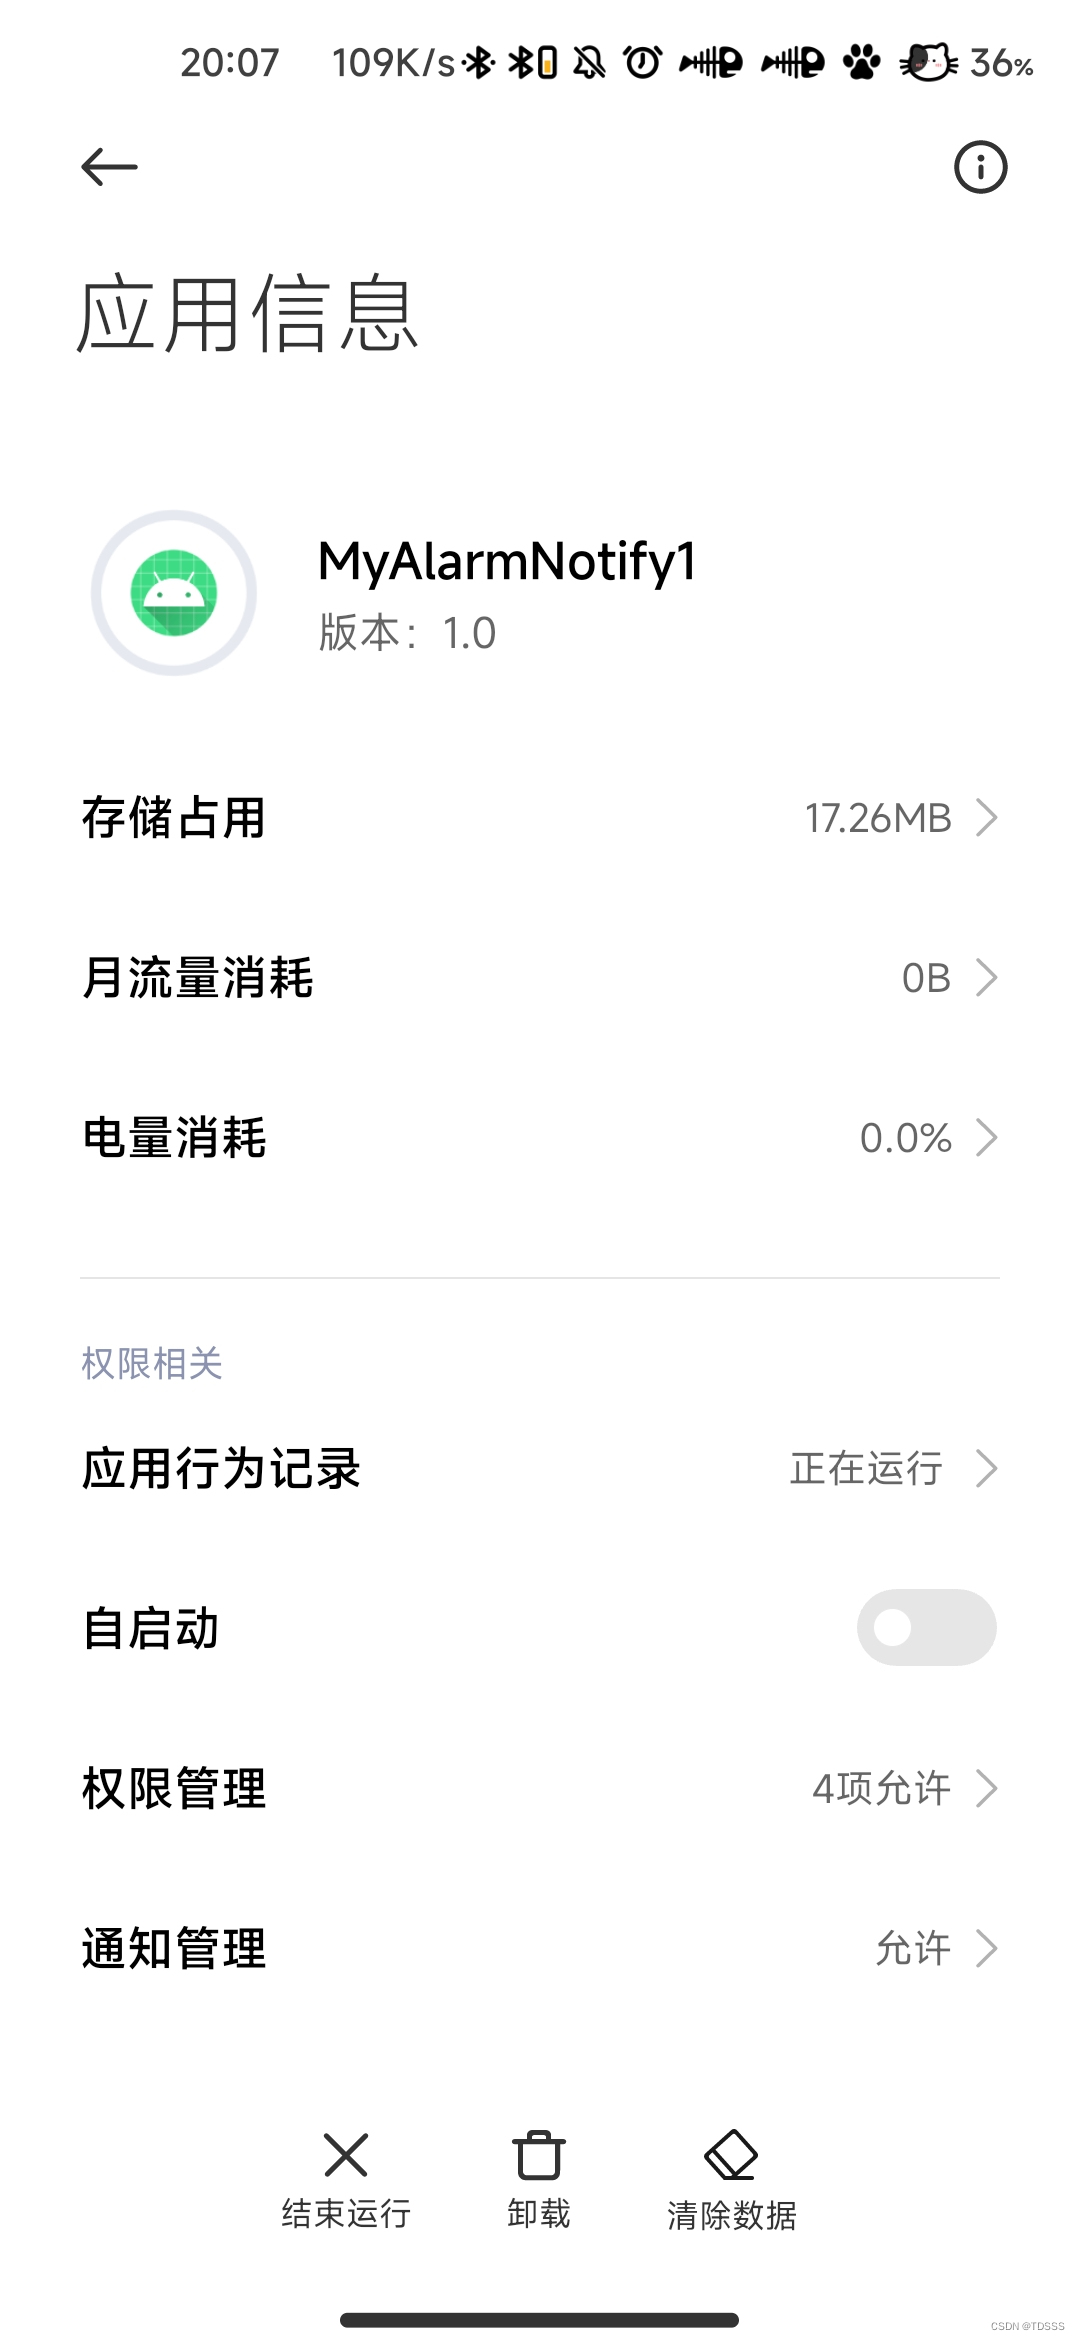
把这个自启动开关打开,再去设定闹钟,就能触发一个定时闹钟了。
实现重复闹钟且自动取消
重复闹钟的实现很简单,只需要设定闹钟的时候使用setRepeating方法,就能指定第一次闹钟的时间,以及重复的间隔。但想要自动取消该怎么办呢?
想要取消闹钟,就需要调用闹钟服务的cancel()方法,且传递一个一样的pendingIntent
其实实现方法很简单,只需要再定一个取消的闹钟就行了。
给我们的Receiver区分一下不同的闹钟做什么事,根据intent中的"enable"值来区分是发送通知还是取消闹钟。
为1的时候,就发送通知,为0的时候就取消闹钟。
import android.Manifest;
import android.app.AlarmManager;
import android.app.NotificationChannel;
import android.app.NotificationManager;
import android.app.PendingIntent;
import android.content.BroadcastReceiver;
import android.content.Context;
import android.content.Intent;
import android.content.pm.PackageManager;
import android.os.Build;
import android.util.Log;

import androidx.core.app.ActivityCompat;
import androidx.core.app.NotificationCompat;
import androidx.core.app.NotificationManagerCompat;
import androidx.core.content.ContextCompat;

import java.util.Random;


public class MyAlarmReceiver extends BroadcastReceiver {

    public static final String NOTIFY_ALARM = "tdsss.myalarmnotify1.MyAlarmReceiver";
    public static final String CANCEL_ALARM = "tdsss.myalarmnotify1.cacelAlarm";

    String CHANNEL_LOCATION_ID = "myAlarm";

    @Override
    public void onReceive(Context context, Intent intent) {
        int isEnable = intent.getIntExtra("enable",-1);
        Log.e("TAG", "alarm onReceive: " );
        switch (isEnable){
            case 1:
                Log.e("TAG", "onReceive: NOTIFY_ALARM" );
                int count = new Random().nextInt(100);
                NotificationManager notificationManager = ContextCompat.getSystemService(context, NotificationManager.class);
                if (Build.VERSION.SDK_INT >= Build.VERSION_CODES.O) {
                    int importance = NotificationManager.IMPORTANCE_DEFAULT;
                    NotificationChannel channel = new NotificationChannel(CHANNEL_LOCATION_ID, CHANNEL_LOCATION_ID, importance);
                    channel.setDescription("test");
                    notificationManager.createNotificationChannel(channel);
                }
                //通知的普通点按操作
                Intent intentN = new Intent(context, MainActivity.class);
                PendingIntent pendingIntent = PendingIntent.getActivity(context, 202, intentN, PendingIntent.FLAG_IMMUTABLE);
        NotificationCompat.Builder builder = new NotificationCompat.Builder(context,CHANNEL_LOCATION_ID)
                .setSmallIcon(R.drawable.notification_icon_blue)//发送通知必须指定一个smallIcon,背景需透明
                .setContentTitle("My notification")
                .setContentText("Hello World!"+ count)
                .setPriority(NotificationCompat.PRIORITY_DEFAULT)
                .setContentIntent(pendingIntent);
                //发送通知,检查权限
                if (ActivityCompat.checkSelfPermission(context, Manifest.permission.POST_NOTIFICATIONS) != PackageManager.PERMISSION_GRANTED) {
                    return;
                }
                NotificationManagerCompat.from(context).notify(count, builder.build());
                break;
            case 0:
                Log.e("TAG", "onReceive: CANCEL_ALARM" );
                Intent cancel = new Intent(context,MyAlarmReceiver.class);
                cancel.setAction(MyAlarmReceiver.NOTIFY_ALARM);
                intent.putExtra("enable",1);
                PendingIntent cancelPendingIntent = PendingIntent.getBroadcast(
                        context,
                        0,
                        cancel,
                        PendingIntent.FLAG_UPDATE_CURRENT | PendingIntent.FLAG_IMMUTABLE
                );
                AlarmManager alarmManager = (AlarmManager) context.getSystemService(Context.ALARM_SERVICE);
                alarmManager.cancel(cancelPendingIntent);
                break;
            default:
                Log.e("TAG", "onReceive: " );
                break;
        }
    }
}
    private void setRepeatAlarmAndCancel(){
        alarmManager.cancel(pendingIntent);
        Calendar calendar = Calendar.getInstance();
        calendar.set(Calendar.HOUR_OF_DAY,17);
        calendar.set(Calendar.MINUTE,30);
        calendar.set(Calendar.SECOND,0);
        Log.e("TAG", "notify time: "+new SimpleDateFormat("yyyy-MM-dd HH:mm:ss").format(calendar.getTime()));
        alarmManager.setRepeating(AlarmManager.RTC_WAKEUP,calendar.getTimeInMillis(),1000*60*1,pendingIntent);
        //cancel alarm
        Calendar cancelTime = Calendar.getInstance();
        cancelTime.set(Calendar.HOUR_OF_DAY,17);
        cancelTime.set(Calendar.MINUTE,35);
        cancelTime.set(Calendar.SECOND,0);
        Log.e("TAG", "cancel time: "+new SimpleDateFormat("yyyy-MM-dd HH:mm:ss").format(cancelTime.getTime()));
        Intent cancelIntent = new Intent(getContext(),MyAlarmReceiver.class);
        cancelIntent.setAction(MyAlarmReceiver.CANCEL_ALARM);
        cancelIntent.putExtra("enable",0);
        PendingIntent cancelPendingIntent = PendingIntent.getBroadcast(getContext(),2,cancelIntent,
                PendingIntent.FLAG_UPDATE_CURRENT | PendingIntent.FLAG_IMMUTABLE);
        if (Build.VERSION.SDK_INT >= Build.VERSION_CODES.M) {
            Log.e("TAG", "alarm: must" );
            alarmManager.setExactAndAllowWhileIdle(AlarmManager.RTC_WAKEUP,cancelTime.getTimeInMillis(),cancelPendingIntent);
        }else{
            Log.e("TAG", "alarm: normal" );
            alarmManager.setExact(AlarmManager.RTC_WAKEUP,cancelTime.getTimeInMillis(),cancelPendingIntent);
        }
    }
设定完以后,系统就会在17点30分0秒时,发送5条通知,然后自动取消不再重复,还有更多的扩展用法就自己摸索啦!本文只是简单的使用一下~