转载自:https://blog.csdn.net/lovebyz/article/details/80704800
为了使用tensorflow目标检测API的所有算法,所以打算升级一下CUDA版本以支持tf-gpu 1.5++,但原本项目都是基于tf-gpu 1.4 的(tf-gpu 1.5以下都只能使用CUDA_8.0),所以保留了cuda-8.0的情况下安装cuda-9.0。
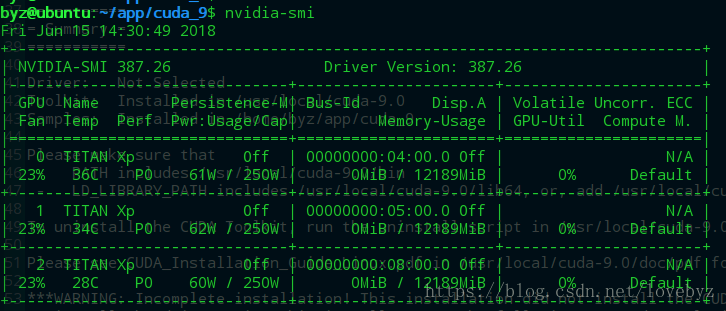
系统信息:
byz@ubuntu:~$ nvidia-smi -(在cuda-8时就已经安装好了的驱动,所以下面选择安装驱动时选No
首先:关闭X. light类型的桌面系统
$ sudo /etc/init.d/lightdm stop
一、下载CUDA
点击下载(https://developer.nvidia.com/cuda-90-download-archive?target_os=Linux&target_arch=x86_64&target_distro=Ubuntu&target_version=1604&target_type=runfilelocal),选择如图,最好不要使用deb方式,比较容易失败。

二、新建cuda_9文件夹,将一中下载的文件放进来
mkdir cuda_9
三、生成可执行文件
chmod 777 cuda_9.0.176_384.81_linux-run
四、执行安装
./cuda_9.0.176_384.81_linux-run
五、依次填写选项
-----------------
Do you accept the previously read EULA?
accept/decline/quit: accept
Install NVIDIA Accelerated Graphics Driver for Linux-x86_64 384.81?
(y)es/(n)o/(q)uit: n <--(不要装驱动
Install the CUDA 9.0 Toolkit?
(y)es/(n)o/(q)uit: y
Enter Toolkit Location
[ default is /usr/local/cuda-9.0 ]:
/usr/local/cuda-9.0 is not writable.
Do you wish to run the installation with 'sudo'?
(y)es/(n)o: y
Please enter your password:
Do you want to install a symbolic link at /usr/local/cuda?
(y)es/(n)o/(q)uit: n <--(链接可在完成安装之后软cuda-9.0链接过来
Install the CUDA 9.0 Samples?
(y)es/(n)o/(q)uit: y
Enter CUDA Samples Location
[ default is /home/byz ]: /home/byz/app/cuda_9 <--(刚才新建的文件夹
Installing the CUDA Toolkit in /usr/local/cuda-9.0 ...
Installing the CUDA Samples in /home/byz/app/cuda_9 ...
Copying samples to /home/byz/app/cuda_9/NVIDIA_CUDA-9.0_Samples now...
Finished copying samples.
===========
= Summary =
===========
Driver: Not Selected
Toolkit: Installed in /usr/local/cuda-9.0
Samples: Installed in /home/byz/app/cuda_9
Please make sure that
- PATH includes /usr/local/cuda-9.0/bin
- LD_LIBRARY_PATH includes /usr/local/cuda-9.0/lib64, or, add /usr/local/cuda-9.0/lib64 to /etc/ld.so.conf and run ldconfig as root
To uninstall the CUDA Toolkit, run the uninstall script in /usr/local/cuda-9.0/bin
Please see CUDA_Installation_Guide_Linux.pdf in /usr/local/cuda-9.0/doc/pdf for detailed information on setting up CUDA.
***WARNING: Incomplete installation! This installation did not install the CUDA Driver. A driver of version at least 384.00 is required for CUDA 9.0 functionality to work.
To install the driver using this installer, run the following command, replacing <CudaInstaller> with the name of this run file:
sudo <CudaInstaller>.run -silent -driver
Logfile is /tmp/cuda_install_2684.log
六、修改配置文件
vim .bashrc
export PATH="/usr/local/cuda/bin:$PATH"
export LD_LIBRARY_PATH="/usr/local/cuda/lib64:$LD_LIBRARY_PATH"
export LIBRARY_PATH="/usr/local/cuda/lib64:$LIBRARY_PATH
source .bashrc
七、从cuda-8.0 切换到cuda-9.0
rm –rf /usr/local/cuda
ln -s /usr/local/cuda-9.0 /usr/local/cuda
(需要切换到8.0的话换汤不换药)
八、 进到 cuda9.0的sample. make所有的例子
byz@ubuntu:~/app/cuda_9/NVIDIA_CUDA-9.0_Samples$ make
最后可能像这样:
...
cp simpleCUFFT_2d_MGPU ../../bin/x86_64/linux/release
make[1]: Leaving directory '/home/byz/app/cuda_9/NVIDIA_CUDA-9.0_Samples/7_CUDALibraries/simpleCUFFT_2d_MGPU'
make[1]: Entering directory '/home/byz/app/cuda_9/NVIDIA_CUDA-9.0_Samples/7_CUDALibraries/MC_EstimatePiP'
"/usr/local/cuda-9.0"/bin/nvcc -ccbin g++ -I../../common/inc -m64 -gencode arch=compute_30,code=sm_30 -gencode arch=compute_35,code=sm_35 -gencode arch=compute_37,code=sm_37 -gencode arch=compute_50,code=sm_50 -gencode arch=compute_52,code=sm_52 -gencode arch=compute_60,code=sm_60 -gencode arch=compute_70,code=sm_70 -gencode arch=compute_70,code=compute_70 -o main.o -c src/main.cpp
"/usr/local/cuda-9.0"/bin/nvcc -ccbin g++ -I../../common/inc -m64 -gencode arch=compute_30,code=sm_30 -gencode arch=compute_35,code=sm_35 -gencode arch=compute_37,code=sm_37 -gencode arch=compute_50,code=sm_50 -gencode arch=compute_52,code=sm_52 -gencode arch=compute_60,code=sm_60 -gencode arch=compute_70,code=sm_70 -gencode arch=compute_70,code=compute_70 -o piestimator.o -c src/piestimator.cu
"/usr/local/cuda-9.0"/bin/nvcc -ccbin g++ -I../../common/inc -m64 -gencode arch=compute_30,code=sm_30 -gencode arch=compute_35,code=sm_35 -gencode arch=compute_37,code=sm_37 -gencode arch=compute_50,code=sm_50 -gencode arch=compute_52,code=sm_52 -gencode arch=compute_60,code=sm_60 -gencode arch=compute_70,code=sm_70 -gencode arch=compute_70,code=compute_70 -o test.o -c src/test.cpp
"/usr/local/cuda-9.0"/bin/nvcc -ccbin g++ -m64 -gencode arch=compute_30,code=sm_30 -gencode arch=compute_35,code=sm_35 -gencode arch=compute_37,code=sm_37 -gencode arch=compute_50,code=sm_50 -gencode arch=compute_52,code=sm_52 -gencode arch=compute_60,code=sm_60 -gencode arch=compute_70,code=sm_70 -gencode arch=compute_70,code=compute_70 -o MC_EstimatePiP main.o piestimator.o test.o -lcurand
mkdir -p ../../bin/x86_64/linux/release
cp MC_EstimatePiP ../../bin/x86_64/linux/release
make[1]: Leaving directory '/home/byz/app/cuda_9/NVIDIA_CUDA-9.0_Samples/7_CUDALibraries/MC_EstimatePiP'
make[1]: Entering directory '/home/byz/app/cuda_9/NVIDIA_CUDA-9.0_Samples/7_CUDALibraries/randomFog'
"/usr/local/cuda-9.0"/bin/nvcc -ccbin g++ -I../../common/inc -m64 -Xcompiler -fpermissive -gencode arch=compute_30,code=compute_30 -o randomFog.o -c randomFog.cpp
"/usr/local/cuda-9.0"/bin/nvcc -ccbin g++ -I../../common/inc -m64 -Xcompiler -fpermissive -gencode arch=compute_30,code=compute_30 -o rng.o -c rng.cpp
"/usr/local/cuda-9.0"/bin/nvcc -ccbin g++ -m64 -gencode arch=compute_30,code=compute_30 -o randomFog randomFog.o rng.o -L/usr/lib/nvidia-387 -lGL -lGLU -lX11 -lglut -lcurand
mkdir -p ../../bin/x86_64/linux/release
cp randomFog ../../bin/x86_64/linux/release
make[1]: Leaving directory '/home/byz/app/cuda_9/NVIDIA_CUDA-9.0_Samples/7_CUDALibraries/randomFog'
Finished building CUDA samples
九、测试是否安装成功
byz@ubuntu:~/app/cuda_9/NVIDIA_CUDA-9.0_Samples$ cd 1_Utilities/deviceQuery
byz@ubuntu:~/app/cuda_9/NVIDIA_CUDA-9.0_Samples$ ll
total 132
drwxrwxr-x 12 byz byz 4096 Jun 15 14:12 ./
drwxrwxr-x 3 byz byz 4096 Jun 15 12:53 ../
drwxr-xr-x 50 byz byz 4096 Jun 15 12:53 0_Simple/
drwxr-xr-x 7 byz byz 4096 Jun 15 12:53 1_Utilities/
drwxr-xr-x 12 byz byz 4096 Jun 15 12:53 2_Graphics/
drwxr-xr-x 22 byz byz 4096 Jun 15 12:53 3_Imaging/
drwxr-xr-x 10 byz byz 4096 Jun 15 12:53 4_Finance/
drwxr-xr-x 10 byz byz 4096 Jun 15 12:53 5_Simulations/
drwxr-xr-x 34 byz byz 4096 Jun 15 12:53 6_Advanced/
drwxr-xr-x 38 byz byz 4096 Jun 15 12:53 7_CUDALibraries/
drwxrwxr-x 3 byz byz 4096 Jun 15 14:12 bin/
drwxr-xr-x 6 byz byz 4096 Jun 15 12:53 common/
-rw-r--r-- 1 byz byz 81262 Jun 15 12:53 EULA.txt
-rw-r--r-- 1 byz byz 2652 Jun 15 12:53 Makefile
byz@ubuntu:~/app/cuda_9/NVIDIA_CUDA-9.0_Samples/1_Utilities/deviceQuery$ ./deviceQuery
./deviceQuery Starting...
CUDA Device Query (Runtime API) version (CUDART static linking)
Detected 8 CUDA Capable device(s)
Device 0: "TITAN Xp"
CUDA Driver Version / Runtime Version 9.1 / 9.0
CUDA Capability Major/Minor version number: 6.1
Total amount of global memory: 12190 MBytes (12782075904 bytes)
(30) Multiprocessors, (128) CUDA Cores/MP: 3840 CUDA Cores
GPU Max Clock rate: 1582 MHz (1.58 GHz)
Memory Clock rate: 5705 Mhz
Memory Bus Width: 384-bit
L2 Cache Size: 3145728 bytes
Maximum Texture Dimension Size (x,y,z) 1D=(131072), 2D=(131072, 65536), 3D=(16384, 16384, 16384)
Maximum Layered 1D Texture Size, (num) layers 1D=(32768), 2048 layers
Maximum Layered 2D Texture Size, (num) layers 2D=(32768, 32768), 2048 layers
Total amount of constant memory: 65536 bytes
Total amount of shared memory per block: 49152 bytes
Total number of registers available per block: 65536
Warp size: 32
Maximum number of threads per multiprocessor: 2048
Maximum number of threads per block: 1024
Max dimension size of a thread block (x,y,z): (1024, 1024, 64)
Max dimension size of a grid size (x,y,z): (2147483647, 65535, 65535)
Maximum memory pitch: 2147483647 bytes
Texture alignment: 512 bytes
Concurrent copy and kernel execution: Yes with 2 copy engine(s)
Run time limit on kernels: No
Integrated GPU sharing Host Memory: No
Support host page-locked memory mapping: Yes
Alignment requirement for Surfaces: Yes
Device has ECC support: Disabled
Device supports Unified Addressing (UVA): Yes
Supports Cooperative Kernel Launch: Yes
Supports MultiDevice Co-op Kernel Launch: Yes
Device PCI Domain ID / Bus ID / location ID: 0 / 4 / 0
Compute Mode:
< Default (multiple host threads can use ::cudaSetDevice() with device simultaneously) >
Device 1: "TITAN Xp"
CUDA Driver Version / Runtime Version 9.1 / 9.0
CUDA Capability Major/Minor version number: 6.1
Total amount of global memory: 12190 MBytes (12782075904 bytes)
(30) Multiprocessors, (128) CUDA Cores/MP: 3840 CUDA Cores
GPU Max Clock rate: 1582 MHz (1.58 GHz)
Memory Clock rate: 5705 Mhz
Memory Bus Width: 384-bit
L2 Cache Size: 3145728 bytes
Maximum Texture Dimension Size (x,y,z) 1D=(131072), 2D=(131072, 65536), 3D=(16384, 16384, 16384)
Maximum Layered 1D Texture Size, (num) layers 1D=(32768), 2048 layers
Maximum Layered 2D Texture Size, (num) layers 2D=(32768, 32768), 2048 layers
Total amount of constant memory: 65536 bytes
Total amount of shared memory per block: 49152 bytes
Total number of registers available per block: 65536
Warp size: 32
Maximum number of threads per multiprocessor: 2048
Maximum number of threads per block: 1024
Max dimension size of a thread block (x,y,z): (1024, 1024, 64)
Max dimension size of a grid size (x,y,z): (2147483647, 65535, 65535)
Maximum memory pitch: 2147483647 bytes
Texture alignment: 512 bytes
Concurrent copy and kernel execution: Yes with 2 copy engine(s)
Run time limit on kernels: No
Integrated GPU sharing Host Memory: No
Support host page-locked memory mapping: Yes
Alignment requirement for Surfaces: Yes
Device has ECC support: Disabled
Device supports Unified Addressing (UVA): Yes
Supports Cooperative Kernel Launch: Yes
Supports MultiDevice Co-op Kernel Launch: Yes
Device PCI Domain ID / Bus ID / location ID: 0 / 5 / 0
Compute Mode:
< Default (multiple host threads can use ::cudaSetDevice() with device simultaneously) >
... (每颗GPU的信息)
...
> Peer access from TITAN Xp (GPU6) -> TITAN Xp (GPU7) : Yes
> Peer access from TITAN Xp (GPU7) -> TITAN Xp (GPU0) : No
> Peer access from TITAN Xp (GPU7) -> TITAN Xp (GPU1) : No
> Peer access from TITAN Xp (GPU7) -> TITAN Xp (GPU2) : No
> Peer access from TITAN Xp (GPU7) -> TITAN Xp (GPU3) : No
> Peer access from TITAN Xp (GPU7) -> TITAN Xp (GPU4) : Yes
> Peer access from TITAN Xp (GPU7) -> TITAN Xp (GPU5) : Yes
> Peer access from TITAN Xp (GPU7) -> TITAN Xp (GPU6) : Yes
deviceQuery, CUDA Driver = CUDART, CUDA Driver Version = 9.1, CUDA Runtime Version = 9.0, NumDevs = 8
Result = PASS
接下来~
clone一个环境装tf1.8
conda create --name tf14 --clone py35
安装tf-gpu-1.8
(py35) byz@ubuntu:~/app$ pip install tensorflow_gpu-1.8.0-cp35-cp35m-manylinux1_x86_64.whl
试运行一下,发现cudnn版本不对,报错如下:
>>> import tensorflow
Traceback (most recent call last):
File "/home/byz/anaconda3/envs/py35/lib/python3.5/site-packages/tensorflow/python/pywrap_tensorflow.py", line 58, in <module>
from tensorflow.python.pywrap_tensorflow_internal import *
File "/home/byz/anaconda3/envs/py35/lib/python3.5/site-packages/tensorflow/python/pywrap_tensorflow_internal.py", line 28, in <module>
_pywrap_tensorflow_internal = swig_import_helper()
File "/home/byz/anaconda3/envs/py35/lib/python3.5/site-packages/tensorflow/python/pywrap_tensorflow_internal.py", line 24, in swig_import_helper
_mod = imp.load_module('_pywrap_tensorflow_internal', fp, pathname, description)
File "/home/byz/anaconda3/envs/py35/lib/python3.5/imp.py", line 243, in load_module
return load_dynamic(name, filename, file)
File "/home/byz/anaconda3/envs/py35/lib/python3.5/imp.py", line 343, in load_dynamic
return _load(spec)
ImportError: libcudnn.so.7: cannot open shared object file: No such file or directory
Failed to load the native TensorFlow runtime.
See https://www.tensorflow.org/install/install_sources#common_installation_problems
for some common reasons and solutions. Include the entire stack trace
above this error message when asking for help.
十、安装cudnn-7.1
下载路径:https://developer.nvidia.com/rdp/cudnn-download
下的是cuDNN v7.1 Library for Linux这个版本。不要下cuDNN v7.1 Developer Library for Ubuntu16.04 Power8 (Deb)这个版本,因为是给powe8处理器用的,不是amd64。
解压安装:
(py35) byz@ubuntu:~/app$ tar -xvf cudnn-9.0-linux-x64-v7.1.tgz
cuda/include/cudnn.h
cuda/NVIDIA_SLA_cuDNN_Support.txt
cuda/lib64/libcudnn.so
cuda/lib64/libcudnn.so.7 <--(这就是上面缺的文件
cuda/lib64/libcudnn.so.7.1.4
cuda/lib64/libcudnn_static.a
解压后把相应的文件拷贝到对应的CUDA目录下即可
sudo cp cuda/include/cudnn.h /usr/local/cuda/include/
sudo cp cuda/lib64/libcudnn* /usr/local/cuda/lib64/
sudo chmod a+r /usr/local/cuda/include/cudnn.h
sudo chmod a+r /usr/local/cuda/lib64/libcudnn*
再次运行tf,错误消失
(py35) byz@ubuntu:~/app$ python
Python 3.5.5 |Anaconda, Inc.| (default, Mar 12 2018, 23:12:44)
[GCC 7.2.0] on linux
Type "help", "copyright", "credits" or "license" for more information.
>>> import tensorflow
/home/byz/anaconda3/envs/py35/lib/python3.5/site-packages/h5py/__init__.py:36: FutureWarning: Conversion of the second argument of issubdtype from `float` to `np.floating` is deprecated. In future, it will be treated as `np.float64 == np.dtype(float).type`.
from ._conv import register_converters as _register_converters
所以~ 这就搞定啦
说在最后(tf1.4迁移新版本问题):
ImportError: libcudart.so.8.0: cannot open shared object file: No such file or directory
解决:
byz@ubuntu:/usr/local/cuda/lib64$ sudo ln -s libcudart.so.9.0.176 libcudart.so.8.0
做个软链接到9.0
---------------------
作者:Raini.闭雨哲
来源:CSDN
原文:https://blog.csdn.net/lovebyz/article/details/80704800
版权声明:本文为博主原创文章,转载请附上博文链接!