Centos CA自签证书服务器及自签证书配置手册
- 1 准备工作
-
- 2 创建CA
- 2.1 生成CA私钥文件(Key)
- 2.2 生成CA自签名证书
- 2.3 生成自签名证书(拓展部分)
- 2.4 /etc/pki/CA/目录结构
- 2.5 在windows中查看
- 3 用户申请私钥
-
- 4 CA颁发证书
- 4.1 查看颁发证书信息
- 4.2 将根证书导入受信任的组织
- 4.3 查看www证书
- 5 结束
1 准备工作
1.1 系统版本信息
[08:33:10 root@centos8 ~]#cat /etc/redhat-release
CentOS Linux release 8.4.2105
[08:33:26 root@centos8 ~]#openssl version
OpenSSL 1.1.1g FIPS  21 Apr 2020
1.2 创建必要的目录和文件
mkdir -pv /etc/pki/CA/{certs,crl,newcerts,private}
touch /etc/pki/CA/index.txt
echo 01 > /etc/pki/CA/serial
mkdir /data/app1 -p
[08:28:54 root@centos8 ~]#mkdir -pv /etc/pki/CA/{certs,crl,newcerts,private}
mkdir: created directory '/etc/pki/CA'
mkdir: created directory '/etc/pki/CA/certs'
mkdir: created directory '/etc/pki/CA/crl'
mkdir: created directory '/etc/pki/CA/newcerts'
mkdir: created directory '/etc/pki/CA/private'
[08:28:58 root@centos8 ~]#touch /etc/pki/CA/index.txt
[08:29:16 root@centos8 ~]#echo 01 > /etc/pki/CA/serial
[08:29:23 root@centos8 ~]#mkdir /data/app1 -p
2 创建CA
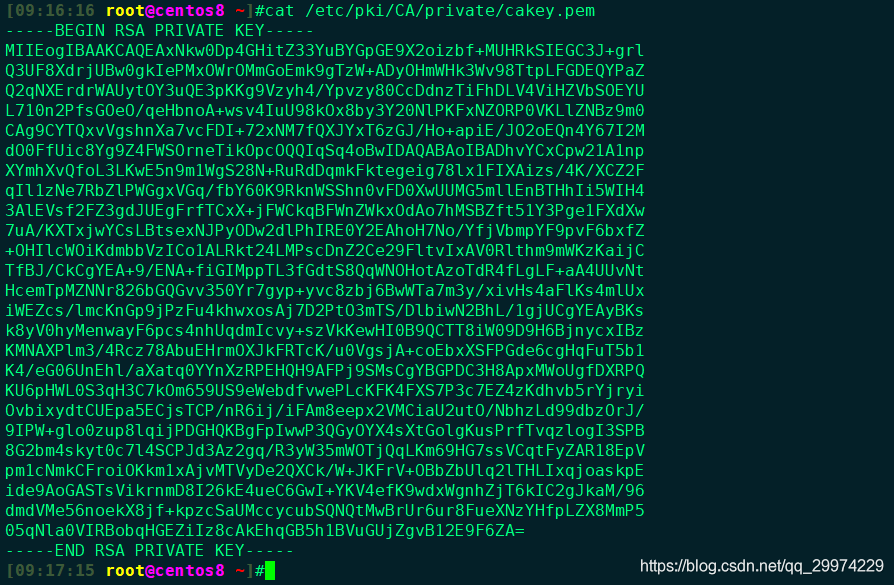
2.1 生成CA私钥文件(Key)
( umask 066;openssl genrsa -out /etc/pki/CA/private/cakey.pem 2048 )
[08:30:27 root@centos8 ~]#( umask 066;openssl genrsa -out /etc/pki/CA/private/cakey.pem 2048 )
Generating RSA private key, 2048 bit long modulus (2 primes)
.........................................+++++
...................................+++++
e is 65537 (0x010001)
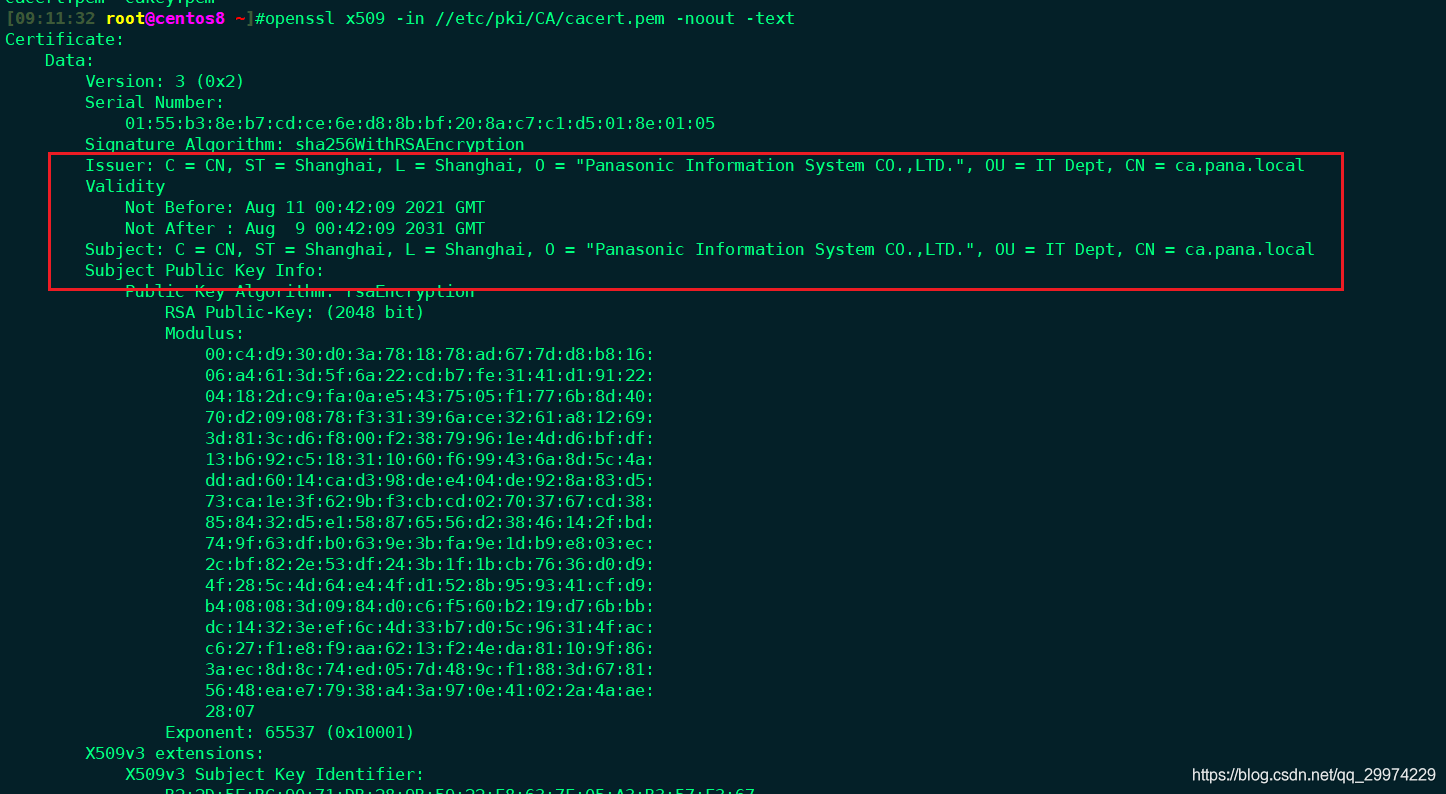
2.2 生成CA自签名证书
openssl req -new -x509 -key /etc/pki/CA/private/cakey.pem -days 3650 -out /etc/pki/CA/cacert.pem
[08:35:22 root@centos8 ~]#openssl req -new -x509 -key /etc/pki/CA/private/cakey.pem -days3650 -out /etc/pki/CA/cacert.pem
You are about to be asked to enter information that will be incorporated
into your certificate request.
What you are about to enter is what is called a Distinguished Name or a DN.
There are quite a few fields but you can leave some blank
For some fields there will be a default value,
If you enter '.', the field will be left blank.
-----
Country Name (2 letter code) [XX]:CN
State or Province Name (full name) []:Shanghai
Locality Name (eg, city) [Default City]:Shanghai
Organization Name (eg, company) [Default Company Ltd]:Panasonic Information System CO.,LTD.
Organizational Unit Name (eg, section) []:IT Dept
Common Name (eg, your name or your server's hostname) []:ca.pana.local
Email Address []:
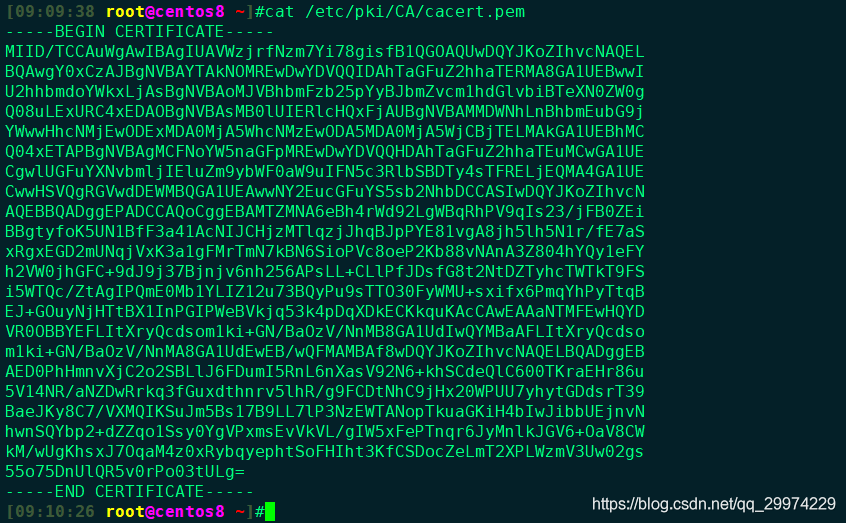
可以看到这部分信息和我们之前输入的相同.
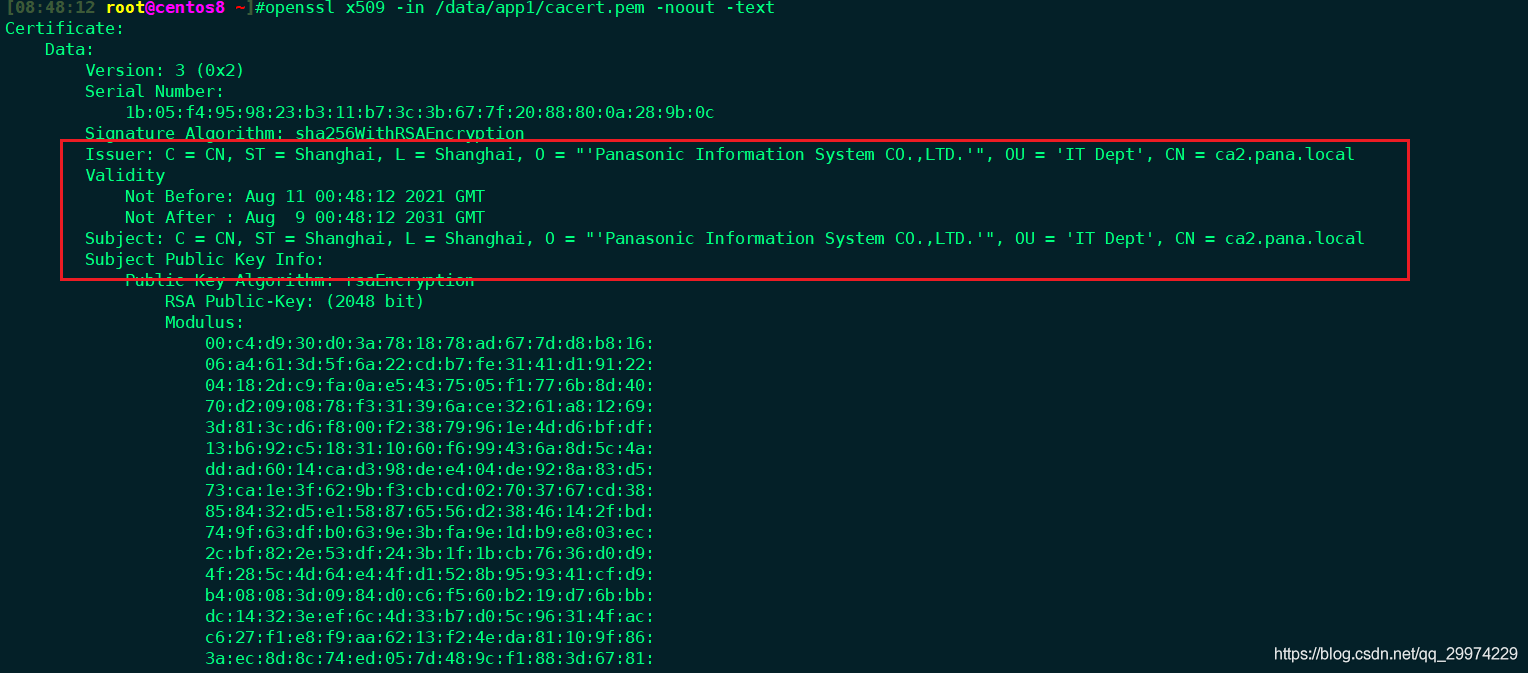
2.3 生成自签名证书(拓展部分)
那么如果是批量生成的话应该怎么处理?
可以使用-subj 将这部分信息传入,当然也可以用expect这类的工具.
openssl req -new -x509 -subj "/C=CN/ST=Shanghai/L=Shanghai/O='Panasonic Information System CO.,LTD.'/OU='IT Dept'/CN=ca2.pana.local" -key /etc/pki/CA/private/cakey.pem -days 3650 -out /data/app1/cacert.pem
[08:47:50 root@centos8 ~]#openssl req -new -x509 -subj "/C=CN/ST=Shanghai/L=Shanghai\
/O='Panasonic Information System CO.,LTD.'/OU='IT Dept'/CN=ca2.pana.local"\
 -key /etc/pki/CA/private/cakey.pem -days 3650 -out /data/app1/cacert.pem
看到这部分信息一样生成
2.4 /etc/pki/CA/目录结构
[09:16:10 root@centos8 ~]#tree /etc/pki/CA/
/etc/pki/CA/
├── cacert.pem
├── certs
├── crl
├── index.txt
├── newcerts
├── private
│   └── cakey.pem
└── serial
2.5 在windows中查看
将证书下载到windows上,并改名成crt
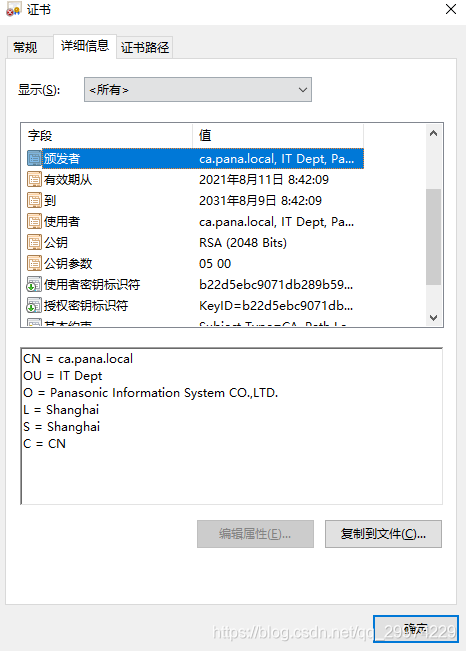
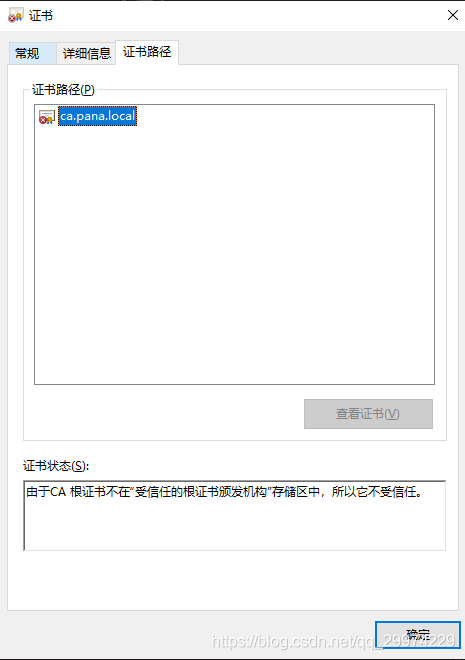
此时我们可以看到证书是不受信任的.

3 用户申请私钥
3.1 用户私钥和证书申请
这里我们用脚本直接完成这2部分的申请,申请完只需要将crt文件发送给CA.
cat >> ssl.sh<<EOF
#!/bin/bash
Ssl_dir=/data/ssl
Url=www.pana.local
Keyfile=$Ssl_dir/$Url.key
Crtfile=$Ssl_dir/$Url.csr
[ -d $Ssl_dir ] || mkdir $Ssl_dir -p
[ `rpm -qa|grep openssl|wc -l` -gt 0 ] || yum install openssl -y

( umask 066;openssl genrsa -out $Keyfile 2048 )
openssl req -new -subj "/C=CN/ST=Shanghai/L=Shanghai/O=Panasonic Information System CO.,LTD./OU='IT Dept'/CN=$Url" -key $Keyfile -out $Crtfile
EOF
bash ssl.sh

4 CA颁发证书
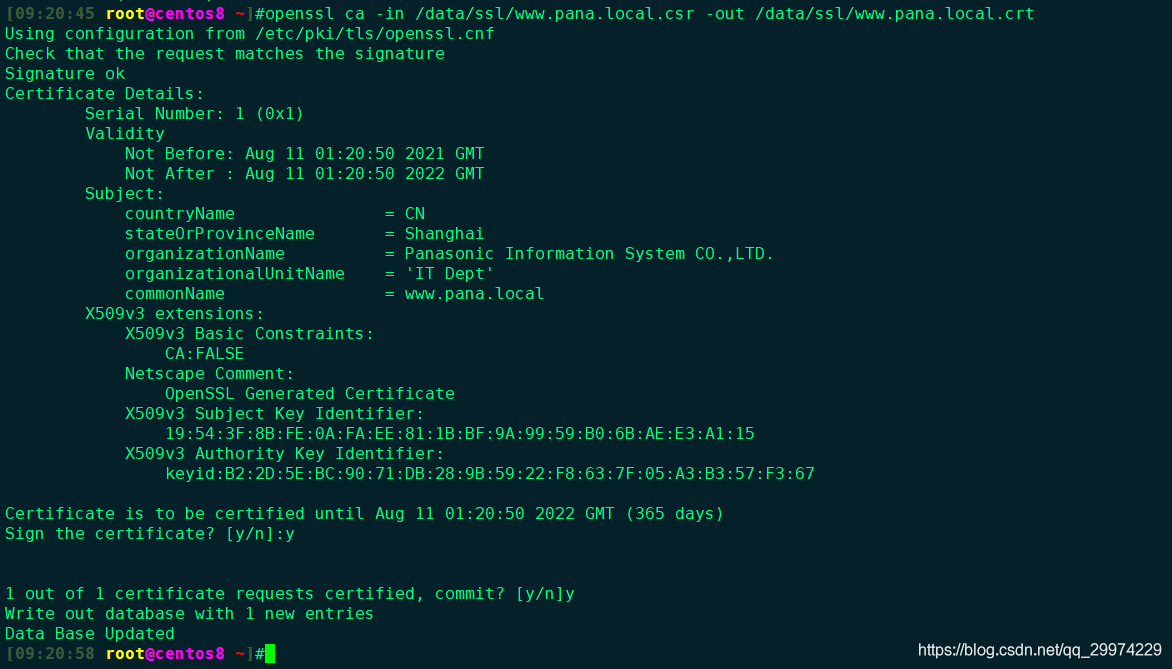
openssl ca -in /data/ssl/www.pana.local.csr -out /data/ssl/www.pana.local.crt
[09:20:45 root@centos8 ~]#openssl ca -in /data/ssl/www.pana.local.csr -out /data/ssl/www.pana.local.crt
Using configuration from /etc/pki/tls/openssl.cnf
Check that the request matches the signature
Signature ok
Certificate Details:
        Serial Number: 1 (0x1)
        Validity
            Not Before: Aug 11 01:20:50 2021 GMT
            Not After : Aug 11 01:20:50 2022 GMT
        Subject:
            countryName               = CN
            stateOrProvinceName       = Shanghai
            organizationName          = Panasonic Information System CO.,LTD.
            organizationalUnitName    = 'IT Dept'
            commonName                = www.pana.local
        X509v3 extensions:
            X509v3 Basic Constraints:
                CA:FALSE
            Netscape Comment:
                OpenSSL Generated Certificate
            X509v3 Subject Key Identifier:
                19:54:3F:8B:FE:0A:FA:EE:81:1B:BF:9A:99:59:B0:6B:AE:E3:A1:15
            X509v3 Authority Key Identifier:
                keyid:B2:2D:5E:BC:90:71:DB:28:9B:59:22:F8:63:7F:05:A3:B3:57:F3:67

Certificate is to be certified until Aug 11 01:20:50 2022 GMT (365 days)
Sign the certificate? [y/n]:y


1 out of 1 certificate requests certified, commit? [y/n]y
Write out database with 1 new entries
Data Base Updated
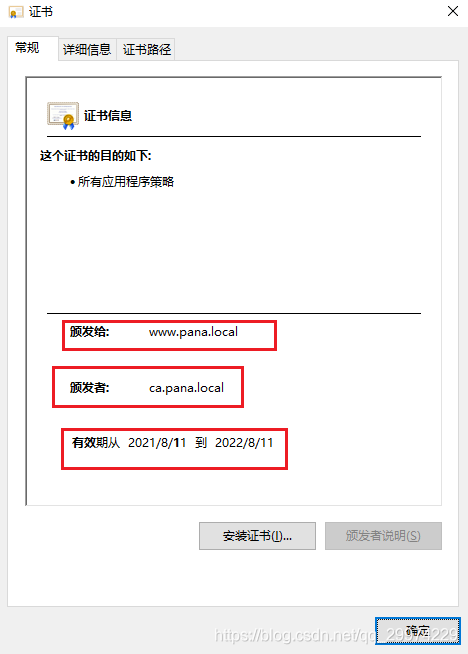
4.1 查看颁发证书信息
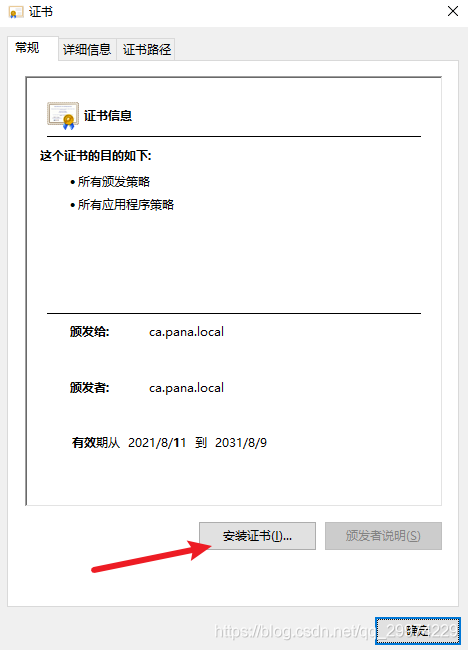
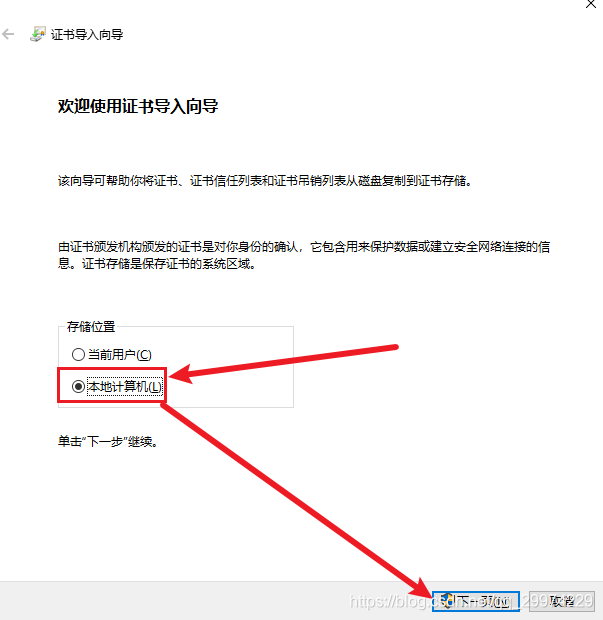
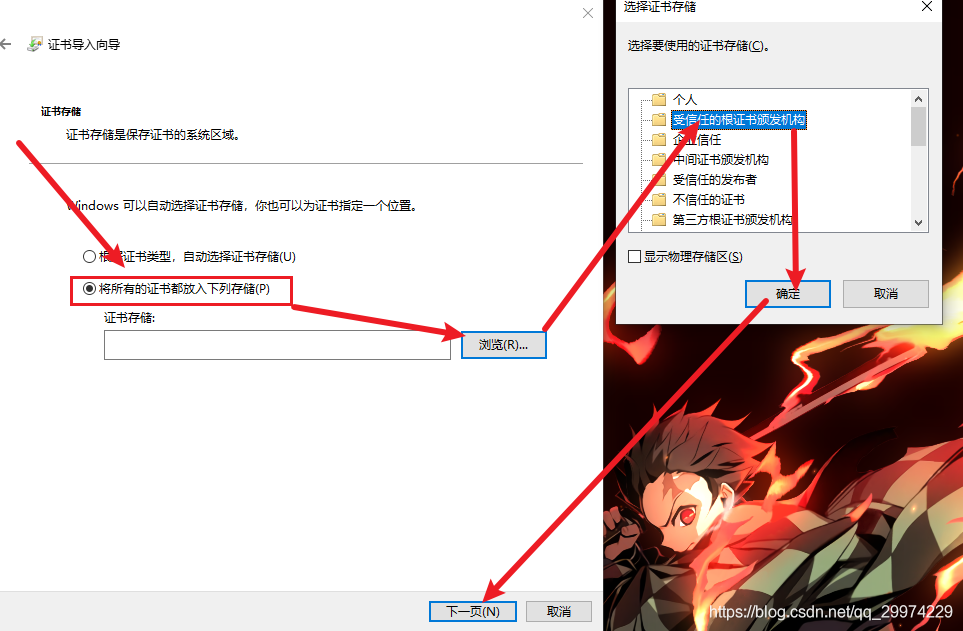
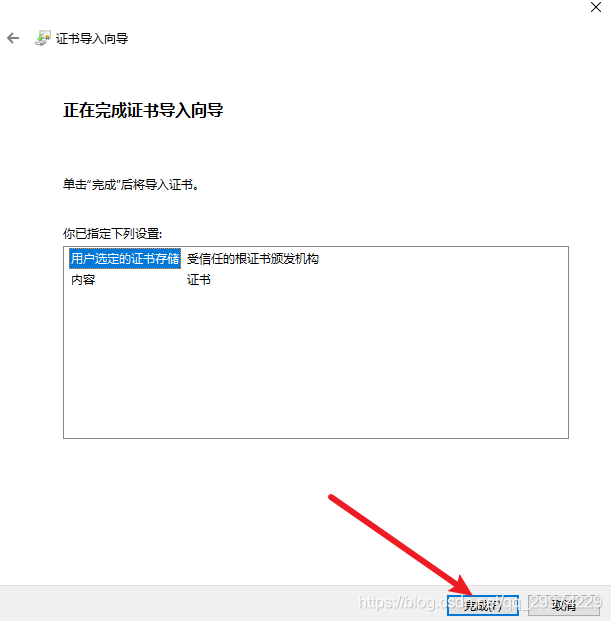
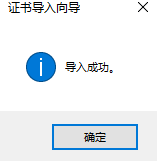
4.2 将根证书导入受信任的组织
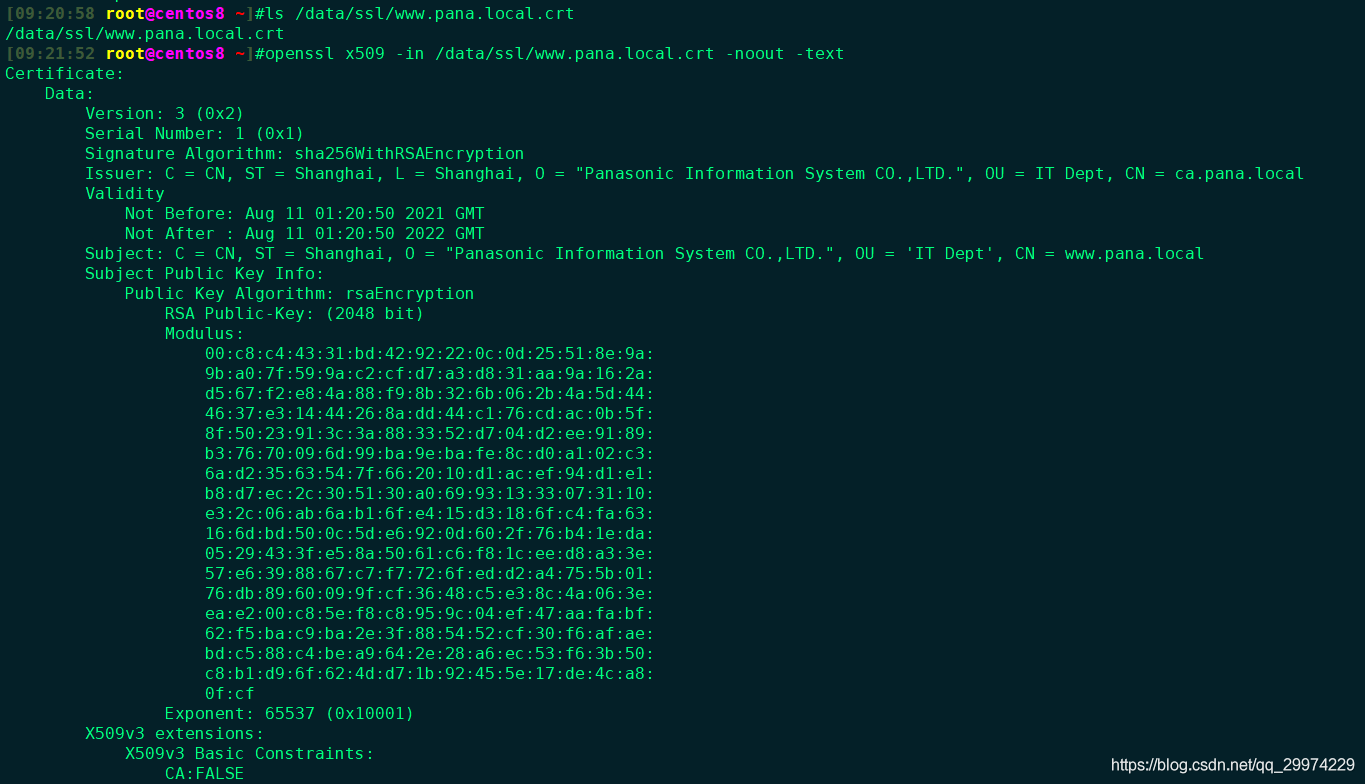
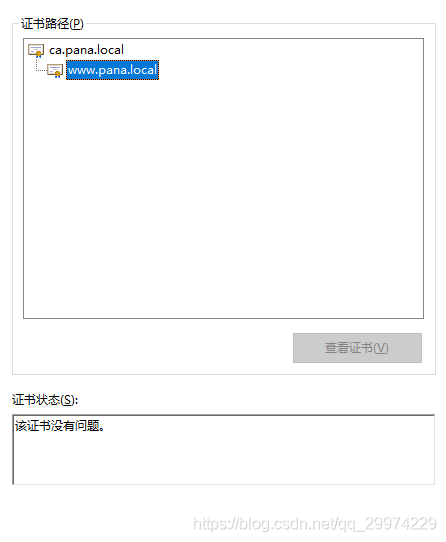
4.3 查看www证书

5 结束
到此证书颁发已经完成,可以将证书绑定到需要的软件上即可.
本文内容由网友自发贡献,版权归原作者所有,本站不承担相应法律责任。如您发现有涉嫌抄袭侵权的内容,请联系:hwhale#tublm.com(使用前将#替换为@)