在CentOS 7中安装Nginx。
当使用以下命令安装Nginx时,发现无法安装成功。
yum install -y nginx
[如果出现没有可用软件包]需要做一点处理。
安装Nginx源
执行以下命令:
rpm -ivh http://nginx.org/packages/centos/7/noarch/RPMS/nginx-release-centos-7-0.el7.ngx.noarch.rpm
安装该rpm后,我们就能在/etc/yum.repos.d/ 目录中看到一个名为nginx.repo 的文件。
安装Nginx
安装完Nginx源后,就可以正式安装Nginx了。
yum install -y nginx
Nginx默认目录
输入命令:
whereis nginx
即可看到类似于如下的内容:
nginx: /usr/sbin/nginx /usr/lib64/nginx /etc/nginx /usr/share/nginx
以下是Nginx的默认路径:
(1) Nginx配置路径:/etc/nginx/
(2) PID目录:/var/run/nginx.pid
(3) 错误日志:/var/log/nginx/error.log
(4) 访问日志:/var/log/nginx/access.log
(5) 默认站点目录:/usr/share/nginx/html
事实上,只需知道Nginx配置路径,其他路径均可在/etc/nginx/nginx.conf 以及/etc/nginx/conf.d/default.conf 中查询到。
2、通过压缩包进行安装
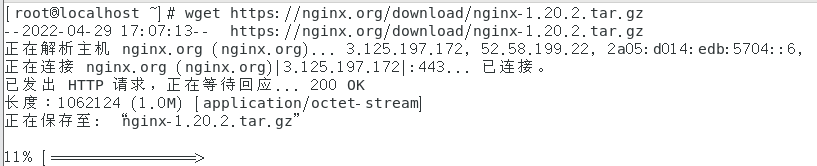
1、下载安装包 nginx: download

右键,复制链接地址,在liunx中使用 wget获取【我是在 root 根目录下执行的下载,他会下载到root目录下】
2、解压缩【我将压缩文件剪贴到了 /root/share/nginx目录下】

[root@localhost share]# mkdir nginx
[root@localhost share]# mv /root/nginx-1.20.2.tar.gz nginx
[root@localhost share]# ls
app  centos  nginx  webapp
[root@localhost share]# ls nginx
nginx-1.20.2.tar.gz
[root@localhost share]# cd nginx
[root@localhost nginx]# tar -zxf nginx-1.20.2.tar.gz
[root@localhost nginx]# ls
nginx-1.20.2  nginx-1.20.2.tar.gz

3、进入箭头所指的文件夹

4、通过 ./configure 进行nginx配置
./configure --prefix=/usr/share/nginx --sbin-path=/usr/sbin/nginx --modules-path=/usr/lib64/nginx/modules --conf-path=/etc/nginx/nginx.conf --error-log-path=/var/log/nginx/error.log --http-log-path=/var/log/nginx/access.log --pid-path=/run/nginx.pid --lock-path=/run/lock/subsys/nginx --user=nginx --group=nginx
按下enter键,执行

5、编译 并 安装 【一次执行两个指令】
make && make install

如果出现上述问题,说明缺少依赖,安装依赖
执行
yum -y install gcc openssl openssl-devel pcre-deve
再次执行 ./configure 进行基本配置
./configure --prefix=/usr/share/nginx --sbin-path=/usr/sbin/nginx --modules-path=/usr/lib64/nginx/modules --conf-path=/etc/nginx/nginx.conf --error-log-path=/var/log/nginx/error.log --http-log-path=/var/log/nginx/access.log --pid-path=/run/nginx.pid --lock-path=/run/lock/subsys/nginx --user=nginx --group=nginx
再次编译 并 安装 【一次执行两个指令】,本次就不会报错了
make && make install

这样压缩包安装就OK了,在这里建议使用压缩包安装,因为yum安装找不到 ./configure 目录,那么我们无法添加 ssl 和 stream 支持。
Nginx 常用命令
(1) 启动:
nginx
(2) 测试Nginx配置是否正确:
nginx -t
(3) 优雅重启:
nginx -s reload
安装Nginx后的注意事项:
Nginx默认使用80端口,因为Linux有防火墙,因此,我们需要查看 80 端口是否开启,如果没有开启,需要开启
1、查看开放的端口信息
irewall-cmd --list-all

2、开启 80 端口
sudo firewall-cmd --add-port=80/tcp --permanent

3、重启防火墙,使增加的端口生效
firewall-cmd --reload
4、查看nginx的相关路径信息
whereis nginx

我们要想执行Nginx命令,就必须进入 红圈 内的路径,这个路径不同的操作系统可能不一致
5、查看Nginx 的版本信息
[root@localhost sbin]# cd /usr/sbin
[root@localhost sbin]# ./nginx -v
nginx version: nginx/1.20.1
6、修改Nginx配置,因为我的linux 80 端口被占用,因此,我需要使用其他端口

Nginx 的配置文件放在了这个目录下

修改配置文件,80 改成 8001

7、防火墙开通 8001 端口 并重启防火墙

8、重启、停止、开启Nginx 相关指令
[root@localhost nginx]# cd /usr/sbin
[root@localhost sbin]# ./nginx                 --启动Nginx
[root@localhost sbin]# ./nginx -s stop         --关闭Ngix
[root@localhost sbin]# ./nginx
[root@localhost sbin]# ./nginx -s reload    --重加载Nginx  [修改配置文件后,必须执行,否则不生效]
9、访问 8001 端口 我的: http://192.168.136.135:8001/

怎么变成了 welcome to centos 了?这其实是nginx的欢迎页面(每个版本的nginx各不相同),这并不代表nginx没有正常启动, 我们可以查看 /usr/share/nginx/html目录下的index.html 的内容,判断Nginx是否正确启动

OK,截止到这儿,Nginx安装、启动成功
设置Nginx服务自启动【前提是你的nginx 已经启动,80端口可访问】
1、在 /lib/systemd/system 目录添加 nginx.service 文件
#进入自启文件目录
cd /lib/systemd/system
#自定义nginx自启文件
touch nginx.service
2、编辑nginx.service
#编辑自启文件
vi nginx.service
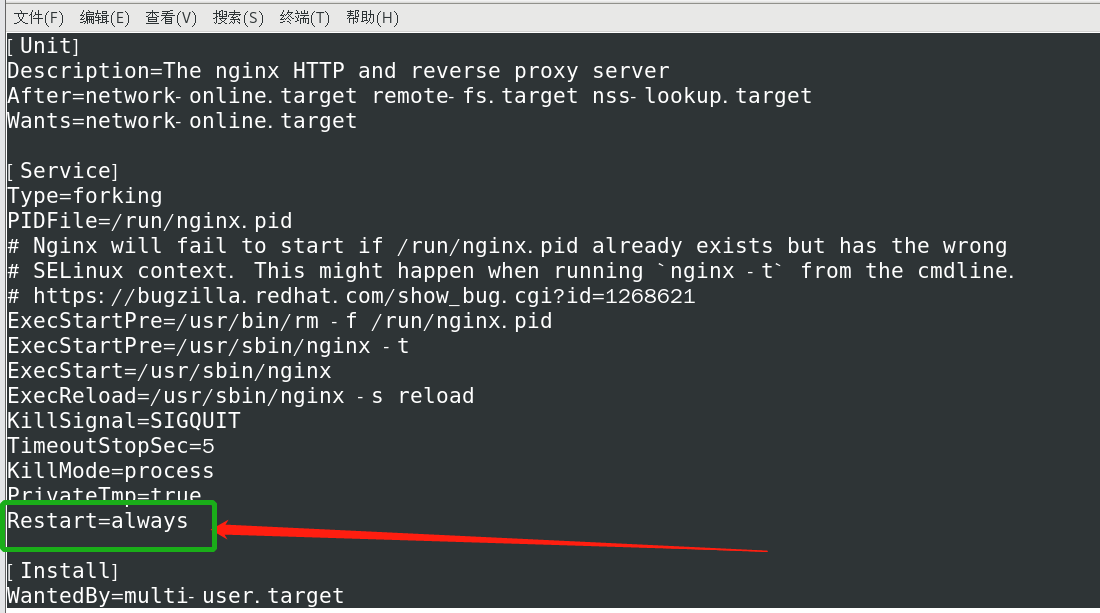
3、添加一下内容, Restart=always 【如果是手动安装,直接复制粘贴,并按照下面的步骤一步步执行】

[Unit]
Description=The nginx HTTP and reverse proxy server
After=network-online.target remote-fs.target nss-lookup.target
Wants=network-online.target

[Service]
Type=forking
PIDFile=/run/nginx.pid
# Nginx will fail to start if /run/nginx.pid already exists but has the wrong
# SELinux context. This might happen when running `nginx -t` from the cmdline.
# https://bugzilla.redhat.com/show_bug.cgi?id=1268621
ExecStartPre=/usr/bin/rm -f /run/nginx.pid
ExecStartPre=/usr/sbin/nginx -t
ExecStart=/usr/sbin/nginx
ExecReload=/usr/sbin/nginx -s reload
KillSignal=SIGQUIT
TimeoutStopSec=5
KillMode=process
PrivateTmp=true
Restart=always

[Install]
WantedBy=multi-user.target

4、设置开机自启
# 设置开机启动
systemctl enable nginx

5、其它命令

# 启动 nginx
systemctl start nginx
# 停止
systemctl stop nginx
# 加载配置文件
systemctl reload nginx

6、关闭虚拟机
init 0
7、开机,输入 whereis nginx ,测试是否设置成功

设置成功,over