1.新建远程仓库
下载和安装git(傻瓜方式next)


登录或注册账号

进入界面创建仓库


1.2添加ssh公钥并下载项目


用vscode打开随便建一个文件

1.3git创建分支和切换分支
相当于分支是队员们的一套代码,主支是组长的,队员在分支的代码编写不影响主支,分支的队员把代码写好了最后交给主支组长合并就可以了


切换分支 之前必须先把修改的代码提交

合并中的代码冲突解决(同一个文件的同一行代码不相同)

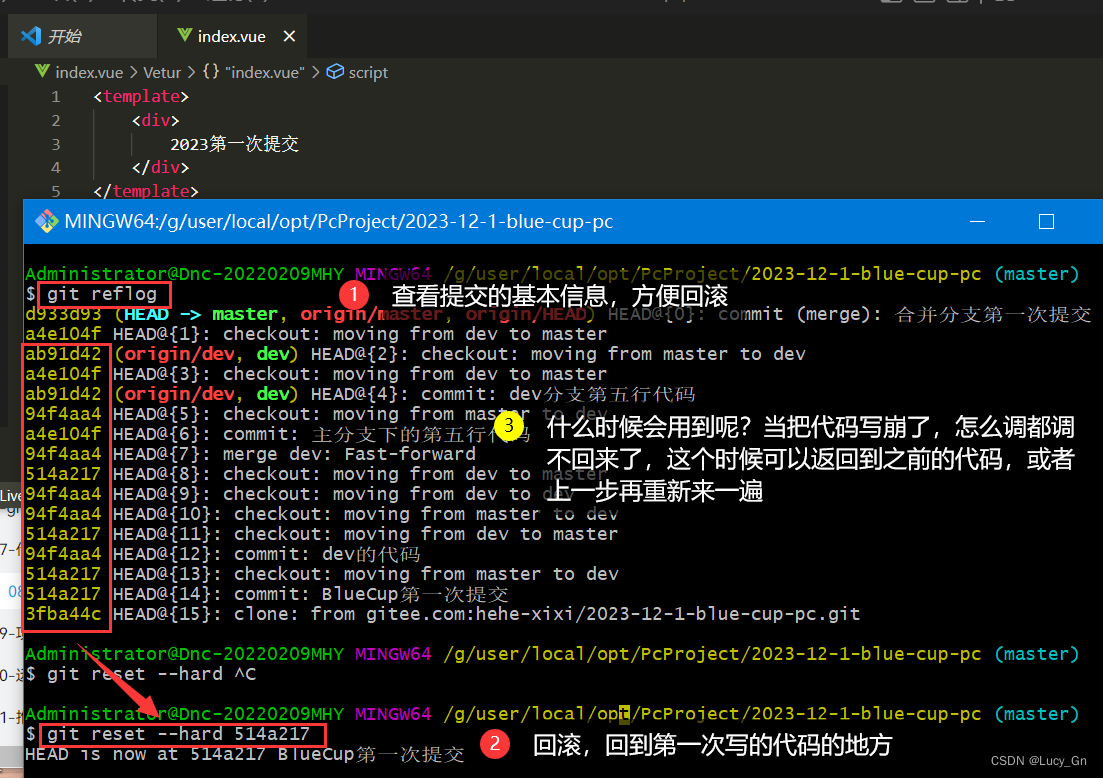
git reset --hard版本号实现代码回滚

总结:
1.工作区(git add . )-> 暂存区(git commit -m "描述") ->本地仓库(git push) ->远程仓库(git pull) ->工作区
2.
git init
git config --global user.name "ydyr"
git config --global user.email "ydyr@163.com"
git add .
git commit -m "第一次提交"
git push origin master
如有错误,愿各位大佬指错,别忘记点赞收藏加关注噢!!!
你们的关注是我创作的最大动力。
一、git作用
1.不会生成新的文件,只会在源文件的基础上修改。
2.在这维护的几年间中,不会有成千上万文件,只会有一个文件。
3.所有的更改信息都会记录在版本控制系统里,如果想回到之前的版本,只要执行对应的操作
4.协同合作 :在他改完后能知道他最新的情况,并再在他的基础上修改
二、git安装
1.找到git官网,直接找到对应的版本进行默认安装
2.检测是否安装成功(右击git bash here)git --version

3.简单配置-----查看设置好的配置信息(git config --global --list)

3.1简单配置-----重新设置用户名和邮箱

4.建立git仓库--------已经存在的项目


4.1再重新建一个项目

4.3对某一个仓库进行配置

git config --local 只对仓库有效
git config --global只对登录用户仓库有效
git config --system 对系统的所有用户有效
5.提交版本信息


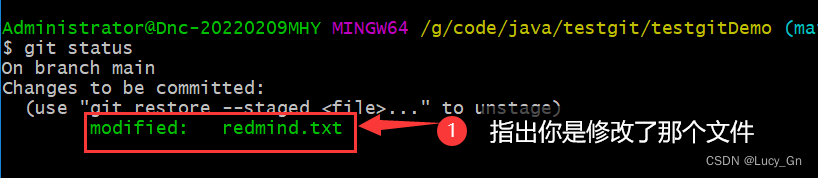
版本状态查看

修改了的文件


git push提交上去就ok了