
简介
当开始一个新项目的时候,有一个很重要的步骤就是确定我们的 APP 首页框架,也就是用户从桌面点击 APP 图标,进入 APP 首页的时候展示给用户的框架,比如微信,展示了有四个 Tab ,分别对应不同的板块(微信、通讯录、发现、我),现在市面出了少部分的 Material Design 风格的除外,大部分都是这样的一个框架,称之为底部导航栏。

TabLayout + Fragment
1. 效果图

2. 布局文件
<?xml version="1.0" encoding="utf-8"?>
<LinearLayout xmlns:android="http://schemas.android.com/apk/res/android"
    xmlns:app="http://schemas.android.com/apk/res-auto"
    xmlns:tools="http://schemas.android.com/tools"
    android:layout_width="match_parent"
    android:layout_height="match_parent"
    android:orientation="vertical"
    tools:context=".TabLayoutActivity">

    <FrameLayout
        android:id="@+id/home_container"
        android:layout_width="match_parent"
        android:layout_height="0dp"
        android:layout_weight="1" />

    <View android:layout_width="match_parent"
        android:layout_height="0.5dp"
        android:alpha="0.6"
        android:background="@android:color/darker_gray"/>

    <com.google.android.material.tabs.TabLayout
        android:id="@+id/bottom_tab_layout"
        android:layout_width="match_parent"
        android:layout_height="50dp"
        app:tabIndicatorHeight="0dp"
        app:tabSelectedTextColor="@android:color/black"
        app:tabTextColor="@android:color/darker_gray"/>


</LinearLayout>
3. 代码
public class TabLayoutActivity extends AppCompatActivity {
    @BindView(R.id.bottom_tab_layout)
    TabLayout mTabLayout;

    private Fragment[]mFragmensts;

    @Override
    protected void onCreate(Bundle savedInstanceState) {
        super.onCreate(savedInstanceState);
        setContentView(R.layout.activity_tab_layout);
        ButterKnife.bind(this);
        mFragmensts = DataGenerator.getFragments("TabLayout Tab");

        initView();
    }

    private void initView() {
        mTabLayout.addOnTabSelectedListener(new TabLayout.OnTabSelectedListener() {
            @Override
            public void onTabSelected(TabLayout.Tab tab) {
                onTabItemSelected(tab.getPosition());

                for (int i=0;i<mTabLayout.getTabCount();i++){
                    View view = mTabLayout.getTabAt(i).getCustomView();
                    ImageView icon = (ImageView) view.findViewById(R.id.tab_content_image);
                    TextView text = (TextView) view.findViewById(R.id.tab_content_text);
                    if(i == tab.getPosition()){
                        icon.setImageResource(DataGenerator.mTabResPressed[i]);
                        text.setTextColor(getResources().getColor(android.R.color.black));
                    }else{
                        icon.setImageResource(DataGenerator.mTabRes[i]);
                        text.setTextColor(getResources().getColor(android.R.color.darker_gray));
                    }
                }


            }

            @Override
            public void onTabUnselected(TabLayout.Tab tab) {

            }

            @Override
            public void onTabReselected(TabLayout.Tab tab) {

            }
        });

        for(int i=0;i<4;i++){
            mTabLayout.addTab(mTabLayout.newTab().setCustomView(DataGenerator.getTabView(this,i)));
        }
    }

    private void onTabItemSelected(int position){
        Fragment fragment = null;
        switch (position){
            case 0:
                fragment = mFragmensts[0];
                break;
            case 1:
                fragment = mFragmensts[1];
                break;

            case 2:
                fragment = mFragmensts[2];
                break;
            case 3:
                fragment = mFragmensts[3];
                break;
        }
        if(fragment!=null) {
            getSupportFragmentManager().beginTransaction().replace(R.id.home_container,fragment).commit();
        }
    }
}
推荐阅读 【Kevin Learn Android】–>TabLayout
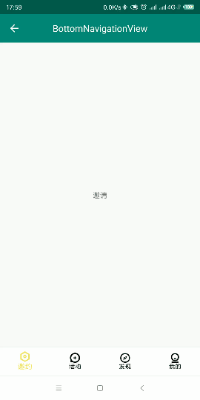
BottomNavigationView + Fragment
1. 效果图

2. 布局文件
<?xml version="1.0" encoding="utf-8"?>
<RelativeLayout xmlns:android="http://schemas.android.com/apk/res/android"
    xmlns:tools="http://schemas.android.com/tools"
    xmlns:app="http://schemas.android.com/apk/res-auto"
    android:layout_width="match_parent"
    android:layout_height="match_parent"
    tools:context=".MainActivity">

    <FrameLayout
        android:id="@+id/fl_content"
        android:layout_width="match_parent"
        android:layout_height="match_parent"
        android:layout_above="@id/bottomNavigationView" />

    <com.google.android.material.bottomnavigation.BottomNavigationView
        android:id="@+id/bottomNavigationView"
        android:layout_width="match_parent"
        android:layout_height="wrap_content"
        android:background="@color/white"
        android:layout_alignParentBottom="true"
        app:itemTextColor="@drawable/bottom_navigation_item_selector"
        app:menu="@menu/main_bottom_navigation" />

</RelativeLayout>
3. main_bottom_navigation.xml
<?xml version="1.0" encoding="utf-8"?>
<menu xmlns:android="http://schemas.android.com/apk/res/android"
    xmlns:app="http://schemas.android.com/apk/res-auto">
    <item
        android:id="@+id/menu_message"
        android:enabled="true"
        android:icon="@drawable/sel_home"
        android:title="首页"
        app:showAsAction="ifRoom" />
    <item
        android:id="@+id/menu_contacts"
        android:enabled="true"
        android:icon="@drawable/sel_mine"
        android:title="我的"
        app:showAsAction="ifRoom" />
</menu>
4. 代码
public class MainActivity extends BaseActivity {
    private HomeFragment mHomeFragment = HomeFragmentFactory.getInstance().getHomeFragment();
    private MineFragment mMineFragment = HomeFragmentFactory.getInstance().getMineFragment();

    private List<Fragment> mFragments = new ArrayList<>();

    @BindView(R.id.bottomNavigationView)
    BottomNavigationView mNavigationView;

    @Override
    public int getLayoutId() {
        return R.layout.activity_main;
    }

    @Override
    public void initView() {
        mFragments.add(mHomeFragment);
        mFragments.add(mMineFragment);

        mNavigationView.setOnNavigationItemSelectedListener(new BottomNavigationView.OnNavigationItemSelectedListener() {
            @Override
            public boolean onNavigationItemSelected(@NonNull MenuItem item) {
                switchFragment(item.getItemId());
                return true;
            }
        });

        switchFragment(R.id.menu_message);
    }

    /**
     * 切换fragment
     *
     * @param id
     * @return
     */
    private void switchFragment(int id) {
        Fragment fragment = null;
        switch (id) {
            case R.id.menu_message:
                fragment = mFragments.get(0);
                break;

            case R.id.menu_contacts:
                fragment = mFragments.get(1);
                break;

            default:
                break;
        }
        if (fragment != null) {
            getSupportFragmentManager().beginTransaction().replace(R.id.fl_content,fragment).commit();
        }
    }


}
推荐阅读:【Kevin Learn Android】–>BottomNavigationView
RadioGroup + ViewPager2 + Fragment
1. 效果图

2. 布局文件
style.xml
	<style name="Custom" />

    <style name="Custom.TabRadioButton">
        <item name="android:layout_width">0dp</item>
        <item name="android:layout_weight">1</item>
        <item name="android:layout_height">match_parent</item>
        <item name="android:padding">5dp</item>
        <item name="android:gravity">center</item>
        <item name="android:button">@null</item>
        <item name="android:textSize">14sp</item>
        <item name="android:textColor">@color/black</item>
    </style>
<?xml version="1.0" encoding="utf-8"?>
<LinearLayout xmlns:android="http://schemas.android.com/apk/res/android"
    xmlns:app="http://schemas.android.com/apk/res-auto"
    xmlns:tools="http://schemas.android.com/tools"
    android:layout_width="match_parent"
    android:layout_height="match_parent"
    android:orientation="vertical"
    tools:context=".TabLayoutActivity">

    <androidx.viewpager2.widget.ViewPager2
        android:id="@+id/vp_container"
        android:layout_width="match_parent"
        android:layout_height="0dp"
        android:layout_weight="1" />

    <View android:layout_width="match_parent"
        android:layout_height="0.5dp"
        android:alpha="0.6"
        android:background="@android:color/darker_gray"/>

    <RadioGroup
        android:id="@+id/rg_tabs"
        android:layout_width="match_parent"
        android:layout_height="56dp"
        android:background="#dcdcdc"
        android:orientation="horizontal">

        <RadioButton
            android:id="@+id/tab_home"
            style="@style/Custom.TabRadioButton"
            android:checked="true"
            android:drawableTop="@drawable/tab_home_selector"
            android:text="首页" />

        <RadioButton
            android:id="@+id/tab_discover"
            style="@style/Custom.TabRadioButton"
            android:drawableTop="@drawable/tab_discovery_selector"
            android:text="发现" />

        <RadioButton
            android:id="@+id/tab_attention"
            style="@style/Custom.TabRadioButton"
            android:drawableTop="@drawable/tab_attention_selector"
            android:text="关注" />

        <RadioButton
            android:id="@+id/tab_profile"
            style="@style/Custom.TabRadioButton"
            android:drawableTop="@drawable/tab_profile_selector"
            android:text="我的" />

    </RadioGroup>
</LinearLayout>
3. MyPagerAdapter.java
public class MyPagerAdapter extends FragmentStateAdapter {
    private List<Class> fragments;

    public MyPagerAdapter(FragmentActivity fragmentActivity) {
        super(fragmentActivity);
        if (fragments == null) {
            fragments = new ArrayList<>();
        }
    }

    public void addFragment(Fragment fragment) {
        if (fragments != null) {
            fragments.add(fragment.getClass());
        }
    }

    @NonNull
    @Override
    public Fragment createFragment(int position) {
        try {
            return (Fragment) fragments.get(position).newInstance();
        } catch (IllegalAccessException e) {
            e.printStackTrace();
        } catch (InstantiationException e) {
            e.printStackTrace();
        }
        return null;
    }

    @Override
    public int getItemCount() {
        return fragments == null ? 0 : fragments.size();
    }
}
4. TabLayoutActivity.java
public class TabLayoutActivity extends AppCompatActivity {
    @BindView(R.id.rg_tabs)
    RadioGroup mRadioGroup;

    @BindView(R.id.vp_container)
    ViewPager2 mViewPager2;

    @BindView(R.id.tab_home)
    RadioButton mRadioHome;

    @BindView(R.id.tab_discover)
    RadioButton mRadioDiscover;

    @BindView(R.id.tab_attention)
    RadioButton mRadioAttention;

    @BindView(R.id.tab_profile)
    RadioButton mRadioProfile;

    private MyPagerAdapter mAdapter;

    @Override
    protected void onCreate(Bundle savedInstanceState) {
        super.onCreate(savedInstanceState);
        setContentView(R.layout.activity_tab_layout);
        ButterKnife.bind(this);
        initView();
    }

    private void initView() {
        mViewPager2.registerOnPageChangeCallback(new ViewPager2.OnPageChangeCallback() {
            @Override
            public void onPageSelected(int position) {
                super.onPageSelected(position);
                switch (position) {
                    case 0:
                        mRadioHome.setChecked(true);
                        break;

                    case 1:
                        mRadioDiscover.setChecked(true);
                        break;

                    case 2:
                        mRadioAttention.setChecked(true);
                        break;

                    case 3:
                        mRadioProfile.setChecked(true);
                        break;

                    default:
                        break;
                }
            }
        });

        mRadioGroup.setOnCheckedChangeListener(new RadioGroup.OnCheckedChangeListener() {
            @Override
            public void onCheckedChanged(RadioGroup radioGroup, int checkId) {
                switch (checkId) {
                    case R.id.tab_home:
                        mViewPager2.setCurrentItem(0);
                        break;

                    case R.id.tab_discover:
                        mViewPager2.setCurrentItem(1);
                        break;

                    case R.id.tab_attention:
                        mViewPager2.setCurrentItem(2);
                        break;

                    case R.id.tab_profile:
                        mViewPager2.setCurrentItem(3);
                        break;

                    default:
                        break;
                }
            }
        });
        mAdapter = new MyPagerAdapter(this);
        mViewPager2.setAdapter(mAdapter);
        mAdapter.addFragment(new HomeFragment());
        mAdapter.addFragment(new DiscoveryFragment());
        mAdapter.addFragment(new AttentionFragment());
        mAdapter.addFragment(new ProfileFragment());
        mViewPager2.setCurrentItem(0);
    }
}
带页面跳转功能的底部导航
1. 效果图

2. 布局文件
<?xml version="1.0" encoding="utf-8"?>
<RelativeLayout xmlns:android="http://schemas.android.com/apk/res/android"
    xmlns:app="http://schemas.android.com/apk/res-auto"
    xmlns:tools="http://schemas.android.com/tools"
    android:layout_width="match_parent"
    android:layout_height="match_parent"
    tools:context=".TabLayoutActivity">

    <FrameLayout
        android:id="@+id/fragment_container"
        android:layout_width="match_parent"
        android:layout_height="match_parent"
        android:layout_above="@+id/rg_tabs" />

    <RadioGroup
        android:id="@+id/rg_tabs"
        android:layout_width="match_parent"
        android:layout_height="56dp"
        android:background="#dcdcdc"
        android:layout_alignParentBottom="true"
        android:orientation="horizontal">

        <RadioButton
            android:id="@+id/tab_home"
            style="@style/Custom.TabRadioButton"
            android:checked="true"
            android:drawableTop="@drawable/tab_home_selector"
            android:text="首页" />

        <RadioButton
            android:id="@+id/tab_discover"
            style="@style/Custom.TabRadioButton"
            android:drawableTop="@drawable/tab_discovery_selector"
            android:text="发现" />

        <View style="@style/Custom.TabRadioButton" />

        <RadioButton
            android:id="@+id/tab_attention"
            style="@style/Custom.TabRadioButton"
            android:drawableTop="@drawable/tab_attention_selector"
            android:text="关注" />

        <RadioButton
            android:id="@+id/tab_profile"
            style="@style/Custom.TabRadioButton"
            android:drawableTop="@drawable/tab_profile_selector"
            android:text="我的" />

    </RadioGroup>

    <ImageView
        android:id="@+id/sign_iv"
        android:layout_width="80dp"
        android:layout_height="80dp"
        android:layout_alignParentBottom="true"
        android:layout_centerHorizontal="true"
        android:background="@android:color/transparent"
        android:src="@mipmap/ic_add" />
</RelativeLayout>
3. 代码
public class TabLayoutActivity extends AppCompatActivity {
    @BindView(R.id.rg_tabs)
    RadioGroup mRadioGroup;

    @BindView(R.id.tab_home)
    RadioButton mRadioHome;

    @BindView(R.id.tab_discover)
    RadioButton mRadioDiscover;

    @BindView(R.id.tab_attention)
    RadioButton mRadioAttention;

    @BindView(R.id.tab_profile)
    RadioButton mRadioProfile;

    private List<Fragment> mFragmensts;


    @Override
    protected void onCreate(Bundle savedInstanceState) {
        super.onCreate(savedInstanceState);
        setContentView(R.layout.activity_tab_layout);
        ButterKnife.bind(this);
        mFragmensts = DataGenerator.getFragments("TabLayout Tab");
        initView();
    }

    private void initView() {
        onTabItemSelected(0);
        mRadioGroup.setOnCheckedChangeListener(new RadioGroup.OnCheckedChangeListener() {
            @Override
            public void onCheckedChanged(RadioGroup radioGroup, int checkId) {
                switch (checkId) {
                    case R.id.tab_home:
                        onTabItemSelected(0);
                        break;

                    case R.id.tab_discover:
                        onTabItemSelected(1);
                        break;

                    case R.id.tab_attention:
                        onTabItemSelected(2);
                        break;

                    case R.id.tab_profile:
                        onTabItemSelected(3);
                        break;

                    default:
                        break;
                }
            }
        });
    }

    private void onTabItemSelected(int position){
        Fragment fragment = null;
        switch (position){
            case 0:
                fragment = mFragmensts.get(0);
                break;
            case 1:
                fragment = mFragmensts.get(1);
                break;

            case 2:
                fragment = mFragmensts.get(2);
                break;
            case 3:
                fragment = mFragmensts.get(3);
                break;
        }
        if(fragment!=null) {
            getSupportFragmentManager().beginTransaction().replace(R.id.fragment_container,fragment).commit();
        }
    }


}
PagerBottomTabStrip
BottomNavigation + Fragment
1. 效果图
2. 在 app/build.gradle 中添加:
implementation 'com.ashokvarma.android:bottom-navigation-bar:2.1.0'
3. 布局文件
<?xml version="1.0" encoding="utf-8"?>
<androidx.constraintlayout.widget.ConstraintLayout xmlns:android="http://schemas.android.com/apk/res/android"
    xmlns:app="http://schemas.android.com/apk/res-auto"
    xmlns:tools="http://schemas.android.com/tools"
    android:layout_width="match_parent"
    android:layout_height="match_parent"
    android:orientation="vertical"
    tools:context=".ui.BottomNavigationActivity">

    <include
        android:id="@+id/include4"
        layout="@layout/layout_toolbar"/>

    <FrameLayout
        android:id="@+id/fl_content"
        android:layout_width="match_parent"
        android:layout_height="match_parent"
        app:layout_constraintBottom_toTopOf="@+id/bottom_navigation_bar"
        app:layout_constraintTop_toBottomOf="@+id/include4" />

    <com.ashokvarma.bottomnavigation.BottomNavigationBar
        android:id="@+id/bottom_navigation_bar"
        android:layout_width="match_parent"
        android:layout_height="wrap_content"
        app:layout_constraintBottom_toBottomOf="parent" />
</androidx.constraintlayout.widget.ConstraintLayout>
4. 代码
public class BottomNavigationActivity extends BaseActivity implements BottomNavigationBar.OnTabSelectedListener {
    @BindView(R.id.bottom_navigation_bar)
    BottomNavigationBar mNavigationBar;

    private InviteFragment mInviteFragment = HomeFragmentFactory.getInstance().getInviteFragment();
    private ActivityFragment mActivityFragment = HomeFragmentFactory.getInstance().getActivityFragment();
    private FoundFragment mFoundFragment = HomeFragmentFactory.getInstance().getFoundFragment();
    private MineFragment mMineFragment = HomeFragmentFactory.getInstance().getMineFragment();

    private Fragment currentFragment = new Fragment();
//    private TextBadgeItem mBadgeItem;
    private FragmentManager fm;


    @Override
    protected int getLayoutId() {
        return R.layout.activity_bottom_navigation;
    }

    @Override
    protected void setToolbar() {

    }

    @Override
    protected void initView() {
        setNavTitle(R.string.bottom_navigation);

        fm = getSupportFragmentManager();

        initBottomBar();

    }

    private void initBottomBar() {

        /**
         * 导航基础设置 包括按钮选中效果 导航栏背景色等
         */
        mNavigationBar.setTabSelectedListener(this)
                .setMode(BottomNavigationBar.MODE_FIXED)
                .setBackgroundStyle(BottomNavigationBar.BACKGROUND_STYLE_STATIC)
                .setActiveColor("#F5DF3E")//选中颜色
                .setInActiveColor("#000000")//未选中颜色
                .setBarBackgroundColor("#ffffff");//导航栏背景色
//        mBadgeItem = new TextBadgeItem()
//                .setBorderWidth(2)//Badge的Border(边界)宽度
//                .setBorderColor(Color.BLUE)//Badge的Border颜色
//                .setBackgroundColor(Color.RED)
//                .setTextColor(Color.BLACK)//文本颜色
//                .setGravity(Gravity.RIGHT| Gravity.TOP)//位置,默认右上角
//                .setAnimationDuration(2000)
//                .setHideOnSelect(true)//当选中状态时消失,非选中状态显示
//                .setText("9");

        setInvite();


    }

    /**
     * 切换fragment
     *
     * @param targetFragment
     * @return
     */
    private FragmentTransaction switchFragment(Fragment targetFragment) {
        FragmentTransaction transaction = getSupportFragmentManager().beginTransaction();
        if (!targetFragment.isAdded()) {
            // 第一次使用switchFragment()时currentFragment为null,所以要判断一下
            if (currentFragment != null) {
                transaction.hide(currentFragment);
            }
            transaction.add(R.id.fl_content, targetFragment, targetFragment.getClass().getName());
        } else {
            transaction.hide(currentFragment).show(targetFragment);
        }
        currentFragment = targetFragment;
        return transaction;
    }


    /**
     * 邀请
     */
    private void setInvite() {
        mNavigationBar.clearAll();
        switchFragment(mInviteFragment).commitNowAllowingStateLoss();
        mNavigationBar.addItem(new BottomNavigationItem(R.mipmap.icon_invite_nor,"邀约"))
                .addItem(new BottomNavigationItem(R.mipmap.icon_activity_nor,"活动"))
                .addItem(new BottomNavigationItem(R.mipmap.icon_find_nor,"发现"))
                .addItem(new BottomNavigationItem(R.mipmap.icon_my_nor,"我的"))
                .setFirstSelectedPosition(0)
                .initialise();

    }

    /**
     * 活动
     */
    private void setActivity() {
        mNavigationBar.clearAll();
        switchFragment(mActivityFragment).commitNowAllowingStateLoss();
        mNavigationBar.addItem(new BottomNavigationItem(R.mipmap.icon_invite_nor,"邀约"))
                .addItem(new BottomNavigationItem(R.mipmap.icon_activity_nor,"活动"))
                .addItem(new BottomNavigationItem(R.mipmap.icon_find_nor,"发现"))
                .addItem(new BottomNavigationItem(R.mipmap.icon_my_nor,"我的"))
                .setFirstSelectedPosition(1)
                .initialise();

    }

    /**
     * 发现
     */
    private void setFound() {
        mNavigationBar.clearAll();
        switchFragment(mFoundFragment).commitNowAllowingStateLoss();
        mNavigationBar.addItem(new BottomNavigationItem(R.mipmap.icon_invite_nor,"邀约"))
                .addItem(new BottomNavigationItem(R.mipmap.icon_activity_nor,"活动"))
                .addItem(new BottomNavigationItem(R.mipmap.icon_find_nor,"发现"))
                .addItem(new BottomNavigationItem(R.mipmap.icon_my_nor,"我的"))
                .setFirstSelectedPosition(2)
                .initialise();

    }

    /**
     * 我的
     */
    private void setMine() {
        mNavigationBar.clearAll();
        switchFragment(mMineFragment).commitNowAllowingStateLoss();
        mNavigationBar.addItem(new BottomNavigationItem(R.mipmap.icon_invite_nor,"邀约"))
                .addItem(new BottomNavigationItem(R.mipmap.icon_activity_nor,"活动"))
                .addItem(new BottomNavigationItem(R.mipmap.icon_find_nor,"发现"))
                .addItem(new BottomNavigationItem(R.mipmap.icon_my_nor,"我的"))
                .setFirstSelectedPosition(3)
                .initialise();

    }

    @Override
    public void onTabSelected(int position) {
        FragmentTransaction ft = fm.beginTransaction();
        switch (position) {
            case 0:
                setInvite();
                break;

            case 1:
                setActivity();
                break;

            case 2:
                setFound();
                break;

            case 3:
                setMine();
                break;
        }

    }

    @Override
    public void onTabUnselected(int position) {

    }

    @Override
    public void onTabReselected(int position) {

    }
}
推荐阅读:【第三方开源库】–> BottomNavigation 底部导航栏