缘由 :
本来使用的是 Typora+PicGo+Gitee,但是gitee增加了防盗链,经常发生Typora里图片上传不上去或者图片不显示的问题(真的超级烦人,心态已经崩了,果然“免费的才是最贵的”),所以打算换一个图床。
不选 Github 的原因是 Github 需要经常翻墙,虽然速度虽然不慢,但不流畅,本人本着一切从简的原则,选择了 阿里云图床
-
优点:稳定
-
缺点:花费一点点小钱(6个月4.98元)

不过,我觉得 稳定 这一点就已经胜过一切了。毕竟用了Typora+PicGo+Gitee 的人应该都深有体会。下面介绍详细步骤。
前期准备工作一,下载了 Typora 和Picgo
1.本人 Typora 版本
2.本人Picgo 版本

准备工作二,注册阿里云账号
https://www.aliyun.com/product/oss
注册过程就不再叙述了,相信大家既然都已经用上了 Typora ,注册这种小事根本不在话下。
重要,一定要看一下!!!
我们 打开 PicGo 软件,在 图床设置 里,可以找到 阿里云OSS,如图

我们的目的就是,购买了阿里云的资源包之后,把图中所圈起来的位置都填上,就可以使用啦。
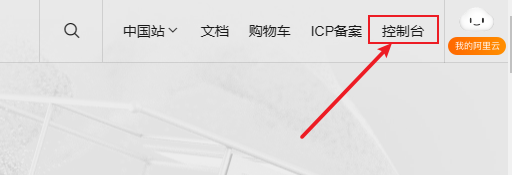
步骤一:点击控制台
右上角
步骤二:选择 对象储存 并开通
左上角

选择 对象储存 OSS

步骤三,点击左侧 概览,点击右侧 创建bucket

步骤四:创建信息
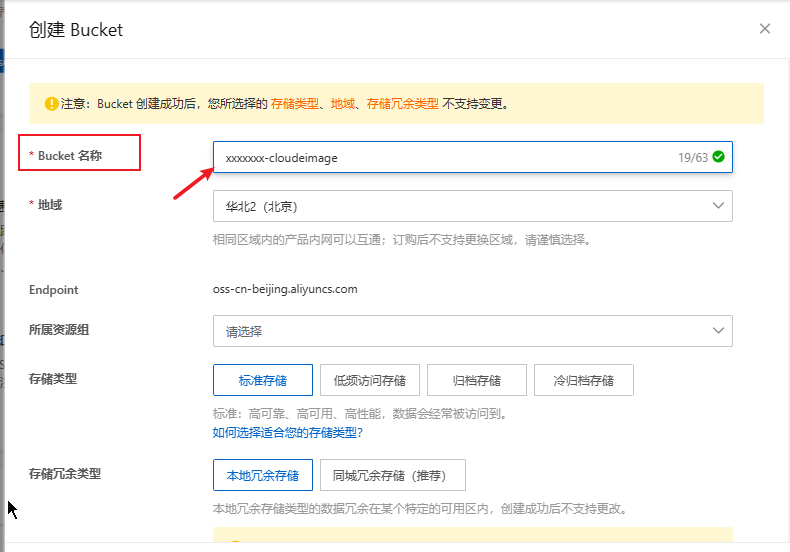
名字随便起,但不能有大写字母。

步骤五:购买资源包
左侧


点击购买即可。
步骤六,设定 KeyId 和 KeySecret

选择继续使用AccessKey,并点击创建accessKey,


在弹出的界面里,记住你的accessKeyId和accessKeySecret
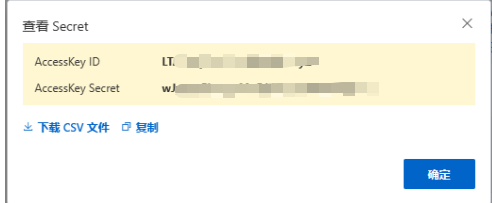
填写到 PicGo 的 KeyId 和 KeySecret 中

步骤七:设定 Bucket ,存储区域,存储路径,自定义域名
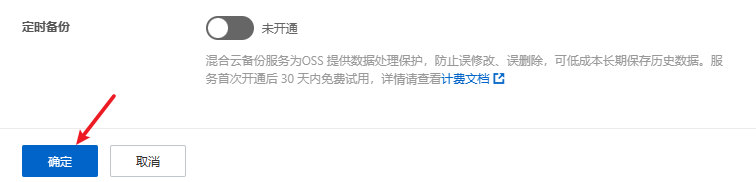
回到之前的oss对象存贮,点击之前创建的bucket,在点击概览。

注意:自定义域名,注意要在前面加 http://或者 https://

点击“确定”,并点击“设置为默认图床”!即可大功告成
步骤8:设置 Typora
打开 Typora
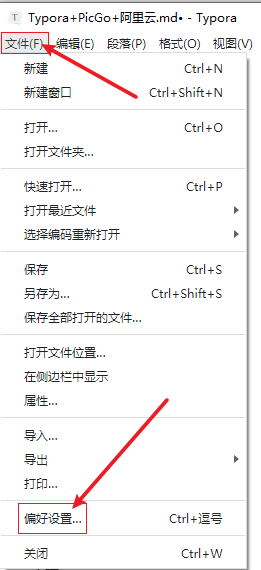

点击 验证图片上传选项


即可大功告成!!!
祝贺你!!!