在windows平台上使用Hyper-V搭建虚拟机集群环境
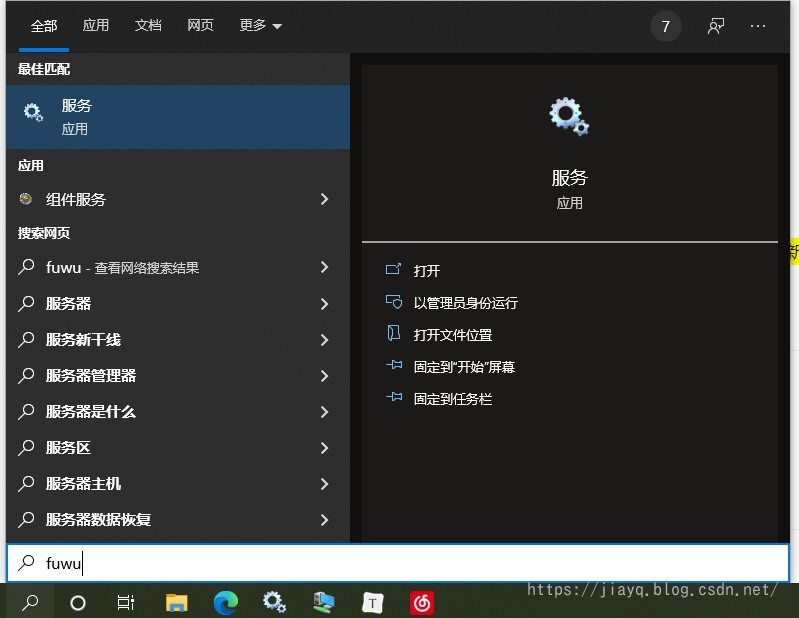
开启windows服务
首先需要启动hyper-v的windows服务
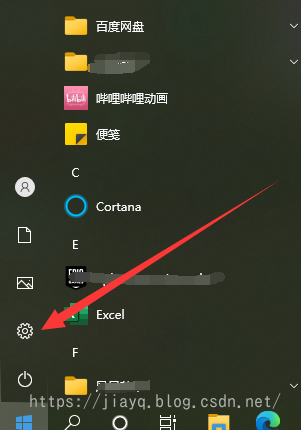
打开windows更新

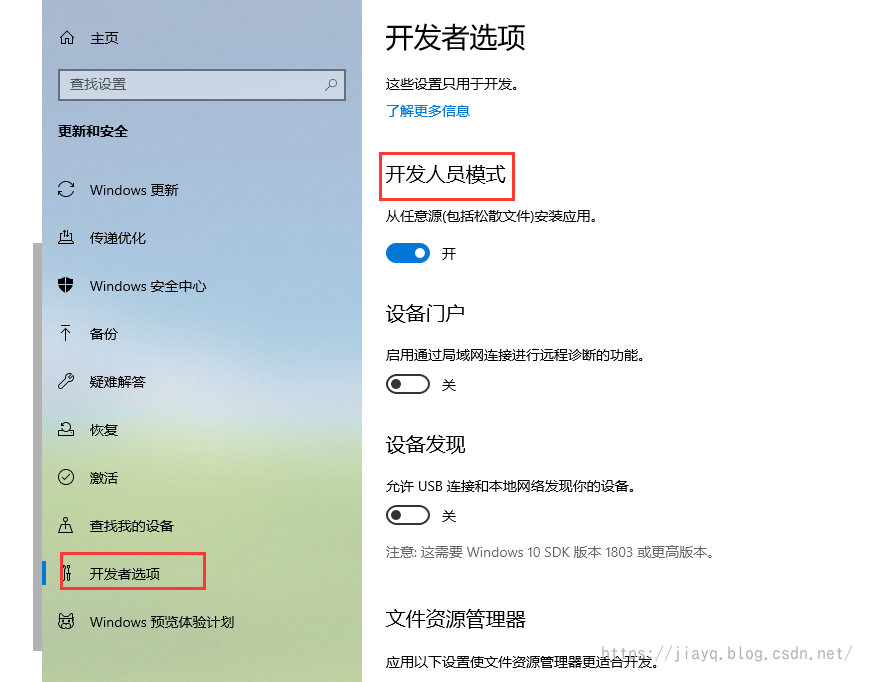
选择开发人员模式
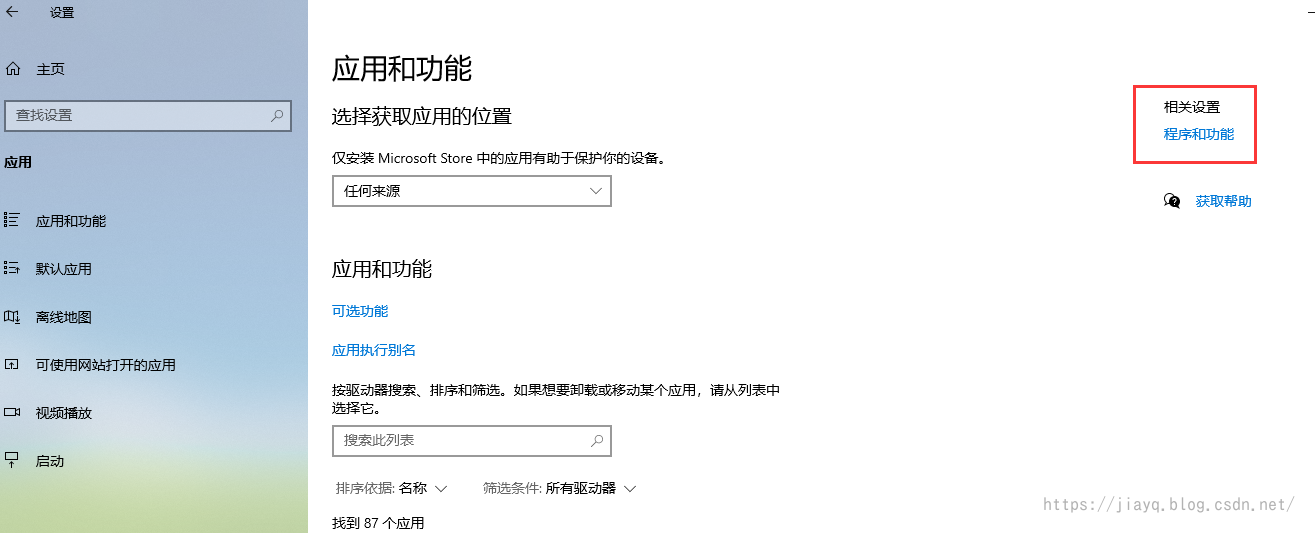
然后选择应用

然后选择【程序和功能】
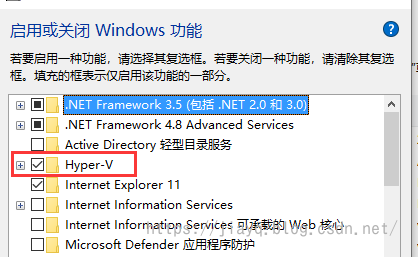
然后选择【启用或关闭windows功能】

把Hyper-V的√选中
重启电脑生效。
如果上述步骤中哪一步没有,请更新windows至最新。
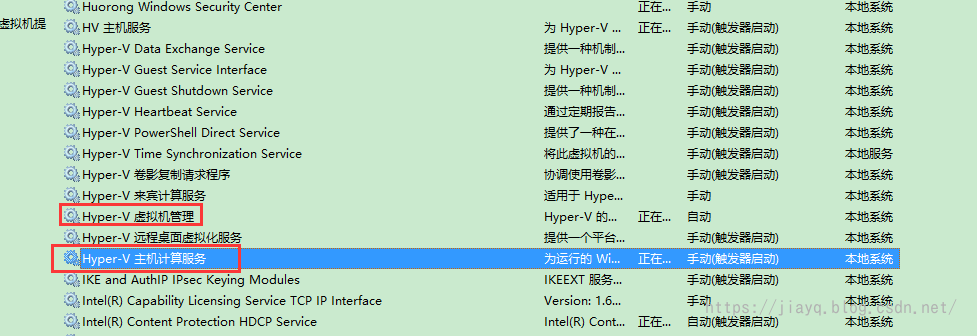
启动服务
打开【服务】管理
手动启动Hyper-V的服务
然后打开Hyper-V的虚拟机创建向导

当出现如下窗口,表示Hyper-V启动成功

下载镜像
下载自己想安装的操作系统,我选择的是centos,The CentOS Project

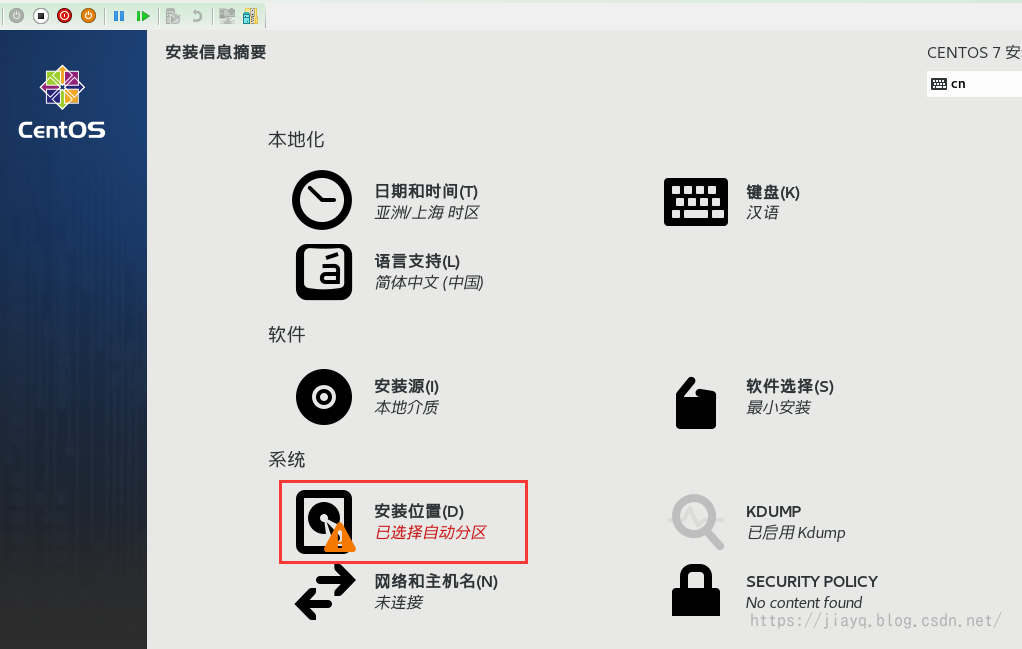
创建虚拟机
在创建虚拟机向导中,选择本地安装源
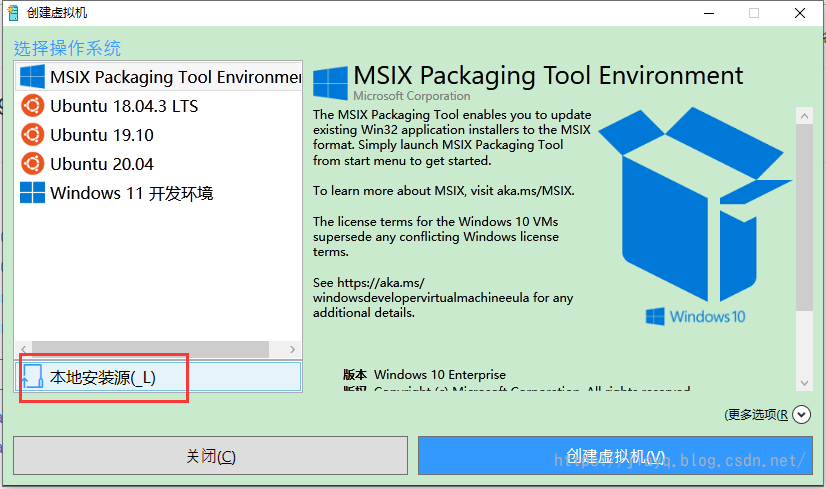
然后更改安装源

选择想要安装的操作系统的镜像文件,如果你安装的操作系统不是windows,请去掉windows的√

接着配置虚拟机的物理资源

内存

处理器

硬盘
默认是虚拟机使用C盘的磁盘空间

使用虚拟硬盘新建向导,自定义位置

选择动态扩展

自己指定存储名字和位置

指定磁盘大小

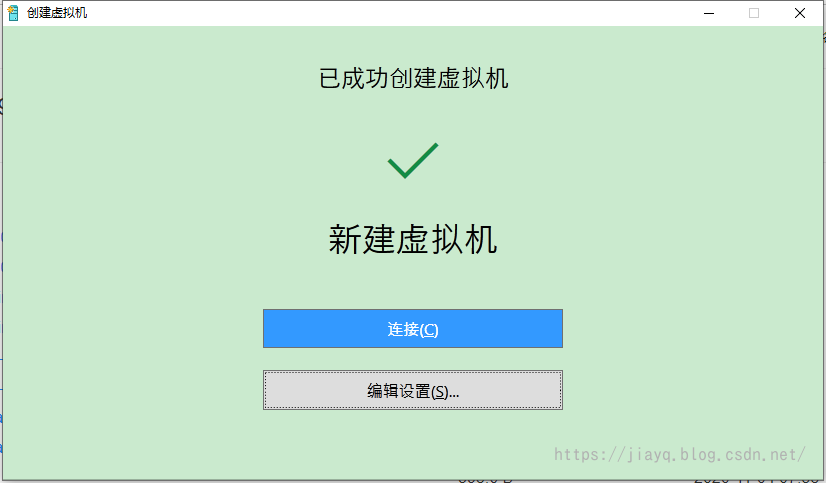
最后完成

虚拟机主机名

集成服务
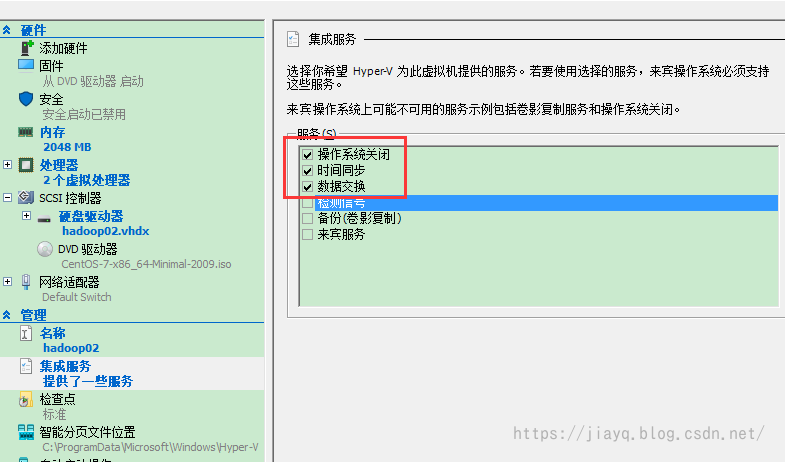
检查点
关闭检查点可以节省资源

智能分页

自动启动
自动启动是指是否物理主机启动时,自动启动虚拟机
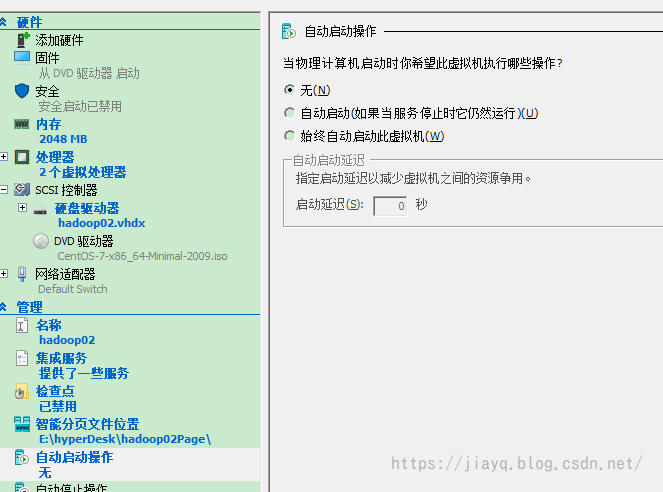
自动停止
自动停止是指物理主机关闭时,保存虚拟机

到了这里就配置完了物理资源了,点击确定
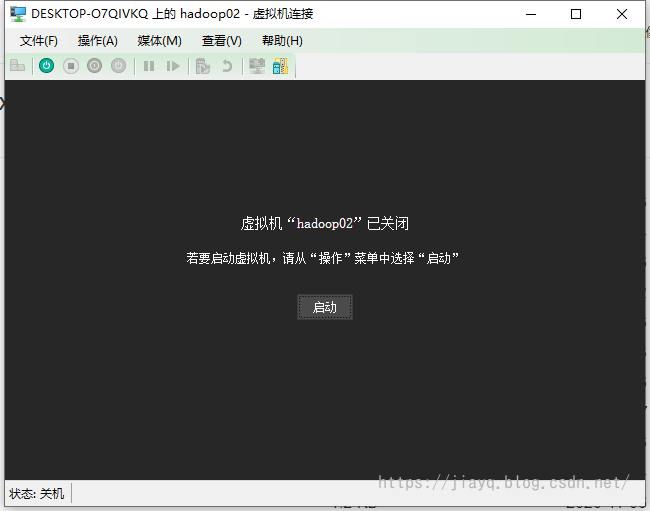
然后接着点击连接,进入操作系统安装
需要点击启动,来启动虚拟机
你可以在Hyper-V管理中修改物理资源配置。
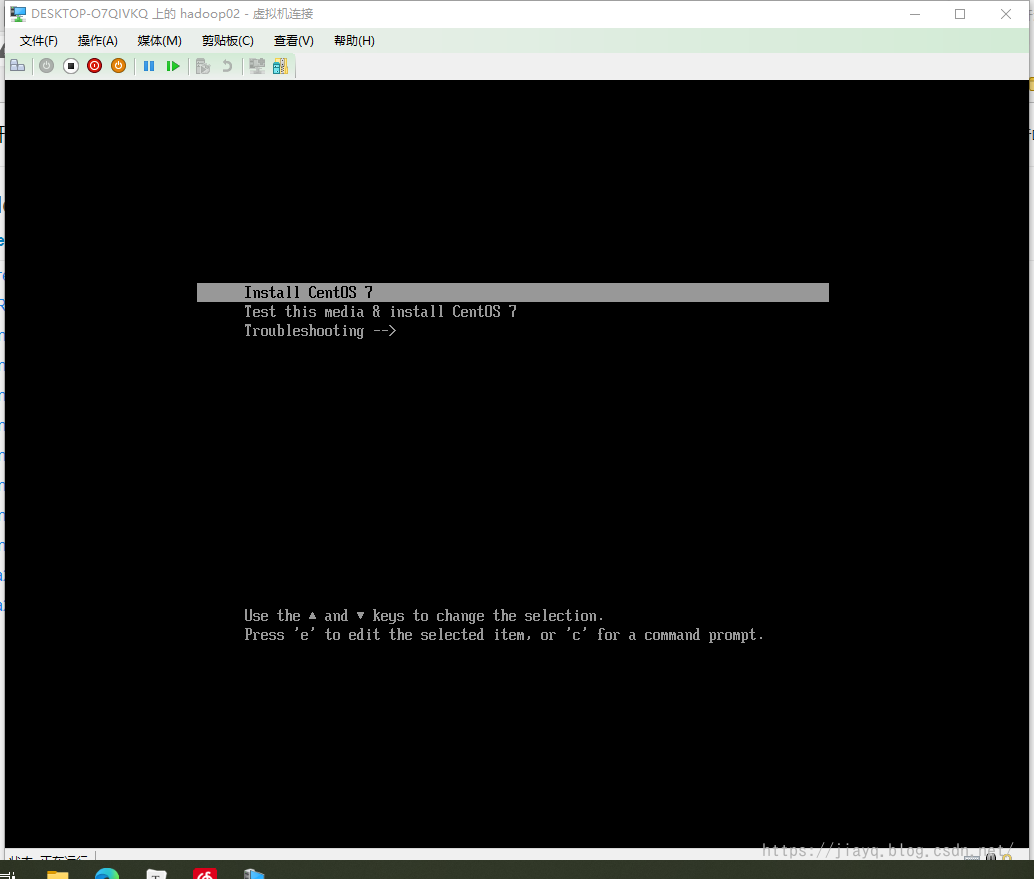
安装linux系统
选择安装操作系统
然后会进行一系列的检查等操作,检查通过后,就会展示可视化界面选择语言

然后选择安装位置
点进去什么都不需要操作,点击完成即可

然后选择开始安装,这里因为下载的就是最小的包,安装也是默认最小安装即可

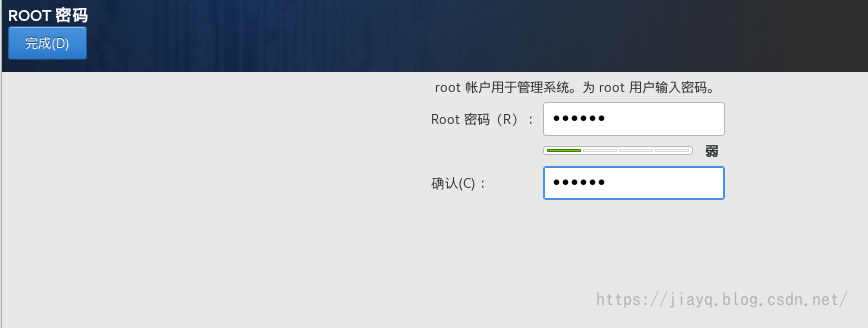
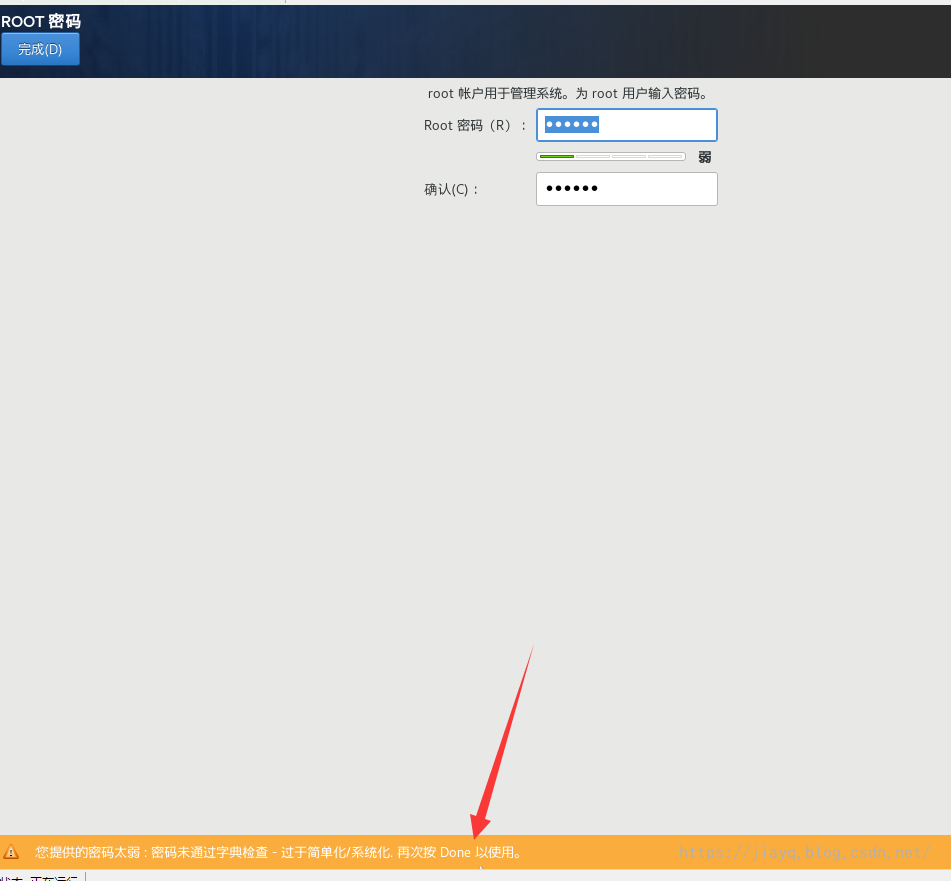
在安装的过程中,设置root密码

为了简单,设置为123456,简单密码需要点击两次完成
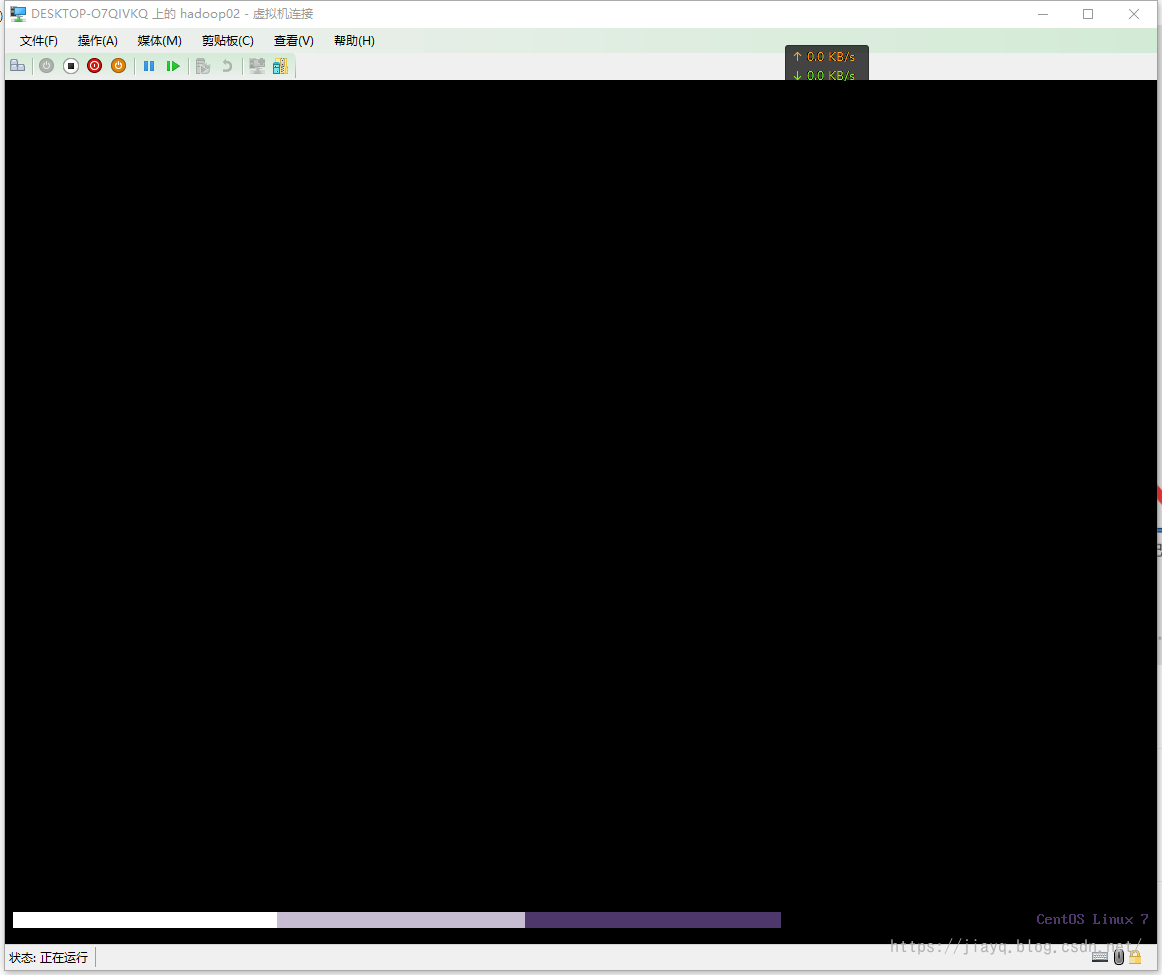
然后等待安装完成即可

安装完成重启就好了

重启后就进入系统了
登录root,即可进入

别忘记安装完操作系统后,把挂载的操作系统镜像弹出,要不然每次启动虚拟机,都会挂载,也会影响启动速度。
取消挂载是在设置中,移除硬件资源即可(需要在虚拟机关机的状态下修改配置)
工具连接
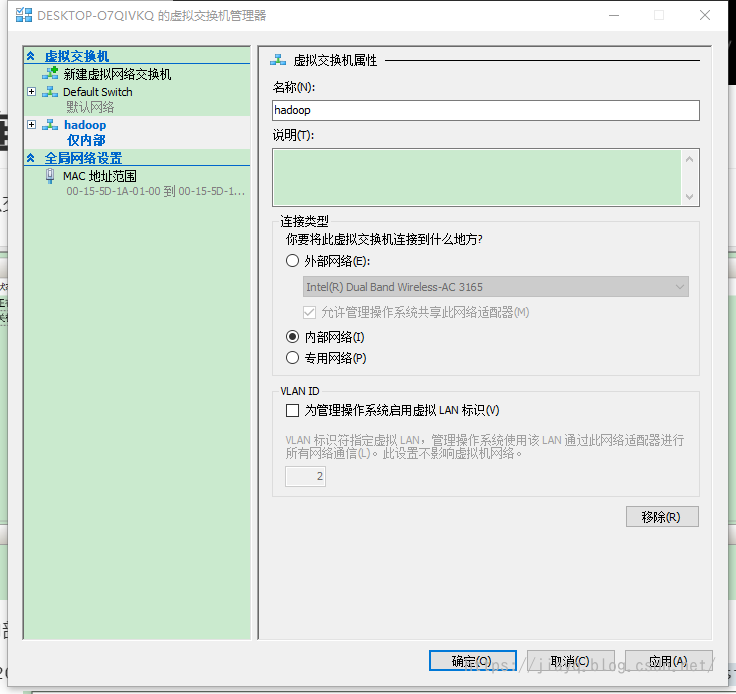
首先新增虚拟交换机
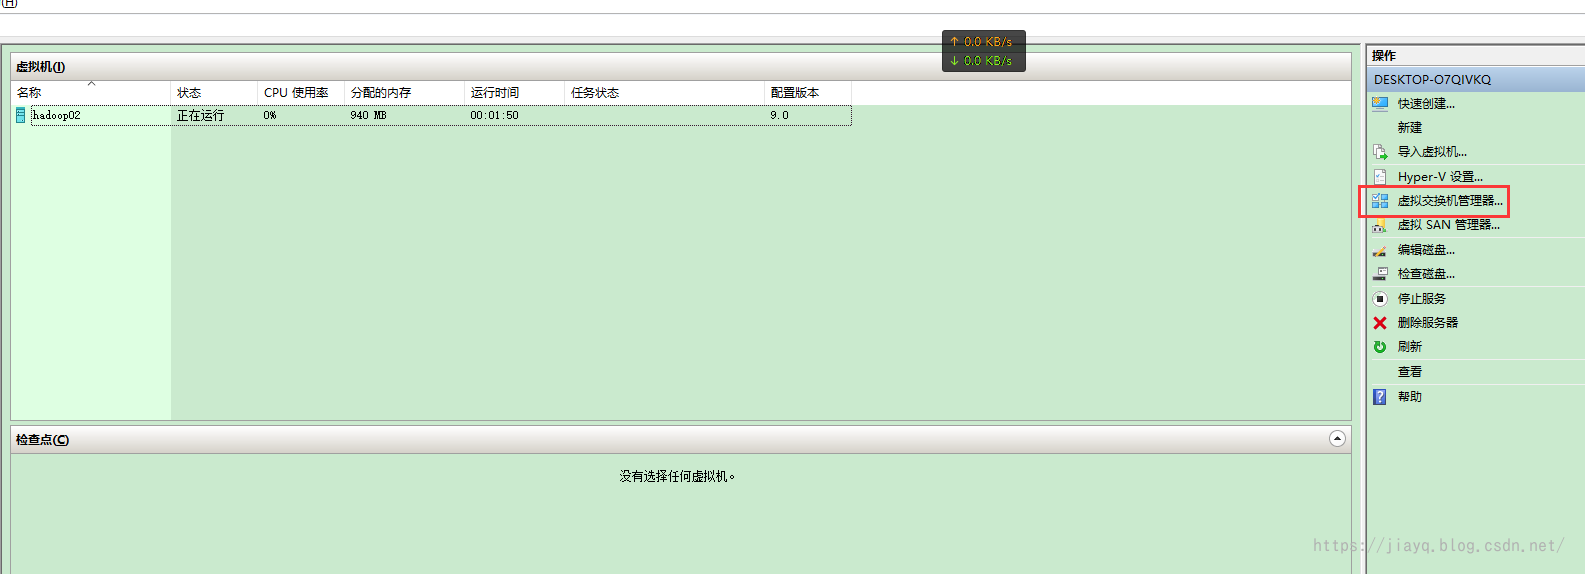
记得是创建内部类型的交换机

设置名字后确定
此时打开物理机的网络适配器
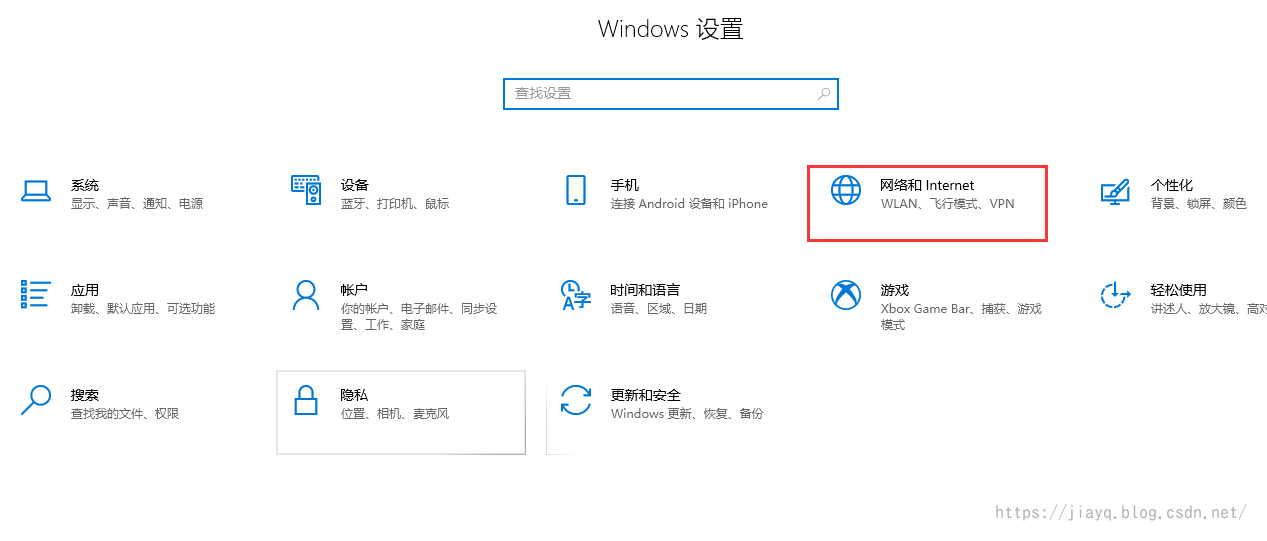

找到物理机使用的网卡
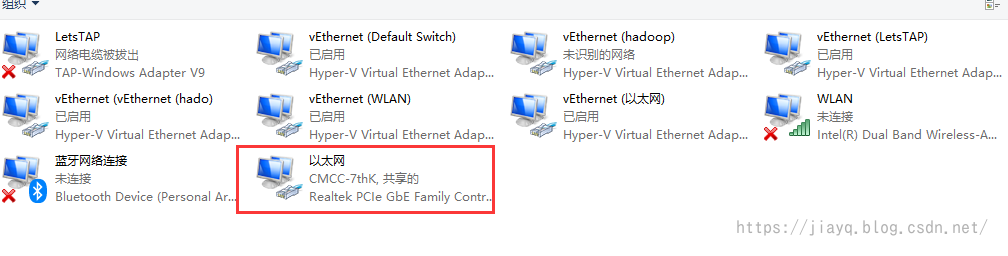
打开【属性】-【共享】,选择刚才创建的网卡共享网络

中间会提示一些信息,不管他确定。
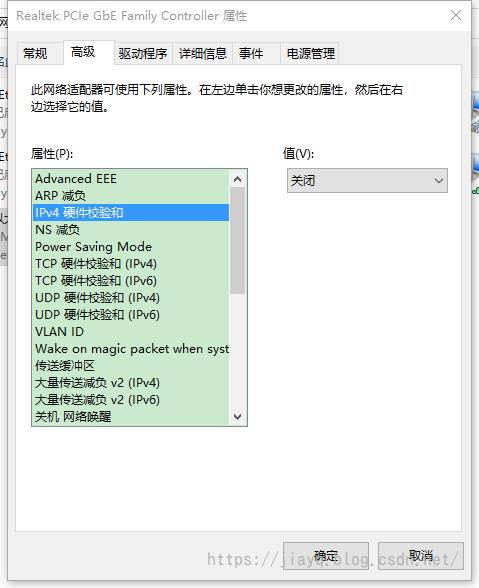
确定之后,被共享的网卡的ip为192.168.137.1,这里千万不要修改。网上很多说这里可以随便写,你随便写了,就会导致虚拟机无法链接外网。这是windows定的一个nat转换地址,当然修改注册表可以修改这个ip,不过我没有尝试。

除此之外,还需要关闭硬件网卡的一些校验和检测,用于增加网卡性能【属性】-【配置】-【高级】下的IPv4校验和关闭,TCP硬件校验和关闭,UDP硬件校验和关闭。
物理机设置完了,还需要设置虚拟机
使用root登录虚拟机,然后切换到/etc/sysconfig/network-scrpts/目录下,然后使用vi ifcfg-eth0编辑网络配置。
主要修改这些内容
BOOTPROTO=static
ONBOOT=yes
IPADDR=192.168.137.101 # 网址可以随便写,但是需要是在192.168.137.1网段下的
NETMASK=255.255.255.0
GATEWAY=192.168.137.1
DNS1=114.114.114.114
DNS2=8.8.8.8
修改完保存退出

然后使用systemctl restart network重启网络服务
然后使用ip addr查看网络信息

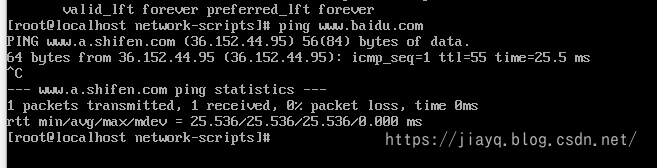
接着使用ping www.baidu.com验证外网是否可用
然后在物理机上使用cmd的命令ping 192.168.137.101ping虚拟机

需要注意的是,这里一个单向的交换机,物理机可以ping虚拟机,但是虚拟机不能ping物理机。
最后我们使用xshell工具连接虚拟机(虚拟机连接是可以关闭的,关闭虚拟机连接后,虚拟机还是启动的)

xshell可以在XSHELL - NetSarang Website下载,我们选择家庭和学校的免费版。填写你的邮箱后,会给你的邮箱发送下载链接,下载即可。(下载比较慢,科学上网能快点)
下载安装后打开,连接虚拟机

多个虚拟机
我自己的笔记本是16G内存的,而且初始分配的硬盘比较小(因为随时可以调整)
所以我打算创建3个虚拟机,一起启动,做到虚拟机互联,访问外网,固定ip,物理机使用xshell访问三个虚拟机。
首先创建3个虚拟机,配置都相同分别为hadoop01,hadoop02,hadoop03
这些虚拟机使用同一个网络交换机hadoop
安装操作系统的时候,设置root密码也相同123456
(我之前创建的时候ip错位了,101给了hadoop02,可以重新设置ip,给hadoop02设置102,hadoop01设置101,hadoop03设置103)
在设置网络的使用,同时设置主机名vi /etc/hostname,设置完成后将主机名进行映射,不仅仅映射自己,还需要映射其他的虚拟机。
vi /etc/hosts
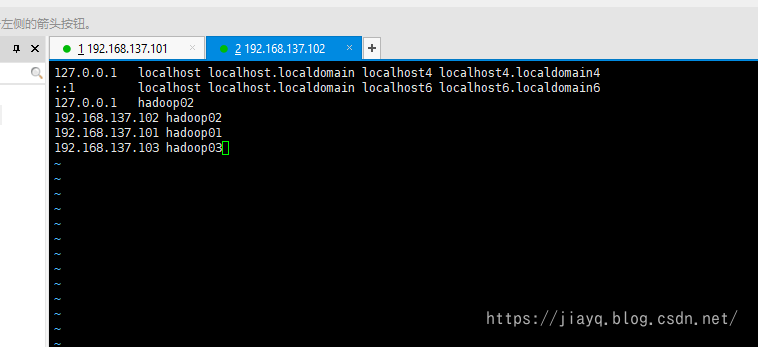
全部虚拟机这样配置后,就可以相互访问了


总结
总的来说还是很不错的,除了网络设置有点难度(其实也不算难,主要是网上的资料不正确),其他的都比较容易。
而且占用的资源也算还行,并不是很大。

自己学习啥的,也够折腾了。
== 2022-01-22 更新==
直接使用物理机的网卡–解决虚拟机网络慢的问题
之前使用内网的网络交换设备,然后将物理机外网网卡共享给内网的网络交换设备,虽然也能使用,但是存在一个非常大的问题:网络慢。
这个问题真的好恶心,物理机使用xshell连接虚拟机,都需要将近2分钟才能连上。
这也太慢了吧。
想到物理网卡可以共享网络给内网网络交换机,那么为什么不让虚拟机直接使用物理网卡呢?
说干就干。
首先在hyper-v的网络交换设置中增加物理网卡的虚拟网卡,其实也是虚拟网卡,只是对外的

然后给虚拟机更换为这个网络交换机

然后重新启动虚拟机,使用hyper-v自己的连接窗口连接虚拟机,此时之前可用的xshell的连接可能已经无效了,无法连接了,所以需要使用hyper-v自己的连接工具。
连接上后需要修改ip地址,修改为和物理机相同网段的地址

然后修改/etc/hosts文件,以及物理机的hosts文件。
理论上物理机的hosts不用修改,虚拟机的也不用修改,因为都是同一个网段,使用同一个网卡,连接的同一个路由器。
如果无法互通,那么配置/etc/hsots可能是一个解决方案。
刚配置上,网速还是挺快的
不知道会不会和虚拟内网一样,用一段时间就变慢了。
