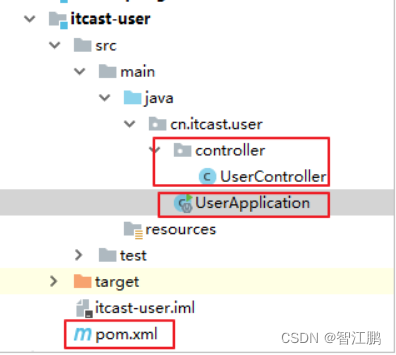
项目结构
引入web启动器
pom.xml:
<?xml version="1.0" encoding="UTF-8"?>
<project xmlns="http://maven.apache.org/POM/4.0.0"
         xmlns:xsi="http://www.w3.org/2001/XMLSchema-instance"
         xsi:schemaLocation="http://maven.apache.org/POM/4.0.0 http://maven.apache.org/xsd/maven-4.0.0.xsd">

    <modelVersion>4.0.0</modelVersion>

    <groupId>cn.itcast.user</groupId>
    <artifactId>itcast-user</artifactId>
    <version>1.0-SNAPSHOT</version>

    <parent>
        <groupId>org.springframework.boot</groupId>
        <artifactId>spring-boot-starter-parent</artifactId>
        <version>2.0.6.RELEASE</version>
    </parent>

    <dependencies>
        <dependency>
            <groupId>org.springframework.boot</groupId>
            <artifactId>spring-boot-starter-web</artifactId>
        </dependency>
    </dependencies>

</project>
编写引导类
@SpringBootApplication
public class UserApplication {

    public static void main(String[] args) {
        SpringApplication.run(UserApplication.class);
    }
}
编写UserController
@RestController
@RequestMapping("user")
public class UserController {

    @GetMapping("hello")
    public String test(){
        return "hello ssm";
    }
}
修改端口(修改默认配置)
1.application.yml中配置
# 开发环境配置
server:
  # 服务器的HTTP端口,默认为8080
  port: 6100
访问静态资源
1.默认的静态资源路径为:
只要静态资源放在这些目录中任何一个,SpringMVC都会帮我们处理
添加拦截器
1.拦截器不是一个普通属性,而是一个类,所以就要用到java配置方式
2.通过WebMvcConfigurer并添加@Configuration注解来实现自定义部分SpringMvc配置
1.定义拦截器
package com.ruoyi.framework.interceptor;

import java.lang.reflect.Method;
import javax.servlet.http.HttpServletRequest;
import javax.servlet.http.HttpServletResponse;
import org.springframework.stereotype.Component;
import org.springframework.web.method.HandlerMethod;
import org.springframework.web.servlet.HandlerInterceptor;
import com.alibaba.fastjson.JSONObject;
import com.ruoyi.common.annotation.RepeatSubmit;
import com.ruoyi.common.core.domain.AjaxResult;
import com.ruoyi.common.utils.ServletUtils;

/**
 * 防止重复提交拦截器
 *
 * @author ruoyi
 */
@Component
public abstract class RepeatSubmitInterceptor implements HandlerInterceptor
{
    @Override
    public boolean preHandle(HttpServletRequest request, HttpServletResponse response, Object handler) throws Exception
    {
        if (handler instanceof HandlerMethod)
        {
            HandlerMethod handlerMethod = (HandlerMethod) handler;
            Method method = handlerMethod.getMethod();
            RepeatSubmit annotation = method.getAnnotation(RepeatSubmit.class);
            if (annotation != null)
            {
                if (this.isRepeatSubmit(request, annotation))
                {
                    AjaxResult ajaxResult = AjaxResult.error(annotation.message());
                    ServletUtils.renderString(response, JSONObject.toJSONString(ajaxResult));
                    return false;
                }
            }
            return true;
        }
        else
        {
            return true;
        }
    }

    /**
     * 验证是否重复提交由子类实现具体的防重复提交的规则
     *
     * @param request
     * @return
     * @throws Exception
     */
    public abstract boolean isRepeatSubmit(HttpServletRequest request, RepeatSubmit annotation);
}
2.WebMvcConfigurer配置类,注册拦截器
package com.ruoyi.framework.config;

import org.springframework.beans.factory.annotation.Autowired;
import org.springframework.context.annotation.Bean;
import org.springframework.context.annotation.Configuration;
import org.springframework.web.cors.CorsConfiguration;
import org.springframework.web.cors.UrlBasedCorsConfigurationSource;
import org.springframework.web.filter.CorsFilter;
import org.springframework.web.servlet.config.annotation.InterceptorRegistry;
import org.springframework.web.servlet.config.annotation.ResourceHandlerRegistry;
import org.springframework.web.servlet.config.annotation.WebMvcConfigurer;
import com.ruoyi.common.config.RuoYiConfig;
import com.ruoyi.common.constant.Constants;
import com.ruoyi.framework.interceptor.RepeatSubmitInterceptor;

/**
 * 通用配置
 *
 * @author ruoyi
 */
@Configuration
public class ResourcesConfig implements WebMvcConfigurer
{
    @Autowired
    private RepeatSubmitInterceptor repeatSubmitInterceptor;


 /**
     *定义资源拦截器,请求为/profile的资源会映射到访问本地资源,这样就可以让别人访问服务器的本地文件了
     * @param registry
     */


    @Override
    public void addResourceHandlers(ResourceHandlerRegistry registry)
    {
        /** 本地文件上传路径 */
        registry.addResourceHandler('/profile' + "/**")
                .addResourceLocations("file:" +'D:/ruoyi/uploadPath/');

        /** swagger配置 */
        registry.addResourceHandler("/swagger-ui/**")
                .addResourceLocations("classpath:/META-INF/resources/webjars/springfox-swagger-ui/");
    }

    /**
     * 自定义拦截规则
     */
    @Override
    public void addInterceptors(InterceptorRegistry registry)
    {
        registry.addInterceptor(repeatSubmitInterceptor).addPathPatterns("/**");
    }

    /**
     * 跨域配置
     */
    @Bean
    public CorsFilter corsFilter()
    {
        CorsConfiguration config = new CorsConfiguration();
        config.setAllowCredentials(true);

        // 设置访问源地址
        config.addAllowedOrigin("*");
        // 设置访问源请求头
        config.addAllowedHeader("*");
        // 设置访问源请求方法
        config.addAllowedMethod("*");
        // 有效期 1800秒
        config.setMaxAge(1800L);
        // 添加映射路径,拦截一切请求
        UrlBasedCorsConfigurationSource source = new UrlBasedCorsConfigurationSource();
        source.registerCorsConfiguration("/**", config);
        // 返回新的CorsFilter
        return new CorsFilter(source);
    }
}
@RequestParam 接收表单
1.@RequestParam接收的参数是来自requestHeader中,即请求头。通常用于GET请求。
2.比如常见的url:http://localhost:8081/spring-boot-study/novel/findByAuthorAndType?author=唐家三少&type=已完结
3.@RequestParam(value="username", required=true, defaultValue="zhang") String username) 表示 入参的请求参数名字,前端必须和这个名称一样 ,默认值是true,必传,默认值是zhang
4.@RequestParam加上这个参数,表示必传项,去掉表示可传可不传
@RequestMapping("/login")
public AjaxResult login2(@RequestParam String username, @RequestParam String password) {
AjaxResult ajax = AjaxResult.success();
// 生成令牌
String token = loginService.login2(username, password);
System.out.println(token);
ajax.put(Constants.TOKEN, token);
return ajax;
}
//------------------------------------
/**
* get携带参数请求(单个接收)
* 请求方式:http://localhost:8080/axiostest/get8?name=123
*
* @param name 可以省略@RequestParam("name"),接收单个参数,前端参数名必须为name
* @return
*/
@RequestMapping(path = "/get8", method = RequestMethod.GET)
@ResponseBody
public Object getid(String name
) {
return "接收到是参数为:" + name;
}
//--------------------------------------------
//接收多个参数,用map接收
/**
* get携带参数请求,接收一个对象
*
* @RequestParam Map 只能用在get 请求当中,接收id=123&&name="张三"中的全部参数
*
* axios.get('http://localhost:8080/axiostest/getparams', {
* params: {
* id: 789,
* name:"张三"
* }
* }).then(function(ret){
* console.log(ret.data)
* })
* @param
* @return
*/
@RequestMapping(path = "/getparams", method = RequestMethod.GET)
@ResponseBody
public Object getParam(@RequestParam Map<String, Object> params
) {
return "接收到是参数为:" + params;
}
5.@RequestParam 注解如果是个map类型,那么mvc适配器就将参数封装到map中
请求地址:localhost:8080/test?name=testname&pwd=123456
@RequestMapping("/test")
    public Object hello2(@RequestParam Map query) {
        String name = (String) query.get("name");
        String pwd = (String) query.get("pwd");
        System.out.println(name);
        System.out.println(pwd);
        return query;
    }
6.将@RequestParam绑定到对象中 ,从对象中取值
@GetMapping
List<Product> searchProducts(ProductCriteria productCriteria) {
   return productRepository.search(productCriteria);
}
@RequestBody 接收JSON数据
1.接收的参数是来自requestBody中,即请求体,即 Content-Type:为application/json、application/xml等类型的数据
2.就application/json类型的数据而言,使用注解@RequestBody可以将body里面所有的json数据传到后端
    //  -----------------------------------
	$.ajax({
						url: "user/testJson",
						contentType: "application/json;charset=UTF-8",
						data: ' {
							"addressName": "aa",
							"addressNum": 100
						}
						',
						dataType: "json",
						type: "post",
						success: function(data) {
							alert(data);
							alert(data.addressName);
						}
					});
//---------------------------------------
/*** 获取请求体的数据 * @param body */
    @RequestMapping("/testJson")
    public void testJson(@RequestBody Address address) {
        System.out.println(address);
    }
@PathVariable 接收路径中的参数
1.拥有绑定url中的占位符的。例如:url中有/delete/{id},{id}就是占位符
    /**
     * get携带参数请求2
     * 请求方式:http://localhost:8080/axiostest/get/123
     *
     * @param id
     * @return
     */
    @RequestMapping(path = "/get/{id}", method = RequestMethod.GET)
    @ResponseBody
    public Object getPath(@PathVariable("id") String id
    ) {
        return "接收到是参数PathVariable为:" + id;
    }
返回字符串
     /*** 请求参数的绑定 */
        @RequestMapping(value = "/initUpdate")
        public String initUpdate(Model model) {
            // 模拟从数据库中查询的数据
            User user = new User();
            user.setUsername("张三");
            user.setPassword("123");
            user.setMoney(100d);
            user.setBirthday(new Date());
            model.addAttribute("user", user);
            return "update";
        }
@ResponseBody 响应JSON字符串
1.加上 @ResponseBody
2.前端接收到前端字符串后,需要转换成json对象使用
/**
     * 2.返回Json串儿的封装
     *
     * @param id
     * @return
     */
    @RequestMapping("/success")
    @ResponseBody
    public AjaxResult delete(String id) {
        List<String> ll = new ArrayList<>();
        ll.add("111");
        ll.add("2222");
        if (id.equals("1")) {
            return success("请求成功2", ll);
        } else {
            return error("数据错误");
        }
    }
返回值为void
返回值是ModelAndView对象
提供的转发和重定向
1.forward请求转发
1.1controller方法返回String类型,想进行请求转发也可以编写成
    /*** 使用forward关键字进行请求转发 * "forward:转发的JSP路径",不走视图解析器了,所以需要编写完整的路径 * @return * @throws Exception */
        @RequestMapping("/delete")
        public String delete() throws Exception {
            System.out.println("delete方法执行了...");
            // return "forward:/WEB-INF/pages/success.jsp";
            return "forward:/user/findAll";
        }
2.redirect重定向
2.1controller方法返回String类型,想进行重定向也可以编写成
  /*** 重定向 * @return * @throws Exception */
    @RequestMapping("/count")
    public String count() throws Exception {
        System.out.println("count方法执行了...");
        return "redirect:/add.jsp";
        // return "redirect:/user/findAll"; }
    }
接收表单数据和图片组(文件上传)
   StringBuffer b;
    List<String> ccList = new ArrayList<String>();
    String images;

    @RequestMapping("/upload")
    public AjaxResult upload(@RequestParam("file") MultipartFile[] multipartfiles,
                             Weixiu weixiu) throws IOException {
        b = new StringBuffer();
        ccList.clear();
        b.setLength(0);

        System.out.println(multipartfiles.length);
        String defaultBaseDir = RuoYiConfig.getProfile();
        System.out.println(defaultBaseDir);
        String savePath = defaultBaseDir + "/";

        if (null != multipartfiles && multipartfiles.length > 0) {
            //遍历并保存文件
            for (MultipartFile file : multipartfiles) {
                File dest = new File(savePath + file.getOriginalFilename());
                if (!dest.getParentFile().exists()) {
                    dest.getParentFile().mkdirs();
                }
                file.transferTo(dest);
                ccList.add(file.getOriginalFilename());
            }
            for (int i = 0; i < ccList.size(); i++) {

                b.append(ccList.get(i));
                b.append(",");
            }

            images = b.substring(0, b.length() - 1);
        }

        Date day = new Date();
        SimpleDateFormat sdf = new SimpleDateFormat("yyyy-MM-dd HH:mm:ss");
        weixiu.setChecktime(sdf.format(day).toString());
        weixiu.setCheckimage(images);
        weixiuService.insertWeixiu(weixiu);

        AjaxResult ajax = AjaxResult.success();
        return ajax;
    }
SpringMVC的异常处理