刚开始上手qt,说实话迷得很啊。。。
不过qt做的界面是真的漂亮,之前在b站看qt官方发布的一些视频,仪表盘煞是好看
今天倒腾了一天,用qml绘制了一个简单的汽车仪表控件,趁现在还热着,先记下来
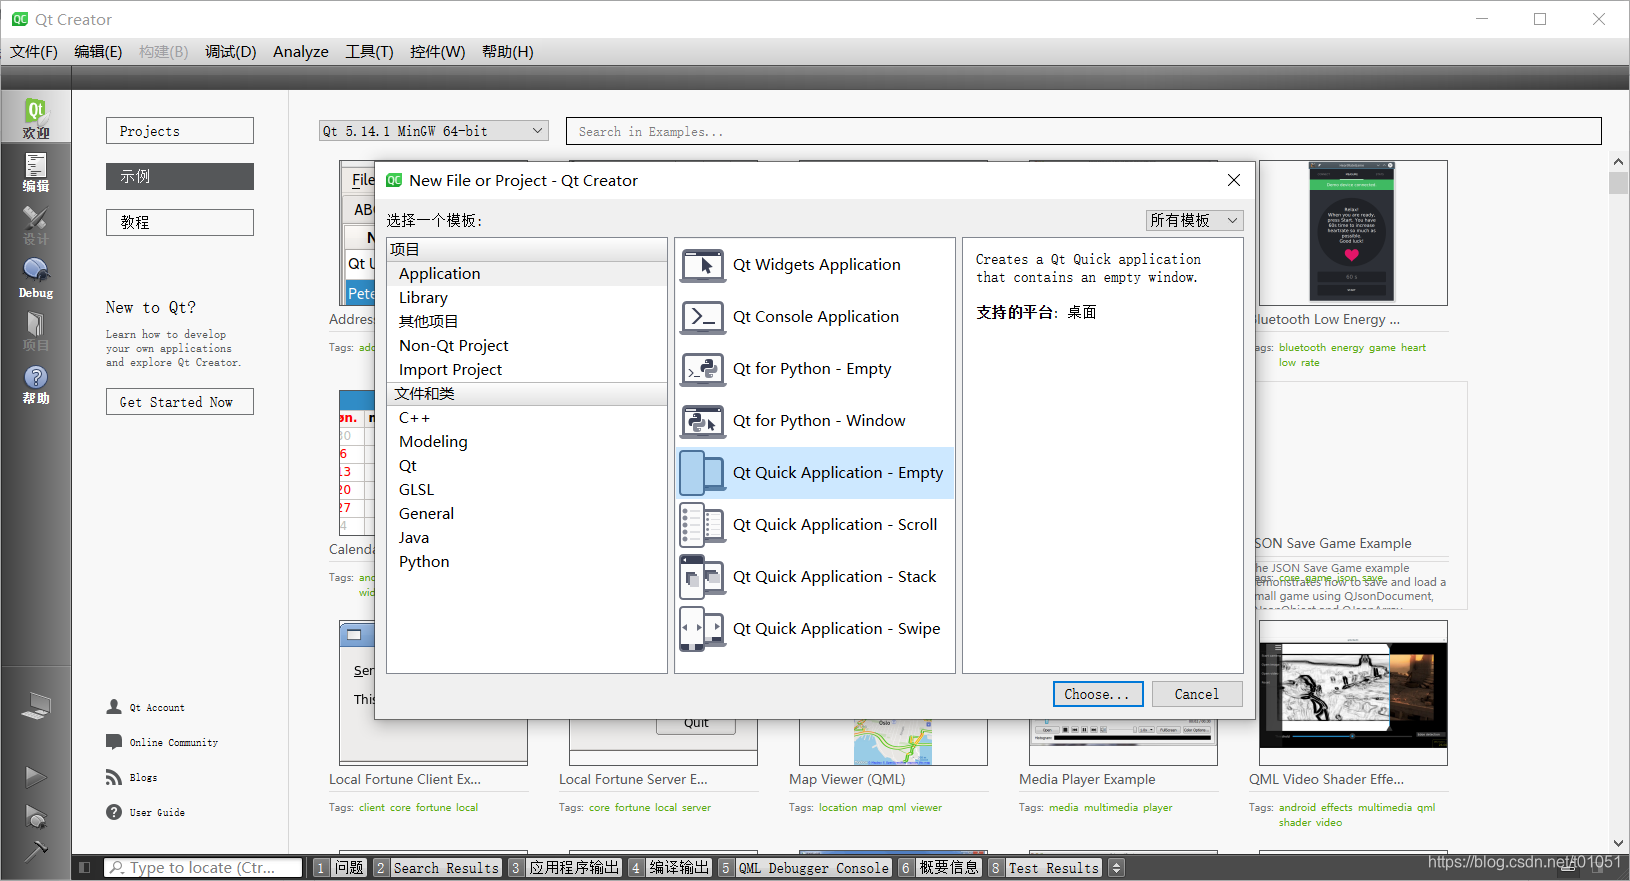
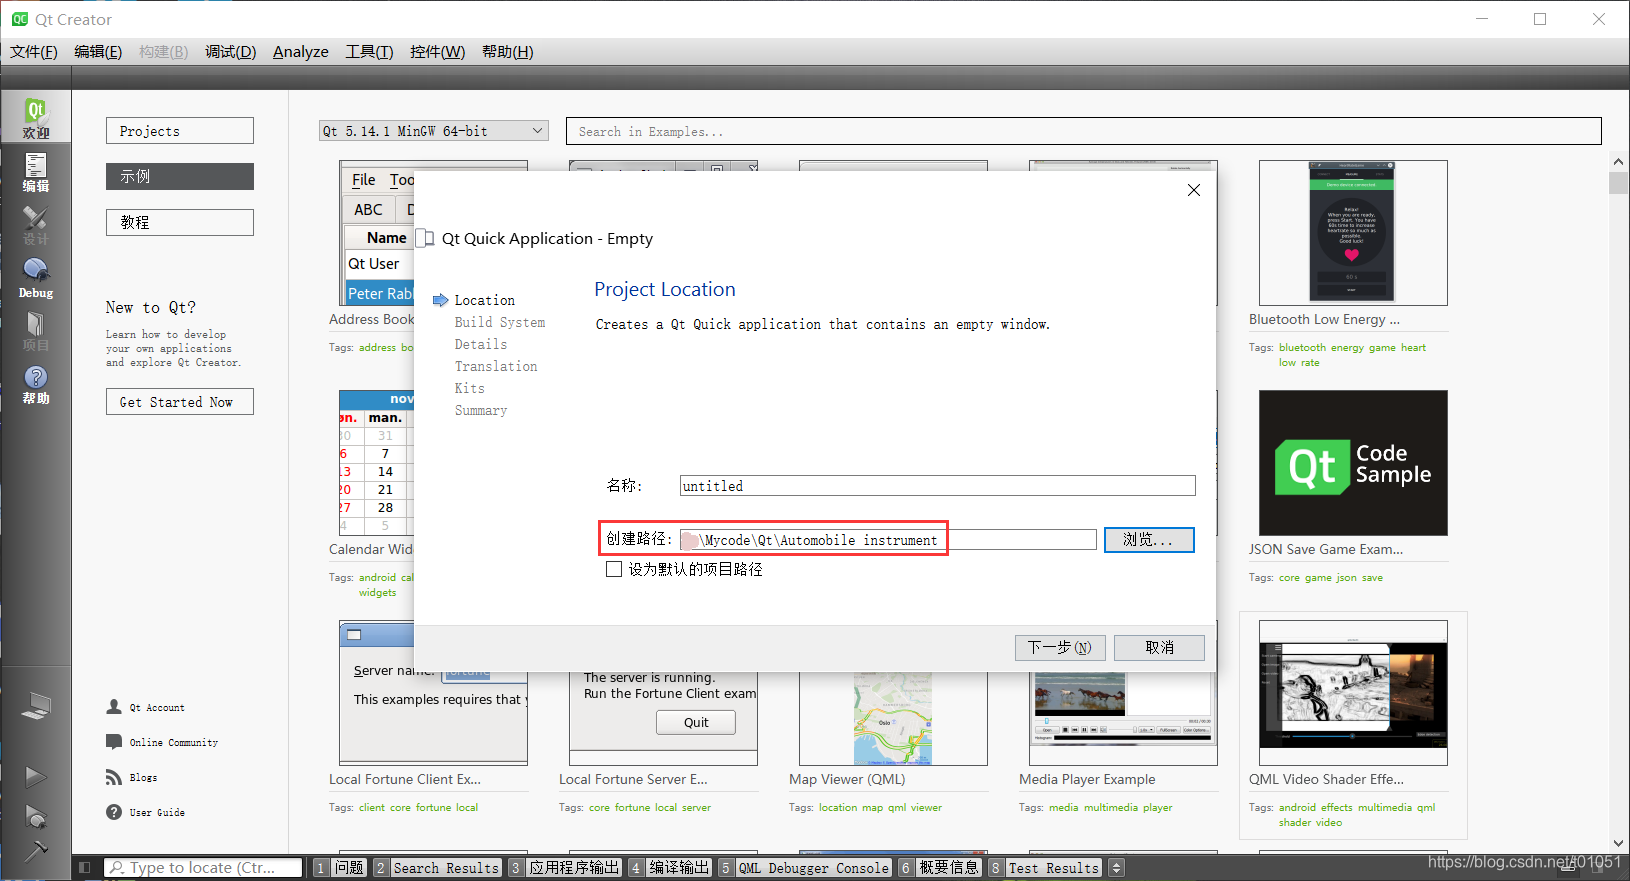
新建一个空的qml工程
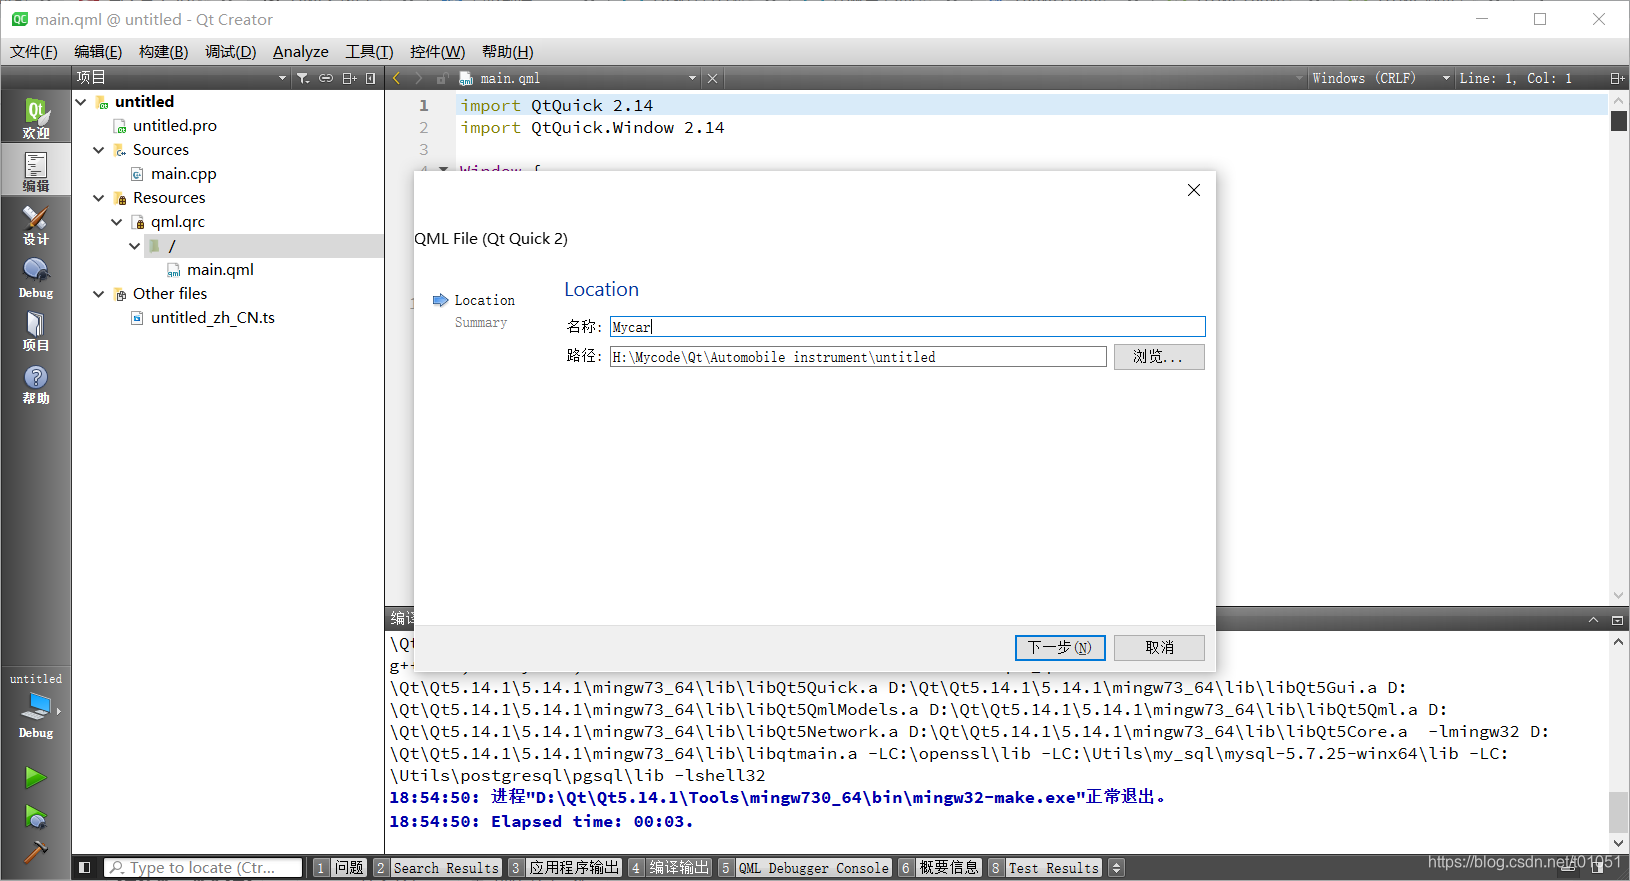
创建工程的时候要注意,工程路径中不能有中文,否则会导致编译失败
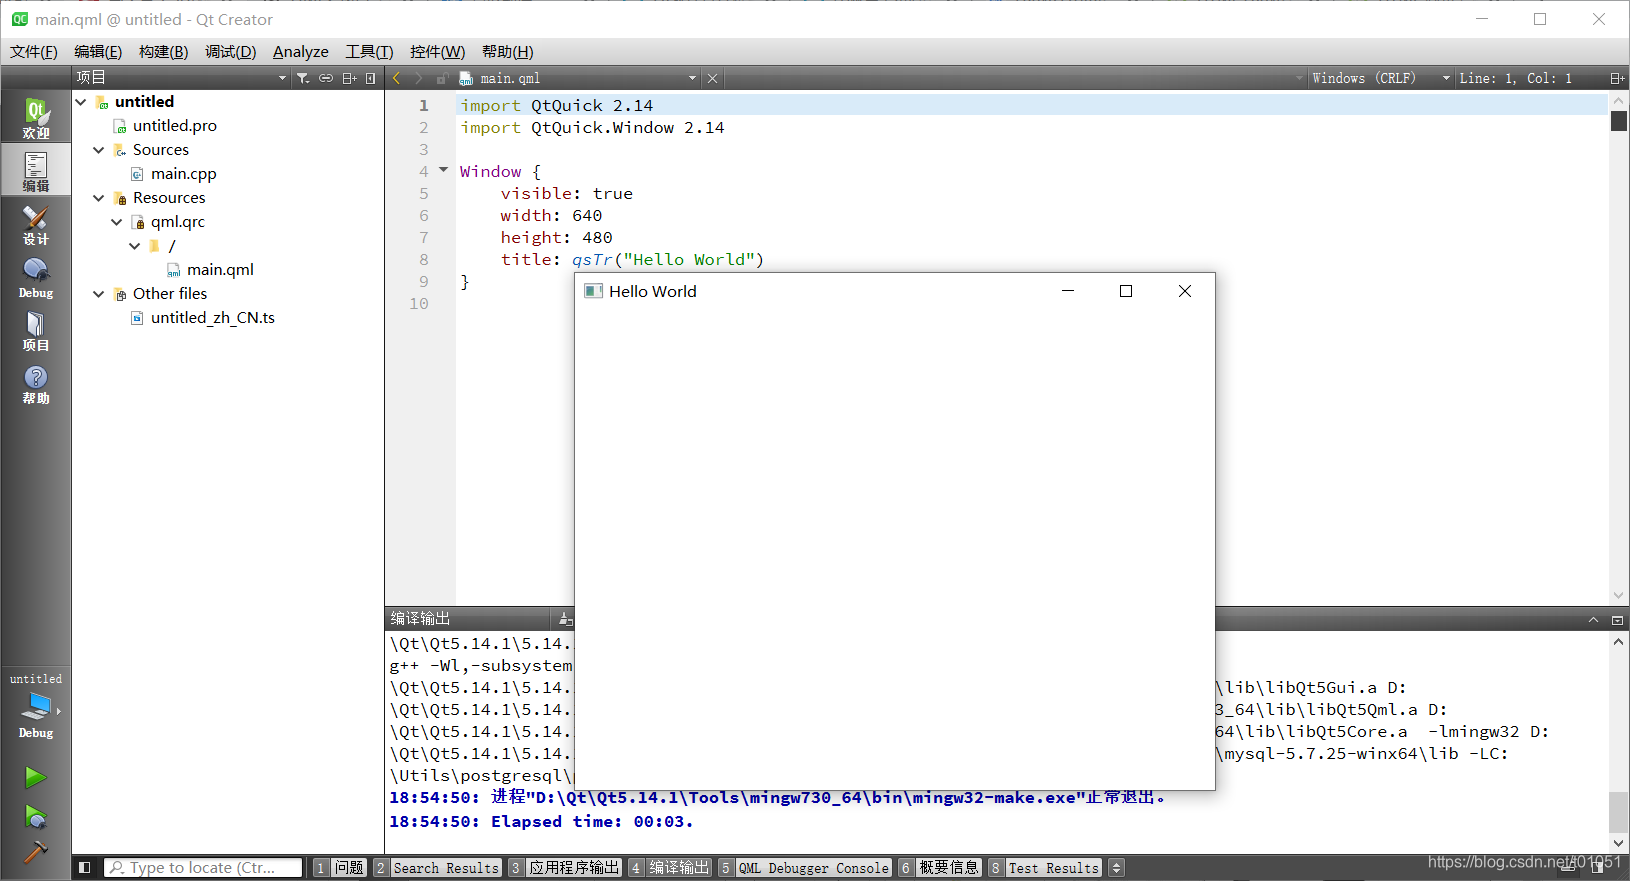
创建完成后按例编译运行,确保工程能正常编译,否则等写得差不多却发现无法正常编译那就很尴尬了。。。
再添加一个单独的.qml文件,我们在里面编写自定义的控件,这样在别的工程中只要载入这个qml文件就能使用了~~
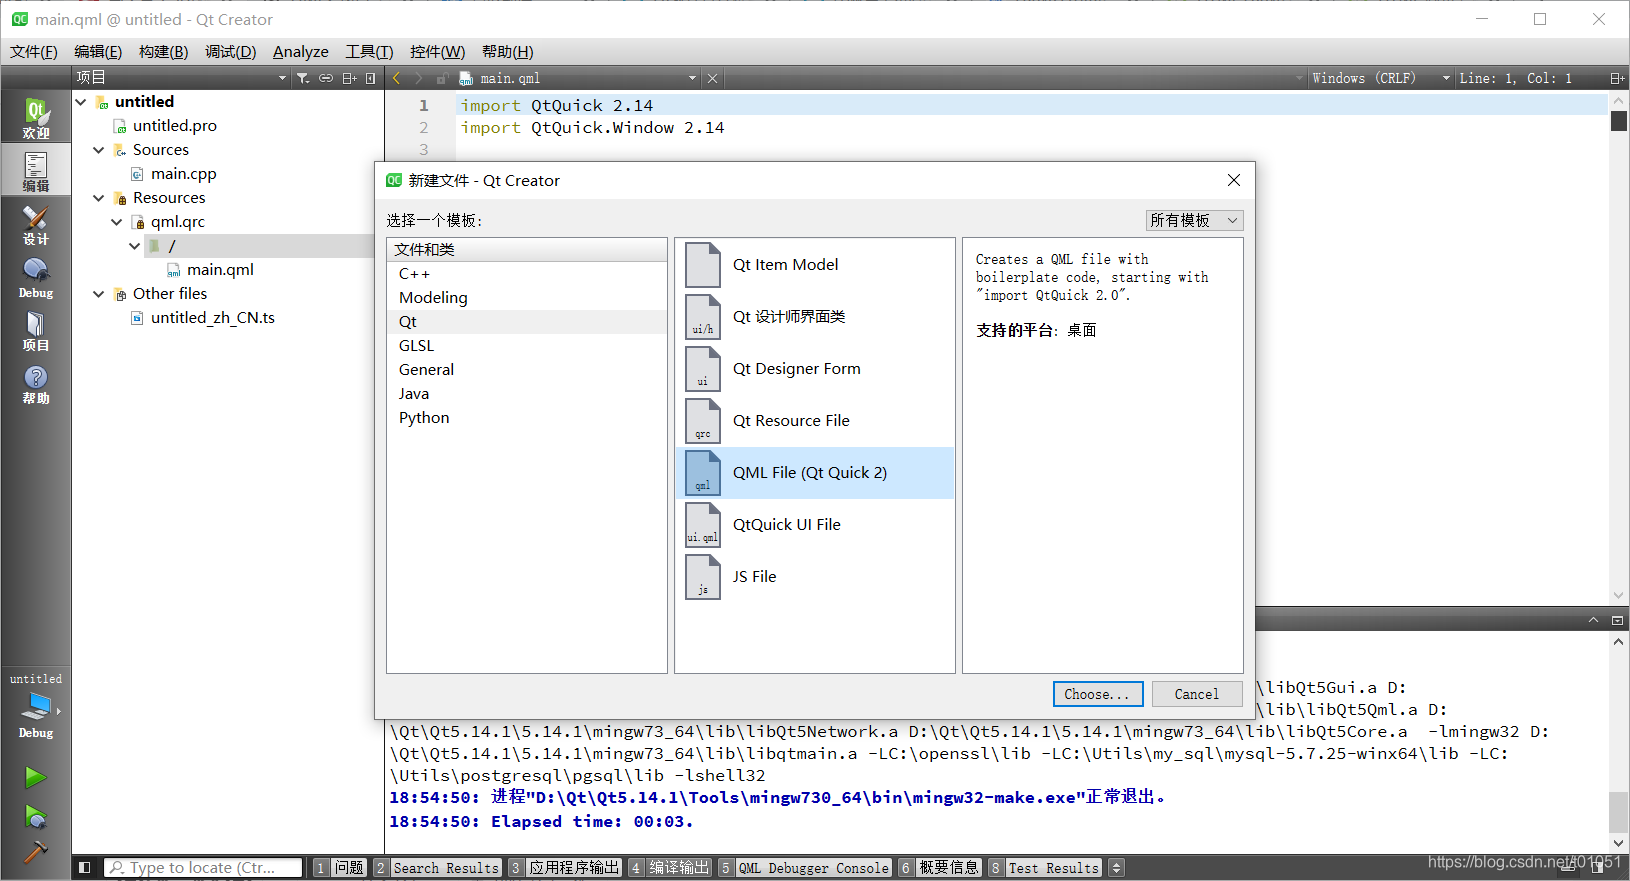
起个名字 (Mycar。。。哈哈,暂且就这样吧
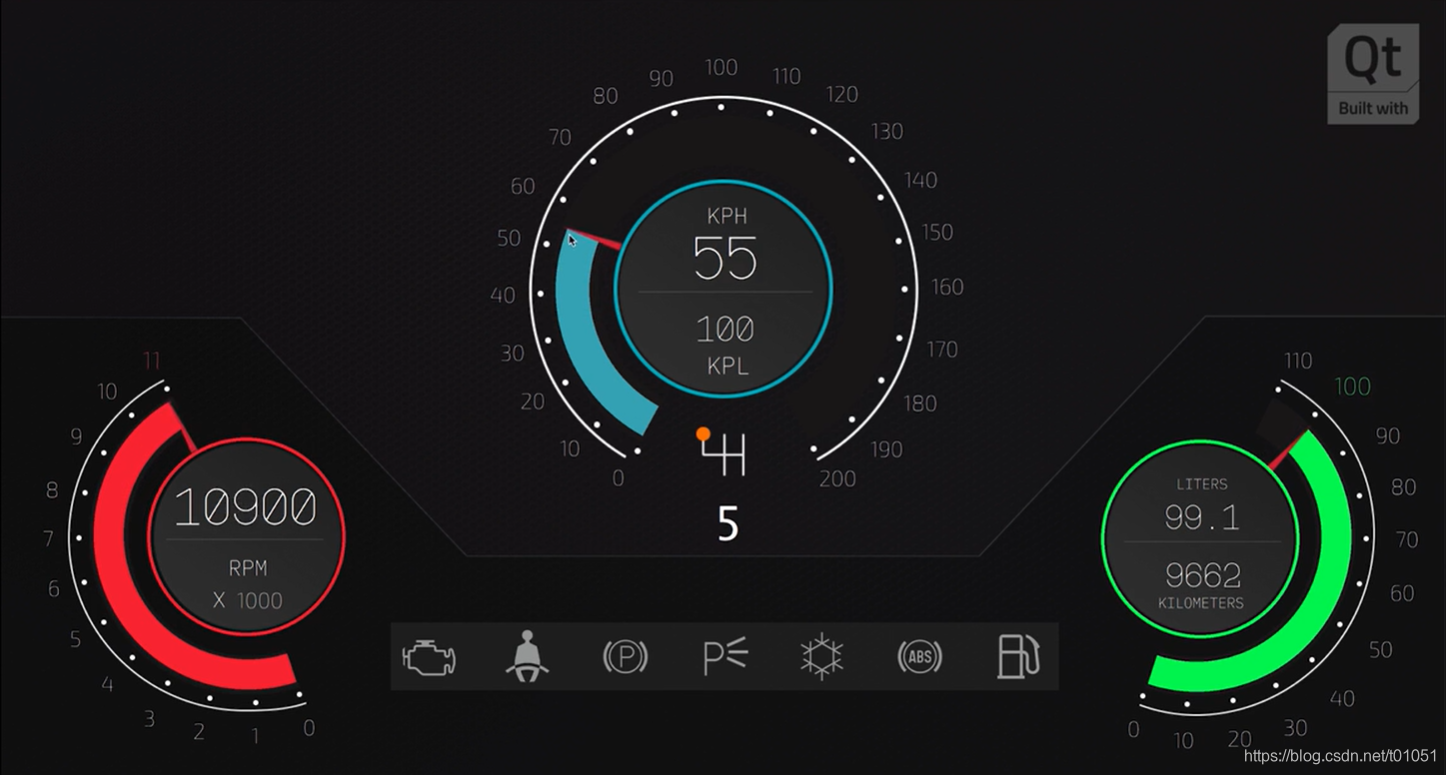
暂时就以这个为例子吧,今天做出来的也就和这个像
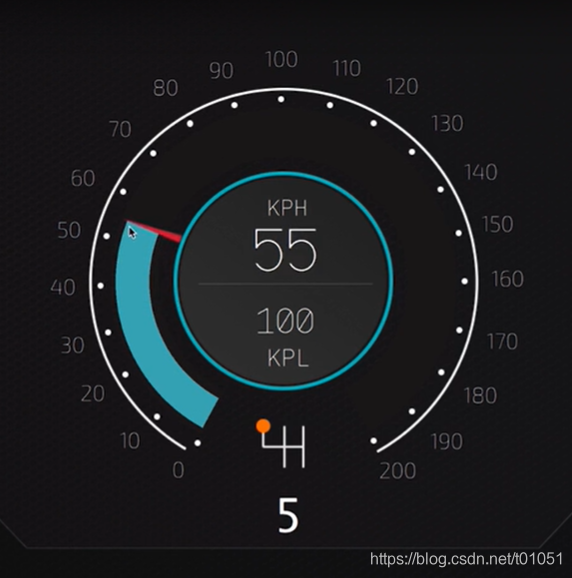
从上面这张图中,我们可以看到这个表盘主要是由几个弧构成。qt官方这个例子是先通过Photoshop设计出表盘整体的样式,然后通过插件直接从ps中导出.qml,接着就是在qt软件上进行编辑。不得不说这种设计和逻辑分开的方式的确非常的棒!让天堂的归天堂,让尘土的归尘土。ps咱不熟悉,过qt的ps插件倒是挺有意思,具体的我还没有研究明白,等哪天搞懂了再写篇文章记一下。需要这个插件的朋友请往:https://code.qt.io/cgit/qt-labs/photoshop-qmlexporter.git/ 或者同性社区: https://github.com/qt-labs/photoshop-qmlexporter
因为这个仪表主要由弧构成,因此我们需要在canvas中对仪表的各个部分进行绘制。首先,我们需要绘制两个重叠的圆弧。最下面的圆弧设置成浅灰色作为背景,最顶上的圆弧则实时显示我们汽车的速度。刚刚创建的qml文件中,键入如下代码:
// file - Mycar.qml

import QtQuick 2.0

Item {
    id: carItem
    width: 100
    height: 100

    // 背景圆弧线宽
    property int btm_lineWidth: 15
    // 背景圆弧颜色
    property color btm_backgroundColor: Qt.rgba(0, 0, 0, 0.1);
    // 背景圆弧半径 开始角度 结束角度
    property int btm_r: 20
    property double btm_startAngle: 0
    property double btm_endAngle: 90

    onBtm_lineWidthChanged: canvas.requestPaint()
    onBtm_backgroundColorChanged: canvas.requestPaint()
    onBtm_rChanged: canvas.requestPaint()
    onBtm_startAngleChanged: canvas.requestPaint()
    onBtm_endAngleChanged: canvas.requestPaint()

    // 顶层圆弧线宽
    property int top_lineWidth: 10
    // 顶层圆弧颜色
    property color top_backgroundColor: "lightgreen"
    // 顶层圆弧半径 开始角度 结束角度
    property int top_r: 20
    property double top_startAngle: 0
    property double top_endAngle: 90

    onTop_lineWidthChanged: canvas.requestPaint()
    onTop_backgroundColorChanged: canvas.requestPaint()
    onTop_rChanged: canvas.requestPaint()
    onTop_startAngleChanged: canvas.requestPaint()
    onTop_endAngleChanged: canvas.requestPaint()

    Canvas {
        id: canvas
        width: carItem.width
        height: carItem.height

        onPaint: {
            var ctx = getContext("2d");
            ctx.clearRect(0, 0, canvas.width, canvas.height);

            // 画背景圆弧
            ctx.lineWidth = carItem.btm_lineWidth;
            ctx.strokeStyle = carItem.btm_backgroundColor;
            ctx.beginPath();
            ctx.arc(carItem.width/2, carItem.width/2, carItem.btm_r, (carItem.btm_startAngle/180*Math.PI), (carItem.btm_endAngle/180*Math.PI));
            ctx.stroke();


            // 画顶层圆弧
            ctx.lineWidth = carItem.top_lineWidth;
            ctx.strokeStyle = carItem.top_backgroundColor;
            ctx.beginPath();
            ctx.arc(carItem.width/2, carItem.width/2, carItem.top_r, (carItem.top_startAngle/180*Math.PI), (carItem.top_endAngle/180*Math.PI));
            ctx.stroke();
        }
    }
}
这里啰嗦一下,我顶层圆弧和底层圆弧属性的命名前置分别是“top_”、“btm_”。为了在设计模式中更改这些属性的值时,图像能够马上更新,代码中使用了形似 onXxxxxxChanged(格式:on<Property>Changed)的信号处理器,当某个属性的值变更时,会触发canvas的重绘(即,canvas.requestPaint())。举个栗子,例如代码中的btm_lineWidth变量,写法就是:
on + Btm_lineWidth + Changed , 即:onBtm_lineWidthChanged: canvas.requestPaint()
如果开头的b没有大写,就会报:

后面在main.qml中引用Mycar.qml的控件也是如此,调用的对象名称首字母必须大写。详见qt文档:https://doc.qt.io/qt-5/qtqml-documents-definetypes.html
接着,回到main.qml文件中,引用我们刚刚写的仪表控件
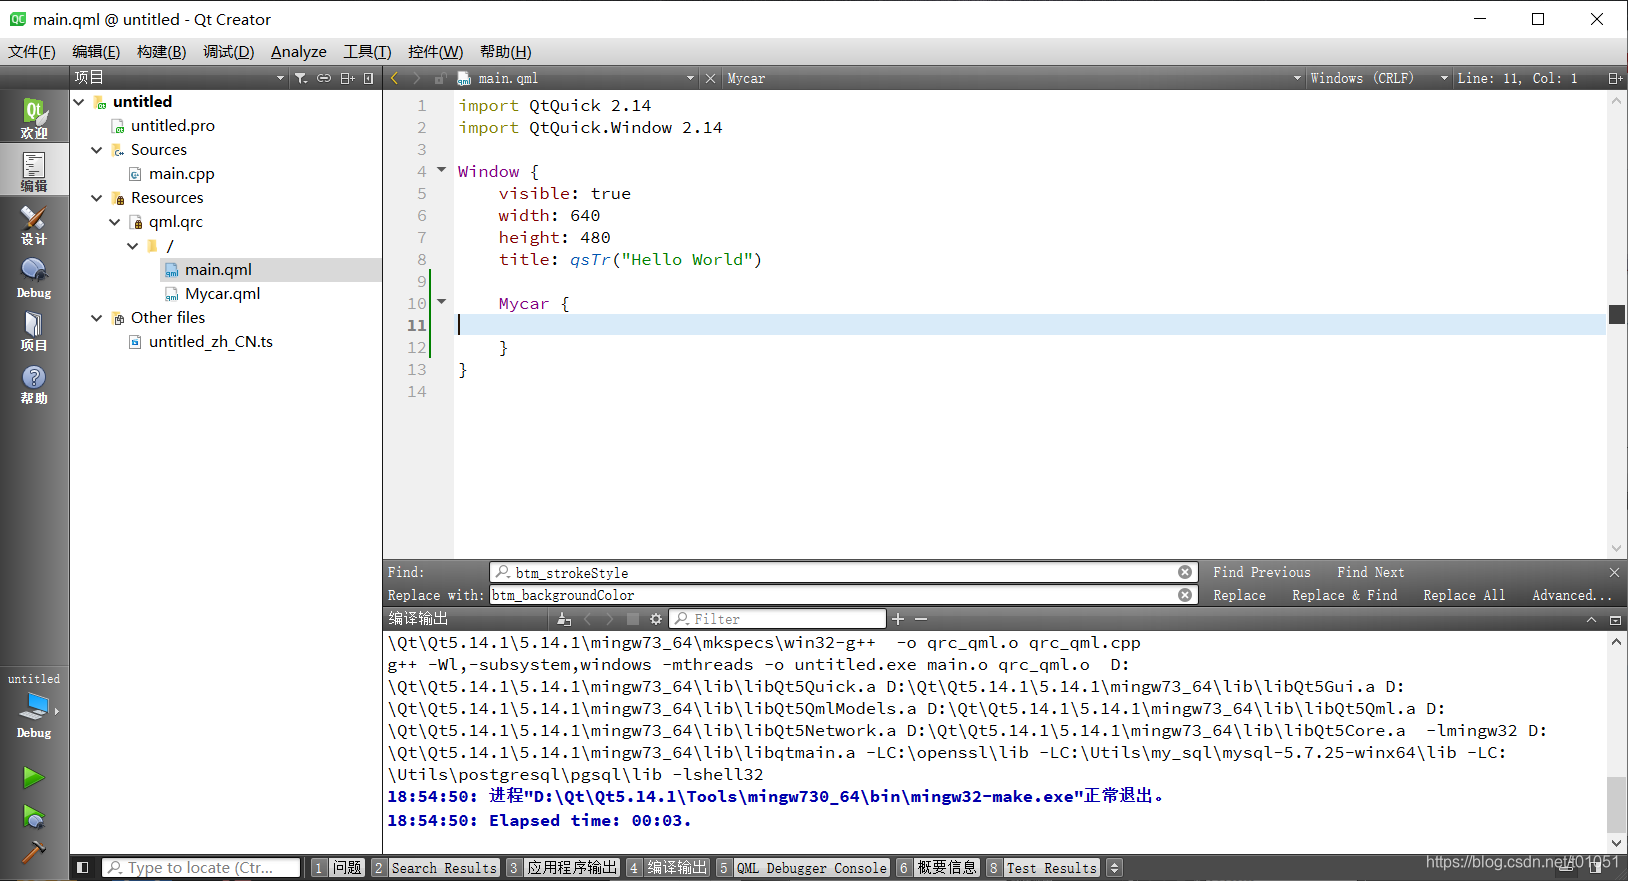
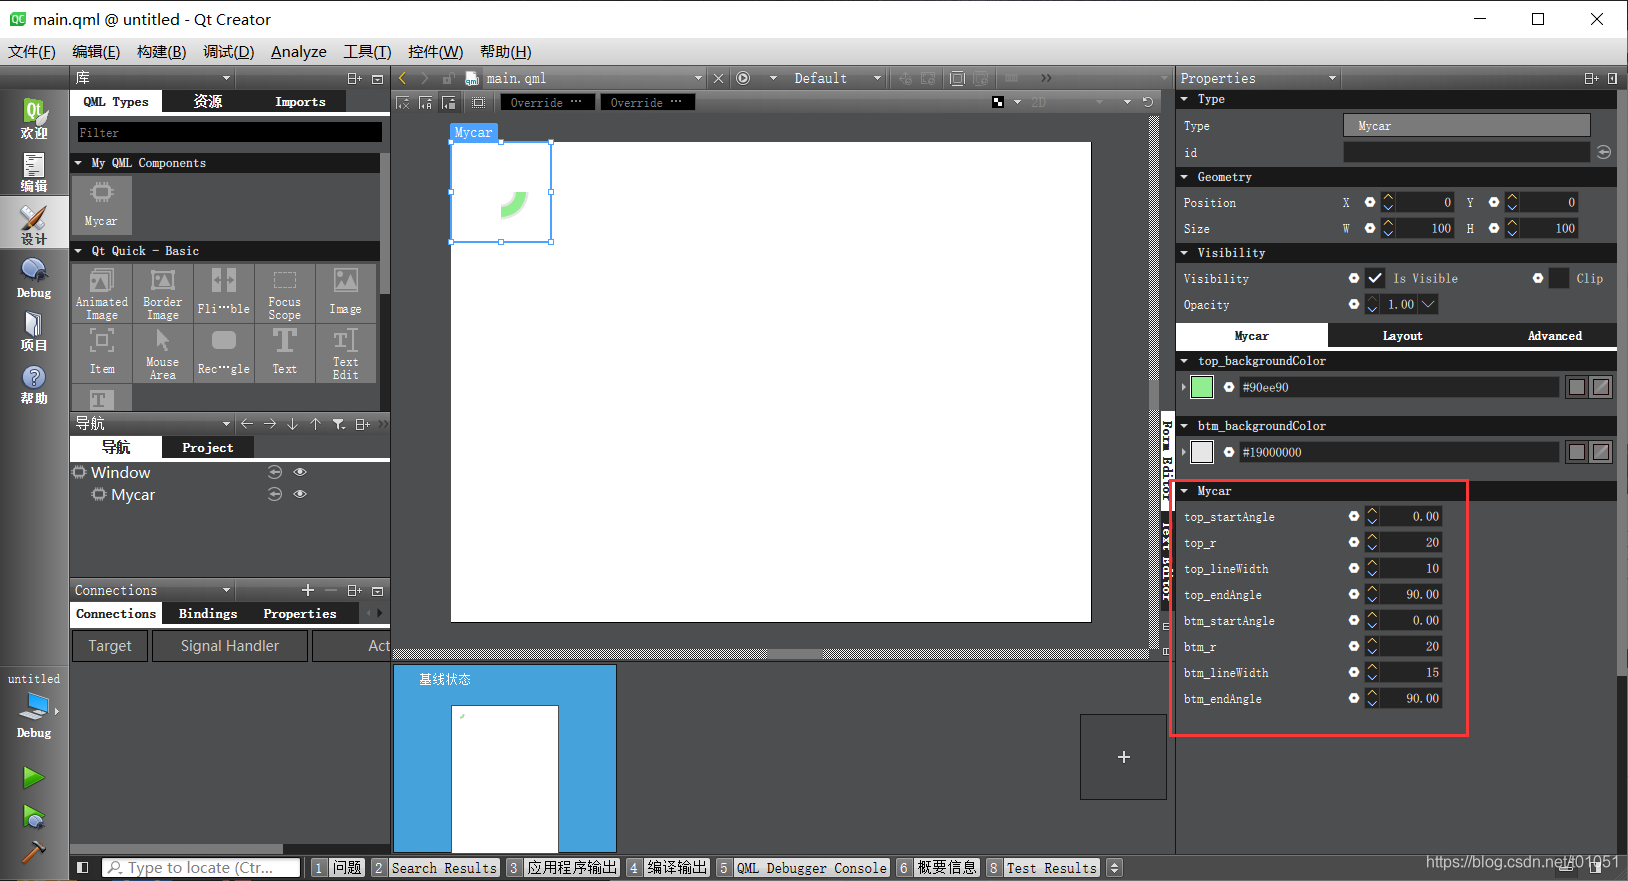
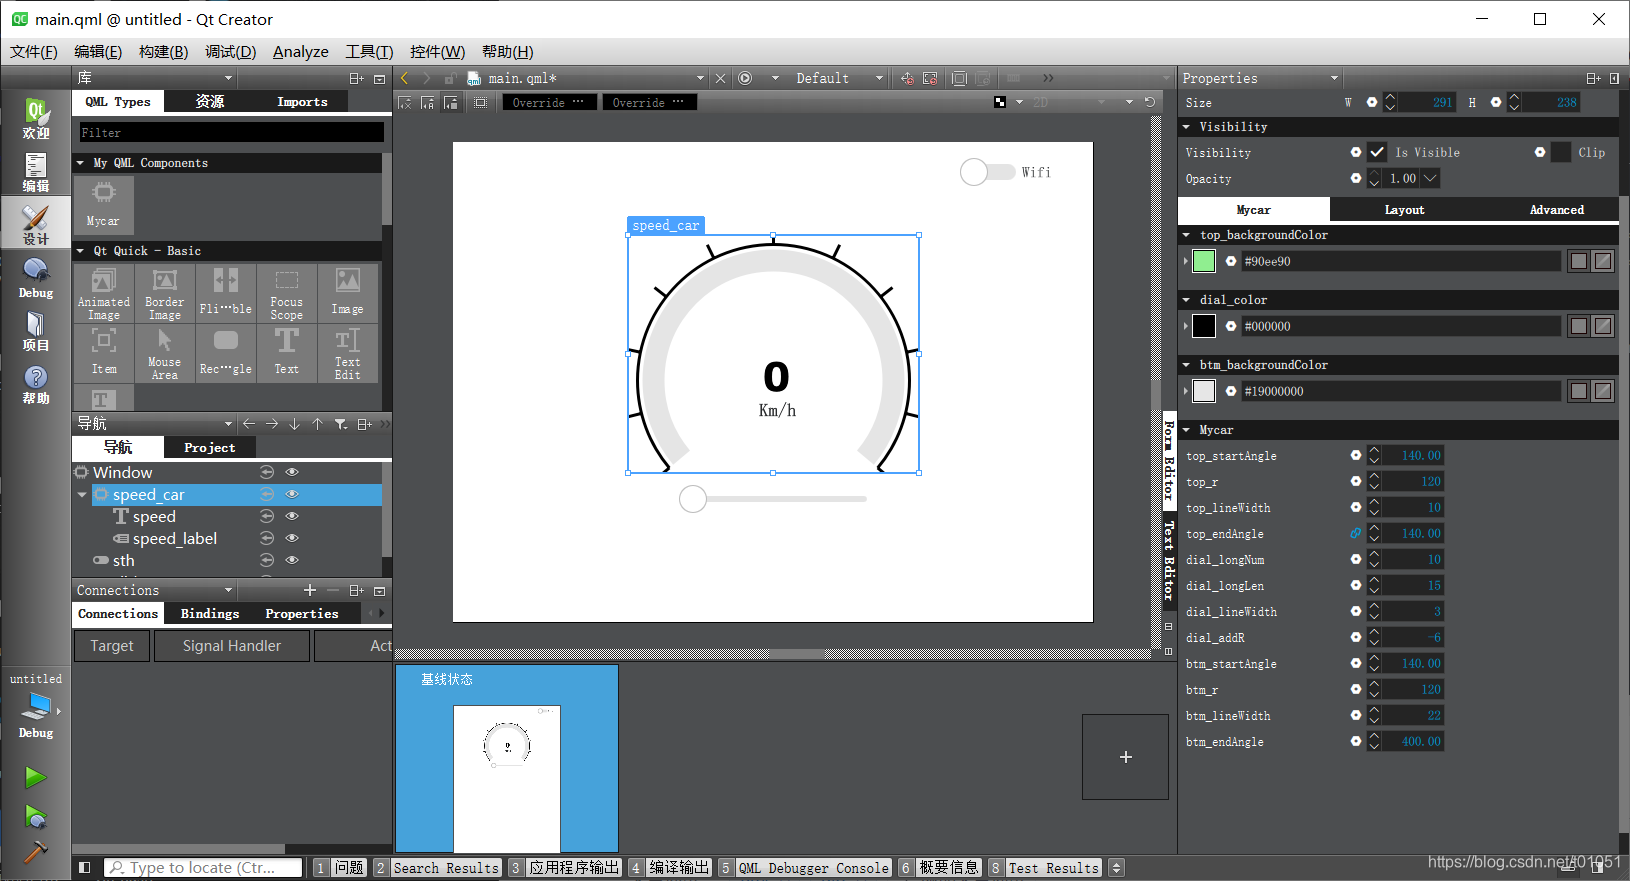
点击左侧的 设计,可以看到自定义的仪表控件已经被载入到界面中。右下角的则是我们在Mycar.qml中定义的,我们可以通过修改这些达到更改顶层和底层圆弧的大小、颜色等目的
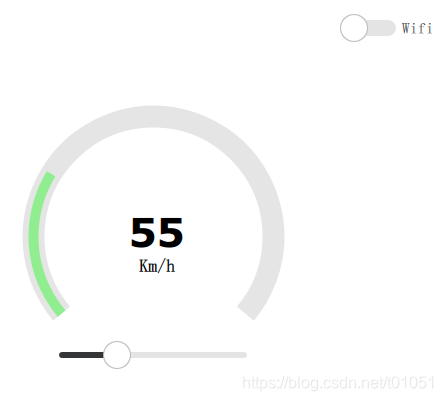
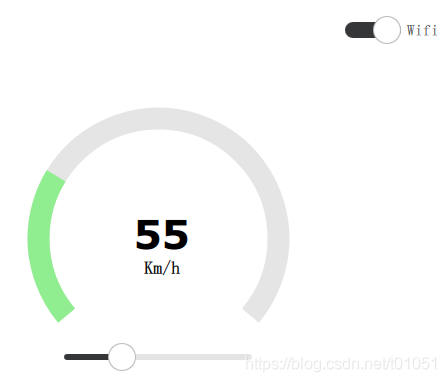
接下来,调整一下仪表的位置和大小,这里我还增加了一些控件,一个开关用来控制顶层圆弧的线宽,滑块用来模拟汽车的速度,文本框用来显示速度。。。
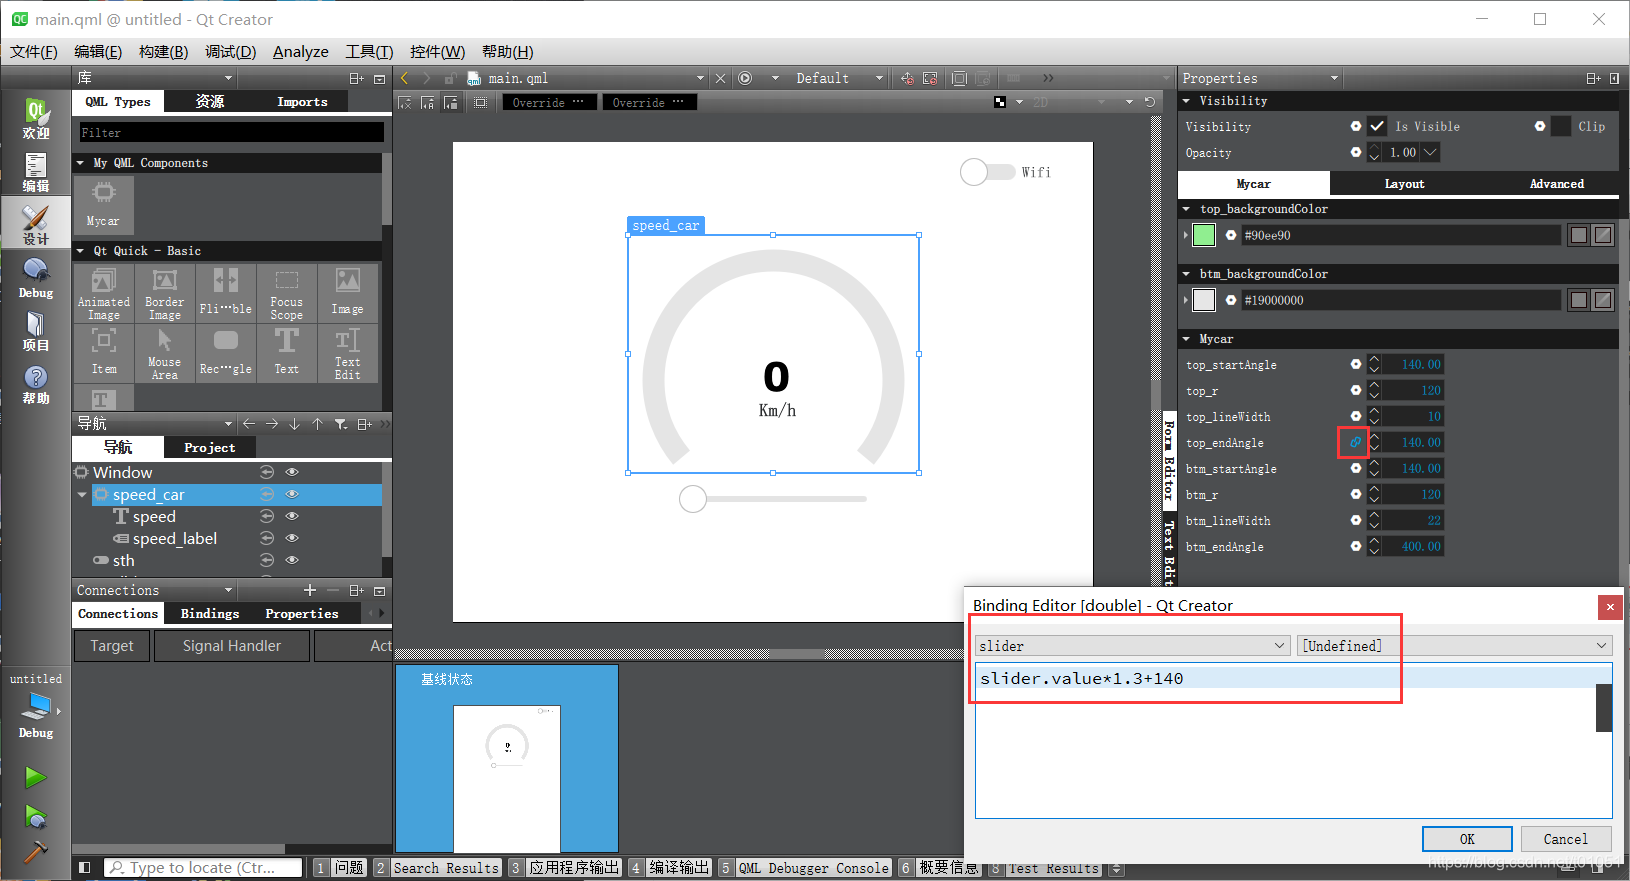
在main.qml中给Mycar一个id=speed_car,然后将顶层圆弧的终止角度与滑块进行绑定。当然你可以使用下图的方式进行绑定,也可以直接在Mycar中进行书写。这里我们约定这个速度仪表盘的最大刻度为200Km/h,将0~200Km/h映射到我们的仪表盘上。
点击左下角的运行,滑动滑块,可以看到开关控制的两种效果
不过作为仪表盘来说,虽然现在有了点模样,但还缺少了刻度盘。qt官方的刻度盘是ps设计好的,之后再在qt中把速度的值用文本框加上,这样就能设置字体和样式了。这里咱没有ps,不过没关系啊,用代码画出来就行,撸起袖子就是干
回到Mycar.qml文件中,将绘制刻度盘的代码加上
import QtQuick 2.0

Item {
    id: carItem
    width: 100
    height: 100

    // 背景圆弧线宽
    property int btm_lineWidth: 15
    // 背景圆弧颜色
    property color btm_backgroundColor: Qt.rgba(0, 0, 0, 0.1);
    // 背景圆弧半径 开始角度 结束角度
    property int btm_r: 20
    property double btm_startAngle: 0
    property double btm_endAngle: 90

    onBtm_lineWidthChanged: canvas.requestPaint()
    onBtm_backgroundColorChanged: canvas.requestPaint()
    onBtm_rChanged: canvas.requestPaint()
    onBtm_startAngleChanged: canvas.requestPaint()
    onBtm_endAngleChanged: canvas.requestPaint()

    // 顶层圆弧线宽
    property int top_lineWidth: 10
    // 顶层圆弧颜色
    property color top_backgroundColor: "lightgreen"
    // 顶层圆弧半径 开始角度 结束角度
    property int top_r: 20
    property double top_startAngle: 0
    property double top_endAngle: 90

    onTop_lineWidthChanged: canvas.requestPaint()
    onTop_backgroundColorChanged: canvas.requestPaint()
    onTop_rChanged: canvas.requestPaint()
    onTop_startAngleChanged: canvas.requestPaint()
    onTop_endAngleChanged: canvas.requestPaint()

    // 刻度盘
    property color dial_color: "#000000"
    property int dial_lineWidth: 3
    property int dial_addR: 2          // 通过调整该变量可以控制刻度盘圆弧与底层圆弧的距离
    property int dial_longNum: 5       // 刻度盘长刻度线的数量
    property int dial_longLen: 10      // 刻度盘长刻度线的长度

    onDial_colorChanged: canvas.requestPaint()
    onDial_lineWidthChanged: canvas.requestPaint()
    onDial_addRChanged: canvas.requestPaint()
    onDial_longNumChanged: canvas.requestPaint()
    onDial_longLenChanged: canvas.requestPaint()

    Canvas {
        id: canvas
        width: carItem.width
        height: carItem.height

        onPaint: {
            var ctx = getContext("2d");
            ctx.clearRect(0, 0, canvas.width, canvas.height);

            // 画背景圆弧
            ctx.lineWidth = carItem.btm_lineWidth;
            ctx.strokeStyle = carItem.btm_backgroundColor;
            ctx.beginPath();
            ctx.arc(carItem.width/2, carItem.width/2, carItem.btm_r, (carItem.btm_startAngle/180*Math.PI), (carItem.btm_endAngle/180*Math.PI));
            ctx.stroke();

            // 画大刻度盘
            ctx.lineWidth = carItem.dial_lineWidth;
            ctx.strokeStyle = carItem.dial_color;
            ctx.beginPath();
            ctx.arc(carItem.width/2, carItem.width/2, carItem.btm_r+carItem.btm_lineWidth+carItem.dial_addR, (carItem.btm_startAngle/180*Math.PI), (carItem.btm_endAngle/180*Math.PI));
            var tmp_step = (carItem.btm_endAngle-carItem.btm_startAngle)/carItem.dial_longNum;
            for(var i=carItem.btm_startAngle;i<carItem.btm_endAngle+tmp_step;i+=tmp_step) {
                var tmp_x = (carItem.width/2)+(carItem.btm_r+carItem.btm_lineWidth+carItem.dial_addR)*Math.cos(i/180*Math.PI);
                var tmp_y = (carItem.width/2)+(carItem.btm_r+carItem.btm_lineWidth+carItem.dial_addR)*Math.sin(i/180*Math.PI);
                ctx.moveTo(tmp_x, tmp_y);
                // 绘制长刻度线
                ctx.lineTo(tmp_x+carItem.dial_longLen*Math.cos(i/180*Math.PI), tmp_y+(carItem.dial_longLen*Math.sin(i/180*Math.PI)));
            }
            ctx.stroke();

            // 画顶层圆弧
            ctx.lineWidth = carItem.top_lineWidth;
            ctx.strokeStyle = carItem.top_backgroundColor;
            ctx.beginPath();
            ctx.arc(carItem.width/2, carItem.width/2, carItem.top_r, (carItem.top_startAngle/180*Math.PI), (carItem.top_endAngle/180*Math.PI));
            ctx.stroke();
        }
    }
}
调整刻度盘的参数,嘿嘿,还是有点模样的
接着用标签控件将速度刻度加上
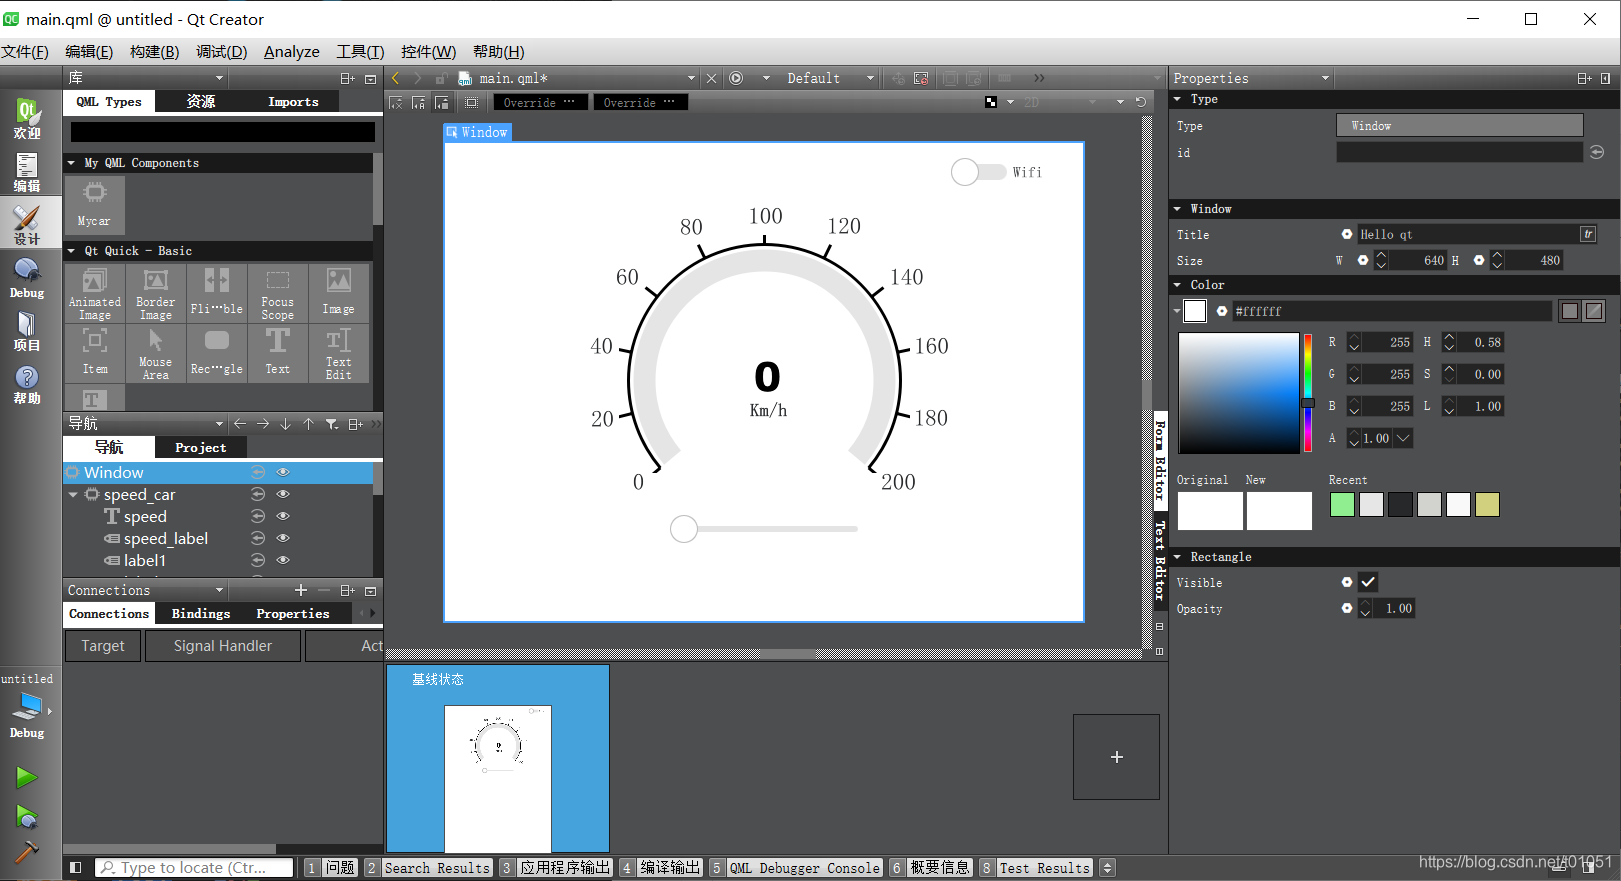
运行效果:
工程完整代码如下:
main.qml
// file - main.qml

import QtQuick 2.14
import QtQuick.Window 2.14
import QtQuick.Controls 2.0

Window {
    visible: true
    width: 640
    height: 480
    title: qsTr("Hello qt")

    Mycar {
        id: speed_car
        x: 175
        y: 93
        width: 291
        height: 238
        dial_addR: -6
        dial_longNum: 10
        dial_longLen: 15
        dial_lineWidth: 3
        btm_lineWidth: 22
        top_lineWidth: 10
        top_endAngle: slider.value*1.3+140
        top_startAngle: 140
        btm_endAngle: 400
        btm_startAngle: 140
        btm_r: 120
        top_r: 120

        Text {
            id: speed
            x: 104
            y: 116
            width: 89
            height: 44
            text: slider.value
            style: Text.Normal
            font.weight: Font.ExtraBold
            font.capitalization: Font.MixedCase
            font.pixelSize: 40
            font.bold: true
            font.family: "Verdana"
            horizontalAlignment: Text.AlignHCenter
                }

        Label {
            id: speed_label
            x: 131
            y: 154
            width: 45
            height: 30
            text: qsTr("Km/h")
            font.pointSize: 11
            font.bold: true
            verticalAlignment: Text.AlignBottom
        }

        Label {
            id: label1
            x: 8
            y: 235
            width: 23
            height: 25
            text: qsTr("0")
            font.weight: Font.Normal
            horizontalAlignment: Text.AlignHCenter
            font.pointSize: 14
        }

        Label {
            id: label2
            x: 263
            y: 235
            width: 33
            height: 25
            text: qsTr("200")
            horizontalAlignment: Text.AlignHCenter
            font.pointSize: 14
            font.weight: Font.Normal
        }

        Label {
            id: label3
            x: -28
            y: 172
            width: 23
            height: 25
            text: qsTr("20")
            horizontalAlignment: Text.AlignHCenter
            font.pointSize: 14
            font.weight: Font.Normal
        }
    }

    Switch {
        id: sth
        x: 501
        y: 10
        text: "Wifi"

        onClicked: {
            if(sth.position) {
                speed_car.top_lineWidth = speed_car.btm_lineWidth;
            } else {
                speed_car.top_lineWidth = 10
            }
        }
    }

    Slider {
        id: slider
        x: 220
        y: 367
        font.pointSize: 14
        stepSize: 1
        to: 200
        from: 0
        value: 0

        onValueChanged: {
            if(value<60) {
                speed.color = "black"
            }
            else if(value<120) {
                speed.color = "#f2ac28"
            }
            else {
                speed.color = "red"
            }
            speed_label.color = speed.color
        }
    }

    Label {
        id: label4
        x: 466
        y: 264
        width: 42
        height: 25
        text: qsTr("180")
        horizontalAlignment: Text.AlignHCenter
        font.pointSize: 14
        font.weight: Font.Normal
    }

    Label {
        id: label5
        x: 146
        y: 192
        width: 23
        height: 25
        text: qsTr("40")
        horizontalAlignment: Text.AlignHCenter
        font.pointSize: 14
        font.weight: Font.Normal
    }

    Label {
        id: label6
        x: 476
        y: 192
        width: 23
        height: 25
        text: qsTr("160")
        horizontalAlignment: Text.AlignHCenter
        font.pointSize: 14
        font.weight: Font.Normal
    }

    Label {
        id: label7
        x: 172
        y: 123
        width: 23
        height: 25
        text: qsTr("60")
        horizontalAlignment: Text.AlignHCenter
        font.pointSize: 14
        font.weight: Font.Normal
    }

    Label {
        id: label8
        x: 445
        y: 123
        width: 35
        height: 25
        text: qsTr("140")
        horizontalAlignment: Text.AlignHCenter
        font.pointSize: 14
        font.weight: Font.Normal
    }

    Label {
        id: label9
        x: 236
        y: 73
        width: 23
        height: 25
        text: qsTr("80")
        horizontalAlignment: Text.AlignHCenter
        font.pointSize: 14
        font.weight: Font.Normal
    }

    Label {
        id: label10
        x: 382
        y: 72
        width: 36
        height: 25
        text: qsTr("120")
        horizontalAlignment: Text.AlignHCenter
        font.pointSize: 14
        font.weight: Font.Normal
    }

    Label {
        id: label11
        x: 310
        y: 62
        width: 23
        height: 25
        text: qsTr("100")
        horizontalAlignment: Text.AlignHCenter
        font.pointSize: 14
        font.weight: Font.Normal
    }

}
Mycar.qml
// file - Mycar.qml

import QtQuick 2.0

Item {
    id: carItem
    width: 100
    height: 100

    // 背景圆弧线宽
    property int btm_lineWidth: 15
    // 背景圆弧颜色
    property color btm_backgroundColor: Qt.rgba(0, 0, 0, 0.1);
    // 背景圆弧半径 开始角度 结束角度
    property int btm_r: 20
    property double btm_startAngle: 0
    property double btm_endAngle: 90

    onBtm_lineWidthChanged: canvas.requestPaint()
    onBtm_backgroundColorChanged: canvas.requestPaint()
    onBtm_rChanged: canvas.requestPaint()
    onBtm_startAngleChanged: canvas.requestPaint()
    onBtm_endAngleChanged: canvas.requestPaint()

    // 顶层圆弧线宽
    property int top_lineWidth: 10
    // 顶层圆弧颜色
    property color top_backgroundColor: "lightgreen"
    // 顶层圆弧半径 开始角度 结束角度
    property int top_r: 20
    property double top_startAngle: 0
    property double top_endAngle: 90

    onTop_lineWidthChanged: canvas.requestPaint()
    onTop_backgroundColorChanged: canvas.requestPaint()
    onTop_rChanged: canvas.requestPaint()
    onTop_startAngleChanged: canvas.requestPaint()
    onTop_endAngleChanged: canvas.requestPaint()

    // 刻度盘
    property color dial_color: "#000000"
    property int dial_lineWidth: 3
    property int dial_addR: 2          // 通过调整该变量可以控制刻度盘圆弧与底层圆弧的距离
    property int dial_longNum: 5       // 刻度盘长刻度线的数量
    property int dial_longLen: 10      // 刻度盘长刻度线的长度

    onDial_colorChanged: canvas.requestPaint()
    onDial_lineWidthChanged: canvas.requestPaint()
    onDial_addRChanged: canvas.requestPaint()
    onDial_longNumChanged: canvas.requestPaint()
    onDial_longLenChanged: canvas.requestPaint()

    Canvas {
        id: canvas
        width: carItem.width
        height: carItem.height

        onPaint: {
            var ctx = getContext("2d");
            ctx.clearRect(0, 0, canvas.width, canvas.height);

            // 画背景圆弧
            ctx.lineWidth = carItem.btm_lineWidth;
            ctx.strokeStyle = carItem.btm_backgroundColor;
            ctx.beginPath();
            ctx.arc(carItem.width/2, carItem.width/2, carItem.btm_r, (carItem.btm_startAngle/180*Math.PI), (carItem.btm_endAngle/180*Math.PI));
            ctx.stroke();

            // 画大刻度盘
            ctx.lineWidth = carItem.dial_lineWidth;
            ctx.strokeStyle = carItem.dial_color;
            ctx.beginPath();
            ctx.arc(carItem.width/2, carItem.width/2, carItem.btm_r+carItem.btm_lineWidth+carItem.dial_addR, (carItem.btm_startAngle/180*Math.PI), (carItem.btm_endAngle/180*Math.PI));
            var tmp_step = (carItem.btm_endAngle-carItem.btm_startAngle)/carItem.dial_longNum;
            for(var i=carItem.btm_startAngle;i<carItem.btm_endAngle+tmp_step;i+=tmp_step) {
                var tmp_x = (carItem.width/2)+(carItem.btm_r+carItem.btm_lineWidth+carItem.dial_addR)*Math.cos(i/180*Math.PI);
                var tmp_y = (carItem.width/2)+(carItem.btm_r+carItem.btm_lineWidth+carItem.dial_addR)*Math.sin(i/180*Math.PI);
                ctx.moveTo(tmp_x, tmp_y);
                // 绘制长刻度线
                ctx.lineTo(tmp_x+carItem.dial_longLen*Math.cos(i/180*Math.PI), tmp_y+(carItem.dial_longLen*Math.sin(i/180*Math.PI)));
            }
            ctx.stroke();

            // 画顶层圆弧
            ctx.lineWidth = carItem.top_lineWidth;
            ctx.strokeStyle = carItem.top_backgroundColor;
            ctx.beginPath();
            ctx.arc(carItem.width/2, carItem.width/2, carItem.top_r, (carItem.top_startAngle/180*Math.PI), (carItem.top_endAngle/180*Math.PI));
            ctx.stroke();
        }
    }
}
工程包:https://download.csdn.net/download/t01051/12654094