一、CoordinatorLayout有什么作用
CoordinatorLayout作为“super-powered FrameLayout”基本实现两个功能:
1、作为顶层布局
2、调度协调子布局
CoordinatorLayout使用新的思路通过协调调度子布局的形式实现触摸影响布局的形式产生动画效果。CoordinatorLayout通过设置子View的 Behaviors来调度子View。系统(Support V7)提供了AppBarLayout.Behavior, AppBarLayout.ScrollingViewBehavior, FloatingActionButton.Behavior, SwipeDismissBehavior<V extends View> 等。
使用CoordinatorLayout需要在Gradle加入Support Design Library:
compile 'com.android.support:design:22.2.1'
定义布局文件:
<?xml version="1.0" encoding="utf-8"?>
<android.support.design.widget.CoordinatorLayout
    xmlns:android="http://schemas.android.com/apk/res/android"
    xmlns:app="http://schemas.android.com/apk/res-auto"
    android:layout_width="match_parent"
    android:layout_height="match_parent">


    <android.support.design.widget.FloatingActionButton
        android:id="@+id/fab"
        android:layout_width="wrap_content"
        android:layout_height="wrap_content"
        android:layout_gravity="end|bottom"
        android:layout_margin="16dp"
        android:src="@drawable/ic_done" />

</android.support.design.widget.CoordinatorLayout>
- 1
- 2
- 3
- 4
- 5
- 6
- 7
- 8
- 9
- 10
- 11
- 12
- 13
- 14
- 15
- 16
- 17
- 1
- 2
- 3
- 4
- 5
- 6
- 7
- 8
- 9
- 10
- 11
- 12
- 13
- 14
- 15
- 16
- 17
CoordinatorLayout作为“super-powered FrameLayout”,设置子视图的Android:layout_gravity属性控制位置。
Activity:
public class MainActivity extends AppCompatActivity {

    @Override
    protected void onCreate(Bundle savedInstanceState) {
        super.onCreate(savedInstanceState);
        setContentView(R.layout.activity_main);
        findViewById(R.id.fab).setOnClickListener(new View.OnClickListener() {
            @Override
            public void onClick(View view) {

                Snackbar.make(view,"FAB",Snackbar.LENGTH_LONG)
                        .setAction("cancel", new View.OnClickListener() {
                            @Override
                            public void onClick(View v) {
                                //这里的单击事件代表点击消除Action后的响应事件

                            }
                        })
                        .show();
            }
        });
    }
}
- 1
- 2
- 3
- 4
- 5
- 6
- 7
- 8
- 9
- 10
- 11
- 12
- 13
- 14
- 15
- 16
- 17
- 18
- 19
- 20
- 21
- 22
- 23
- 1
- 2
- 3
- 4
- 5
- 6
- 7
- 8
- 9
- 10
- 11
- 12
- 13
- 14
- 15
- 16
- 17
- 18
- 19
- 20
- 21
- 22
- 23
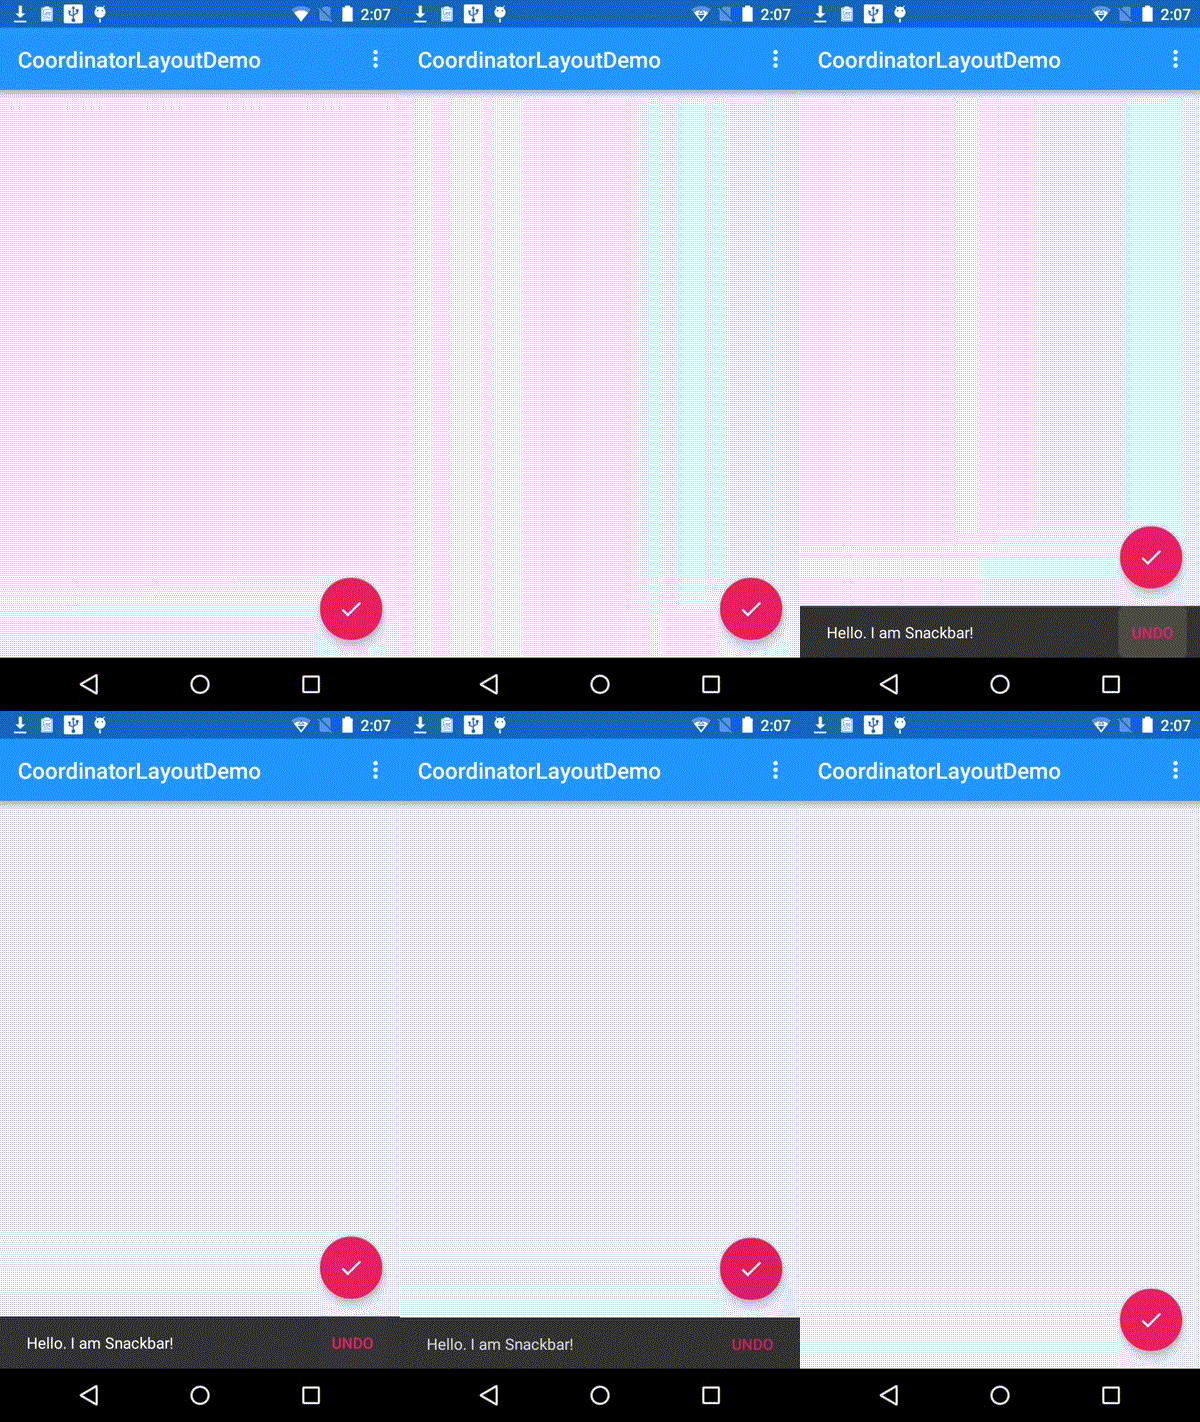
效果:

FloatingActionButton是最简单的使用CoordinatorLayout的例子,FloatingActionButton默认使用FloatingActionButton.Behavior。
三、CoordinatorLayout与AppBarLayout
3.1 AppBarLayout嵌套TabLayout
布局文件代码:
<android.support.design.widget.CoordinatorLayout xmlns:android="http://schemas.android.com/apk/res/android"
    xmlns:app="http://schemas.android.com/apk/res-auto"
    android:id="@+id/main_content"
    android:layout_width="match_parent"
    android:layout_height="match_parent">

    <android.support.design.widget.AppBarLayout
        android:id="@+id/appbar"
        android:layout_width="match_parent"
        android:layout_height="wrap_content"
        android:theme="@style/ThemeOverlay.AppCompat.Dark.ActionBar">

        <android.support.v7.widget.Toolbar
            android:id="@+id/toolbar"
            android:layout_width="match_parent"
            android:layout_height="?attr/actionBarSize"
            android:background="?attr/colorPrimary"
            app:popupTheme="@style/ThemeOverlay.AppCompat.Light"
            app:layout_scrollFlags="scroll|enterAlways" />

        <android.support.design.widget.TabLayout
            android:id="@+id/tabs"
            android:layout_width="match_parent"
            android:layout_height="wrap_content" />

    </android.support.design.widget.AppBarLayout>

    <android.support.v4.view.ViewPager
        android:id="@+id/viewpager"
        android:layout_width="match_parent"
        android:layout_height="match_parent"
        app:layout_behavior="@string/appbar_scrolling_view_behavior" />

    <android.support.design.widget.FloatingActionButton
        android:id="@+id/fab"
        android:layout_width="wrap_content"
        android:layout_height="wrap_content"
        android:layout_gravity="end|bottom"
        android:layout_margin="@dimen/fab_margin"
        android:src="@drawable/ic_done" />

</android.support.design.widget.CoordinatorLayout>
- 1
- 2
- 3
- 4
- 5
- 6
- 7
- 8
- 9
- 10
- 11
- 12
- 13
- 14
- 15
- 16
- 17
- 18
- 19
- 20
- 21
- 22
- 23
- 24
- 25
- 26
- 27
- 28
- 29
- 30
- 31
- 32
- 33
- 34
- 35
- 36
- 37
- 38
- 39
- 40
- 41
- 42
- 43
- 1
- 2
- 3
- 4
- 5
- 6
- 7
- 8
- 9
- 10
- 11
- 12
- 13
- 14
- 15
- 16
- 17
- 18
- 19
- 20
- 21
- 22
- 23
- 24
- 25
- 26
- 27
- 28
- 29
- 30
- 31
- 32
- 33
- 34
- 35
- 36
- 37
- 38
- 39
- 40
- 41
- 42
- 43
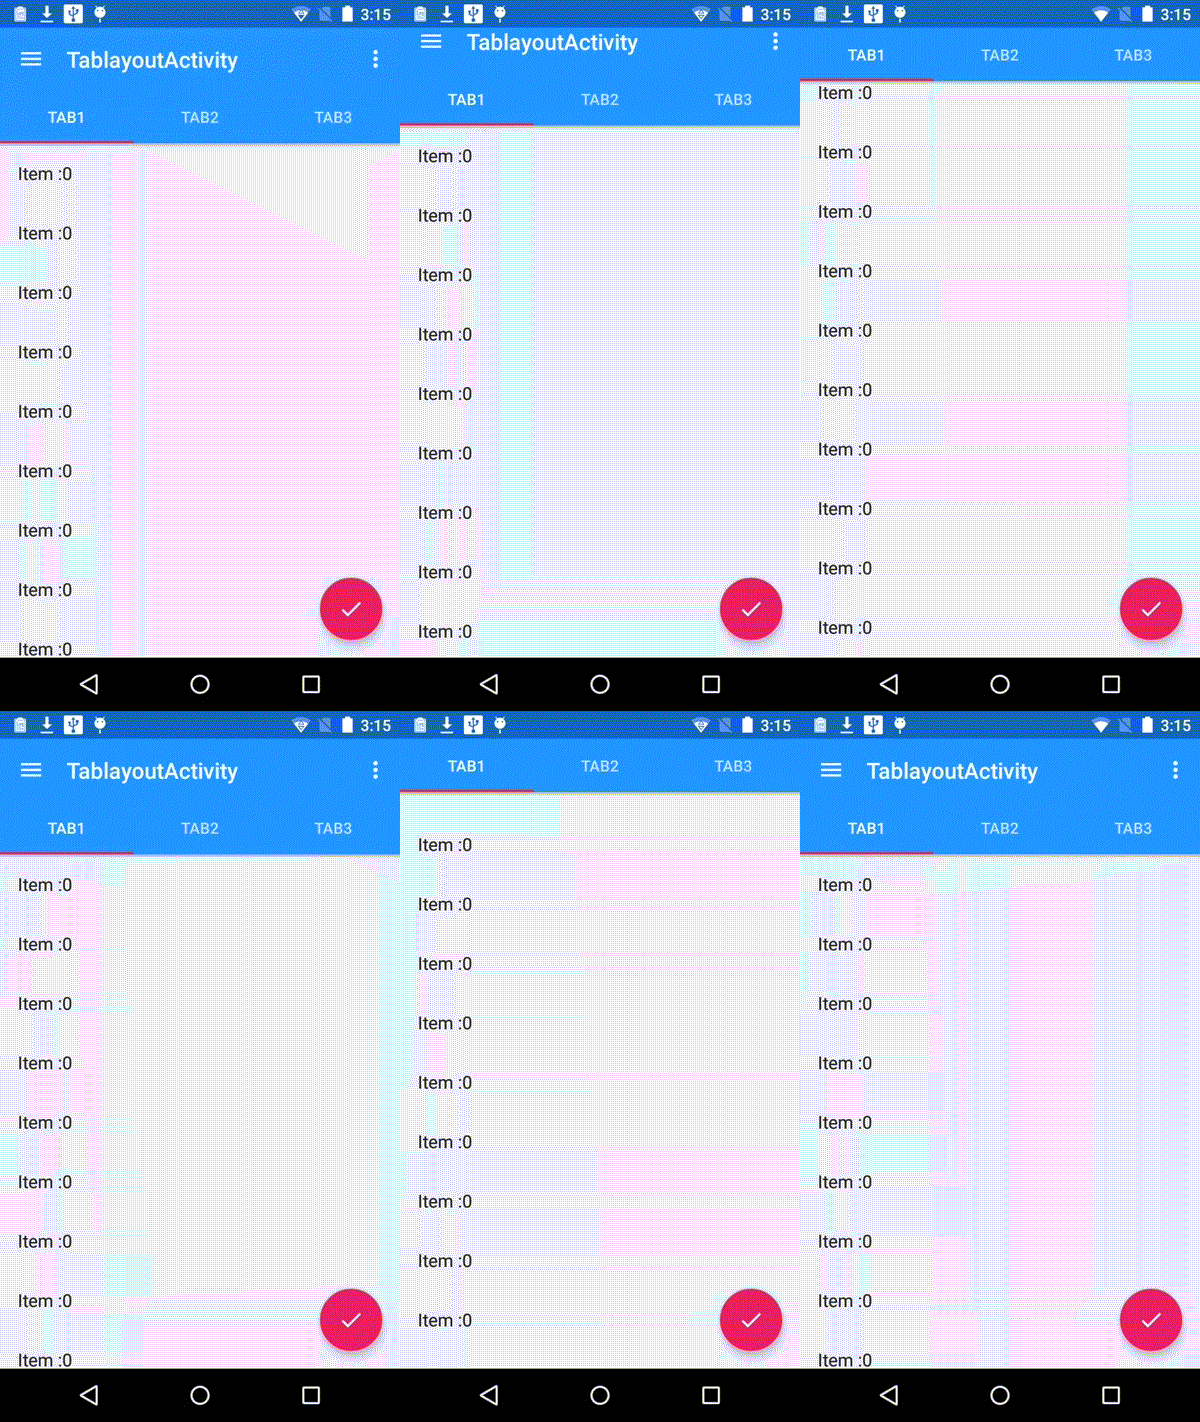
效果:

效果显示,视图滚动时,Toolbar会隐藏,这个效果是Android Support Library里面,新增的CoordinatorLayout, AppBarLayout实现的。通过AppBarLayout的子视图的属性控制。观察AppBarLayout的子布局,Toobar有app:layout_scrollFlags属性,这就是控制滑动时视图效果的属性。app:layout_scrollFlags有四个值:
- scroll: 所有想滚动出屏幕的view都需要设置这个flag, 没有设置这个flag的view将被固定在屏幕顶部。例如,TabLayout 没有设置这个值,将会停留在屏幕顶部。
- enterAlways: 设置这个flag时,向下的滚动都会导致该view变为可见,启用快速“返回模式”。
- enterAlwaysCollapsed: 当你的视图已经设置minHeight属性又使用此标志时,你的视图只能已最小高度进入,只有当滚动视图到达顶部时才扩大到完整高度。
- exitUntilCollapsed: 滚动退出屏幕,最后折叠在顶端。
为了ToolBar可以滚动,CoordinatorLayout里面,放一个带有可滚动的View.如上的例子,放的是ViewPager,而ViewPager里面是放了RecylerView的,即是可以滚动的View。CoordinatorLayout包含的子视图中带有滚动属性的View需要设置app:layout_behavior属性。例如,示例中Viewpager设置了此属性。
app:layout_behavior="@string/appbar_scrolling_view_behavior"
为了使得Toolbar有滑动效果,必须做到如下三点:
1. CoordinatorLayout作为布局的父布局容器。
2. 给需要滑动的组件设置 app:layout_scrollFlags=”scroll|enterAlways” 属性。
3. 给滑动的组件设置app:layout_behavior属性
<?xml version="1.0" encoding="utf-8"?>
<android.support.design.widget.CoordinatorLayout xmlns:android="http://schemas.android.com/apk/res/android"
    xmlns:app="http://schemas.android.com/apk/res-auto"
    android:id="@+id/main_content"
    android:layout_width="match_parent"
    android:layout_height="match_parent"
    android:fitsSystemWindows="true">

    <android.support.design.widget.AppBarLayout
        android:id="@+id/appbar"
        android:layout_width="match_parent"
        android:layout_height="256dp"
        android:theme="@style/ThemeOverlay.AppCompat.Dark.ActionBar"
        android:fitsSystemWindows="true">

        <android.support.design.widget.CollapsingToolbarLayout
            android:id="@+id/collapsing_toolbar"
            android:layout_width="match_parent"
            android:layout_height="match_parent"
            app:layout_scrollFlags="scroll|exitUntilCollapsed"
            android:fitsSystemWindows="true"
            app:contentScrim="?attr/colorPrimary"
            app:expandedTitleMarginStart="48dp"
            app:expandedTitleMarginEnd="64dp">

            <ImageView
                android:id="@+id/backdrop"
                android:layout_width="match_parent"
                android:layout_height="match_parent"
                android:scaleType="centerCrop"
                android:fitsSystemWindows="true"
                android:src="@drawable/header"
                app:layout_collapseMode="parallax"
                />

            <android.support.v7.widget.Toolbar
                android:id="@+id/toolbar"
                android:layout_width="match_parent"
                android:layout_height="?attr/actionBarSize"
                app:popupTheme="@style/ThemeOverlay.AppCompat.Light"
                app:layout_collapseMode="pin" />

        </android.support.design.widget.CollapsingToolbarLayout>

    </android.support.design.widget.AppBarLayout>

    <android.support.v4.widget.NestedScrollView
        android:layout_width="match_parent"
        android:layout_height="match_parent"
        app:layout_behavior="@string/appbar_scrolling_view_behavior">

        <LinearLayout
            android:layout_width="match_parent"
            android:layout_height="match_parent"
            android:orientation="vertical"
            android:paddingTop="24dp">

            <android.support.v7.widget.CardView
                android:layout_width="match_parent"
                android:layout_height="wrap_content"
                android:layout_margin="16dp">

                <LinearLayout
                    style="@style/Widget.CardContent"
                    android:layout_width="match_parent"
                    android:layout_height="wrap_content">

                    <TextView
                        android:layout_width="match_parent"
                        android:layout_height="wrap_content"
                        android:text="CardView"
                        android:textAppearance="@style/TextAppearance.AppCompat.Title" />

                    <TextView
                        android:layout_width="match_parent"
                        android:layout_height="wrap_content"
                        android:text="@string/card_string" />

                </LinearLayout>

            </android.support.v7.widget.CardView>
          ……
        </LinearLayout>

    </android.support.v4.widget.NestedScrollView>

    <android.support.design.widget.FloatingActionButton
        android:layout_height="wrap_content"
        android:layout_width="wrap_content"
        app:layout_anchor="@id/appbar"
        app:layout_anchorGravity="bottom|right|end"
        android:src="@drawable/ic_done"
        android:layout_margin="@dimen/fab_margin"
        android:clickable="true"/>

</android.support.design.widget.CoordinatorLayout>
- 1
- 2
- 3
- 4
- 5
- 6
- 7
- 8
- 9
- 10
- 11
- 12
- 13
- 14
- 15
- 16
- 17
- 18
- 19
- 20
- 21
- 22
- 23
- 24
- 25
- 26
- 27
- 28
- 29
- 30
- 31
- 32
- 33
- 34
- 35
- 36
- 37
- 38
- 39
- 40
- 41
- 42
- 43
- 44
- 45
- 46
- 47
- 48
- 49
- 50
- 51
- 52
- 53
- 54
- 55
- 56
- 57
- 58
- 59
- 60
- 61
- 62
- 63
- 64
- 65
- 66
- 67
- 68
- 69
- 70
- 71
- 72
- 73
- 74
- 75
- 76
- 77
- 78
- 79
- 80
- 81
- 82
- 83
- 84
- 85
- 86
- 87
- 88
- 89
- 90
- 91
- 92
- 93
- 94
- 95
- 96
- 97
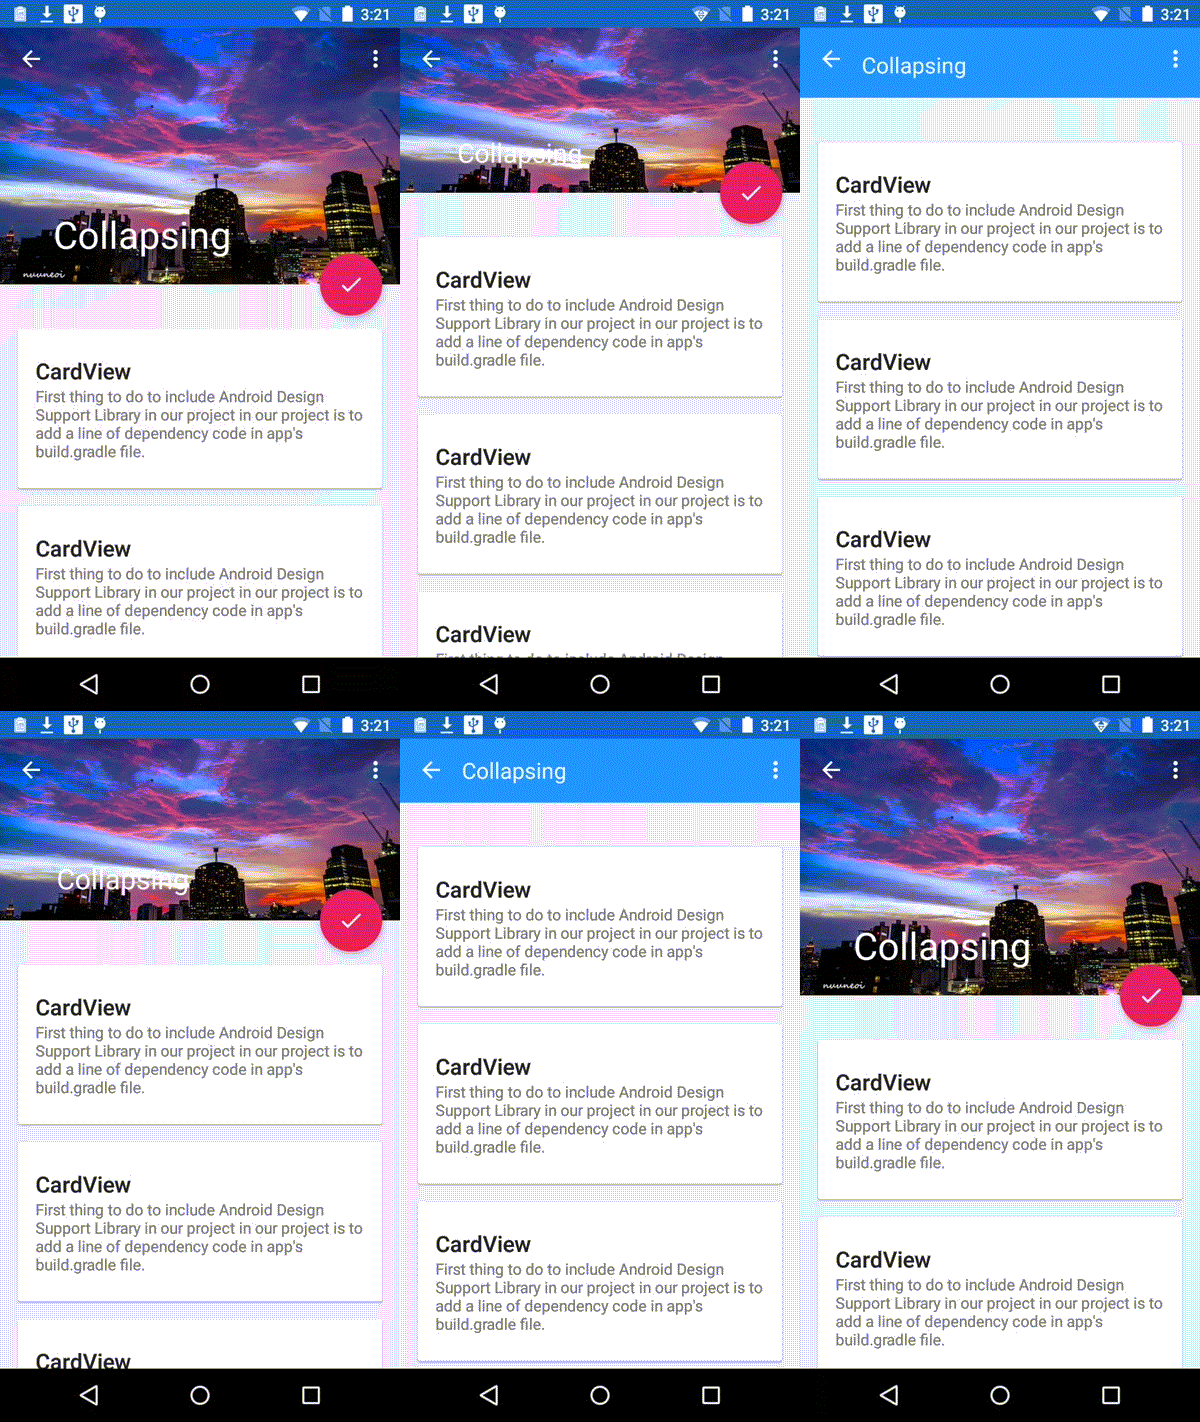
效果:

这种效果在详情页面用的较多,展示个性化内容,图像有强烈的吸引力。这个效果重点使用了CollapsingToolbarLayout 。
CollapsingToolbarLayout可实现Toolbar的折叠效果。CollapsingToolbarLayout的子视图类似与LinearLayout垂直方向排放。
CollapsingToolbarLayout 提供以下属性和方法是用:
1. Collapsing title:ToolBar的标题,当CollapsingToolbarLayout全屏没有折叠时,title显示的是大字体,在折叠的过程中,title不断变小到一定大小的效果。你可以调用setTitle(CharSequence)方法设置title。
2. Content scrim:ToolBar被折叠到顶部固定时候的背景,你可以调用setContentScrim(Drawable)方法改变背景或者 在属性中使用 app:contentScrim=”?attr/colorPrimary”来改变背景。
3. Status bar scrim:状态栏的背景,调用方法setStatusBarScrim(Drawable)。还没研究明白,不过这个只能在Android5.0以上系统有效果。
4. Parallax scrolling children:CollapsingToolbarLayout滑动时,子视图的视觉差,可以通过属性app:layout_collapseParallaxMultiplier=”0.6”改变。值de的范围[0.0,1.0],值越大视察越大。
5. CollapseMode :子视图的折叠模式,在子视图设置,有两种“pin”:固定模式,在折叠的时候最后固定在顶端;“parallax”:视差模式,在折叠的时候会有个视差折叠的效果。我们可以在布局中使用属性app:layout_collapseMode=”parallax”来改变。
CoordinatorLayout 还提供了一个 layout_anchor 的属性,连同 layout_anchorGravity 一起,可以用来放置与其他视图关联在一起的悬浮视图(如 FloatingActionButton)。本例中使用FloatingActionButton。
通过下面的参数设置了FloatingActionButton的位置,两个属性共同作用使得FAB 浮动按钮也能折叠消失,展现。
app:layout_anchor="@id/appbar"
app:layout_anchorGravity="bottom|right|end"
使用CollapsingToolbarLayout实现折叠效果,需要注意3点
1. AppBarLayout的高度固定
2. CollapsingToolbarLayout的子视图设置layout_collapseMode属性
3. 关联悬浮视图设置app:layout_anchor,app:layout_anchorGravity属性
四、自定义behavior
CoordinatorLayout功能如此强大,而他的神奇之处在于Behavior对象,CoordinatorLayout自己并不控制View,所有的控制权都在Behavior。前面写到了FloatingActionButton.Behavior,AppBarLayout.Behavior, AppBarLayout.ScrollingViewBehavior。 AppBarLayout中有两个Behavior,一个是拿来给它自己用的,另一个是拿来给它的兄弟结点用的。这些Behavior实现了复杂的控制功能。系统的Behavior毕竟有限,我们可以通过自定义的方式来实现自己的Behavior。
通过 CoordinatorLayout.Behavior(YourView.Behavior.class) 来定义自己的Behavior,并在layout 文件中设置 app:layout_behavior=”com.example.app.YourView$Behavior” 来达到效果。
自定义Behavior 需要重写两个方法:
 public boolean layoutDependsOn(CoordinatorLayout parent, View child, View dependency)

 public boolean onDependentViewChanged(CoordinatorLayout parent, View child, View dependency)
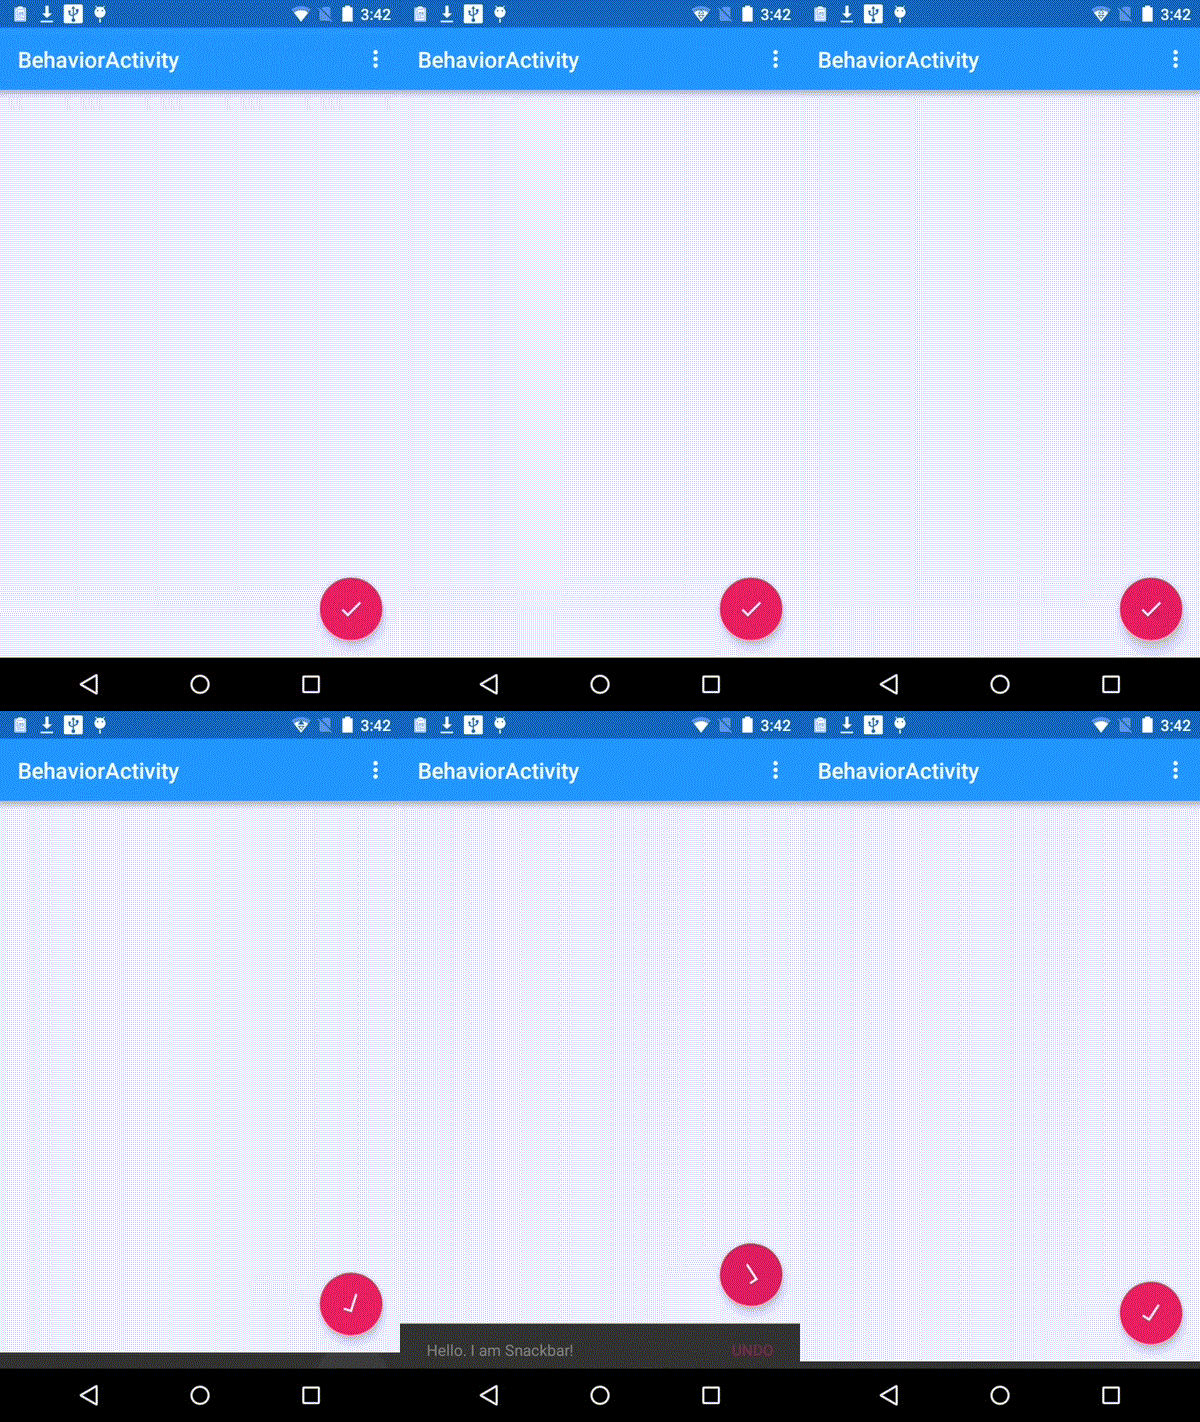
如下面的例子,实现了点击FloatingActionButton点击旋转90度,并适配Snackbar。
public class RotateBehavior  extends CoordinatorLayout.Behavior<FloatingActionButton> {
    private static final String TAG = RotateBehavior.class.getSimpleName();

    public RotateBehavior() {
    }

    public RotateBehavior(Context context, AttributeSet attrs) {
        super(context, attrs);
    }

    @Override
    public boolean layoutDependsOn(CoordinatorLayout parent, FloatingActionButton child, View dependency) {
        return dependency instanceof Snackbar.SnackbarLayout;
    }

    @Override
    public boolean onDependentViewChanged(CoordinatorLayout parent, FloatingActionButton child, View dependency) {
        float translationY = getFabTranslationYForSnackbar(parent, child);
        float percentComplete = -translationY / dependency.getHeight();
        child.setRotation(-90 * percentComplete);
        child.setTranslationY(translationY);
        return false;
    }

    private float getFabTranslationYForSnackbar(CoordinatorLayout parent,
                                                FloatingActionButton fab) {
        float minOffset = 0;
        final List<View> dependencies = parent.getDependencies(fab);
        for (int i = 0, z = dependencies.size(); i < z; i++) {
            final View view = dependencies.get(i);
            if (view instanceof Snackbar.SnackbarLayout && parent.doViewsOverlap(fab, view)) {
                minOffset = Math.min(minOffset,
                        ViewCompat.getTranslationY(view) - view.getHeight());
            }
        }

        return minOffset;
    }
}
- 1
- 2
- 3
- 4
- 5
- 6
- 7
- 8
- 9
- 10
- 11
- 12
- 13
- 14
- 15
- 16
- 17
- 18
- 19
- 20
- 21
- 22
- 23
- 24
- 25
- 26
- 27
- 28
- 29
- 30
- 31
- 32
- 33
- 34
- 35
- 36
- 37
- 38
- 39
- 1
- 2
- 3
- 4
- 5
- 6
- 7
- 8
- 9
- 10
- 11
- 12
- 13
- 14
- 15
- 16
- 17
- 18
- 19
- 20
- 21
- 22
- 23
- 24
- 25
- 26
- 27
- 28
- 29
- 30
- 31
- 32
- 33
- 34
- 35
- 36
- 37
- 38
- 39
<android.support.design.widget.CoordinatorLayout xmlns:android="http://schemas.android.com/apk/res/android"
    xmlns:app="http://schemas.android.com/apk/res-auto"
    android:id="@+id/main_content"
    android:layout_width="match_parent"
    android:layout_height="match_parent"
    android:fitsSystemWindows="true">
    <android.support.design.widget.FloatingActionButton
        android:id="@+id/fab"
        android:layout_width="wrap_content"
        android:layout_height="wrap_content"
        android:layout_gravity="end|bottom"
        android:layout_margin="@dimen/fab_margin"
        android:src="@drawable/ic_done"
        app:layout_behavior="com.meizu.coordinatorlayoutdemo.RotateBehavior"/>
</android.support.design.widget.CoordinatorLayout>
- 1
- 2
- 3
- 4
- 5
- 6
- 7
- 8
- 9
- 10
- 11
- 12
- 13
- 14
- 15
- 1
- 2
- 3
- 4
- 5
- 6
- 7
- 8
- 9
- 10
- 11
- 12
- 13
- 14
- 15
效果:

综上,基本覆盖了CoordinatorLayout的使用方式。