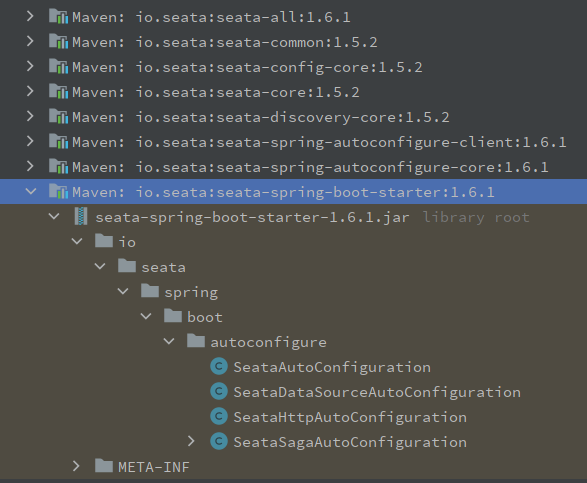
seata AT 模式的业务零侵入性,依靠的就是自动装配 starter 包。
1. 如何开启的全局事务
实现核心为 SeataAutoConfiguration 注入的 GlobalTransactionScanner:
@ConditionalOnProperty(prefix = SEATA_PREFIX, name = "enabled", havingValue = "true", matchIfMissing = true)
@AutoConfigureAfter({SeataCoreAutoConfiguration.class})
public class SeataAutoConfiguration {
    private static final Logger LOGGER = LoggerFactory.getLogger(SeataAutoConfiguration.class);

    ...

    @Bean
    @DependsOn({BEAN_NAME_SPRING_APPLICATION_CONTEXT_PROVIDER, BEAN_NAME_FAILURE_HANDLER})
    @ConditionalOnMissingBean(GlobalTransactionScanner.class)
    public static GlobalTransactionScanner globalTransactionScanner(SeataProperties seataProperties, FailureHandler failureHandler,
            ConfigurableListableBeanFactory beanFactory,
            @Autowired(required = false) List<ScannerChecker> scannerCheckers) {
      	...

        // create global transaction scanner
        return new GlobalTransactionScanner(seataProperties.getApplicationId(), seataProperties.getTxServiceGroup(), failureHandler);
    }
}


public class GlobalTransactionScanner extends AbstractAutoProxyCreator
        implements ConfigurationChangeListener, InitializingBean, ApplicationContextAware, DisposableBean {
	...
}
GlobalTransactionScanner 继承了 AbstractAutoProxyCreator,说明具备生成 Proxy Bean 的能力。那么对什么样的 Bean 生成 Proxy 呢?下面即检查方法:类或者方法上标有:@GlobalTransaction 注解的 Bean,或方法上标有 @GlobalLock 的 Bean。
private boolean existsAnnotation(Class<?>[] classes) {
   if (CollectionUtils.isNotEmpty(classes)) {
        for (Class<?> clazz : classes) {
            if (clazz == null) {
                continue;
            }
            GlobalTransactional trxAnno = clazz.getAnnotation(GlobalTransactional.class);
            if (trxAnno != null) {
                return true;
            }
            Method[] methods = clazz.getMethods();
            for (Method method : methods) {
                trxAnno = method.getAnnotation(GlobalTransactional.class);
                if (trxAnno != null) {
                    return true;
                }

                GlobalLock lockAnno = method.getAnnotation(GlobalLock.class);
                if (lockAnno != null) {
                    return true;
                }
            }
        }
    }
    return false;
}
也就是说前一篇 Blog 中的 加了 @Globaltransaction 注解的 OrderController 即是一个 Proxy Bean。全局事务的开启,就是通过 Proxy Bean 实现的。既然可以开启全局事务,说明 order-service 具备了 TM 的职能,同时也具备了 RM 的职能。换而言之,对于全局事务中的起始微服务节点,不仅可以做为 RM,也可以为 TM。
其实,只要引入了自动装配依赖,就会将微服务同时视为 TM 与 RM。可以通过下面 InitializingBean 接口的初始化方法进行验证:
@Override
public void afterPropertiesSet() {
    if (disableGlobalTransaction) {
        if (LOGGER.isInfoEnabled()) {
            LOGGER.info("Global transaction is disabled.");
        }
        ConfigurationCache.addConfigListener(ConfigurationKeys.DISABLE_GLOBAL_TRANSACTION,
                (ConfigurationChangeListener)this);
        return;
    }
    if (initialized.compareAndSet(false, true)) {
        initClient();
    }
}

private void initClient() {

 	...

    //init TM
    TMClient.init(applicationId, txServiceGroup, accessKey, secretKey);
    if (LOGGER.isInfoEnabled()) {
        LOGGER.info("Transaction Manager Client is initialized. applicationId[{}] txServiceGroup[{}]", applicationId, txServiceGroup);
    }
    //init RM
    RMClient.init(applicationId, txServiceGroup);
    if (LOGGER.isInfoEnabled()) {
        LOGGER.info("Resource Manager is initialized. applicationId[{}] txServiceGroup[{}]", applicationId, txServiceGroup);
    }

    if (LOGGER.isInfoEnabled()) {
        LOGGER.info("Global Transaction Clients are initialized. ");
    }
    registerSpringShutdownHook();
}
截图效果:

那么全局事务具体是如何开启的呢?需要先找到 Proxy 的扩展内容:
public class GlobalTransactionScanner extends AbstractAutoProxyCreator
        implements ConfigurationChangeListener, InitializingBean, ApplicationContextAware, DisposableBean {

  @Override
  protected Object wrapIfNecessary(Object bean, String beanName, Object cacheKey) {

	   ...

      // 1. check TCC proxy
      if (TCCBeanParserUtils.isTccAutoProxy(bean, beanName, applicationContext)) {
          // init tcc fence clean task if enable useTccFence
          TCCBeanParserUtils.initTccFenceCleanTask(TCCBeanParserUtils.getRemotingDesc(beanName), applicationContext);
          //TCC interceptor, proxy bean of sofa:reference/dubbo:reference, and LocalTCC
          interceptor = new TccActionInterceptor(TCCBeanParserUtils.getRemotingDesc(beanName));
          ConfigurationCache.addConfigListener(ConfigurationKeys.DISABLE_GLOBAL_TRANSACTION,
                  (ConfigurationChangeListener)interceptor);
      } else {
          Class<?> serviceInterface = SpringProxyUtils.findTargetClass(bean);
          Class<?>[] interfacesIfJdk = SpringProxyUtils.findInterfaces(bean);

		  // 2. 检查是否标有 @GlobalTransaction、@GlobalLock 注解
          if (!existsAnnotation(new Class[]{serviceInterface})
              && !existsAnnotation(interfacesIfJdk)) {
              return bean;
          }

		  // 3. 如果是需要代理的 Bean,在代理前初始化用于增强 Bean 的拦截器
          if (globalTransactionalInterceptor == null) {
              globalTransactionalInterceptor = new GlobalTransactionalInterceptor(failureHandlerHook);
              ConfigurationCache.addConfigListener(
                      ConfigurationKeys.DISABLE_GLOBAL_TRANSACTION,
                      (ConfigurationChangeListener)globalTransactionalInterceptor);
          }
          interceptor = globalTransactionalInterceptor;
      }

      LOGGER.info("Bean[{}] with name [{}] would use interceptor [{}]", bean.getClass().getName(), beanName, interceptor.getClass().getName());
      // 4. 如果当前 Bean 是普通 Bean 则生成代理
      if (!AopUtils.isAopProxy(bean)) {
          bean = super.wrapIfNecessary(bean, beanName, cacheKey);
      }

	  ...

      return bean;
  }

  ...
}
GlobalTransactionalInterceptor 中封装了开启全局事务的具体实现:
public class GlobalTransactionalInterceptor implements ConfigurationChangeListener, MethodInterceptor, SeataInterceptor {
	 @Override
    public Object invoke(final MethodInvocation methodInvocation) throws Throwable {

		...

		if (globalTransactionalAnnotation != null || this.aspectTransactional != null) {
            AspectTransactional transactional;
             // 1. 组装注解中的事务配置信息
             if (globalTransactionalAnnotation != null) {
                 transactional = new AspectTransactional(globalTransactionalAnnotation.timeoutMills(),
                     globalTransactionalAnnotation.name(), globalTransactionalAnnotation.rollbackFor(),
                     globalTransactionalAnnotation.rollbackForClassName(),
                     globalTransactionalAnnotation.noRollbackFor(),
                     globalTransactionalAnnotation.noRollbackForClassName(),
                     globalTransactionalAnnotation.propagation(),
                     globalTransactionalAnnotation.lockRetryInterval(),
                     globalTransactionalAnnotation.lockRetryTimes(),
                     globalTransactionalAnnotation.lockStrategyMode());
             } else {
                 transactional = this.aspectTransactional;
             }
             // 2. 执行全局事务
             return handleGlobalTransaction(methodInvocation, transactional);
         } else if (globalLockAnnotation != null) {
             return handleGlobalLock(methodInvocation, globalLockAnnotation);
         }

		....

        return methodInvocation.proceed();
	}

	Object handleGlobalTransaction(final MethodInvocation methodInvocation,
        final AspectTransactional aspectTransactional) throws Throwable {
        boolean succeed = true;
        try {
        	// 3. 调用事务模版执行
            return transactionalTemplate.execute(new TransactionalExecutor() {
                @Override
                public Object execute() throws Throwable {
                    return methodInvocation.proceed();
                }

        		...

            });
        }

        ...
    }
}
拦截器内部再次调用了 TransactionalTemplate 实现真正的执行(核心):
public class TransactionalTemplate {

	public Object execute(TransactionalExecutor business) throws Throwable {
        // 1. Get transactionInfo
        TransactionInfo txInfo = business.getTransactionInfo();
        if (txInfo == null) {
            throw new ShouldNeverHappenException("transactionInfo does not exist");
        }
        // 1.1 Get current transaction, if not null, the tx role is 'GlobalTransactionRole.Participant'.
        GlobalTransaction tx = GlobalTransactionContext.getCurrent();

        // 1.2 Handle the transaction propagation.
        Propagation propagation = txInfo.getPropagation();
        SuspendedResourcesHolder suspendedResourcesHolder = null;
        try {
            switch (propagation) {
                case NOT_SUPPORTED:
                    // If transaction is existing, suspend it.
                    if (existingTransaction(tx)) {
                        suspendedResourcesHolder = tx.suspend();
                    }
                    // Execute without transaction and return.
                    return business.execute();
                case REQUIRES_NEW:
                    // If transaction is existing, suspend it, and then begin new transaction.
                    if (existingTransaction(tx)) {
                        suspendedResourcesHolder = tx.suspend();
                        tx = GlobalTransactionContext.createNew();
                    }
                    // Continue and execute with new transaction
                    break;
                case SUPPORTS:
                    // If transaction is not existing, execute without transaction.
                    if (notExistingTransaction(tx)) {
                        return business.execute();
                    }
                    // Continue and execute with new transaction
                    break;
                case REQUIRED:
                    // If current transaction is existing, execute with current transaction,
                    // else continue and execute with new transaction.
                    break;
                case NEVER:
                    // If transaction is existing, throw exception.
                    if (existingTransaction(tx)) {
                        throw new TransactionException(
                                String.format("Existing transaction found for transaction marked with propagation 'never', xid = %s"
                                        , tx.getXid()));
                    } else {
                        // Execute without transaction and return.
                        return business.execute();
                    }
                case MANDATORY:
                    // If transaction is not existing, throw exception.
                    if (notExistingTransaction(tx)) {
                        throw new TransactionException("No existing transaction found for transaction marked with propagation 'mandatory'");
                    }
                    // Continue and execute with current transaction.
                    break;
                default:
                    throw new TransactionException("Not Supported Propagation:" + propagation);
            }

            // 1.3 If null, create new transaction with role 'GlobalTransactionRole.Launcher'.
            if (tx == null) {
                tx = GlobalTransactionContext.createNew();
            }

            // set current tx config to holder
            GlobalLockConfig previousConfig = replaceGlobalLockConfig(txInfo);

            try {
                // 2. If the tx role is 'GlobalTransactionRole.Launcher', send the request of beginTransaction to TC,
                //    else do nothing. Of course, the hooks will still be triggered.
                beginTransaction(txInfo, tx);

                Object rs;
                try {
                    // Do Your Business
                    rs = business.execute();
                } catch (Throwable ex) {
                    // 3. The needed business exception to rollback.
                    completeTransactionAfterThrowing(txInfo, tx, ex);
                    throw ex;
                }

                // 4. everything is fine, commit.
                commitTransaction(tx, txInfo);

                return rs;
            } finally {
                //5. clear
                resumeGlobalLockConfig(previousConfig);
                triggerAfterCompletion();
                cleanUp();
            }
        } finally {
            // If the transaction is suspended, resume it.
            if (suspendedResourcesHolder != null) {
                tx.resume(suspendedResourcesHolder);
            }
        }
    }
}
注释写的很清楚,涵括了:
- 事务传播行为的处理
- 全局事务的创建:若无法从线程上下文中获取到全局事务信息,创建一个角色为
GlobalTransactionRole.Launcher发起者的全局事务。若可以获取到则创建一个角色为GlobalTransactionRole.Participant参与者的全局事务。
- 提交
- 业务执行,业务代码的执行链中可能会涉及多个 RM 的执行。
- 回滚
这就是 2PC (Two Phase Commitment Protocol) 流程的最终实现。当 TM 发起全局事务提交或回滚请求到 TC 后,TC 检查所有的分支事务的状态,并根据统计结果回调所有的分支事务发起提交、回滚请求。
2. 不同服务间如何意识到属于同一个全局事务
根据上面的分析,我们知道了是如何依赖 TransactionalTemplate 开启的全局事务。但当我们的业务方法执行期间进行了 RPC 调用,下游的服务节点又是如何加入到同一个全局事务中的呢?
这个就是SeataHttpAutoConfiguration提供的功能:
@Configuration(proxyBeanMethods = false)
@ConditionalOnWebApplication
@ConditionalOnMissingBean(SeataWebMvcConfigurer.class)
@ConditionalOnProperty(prefix = HTTP_PREFIX, name = "interceptor-enabled", havingValue = "true", matchIfMissing = true)
@AutoConfigureOrder(Ordered.LOWEST_PRECEDENCE)
public class SeataHttpAutoConfiguration {


    @Bean
    @ConditionalOnClass(name = "jakarta.servlet.http.HttpServletRequest")
    public JakartaSeataWebMvcConfigurer jakartaSeataWebMvcConfigurer() {
        return new JakartaSeataWebMvcConfigurer();
    }

    // 1. 注入 Web 配置
    @Bean
    @ConditionalOnMissingBean(JakartaSeataWebMvcConfigurer.class)
    public SeataWebMvcConfigurer seataWebMvcConfigurer() {
        return new SeataWebMvcConfigurer();
    }
}

public class SeataWebMvcConfigurer implements WebMvcConfigurerAdapter {
	// 2. 添加 Web 请求的事务拦截器
    @Override
    public void addInterceptors(InterceptorRegistry registry) {
        registry.addInterceptor(new TransactionPropagationInterceptor());
    }
}

// 3. 事务拦截器的实现
public class TransactionPropagationInterceptor implements HandlerInterceptorAdapter {

    private static final Logger LOGGER = LoggerFactory.getLogger(TransactionPropagationInterceptor.class);

	// 3.1 将请求头中获取的全局事务 id 埋入请求线程上下文
    @Override
    public boolean preHandle(HttpServletRequest request, HttpServletResponse response, Object handler) {
    	// RootContext.KEY_XID = "TX_XID"
        String rpcXid = request.getHeader(RootContext.KEY_XID);
        return this.bindXid(rpcXid);
    }

	// 3.2 请求执行完毕后清除全局事务 id
    @Override
    public void afterCompletion(HttpServletRequest request, HttpServletResponse response, Object handler, Exception ex) throws Exception {
        if (RootContext.inGlobalTransaction()) {
            String rpcXid = request.getHeader(RootContext.KEY_XID);
            this.cleanXid(rpcXid);
        }
    }


    protected boolean bindXid(String rpcXid) {
        String xid = RootContext.getXID();

        if (LOGGER.isDebugEnabled()) {
            LOGGER.debug("xid in RootContext[{}] xid in HttpContext[{}]", xid, rpcXid);
        }
        if (StringUtils.isBlank(xid) && StringUtils.isNotBlank(rpcXid)) {
            RootContext.bind(rpcXid);
            if (LOGGER.isDebugEnabled()) {
                LOGGER.debug("bind[{}] to RootContext", rpcXid);
            }
        }

        return true;
    }

    protected void cleanXid(String rpcXid) {
        XidResource.cleanXid(rpcXid);
    }

}
修改一下 Goods 的 Feign,打印一下 xid,并调用下单接口,看看是否真的可以从请求头中获取到全局事务 id:
@PostMapping("/seata/reduceStock")
public R<Boolean> reduceStock(@RequestParam Long goodsId, @RequestParam Integer num) {
     String xid1 = RootContext.getXID();
     String xid2 = HttpContext.getRequest().getHeader("xid");
     log.info("Global transaction id: [{}] - [{}]", xid1, xid2);
     int reduce = goodsMapper.reduce(goodsId, num);
     if (reduce <= 0) {
         throw new BusinessException("库存不足");
     }
     return R.success(true);
 }
打印结果:
Global transaction id: [192.168.1.64:9600:3261035198123634733] - [192.168.1.64:9600:3261035198123634733]
可见全局事务 id 的组成为 TC 服务的 ip + gRPC Port + xid
3. 事务提交前的全局锁获取 & undo log 的记录
最后一个透明点,seata 是如何实现解析业务 SQL,并生成 before-image 与 after image 存储表中的?
这个是SeataDataSourceAutoConfiguration提供的功能,再次向 IOC 容器中注入一个 AbstractAutoProxyCreator,可以生成特定 Bean 的 Proxy。
@ConditionalOnBean(DataSource.class)
@ConditionalOnExpression("${seata.enabled:true} && ${seata.enableAutoDataSourceProxy:true} && ${seata.enable-auto-data-source-proxy:true}")
@AutoConfigureOrder(Ordered.LOWEST_PRECEDENCE)
@AutoConfigureAfter(value = {SeataCoreAutoConfiguration.class},
    name = "org.springframework.boot.autoconfigure.jdbc.DataSourceAutoConfiguration")
public class SeataDataSourceAutoConfiguration {

    /**
     * The bean seataAutoDataSourceProxyCreator.
     */
    @Bean(BEAN_NAME_SEATA_AUTO_DATA_SOURCE_PROXY_CREATOR)
    @ConditionalOnMissingBean(SeataAutoDataSourceProxyCreator.class)
    public static SeataAutoDataSourceProxyCreator seataAutoDataSourceProxyCreator(SeataProperties seataProperties) {
        return new SeataAutoDataSourceProxyCreator(seataProperties.isUseJdkProxy(),
            seataProperties.getExcludesForAutoProxying(), seataProperties.getDataSourceProxyMode());
    }

}
根据实现可知,会将原生的 DateSource 接口的实现封装为 SeataDataSourceProxy,并根据不同的模式创建不同的 DataSourceProxy。当其他的 ORM 框架在获取 DateSource 时获取的就是 SeataDataSourceProxy 实例。
public class SeataAutoDataSourceProxyCreator extends AbstractAutoProxyCreator {

	private final String dataSourceProxyMode;

	@Override
    protected Object wrapIfNecessary(Object bean, String beanName, Object cacheKey) {
        // we only care DataSource bean
        if (!(bean instanceof DataSource)) {
            return bean;
        }

        // when this bean is just a simple DataSource, not SeataDataSourceProxy
        if (!(bean instanceof SeataDataSourceProxy)) {
            Object enhancer = super.wrapIfNecessary(bean, beanName, cacheKey);
            // this mean this bean is either excluded by user or had been proxy before
            if (bean == enhancer) {
                return bean;
            }
            // else, build proxy,  put <origin, proxy> to holder and return enhancer
            DataSource origin = (DataSource) bean;
            SeataDataSourceProxy proxy = buildProxy(origin, dataSourceProxyMode);
            DataSourceProxyHolder.put(origin, proxy);
            return enhancer;
        }

		...

    }

    SeataDataSourceProxy buildProxy(DataSource origin, String proxyMode) {
        if (BranchType.AT.name().equalsIgnoreCase(proxyMode)) {
            return new DataSourceProxy(origin);
        }
        if (BranchType.XA.name().equalsIgnoreCase(proxyMode)) {
            return new DataSourceProxyXA(origin);
        }
        throw new IllegalArgumentException("Unknown dataSourceProxyMode: " + proxyMode);
    }
}
那么被代理后的数据源有什么扩展功能呢?

以上的标注的类都是用于 AT 模式。当通过 DataSourceProxy 获取 Connection 时,会将其封装为 ConnectionProxy。
@Override
public ConnectionProxy getConnection() throws SQLException {
    Connection targetConnection = targetDataSource.getConnection();
    return new ConnectionProxy(this, targetConnection);
}
并且,当我们通过 ConnectionProxy 的基类 AbstractConnectionProxy 获取 statement、prepareStatement 时,返回的依旧是封装后的 Proxy:
@Override
public Statement createStatement() throws SQLException {
    Statement targetStatement = getTargetConnection().createStatement();
    return new StatementProxy(this, targetStatement);
}

@Override
public PreparedStatement prepareStatement(String sql) throws SQLException {
    String dbType = getDbType();
    // support oracle 10.2+
    PreparedStatement targetPreparedStatement = null;
    if (BranchType.AT == RootContext.getBranchType()) {
        List<SQLRecognizer> sqlRecognizers = SQLVisitorFactory.get(sql, dbType);
        if (sqlRecognizers != null && sqlRecognizers.size() == 1) {
            SQLRecognizer sqlRecognizer = sqlRecognizers.get(0);
            if (sqlRecognizer != null && sqlRecognizer.getSQLType() == SQLType.INSERT) {
                TableMeta tableMeta = TableMetaCacheFactory.getTableMetaCache(dbType).getTableMeta(getTargetConnection(),
                        sqlRecognizer.getTableName(), getDataSourceProxy().getResourceId());
                String[] pkNameArray = new String[tableMeta.getPrimaryKeyOnlyName().size()];
                tableMeta.getPrimaryKeyOnlyName().toArray(pkNameArray);
                targetPreparedStatement = getTargetConnection().prepareStatement(sql,pkNameArray);
            }
        }
    }
    if (targetPreparedStatement == null) {
        targetPreparedStatement = getTargetConnection().prepareStatement(sql);
    }
    return new PreparedStatementProxy(this, targetPreparedStatement, sql);
}
既然封装了原生的 JDBC 接口实现,那么就可以在 SQL 执行的前后植入扩展内容了。没错,undo log 就是这样记录的。
public class PreparedStatementProxy extends AbstractPreparedStatementProxy
    implements PreparedStatement, ParametersHolder {

  	...

    @Override
    public boolean execute() throws SQLException {
        return ExecuteTemplate.execute(this, (statement, args) -> statement.execute());
    }

    @Override
    public ResultSet executeQuery() throws SQLException {
        return ExecuteTemplate.execute(this, (statement, args) -> statement.executeQuery());
    }

    @Override
    public int executeUpdate() throws SQLException {
        return ExecuteTemplate.execute(this, (statement, args) -> statement.executeUpdate());
    }
}
PreparedStatementProxy 的内部又依赖的 ExecuteTemplate,这也是最核心的类:
public class ExecuteTemplate {


    public static <T, S extends Statement> T execute(StatementProxy<S> statementProxy,
                                                     StatementCallback<T, S> statementCallback,
                                                     Object... args) throws SQLException {
        return execute(null, statementProxy, statementCallback, args);
    }


    public static <T, S extends Statement> T execute(List<SQLRecognizer> sqlRecognizers,
                                                     StatementProxy<S> statementProxy,
                                                     StatementCallback<T, S> statementCallback,
                                                     Object... args) throws SQLException {
        if (!RootContext.requireGlobalLock() && BranchType.AT != RootContext.getBranchType()) {
            // Just work as original statement
            return statementCallback.execute(statementProxy.getTargetStatement(), args);
        }

        String dbType = statementProxy.getConnectionProxy().getDbType();
        if (CollectionUtils.isEmpty(sqlRecognizers)) {
            sqlRecognizers = SQLVisitorFactory.get(
                    statementProxy.getTargetSQL(),
                    dbType);
        }
        Executor<T> executor;
        if (CollectionUtils.isEmpty(sqlRecognizers)) {
            executor = new PlainExecutor<>(statementProxy, statementCallback);
        } else {
            if (sqlRecognizers.size() == 1) {
                SQLRecognizer sqlRecognizer = sqlRecognizers.get(0);
                switch (sqlRecognizer.getSQLType()) {
                    case INSERT:
                        executor = EnhancedServiceLoader.load(InsertExecutor.class, dbType,
                                    new Class[]{StatementProxy.class, StatementCallback.class, SQLRecognizer.class},
                                    new Object[]{statementProxy, statementCallback, sqlRecognizer});
                        break;
                    case UPDATE:
                        executor = new UpdateExecutor<>(statementProxy, statementCallback, sqlRecognizer);
                        break;
                    case DELETE:
                        executor = new DeleteExecutor<>(statementProxy, statementCallback, sqlRecognizer);
                        break;
                    case SELECT_FOR_UPDATE:
                        executor = new SelectForUpdateExecutor<>(statementProxy, statementCallback, sqlRecognizer);
                        break;
                    case INSERT_ON_DUPLICATE_UPDATE:
                        switch (dbType) {
                            case JdbcConstants.MYSQL:
                            case JdbcConstants.MARIADB:
                                executor =
                                    new MySQLInsertOnDuplicateUpdateExecutor(statementProxy, statementCallback, sqlRecognizer);
                                break;
                            default:
                                throw new NotSupportYetException(dbType + " not support to INSERT_ON_DUPLICATE_UPDATE");
                        }
                        break;
                    case UPDATE_JOIN:
                        switch (dbType) {
                            case JdbcConstants.MYSQL:
                                executor = new MySQLUpdateJoinExecutor<>(statementProxy,statementCallback,sqlRecognizer);
                                break;
                            default:
                                throw new NotSupportYetException(dbType + " not support to " + SQLType.UPDATE_JOIN.name());
                        }
                        break;
                    default:
                        executor = new PlainExecutor<>(statementProxy, statementCallback);
                        break;
                }
            } else {
                executor = new MultiExecutor<>(statementProxy, statementCallback, sqlRecognizers);
            }
        }
        T rs;
        try {
            rs = executor.execute(args);
        } catch (Throwable ex) {
            if (!(ex instanceof SQLException)) {
                // Turn other exception into SQLException
                ex = new SQLException(ex);
            }
            throw (SQLException) ex;
        }
        return rs;
    }

}
逻辑很简单,根据不同类型的 SQL,匹配不同的 executor,最终进行执行。
以 UpdateExecutor 为例:
public class UpdateExecutor<T, S extends Statement> extends AbstractDMLBaseExecutor<T, S> {
}

public abstract class BaseTransactionalExecutor<T, S extends Statement> implements Executor<T> {
}
当调用 executor 方法,最终调用到基类 AbstractDMLBaseExecutor 的 doExecute 方法,根据是否开启了自动提交而调用不同的方法:
public T doExecute(Object... args) throws Throwable {
    AbstractConnectionProxy connectionProxy = statementProxy.getConnectionProxy();
    if (connectionProxy.getAutoCommit()) {
        return executeAutoCommitTrue(args);
    } else {
        return executeAutoCommitFalse(args);
    }
}

protected T executeAutoCommitTrue(Object[] args) throws Throwable {
    ConnectionProxy connectionProxy = statementProxy.getConnectionProxy();
    try {
        connectionProxy.changeAutoCommit();
        return new LockRetryPolicy(connectionProxy).execute(() -> {
            T result = executeAutoCommitFalse(args);
            connectionProxy.commit();
            return result;
        });
    } catch (Exception e) {
        // when exception occur in finally,this exception will lost, so just print it here
        LOGGER.error("execute executeAutoCommitTrue error:{}", e.getMessage(), e);
        if (!LockRetryPolicy.isLockRetryPolicyBranchRollbackOnConflict()) {
            connectionProxy.getTargetConnection().rollback();
        }
        throw e;
    } finally {
        connectionProxy.getContext().reset();
        connectionProxy.setAutoCommit(true);
    }
}

protected T executeAutoCommitFalse(Object[] args) throws Exception {
    TableRecords beforeImage = beforeImage();
    T result = statementCallback.execute(statementProxy.getTargetStatement(), args);
    TableRecords afterImage = afterImage(beforeImage);
    prepareUndoLog(beforeImage, afterImage);
    return result;
}
因为默认都是自动提交的,所以会走 executeAutoCommitTrue 的流程:
- 取消默认提交
- 加锁执行 executeAutoCommitFalse 中的内容
- 提交
根据 seata 的执行流程,为了防止脏写,需要加 seata 的全局锁。LockRetryPolicy 即是加锁,加锁的内容即:
T result = executeAutoCommitFalse(args);
connectionProxy.commit();
执行内容的第一行正是在记录 undo log:
public abstract class AbstractDMLBaseExecutor<T, S extends Statement> extends BaseTransactionalExecutor<T, S> {

	...

	protected T executeAutoCommitFalse(Object[] args) throws Exception {
	    TableRecords beforeImage = beforeImage();
	    T result = statementCallback.execute(statementProxy.getTargetStatement(), args);
	    TableRecords afterImage = afterImage(beforeImage);
	    prepareUndoLog(beforeImage, afterImage);
	    return result;
	}

    /**
     * Before image table records.
     *
     * @return the table records
     * @throws SQLException the sql exception
     */
    protected abstract TableRecords beforeImage() throws SQLException;

    /**
     * After image table records.
     *
     * @param beforeImage the before image
     * @return the table records
     * @throws SQLException the sql exception
     */
    protected abstract TableRecords afterImage(TableRecords beforeImage) throws SQLException;
}

public class UpdateExecutor<T, S extends Statement> extends AbstractDMLBaseExecutor<T, S> {
	@Override
	protected TableRecords beforeImage() throws SQLException {
	    ArrayList<List<Object>> paramAppenderList = new ArrayList<>();
	    TableMeta tmeta = getTableMeta();
	    // 1. Here
	    String selectSQL = buildBeforeImageSQL(tmeta, paramAppenderList);
	    return buildTableRecords(tmeta, selectSQL, paramAppenderList);
	}

    @Override
    protected TableRecords afterImage(TableRecords beforeImage) throws SQLException {
        TableMeta tmeta = getTableMeta();
        if (beforeImage == null || beforeImage.size() == 0) {
            return TableRecords.empty(getTableMeta());
        }
        // 2. Here
        String selectSQL = buildAfterImageSQL(tmeta, beforeImage);
        ResultSet rs = null;
        try (PreparedStatement pst = statementProxy.getConnection().prepareStatement(selectSQL)) {
            SqlGenerateUtils.setParamForPk(beforeImage.pkRows(), getTableMeta().getPrimaryKeyOnlyName(), pst);
            rs = pst.executeQuery();
            return TableRecords.buildRecords(tmeta, rs);
        } finally {
            IOUtil.close(rs);
        }
    }
}
继续跟踪 new LockRetryPolicy(connectionProxy).execute() 方法,看一下具体是如何加锁的:
private static class LockRetryPolicy extends ConnectionProxy.LockRetryPolicy {

    LockRetryPolicy(final ConnectionProxy connection) {
        super(connection);
    }

    @Override
    public <T> T execute(Callable<T> callable) throws Exception {
        if (LOCK_RETRY_POLICY_BRANCH_ROLLBACK_ON_CONFLICT) {
            return doRetryOnLockConflict(callable);
        } else {
            return callable.call();
        }
    }

    @Override
    protected void onException(Exception e) throws Exception {
        ConnectionContext context = connection.getContext();
        //UndoItems can't use the Set collection class to prevent ABA
        context.removeSavepoint(null);
        connection.getTargetConnection().rollback();
    }

    public static boolean isLockRetryPolicyBranchRollbackOnConflict() {
        return LOCK_RETRY_POLICY_BRANCH_ROLLBACK_ON_CONFLICT;
    }
}
当配置了加锁失败进行回滚 LOCK_RETRY_POLICY_BRANCH_ROLLBACK_ON_CONFLICT 时,会执行基类 ConnectionProxy.LockRetryPolicy.doRetryOnLockConflict 方法:
public static class LockRetryPolicy {
 	protected static final boolean LOCK_RETRY_POLICY_BRANCH_ROLLBACK_ON_CONFLICT = ConfigurationFactory
        .getInstance().getBoolean(ConfigurationKeys.CLIENT_LOCK_RETRY_POLICY_BRANCH_ROLLBACK_ON_CONFLICT, DEFAULT_CLIENT_LOCK_RETRY_POLICY_BRANCH_ROLLBACK_ON_CONFLICT);

    protected final ConnectionProxy connection;

    public LockRetryPolicy(ConnectionProxy connection) {
        this.connection = connection;
    }

    ...

	// 核心方法:自旋获取锁执行
    protected <T> T doRetryOnLockConflict(Callable<T> callable) throws Exception {
        LockRetryController lockRetryController = new LockRetryController();
        while (true) {
            try {
                return callable.call();
            } catch (LockConflictException lockConflict) {
                onException(lockConflict);
                // AbstractDMLBaseExecutor#executeAutoCommitTrue the local lock is released
                if (connection.getContext().isAutoCommitChanged()
                    && lockConflict.getCode() == TransactionExceptionCode.LockKeyConflictFailFast) {
                    lockConflict.setCode(TransactionExceptionCode.LockKeyConflict);
                }
                lockRetryController.sleep(lockConflict);
            } catch (Exception e) {
                onException(e);
                throw e;
            }
        }
    }
}
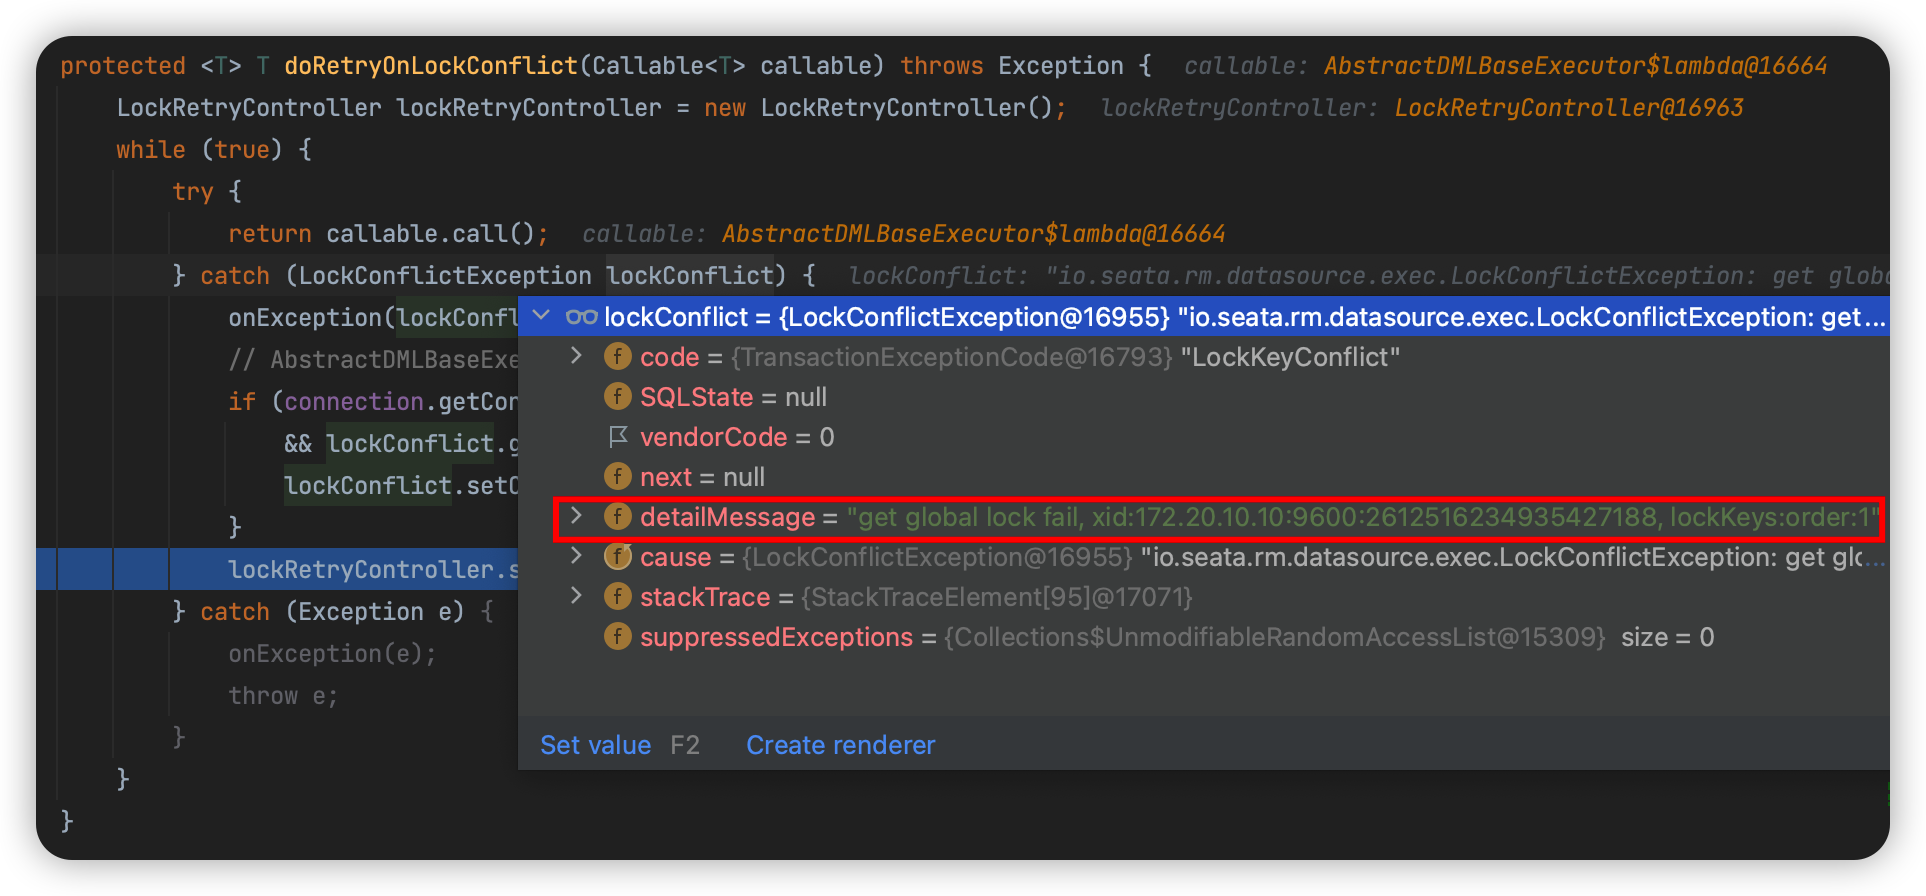
可还是没有看到加锁的代码行,这个异常又是在哪里抛出来的呢?换而言之具体获取全局锁的位置在哪呢?就在 callable.call() 即被加锁的执行内容中的第二行:
connectionProxy.commit();
public class ConnectionProxy extends AbstractConnectionProxy {

	@Override
    public void commit() throws SQLException {
        try {
            lockRetryPolicy.execute(() -> {
                doCommit();
                return null;
            });
        } catch (SQLException e) {
            if (targetConnection != null && !getAutoCommit() && !getContext().isAutoCommitChanged()) {
                rollback();
            }
            throw e;
        } catch (Exception e) {
            throw new SQLException(e);
        }
    }

	private void doCommit() throws SQLException {
		// check xid != null
        if (context.inGlobalTransaction()) {
            processGlobalTransactionCommit();
        } else if (context.isGlobalLockRequire()) {
            processLocalCommitWithGlobalLocks();
        } else {
            targetConnection.commit();
        }
    }

    private void processGlobalTransactionCommit() throws SQLException {
        try {
        	// 1. 通过 RmNettyClient 调用 TC 获取全局锁
            register();
        } catch (TransactionException e) {
            recognizeLockKeyConflictException(e, context.buildLockKeys());
        }
        try {
            UndoLogManagerFactory.getUndoLogManager(this.getDbType()).flushUndoLogs(this);
            // 2. 提交本地事务!targetConnection 即数据库的连接
            targetConnection.commit();
        } catch (Throwable ex) {
            LOGGER.error("process connectionProxy commit error: {}", ex.getMessage(), ex);
            report(false);
            throw new SQLException(ex);
        }
        if (IS_REPORT_SUCCESS_ENABLE) {
            report(true);
        }
        context.reset();
    }

    private void recognizeLockKeyConflictException(TransactionException te, String lockKeys) throws SQLException {
        if (te.getCode() == TransactionExceptionCode.LockKeyConflict
            || te.getCode() == TransactionExceptionCode.LockKeyConflictFailFast) {
            StringBuilder reasonBuilder = new StringBuilder("get global lock fail, xid:");
            reasonBuilder.append(context.getXid());
            if (StringUtils.isNotBlank(lockKeys)) {
                reasonBuilder.append(", lockKeys:").append(lockKeys);
            }
            // Here !!!
            throw new LockConflictException(reasonBuilder.toString(), te.getCode());
        } else {
            throw new SQLException(te);
        }

    }
}
所谓的加全局锁,实际上是在向 TC 进行全局锁的申请。
执行流程完全对应在前一篇 Blog 中 seata 解决全局事务间脏写问题的流程:先申请全局锁,在执行本地数据库的提交。最后执行完毕后,在释放全局锁资源。
刨根到底,看下 register 方法的内容,是如何向 TC 发起的请求:
private voidregister() throws TransactionException {
    if (!context.hasUndoLog() || !context.hasLockKey()) {
        return;
    }

    Long branchId = DefaultResourceManager.get().branchRegister(BranchType.AT, getDataSourceProxy().getResourceId(),
        null, context.getXid(), context.getApplicationData(),
        context.buildLockKeys());
    context.setBranchId(branchId);
}
封装当前全局事务的详细信息以及需要获取的全局锁,调用 branchRegister:
public abstract class AbstractResourceManager implements ResourceManager {
    @Override
    public Long branchRegister(BranchType branchType, String resourceId, String clientId, String xid, String applicationData, String lockKeys) throws TransactionException {
        try {
            BranchRegisterRequest request = new BranchRegisterRequest();
            request.setXid(xid);
            request.setLockKey(lockKeys);
            request.setResourceId(resourceId);
            request.setBranchType(branchType);
            request.setApplicationData(applicationData);
			// netty 调用
            BranchRegisterResponse response = (BranchRegisterResponse) RmNettyRemotingClient.getInstance().sendSyncRequest(request);
            if (response.getResultCode() == ResultCode.Failed) {
                throw new RmTransactionException(response.getTransactionExceptionCode(), String.format("Response[ %s ]", response.getMsg()));
            }
            return response.getBranchId();
        } catch (TimeoutException toe) {
            throw new RmTransactionException(TransactionExceptionCode.IO, "RPC Timeout", toe);
        } catch (RuntimeException rex) {
            throw new RmTransactionException(TransactionExceptionCode.BranchRegisterFailed, "Runtime", rex);
        }
    }
}