
在学习过程中经常遇到 eclipse 开发的项目,但是由于和 idea 配置有差异不能直接运行,需要做一些修改
1.选择从已有文件导入

使用 idea 导入文件,注意这里是导入不是直接打开
import project 与 open 的区别:
import project:如果项目不是用 idea 开发的,用 import 打开。因为这个情况下,这个项目不是 idea 模型,使用 import 可以避免许多不必要的麻烦。
open:如果项目之前就是 idea 开发的,直接用 open 即可
选择文件目录
导入项目选择 eclipse

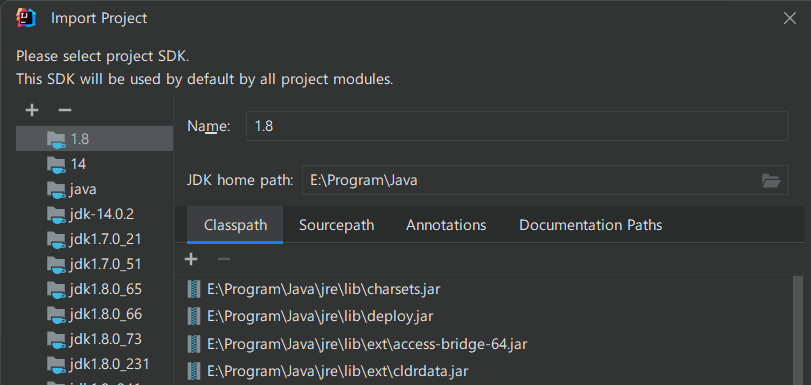
如果项目是 maven 的话直接 next 就可以直接导入 idea 了,很简单,eclipse 需要以下配置
如果需要修改 jdk 可以在这里修改,不需要的话则一路 next
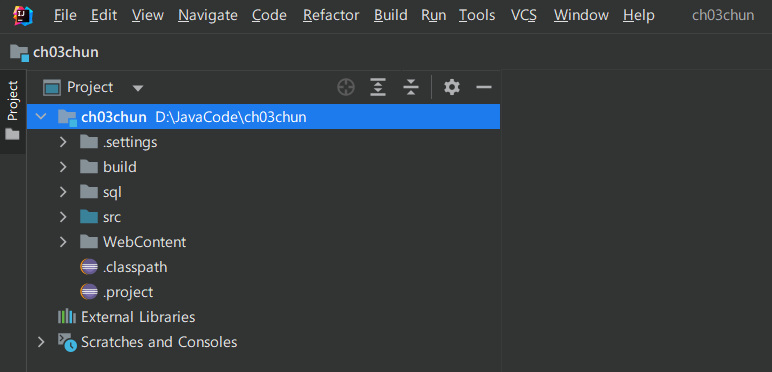
导入完成
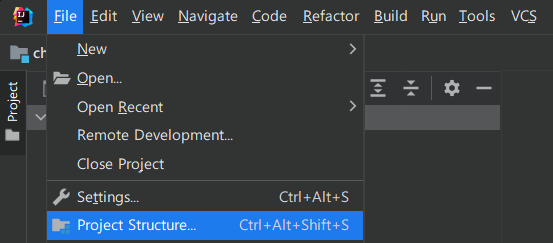
2.配置依赖
2.1 File - ProjectStructure
删除不必要的 eclipse 依赖,爆红的依次选中点击减号即可
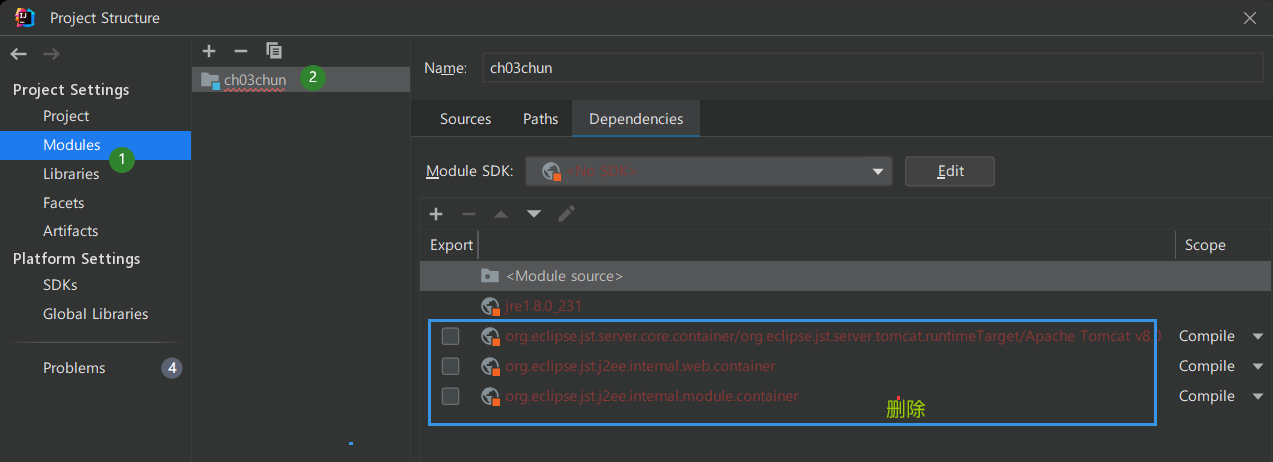
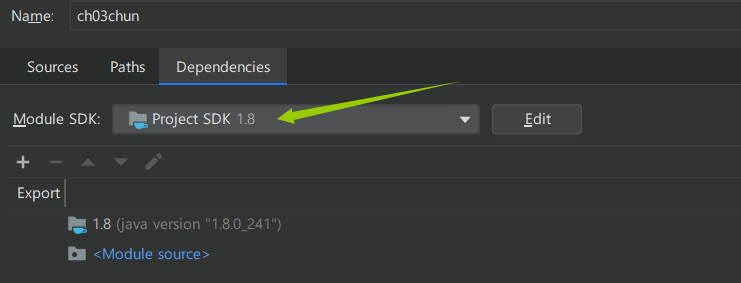
我这里 sdk 爆红,在 ModuleSDK 中选择合适的即可
然后添加项目 lib 依赖,按序号步骤,选择 jars or directories
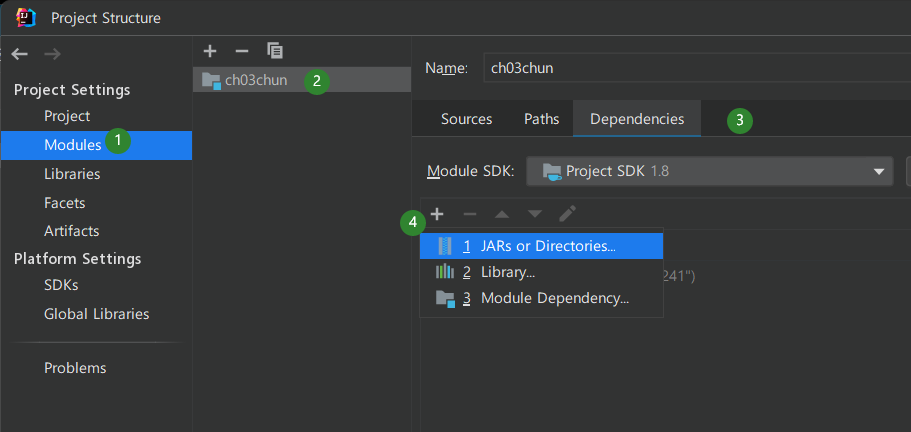
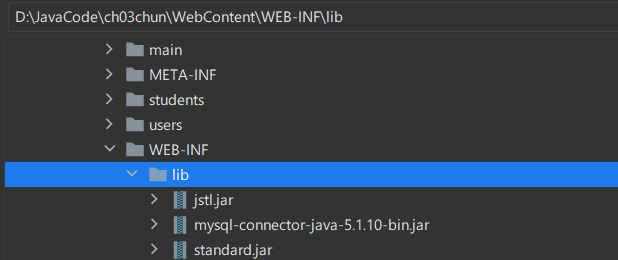
选择项目的 lib 目录
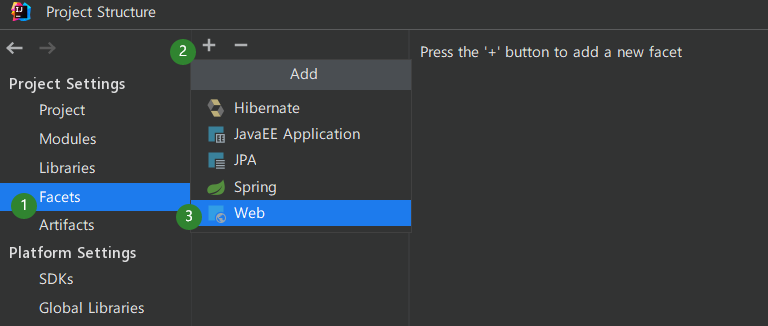
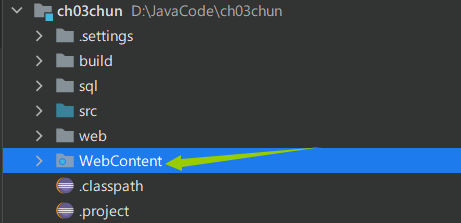
2.2 项目为 web 项目的话,还需要手动定位 web.xml
同样的窗口,在左侧栏选择 Facets - Web,点击加号选择 web
选中 1 标签处,点击 2 标签处笔的标志,修改 xml 文件目录
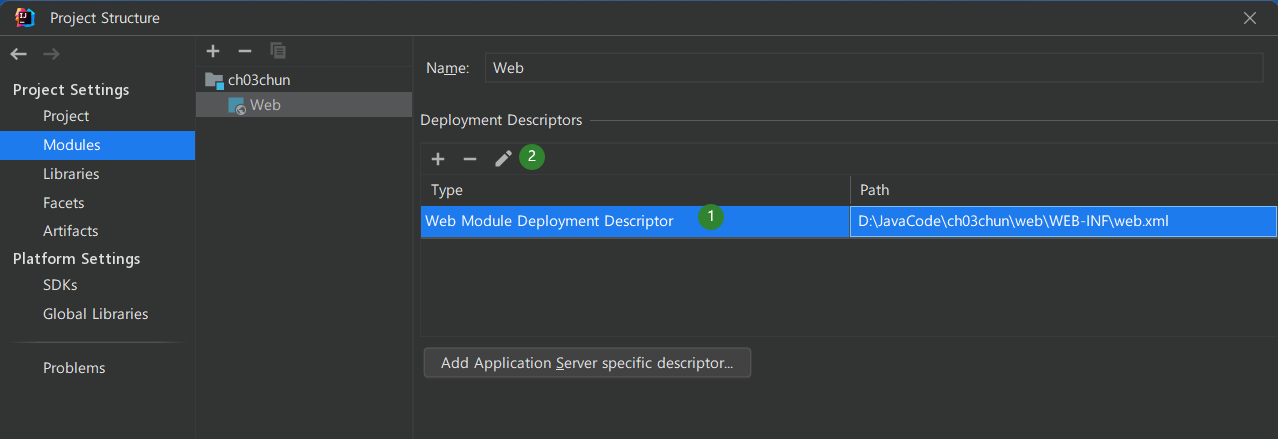
因为我演示的项目 web 目录为 webcontent,所以这里可以修改
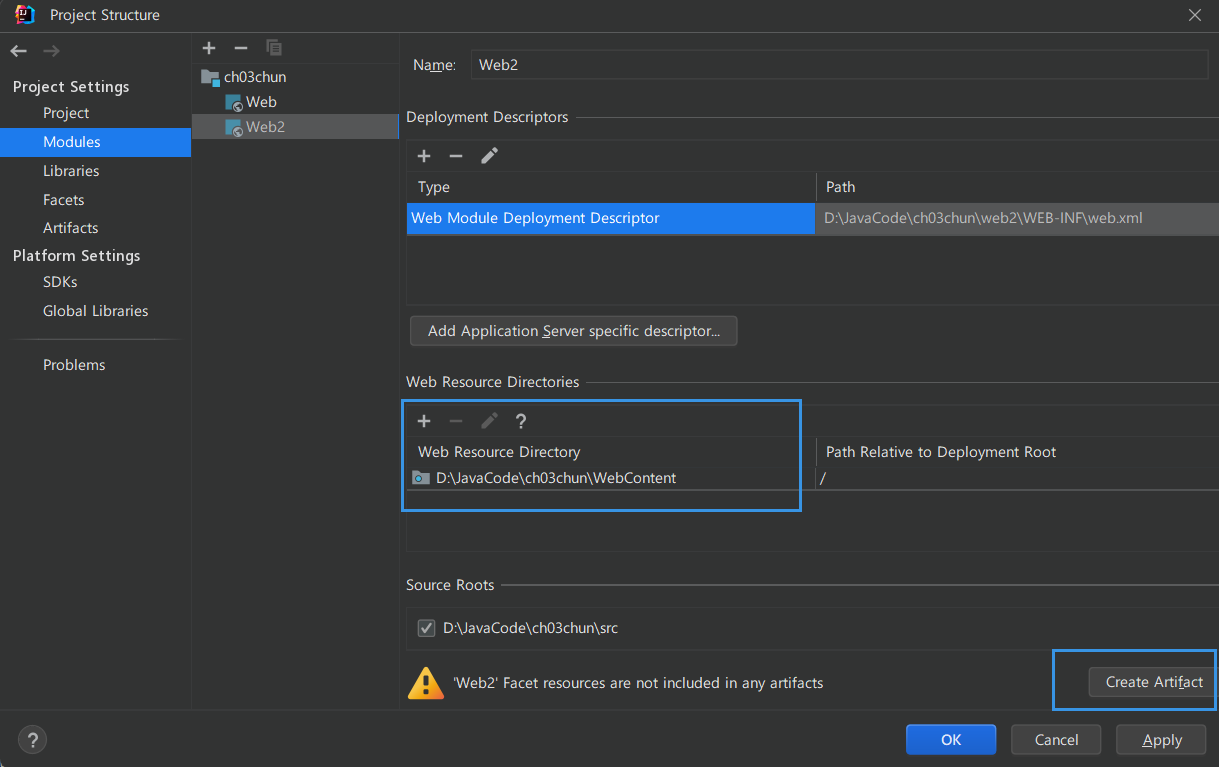
并且点击下面的 create Artifacts,然后点击 fix
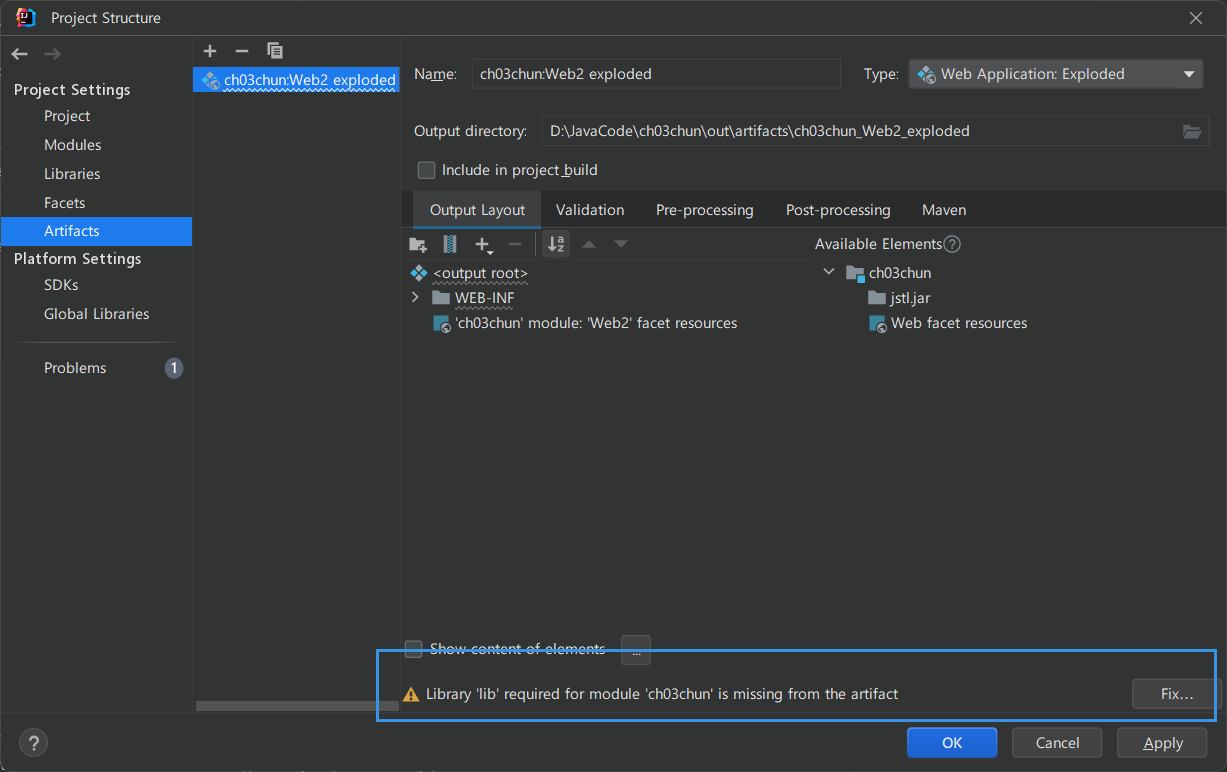
选择 add lib to artifacts,点击 apply - ok,回到项目目录发现项目目录标签多了一个蓝点
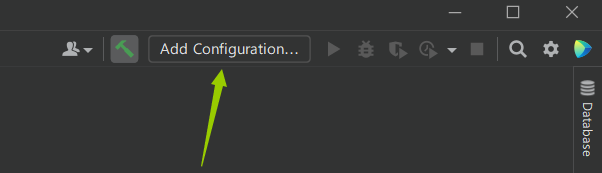
3.配置tomcat
点击右上角 add configuration
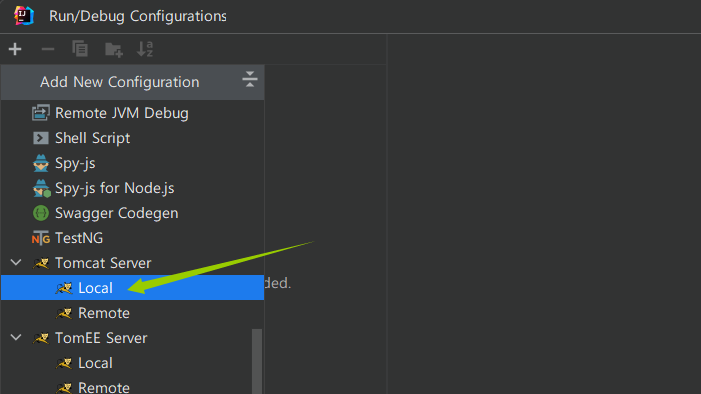
点击左上角加号,选择 tomcat local
配置 tomcat 目录
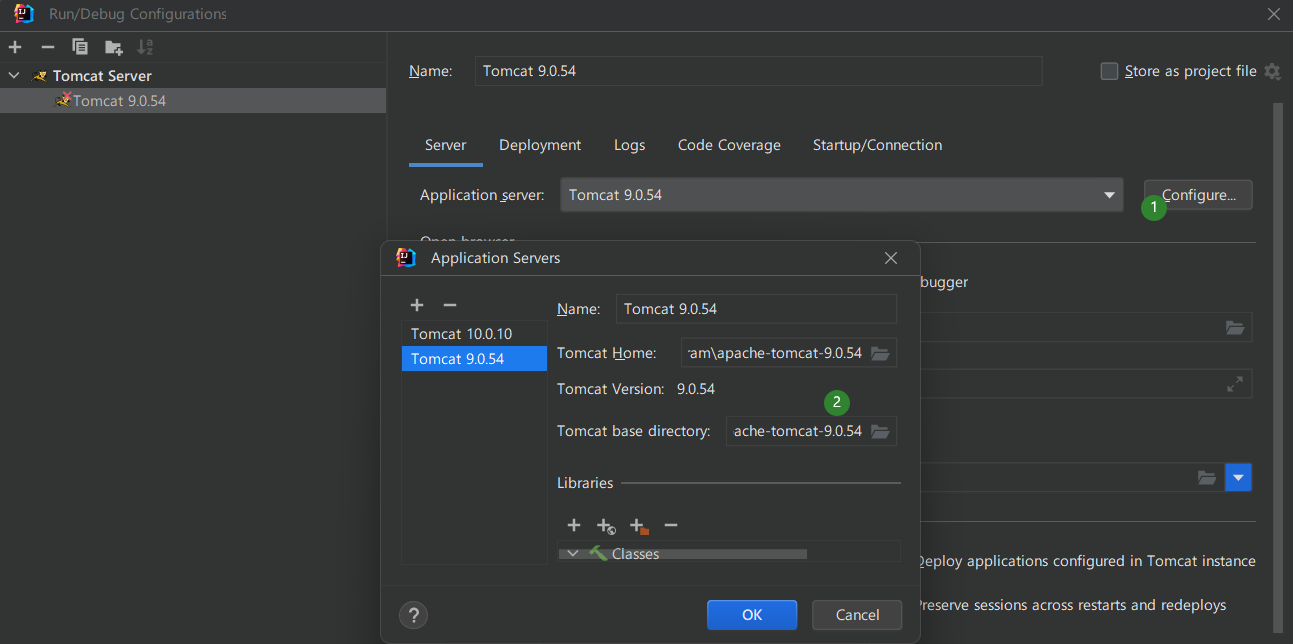
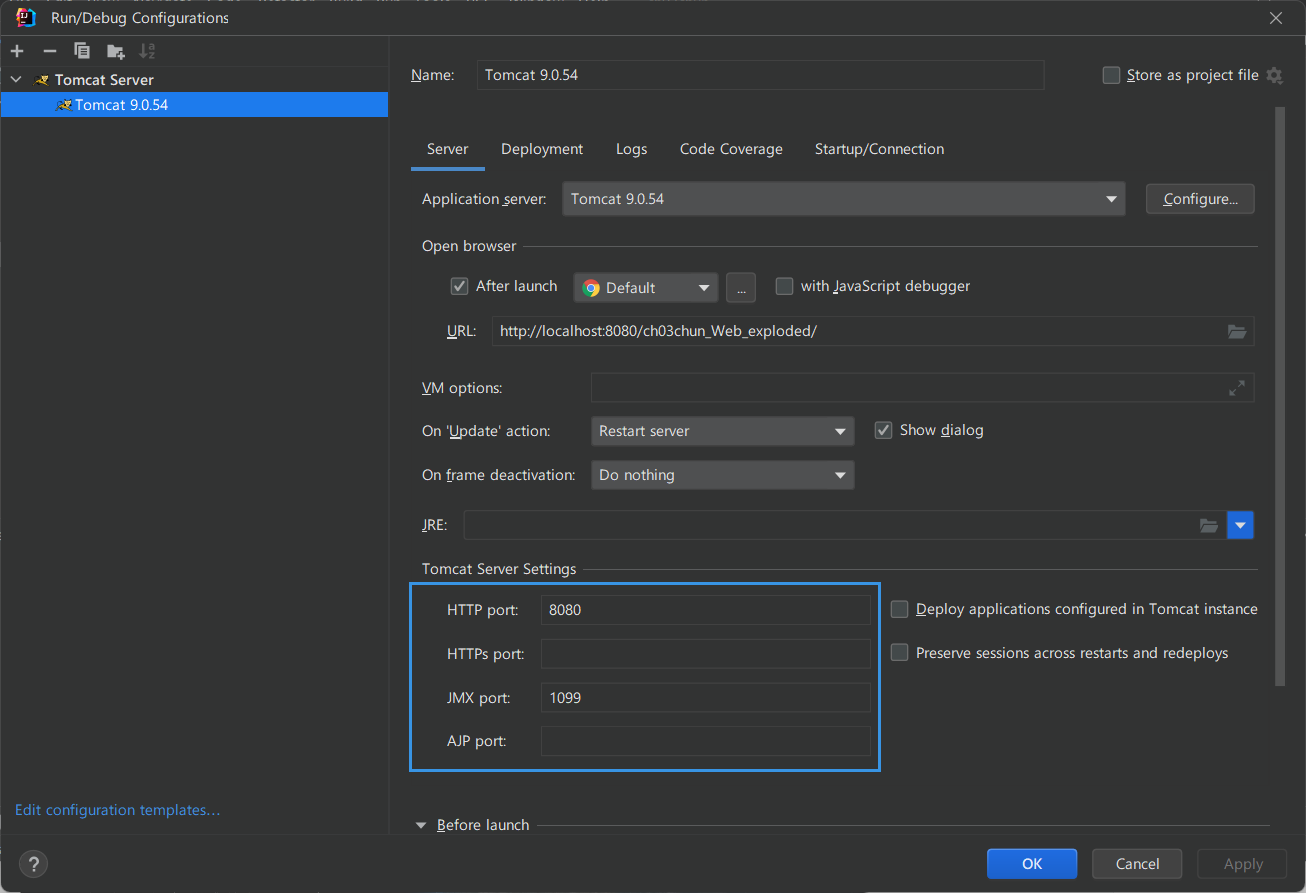
如果有错误提示点击 fix
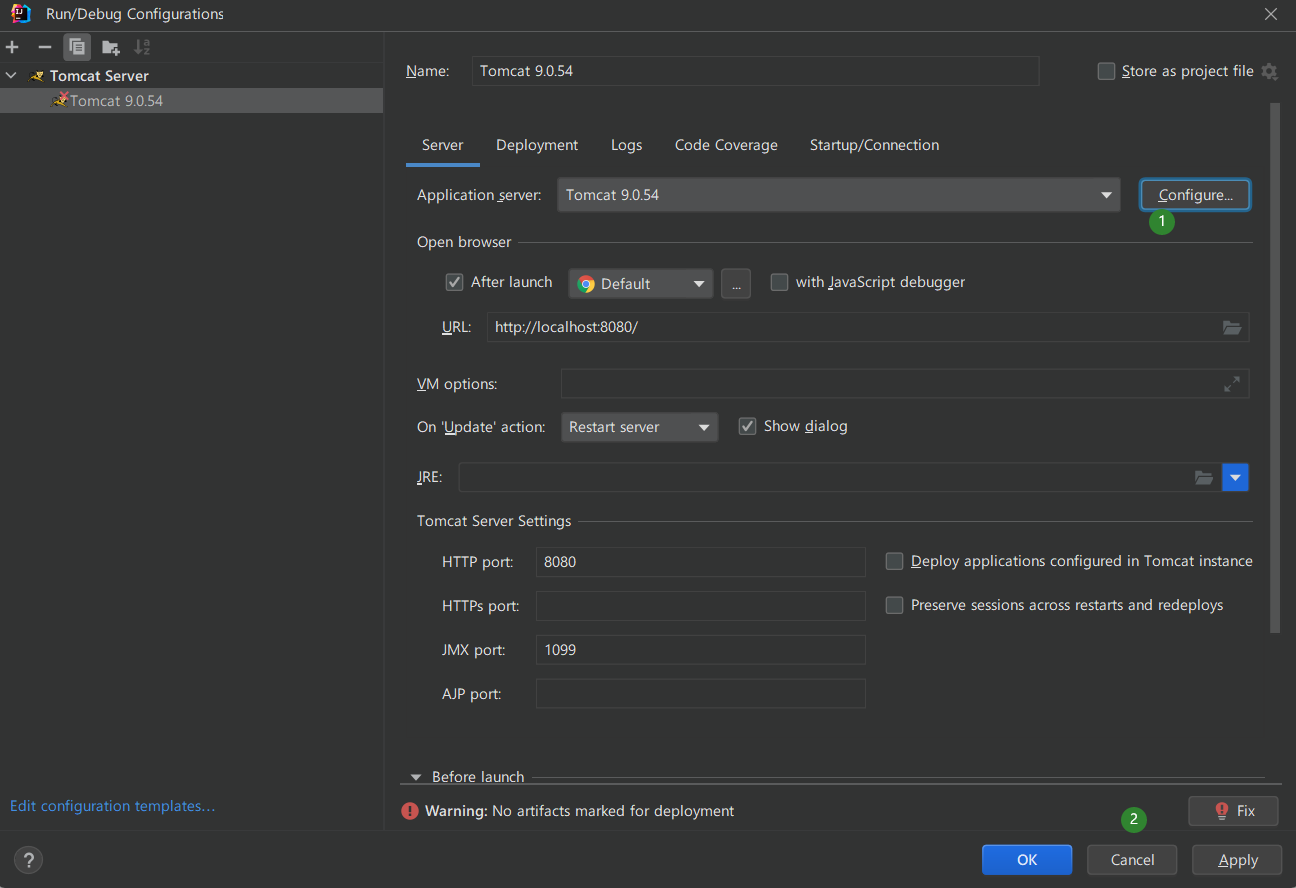

配置成功后点击 apply ok
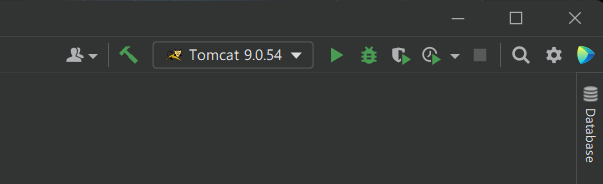
右上角此状态可以判断为配置成功,如果修改 tomcat 启动端口的话可以点击进入刚才的配置目录
点击 绿色 三角即可以启动项目,如果没有错误的话 idea 会自动打开浏览器打开项目
