目前c++流行的编译器有cmake,clang,qmake,xmake等,本文主要介绍如何在cmake和xmake中编译cuda。
xmake
简介
xmake是国人开发的一款编译器,官方链接如下:xmake官网。该编译器安装方便,上手快,支持c++,cuda,Qt,iOS等语言和项目的编译,我在进行简单的模块开发时喜欢用xmake快速生成项目以进行测试。
使用
xmake的安装过程此处略过,官方文档里很详细。使用xmake时只要一行指令就可以创建一个完整的空项目:
user@user-:~/桌面$ xmake create -P project -l cuda
create project ...
  [+]: xmake.lua
  [+]: src/main.cu
  [+]: .gitignore
create ok!
这是xmake自动生成的main.cu文件,可在内部修改
#include "cuda_runtime.h"
#include "device_launch_parameters.h"

#include <stdio.h>

cudaError_t addWithCuda(int *c, const int *a, const int *b, unsigned int size);

__global__ void addKernel(int *c, const int *a, const int *b)
{
    int i = threadIdx.x;
    c[i] = a[i] + b[i];
}

int main()
{
    const int arraySize = 5;
    const int a[arraySize] = {1, 2, 3, 4, 5};
    const int b[arraySize] = {10, 20, 30, 40, 50};
    int c[arraySize] = {0};

    // Add vectors in parallel.
    cudaError_t cudaStatus = addWithCuda(c, a, b, arraySize);
    if (cudaStatus != cudaSuccess)
    {
        fprintf(stderr, "addWithCuda failed!");
        return 1;
    }

    printf("{1,2,3,4,5} + {10,20,30,40,50} = {%d,%d,%d,%d,%d}\n",
           c[0], c[1], c[2], c[3], c[4]);

    // cudaDeviceReset must be called before exiting in order for profiling and
    // tracing tools such as Nsight and Visual Profiler to show complete traces.
    cudaStatus = cudaDeviceReset();
    if (cudaStatus != cudaSuccess)
    {
        fprintf(stderr, "cudaDeviceReset failed!");
        return 1;
    }

    return 0;
}

// Helper function for using CUDA to add vectors in parallel.
cudaError_t addWithCuda(int *c, const int *a, const int *b, unsigned int size)
{
    int *dev_a = 0;
    int *dev_b = 0;
    int *dev_c = 0;
    cudaError_t cudaStatus;

    // Choose which GPU to run on, change this on a multi-GPU system.
    cudaStatus = cudaSetDevice(0);
    if (cudaStatus != cudaSuccess)
    {
        fprintf(stderr, "cudaSetDevice failed!  Do you have a CUDA-capable GPU installed?");
        goto Error;
    }

    // Allocate GPU buffers for three vectors (two input, one output)    .
    cudaStatus = cudaMalloc((void **)&dev_c, size * sizeof(int));
    if (cudaStatus != cudaSuccess)
    {
        fprintf(stderr, "cudaMalloc failed!");
        goto Error;
    }

    cudaStatus = cudaMalloc((void **)&dev_a, size * sizeof(int));
    if (cudaStatus != cudaSuccess)
    {
        fprintf(stderr, "cudaMalloc failed!");
        goto Error;
    }

    cudaStatus = cudaMalloc((void **)&dev_b, size * sizeof(int));
    if (cudaStatus != cudaSuccess)
    {
        fprintf(stderr, "cudaMalloc failed!");
        goto Error;
    }

    // Copy input vectors from host memory to GPU buffers.
    cudaStatus = cudaMemcpy(dev_a, a, size * sizeof(int), cudaMemcpyHostToDevice);
    if (cudaStatus != cudaSuccess)
    {
        fprintf(stderr, "cudaMemcpy failed!");
        goto Error;
    }

    cudaStatus = cudaMemcpy(dev_b, b, size * sizeof(int), cudaMemcpyHostToDevice);
    if (cudaStatus != cudaSuccess)
    {
        fprintf(stderr, "cudaMemcpy failed!");
        goto Error;
    }

    // Launch a kernel on the GPU with one thread for each element.
    addKernel<<<1, size>>>(dev_c, dev_a, dev_b);

    // Check for any errors launching the kernel
    cudaStatus = cudaGetLastError();
    if (cudaStatus != cudaSuccess)
    {
        fprintf(stderr, "addKernel launch failed: %s\n", cudaGetErrorString(cudaStatus));
        goto Error;
    }

    // cudaDeviceSynchronize waits for the kernel to finish, and returns
    // any errors encountered during the launch.
    cudaStatus = cudaDeviceSynchronize();
    if (cudaStatus != cudaSuccess)
    {
        fprintf(stderr, "cudaDeviceSynchronize returned error code %d after launching addKernel!\n", cudaStatus);
        goto Error;
    }

    // Copy output vector from GPU buffer to host memory.
    cudaStatus = cudaMemcpy(c, dev_c, size * sizeof(int), cudaMemcpyDeviceToHost);
    if (cudaStatus != cudaSuccess)
    {
        fprintf(stderr, "cudaMemcpy failed!");
        goto Error;
    }

Error:
    cudaFree(dev_c);
    cudaFree(dev_a);
    cudaFree(dev_b);

    return cudaStatus;
}
编译方面,进入project文件夹,使用以下指令运行:
user@user:~/桌面/$ cd project/
user@user:~/桌面/project$ xmake
checking for platform ... linux
checking for architecture ... x86_64
checking for Cuda SDK directory ... /usr/local/cuda
[ 25%]: compiling.release src/main.cu
[ 50%]: devlinking.release project_gpucode.cu.o
[ 50%]: linking.release project
[100%]: build ok!
user@user:~/桌面/project$ xmake run
{1,2,3,4,5} + {10,20,30,40,50} = {11,22,33,44,55}
总结
xmake使用较为简单,可以满足常规的使用要求,但该编译器毕竟不如cmake这么流行,在社区和使用的广度上仍然存在一些问题,因此个人建议仅用于小型的算法验证,至于大型项目还是考虑cmake。
cmake
版本差异
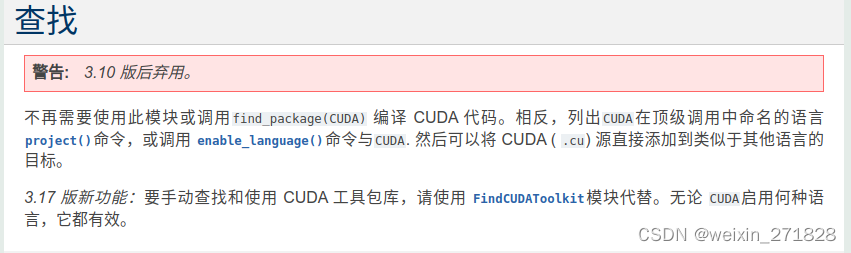
cmake作为使用最广泛的c++编译器之一,不再多做介绍,此处需要说明的是使用cmake编译cuda时需要注意版本问题。在早期版本中,cmake需要使用find_package 和 link_directories将cuda的文件和库链接到程序中(使用 CMake 构建跨平台 CUDA 应用程序),但在cmake3.10以后通过开启cuda编译选项,可以不再使用find cuda(findcuda文档)。

我有两台电脑,一台Ubuntu18,另一台Ubuntu20,以前遇到过相同的代码放到20上就会编译报错,后来排查的原因是18默认安装的cmake是3.10版本,而20默认的是3.16,正好处在新老分界线上,因此使用时需要注意。
检查cuda是否正常安装
由于cmake和cuda的安装都比较繁琐,有的时候编译报错也无法确定究竟是cuda的安装问题还是cmakelists的编写问题,因此建议先使用xmake生成一个简单的demo,如果能正常运行则大概率是cmakelists的问题,反之则需要检查cuda的安装。
示例
cmake版本基于3.23,注意:不同的cmake可能需要使用不同的指令,低版本编译可能报错。文件结构如下所示:
user@user:~/test/test/cuda$ tree -L 1
.
├── bin
├── build
├── CMakeLists.txt
├── cuda_alg.cu
├── cuda_alg.h
└── main.cpp

2 directories, 4 files
main.cpp
#include <iostream>
#include "cuda_alg.h"


int main()
{
    CudaTest cuda_test;
    cuda_test.run();

    return 0;
}
cuda_alg.h
#ifndef _CUDA_ALG_H_
#define _CUDA_ALG_H_

#include <iostream>
#include <stdio.h>
#include "cuda_runtime.h"
#include "device_launch_parameters.h"

class CudaTest
{
public:
    void run();
private:
};
#endif
cuda_alg.cu
#include "cuda_alg.h"


__global__ void helloWorldGPU(const int size)
{
    const int n = blockDim.x * blockIdx.x + threadIdx.x;
    if(n < size)
    {
        printf("hello world:%d\n", n);
    }

}


void CudaTest::run()
{

    helloWorldGPU<<<1, 8>>>(8);

    cudaDeviceSynchronize();
}
CMakeLists.txt
cmake_minimum_required(VERSION 2.8 FATAL_ERROR)
project(test LANGUAGES CXX CUDA)

find_package(CUDA REQUIRED)

cuda_add_executable (${PROJECT_NAME}
                main.cpp
                cuda_alg.cu )
运行结果
user@user:~/test/test/cuda/build$ ./test
hello world:0
hello world:1
hello world:2
hello world:3
hello world:4
hello world:5
hello world:6
hello world:7