Nginx常用模块
1.Nginx常用模块
1.1.Nginx目录索引/下载模块
目录索引也称为下载模块
我们写的/etc/nginx/conf.d/xxx.conf文件中index对应的ngx_http_index_module所支撑的,不开启autoindex off
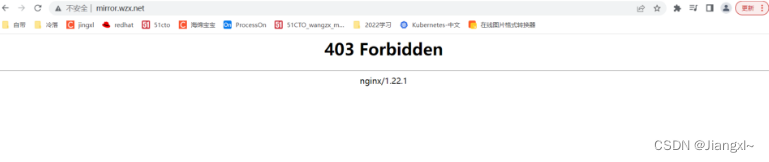
优先会报403
当ngx_http_index_module模块找不到索引文件时,通常会将请求传递给ngx_http_autoindex_module模块
前提必须开始autoindex on.
ngx_http_autoindex_module模块处理以斜杠字符(‘/’)结尾的请求,并生成目录列表
1.1.1.配置autoindex语法
#启用或禁用目录列表输出,on开启,off关闭
Syntax: autoindex on |off;
Default: autoindex off;
Context: http,server,location
Default:默认autoindex是关闭的
Context:可以作用在那个层里面,有http层,server层,location层
1.1.2.autoindex配置实例
[root@nginx/etc/nginx/conf.d]# vim mirror.wzx.net.conf
server {
        listen 80;
        server_name mirror.wzx.net;
        charset utf-8;
        location / {
                root /code1/;
        }
}

创建目录
[root@nginx/etc/nginx/conf.d]# mkdir /code1/{CentOS,RedHat,Ubuntn}
[root@nginx/etc/nginx/conf.d]# ll /code1
总用量 0
drwxr-xr-x 2 root root 6 10月 21 16:25 CentOS
drwxr-xr-x 2 root root 6 10月 21 16:25 RedHat
drwxr-xr-x 2 root root 6 10月 21 16:25 Ubuntn

[root@nginx/etc/nginx/conf.d]# systemctl reload nginx

#index index.html写不写默认都是这个文件
添加本地hosts的解析

看看访问是否是403
开启上autoindex on
[root@nginx/etc/nginx/conf.d]# vim mirror.wzx.net.conf
server {
        listen 80;
        server_name mirror.wzx.net;
        charset utf-8;
        autoindex on;
        location / {
                root /code1/;
        }
}

[root@nginx/etc/nginx/conf.d]# systemctl reload nginx
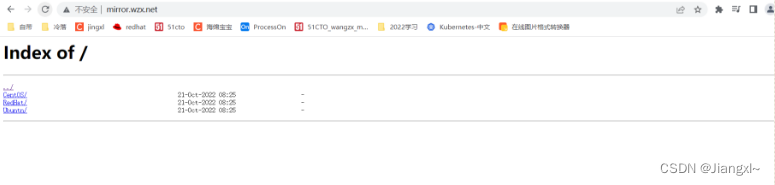
下面没有内容,上传写内容,随意都行
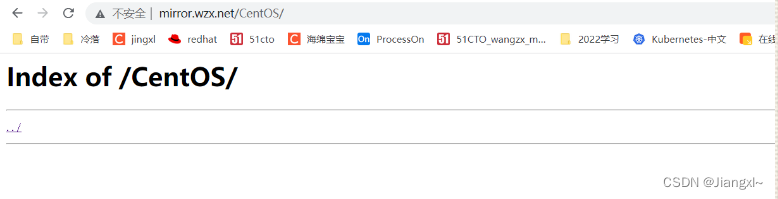
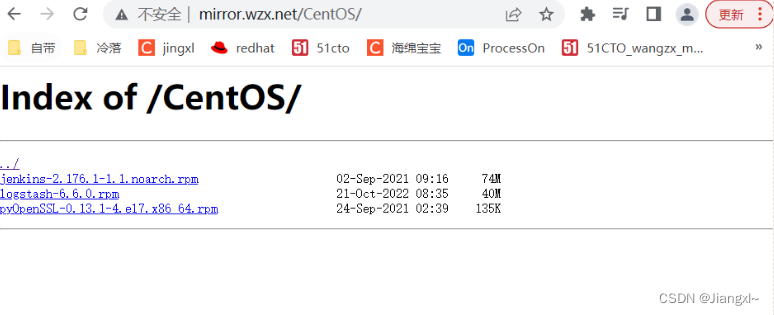
1.1.3上传资源
[root@nginx~]# mv *.rpm /code1/CentOS/
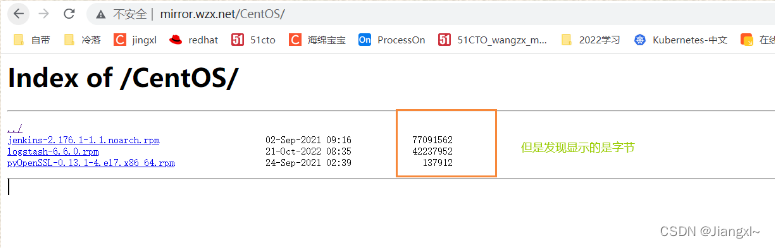
1.1.4.autoindex_exact_size配置语法
指定是否应在目录列表中输出确切的文件大小,on显示字节,off显示大概单位
Syntax:autoindex_exact_size on |off;
Default: autoindex_exact_size on;
Context: http,server,location
1.1.5.修改配置文件
[root@nginx~]# vim /etc/nginx/conf.d/mirror.wzx.net.conf
server {
        listen 80;
        server_name mirror.wzx.net;
        charset utf-8;
        autoindex on;
        autoindex_exact_size off;
        location / {
                root /code1/;
        }
}
[root@nginx~]# systemctl reload nginx
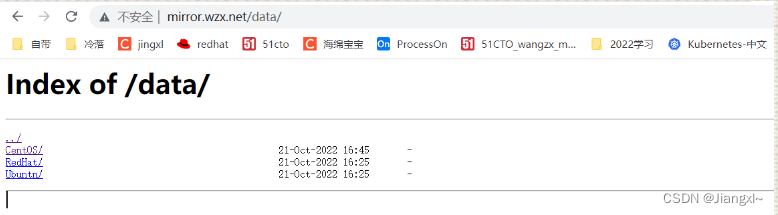
1.1.6.再次访问
1.1.7.修改日期
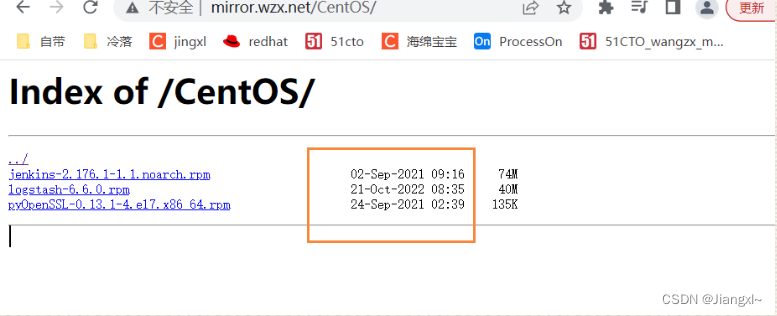
1.1.8.autoindex_localtime语法格式
#指定目录列表中的时间是应以本地时区还是UTC输出。on本地时区;off UTC时区
Syntax: autoindex_localtime on |off;
Default: autoindex_localtime on off;
Context: http,server,location
1.1.9.修改配置
[root@nginx~]# vim /etc/nginx/conf.d/mirror.wzx.net.conf

server {
        listen 80;
        server_name mirror.wzx.net;
        charset utf-8;

        location / {
                root /code1/;
               autoindex on;
               autoindex_exact_size off;
               autoindex_localtion on;
        }
}
[root@nginx~]# systemctl reload nginx

1.1.10.模拟企业内网仓库
实现与阿里云差不多的镜像仓库
1.使用rsync同步互联网的仓库;(也可以直接弄几个)
2.需要对外提供http访问方式;
1.使用rsync同步互联网的仓库(因为我下面有些rpm包了,所以这一步可以操作也可以不操作)
rsync -avz rsync://rsync/mirrors.ustc.edu.cn/repo/centos/ /repo/data
createrepo /repo/data #将该目录创建为仓库目录
2.编辑配置文件
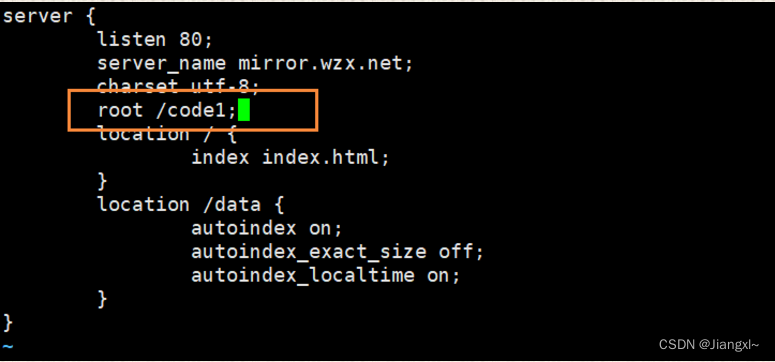
[root@nginx/etc/nginx/conf.d]# vim mirror.wzx.net.conf
server {
listen 80;
server_name mirror.wzx.net;
charset utf-8;
location / {
root /code1/;
}
location /data {
root /code1;
autoindex on;
autoindex_exact_size off;
autoindex_localtime on;
}
}
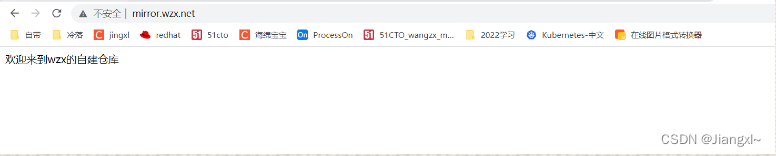
3.创建访问的页面
[root@nginx/etc/nginx/conf.d]# cd /code1/
[root@nginx/code1]# vim index.html
4.配置镜像仓库
[root@nginx/code1]# mkdir data
[root@nginx/code1]# mv RedHat/ Ubuntn/ CentOS/ data/
5.重载服务
[root@nginx/code1]# systemctl reload nginx
那么肯定访问http://mirror.wzx.net/就是出现的/code1/index.html页面
访问http://mirror.wzx.net/后面加/data/就是到了我们镜像仓库的界面

我们也可以优化一下
因为两个location都用到了root /code1,那么我们就可以定义到全局中
1.2.Nginx访问控制
ngx_http_access_module模块允许限制对某些客户端地址的访问
1.2.1.ngx_http_access_module配置语法
#允许配置语法
Syntax: allow address |CIDR |unix: |all;
Default: -
Context: http, server, location,limit_except

#拒绝配置语法
Syntax: deny address |CIDR |unix: |all;
Default: -
Context: http, server, location,limit_except
1.2.2.ngx_http_access_module配置示例
正常我们都可以访问
只允许指定的来源IP能访问/code1,其它网段全部拒绝
[root@nginx~]# vim /etc/nginx/conf.d/mirror.wzx.net.conf
server {
listen 80;
server_name mirror.wzx.net;
charset utf-8;
root /code1;
location / {
index index.html;
}
location /data {
autoindex on;
autoindex_exact_size off;
autoindex_localtime on;
allow 192.168.146.101/32; #允许指定的地址活指定段访问
deny all; #拒绝所有
}
}
[root@nginx~]# nginx -t
[root@nginx~]# systemctl reload nginx
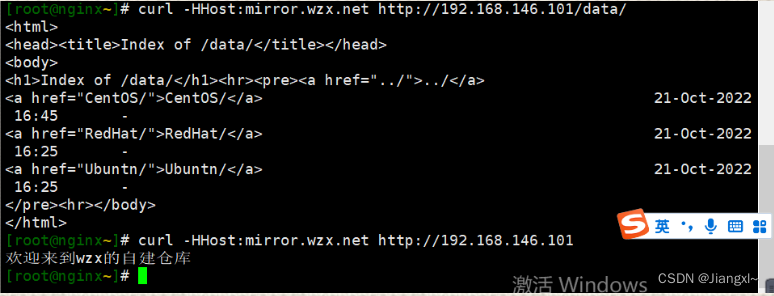
[root@nginx~]# curl -HHost:mirror.wzx.net http://192.168.146.101/data/
发现192.168.146.101还可以访问
但是页面的我们就访问不到了

修改192.168.146.101拒绝访问,但是页面可以访问
[root@nginx~]# vim /etc/nginx/conf.d/mirror.wzx.net.conf
server {
        listen 80;
        server_name mirror.wzx.net;
        charset utf-8;
        root /code1;
        location / {
                index index.html;
        }
        location /data {
                autoindex on;
                autoindex_exact_size off;
                autoindex_localtime on;
                deny 192.168.146.101/32;
                allow all;
        }
}


注意:deny和allow的顺序是有影响的
默认情况下,从第一条规则进行匹配
如果匹配成功,则不继续匹配下面的内容。
如果匹配不成功,则继续往下寻找能匹配成功的内容。
1.3.Nginx基础认证
ngx_http_auth_basic_module模块允许使用HTTP基本身份验证,验证用户名和密码来限制对资源的访问。
1.3.1.ngx_http_auth_basic_module模块配置语法
#使用HTTP基本身份验证协议开启用户名和密码验证
Syntax: auth_basic string| off;
Default: auth_basic off;
Context: http, server, location, limit_except
#指定保存用户名和密码的文件
Syntax: auth_basic_user_file file;
Default: -
Context: http, server, location, limit_except
官网:http://nginx.org/en/docs/http/ngx_http_auth_basic_module.html
指定保存用户名和密码的文件,格式如下:
#可以使用htpasswd程序或“openssl passwd”命令生成对应的密码;
#使用htpasswd创建新的密码文件,-c创建新文件 -b允许命令行输入密码
[root@nginx~]# yum install httpd-tools
[root@nginx~]# htpasswd -b -c /etc/nginx/nginx_password wzx 123456
Adding password for user wzx
-b:允许命令行输入密码
-c:创建新文件
[root@nginx~]# cat /etc/nginx/nginx_password
wzx:
a
p
r
1
apr1
apr1W4s78KHK$PcXU5RcI3qkTivwUEgIeL.
1.3.2.ngx_http_auth_basic_module配置示例
[root@nginx~]# vim /etc/nginx/conf.d/mirror.wzx.net.conf
server {
        listen 80;
        server_name mirror.wzx.net;
        charset utf-8;
        root /code1;
        location / {
                index index.html;
        }
        location /data {
                autoindex on;
                autoindex_exact_size off;
                autoindex_localtime on;
                auth_basic "hello";
                auth_basic_user_file /etc/nginx/nginx_password;
        }
}

[root@nginx~]# systemctl reload nginx

解释说明:
auth_basic :描述
auth_basic_user_file /etc/nginx/nginx_password; 也可以写auth_basic_user_file nginx_password;
因为nginx的安装目录就是/etc/nginx/目录下面
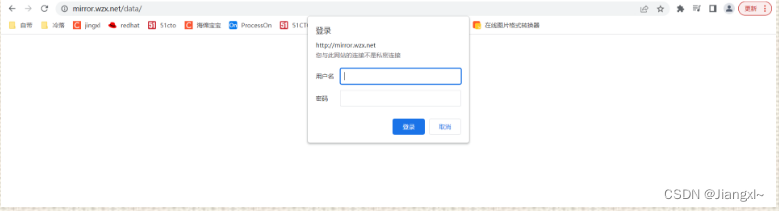

为什么我们http://mirror.wzx.net/的url没有弹出来用户密码,是因为我们把auth…只作用到了/data的uri下面,如果我们把auth…作用于全局,那么uri都会弹出来用户密码
那我们作用于全局,看一下是否会弹出来用户密码
[root@nginx~]# vim /etc/nginx/conf.d/mirror.wzx.net.conf
server {
        listen 80;
        server_name mirror.wzx.net;
        charset utf-8;
        root /code1;
        auth_basic "hello";
        auth_basic_user_file /etc/nginx/nginx_password;
        location / {
                index index.html;
        }
        location /data {
                autoindex on;
                autoindex_exact_size off;
                autoindex_localtime on;
        }
}

[root@nginx~]# systemctl reload nginx
1.4.Nginx限流限速
1.4.1.为什么要限速
限制某个用户在一定时间内能够产生的Http请求。或者说限制某个用户在下载速度。
503:过载保护
1.4.2.限速应用场景
下载限速:限制用户下载资源的速度;
ngx_http_core_module
请求限制:限制用户单位时间内所产生的Http请求数;
ngx_http_limit_req_module
连接限制:限制同一时间的连接数,及并发数限制;
ngx_http_limit_conn_module
1.4.3.请求频率限速原理
水(请求)从上方倒入水桶,从水桶下方流出(被处理);
如果说水(请求)流入的过快,水桶流出(被处理)的过满,来不及流出的水存在水桶中(缓存),然后以固定速率流出,水桶满后则水溢出(丢弃)。
简单来说就是:当处理速度,达不到请求的速度,则会将请求放置缓存,然后持续处理。当缓存被沾满,如果还有大量的请求,则会被丢弃
1.4.4.限制请求并发数
Syntax: limit_req_zone key zone=name:size rate=rate;
Default: -
Context: http
Syntax: limit_req zone number [burst=number] [nodelay];
Default: -
Contest: http, server, location
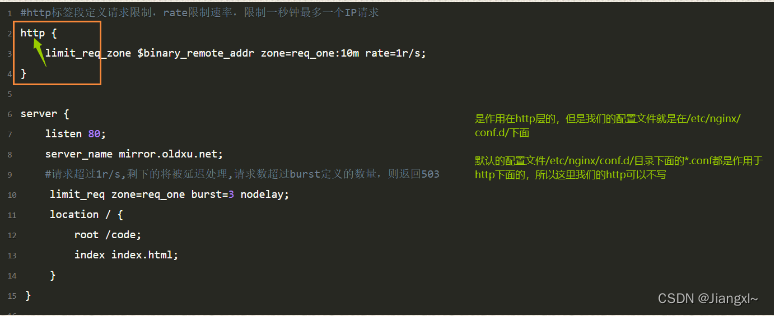
1.基于来源IP对下载速率限制,限制每秒处理1次请求,但可以突发超过5个请求放入缓存区
#http标签段定义请求限制,rate限制速率,限制一秒钟最多一个IP请求
http {
    limit_req_zone $binary_remote_addr zone=req_one:10m rate=1r/s;
}

server {
    listen 80;
    server_name mirror.oldxu.net;
    #请求超过1r/s,剩下的将被延迟处理,请求数超过burst定义的数量,则返回503
    limit_req zone=req_one burst=3 nodelay;
    location / {
        root /code;
        index index.html;
    }
}

解释说明:
#limit_req_zone $binary_remote_addr
#$binary_remote_addr 表示通过这个标识来做限制,限制同一客户端ip地址

#zone=req_one:10m rate=1r/s;
#zone=req_one:10m表示生成一个大小为10M,名为req_one的内存区域,用来存储访问的频次信息
#rate=1r/s表示允许相同标识的客户端的访问频次,这里限制的是每秒1次

#limit_req zone=req_one burst=3 nodelay;
#zone=req_one设置使用哪个配置区域来做限制,与上面limit_req_zone里的name对应
#burst=3设置一个大小为3的缓存区,当有大量请求过来时,超过了访问频次限制的请求可以先放到这个缓存区内
#nodelay超过访问频次并且缓冲区也满的时候,则会返回503(也可以自定义返回值),如果没有设置,则所有请求
#会等待排队
1.4.5.限速示例
[root@nginx~]# vim /etc/nginx/conf.d/mirror.wzx.net.conf
limit_req_zone $binary_remote_addr zone=req_one:10m rate=1r/s;
server {
        listen 80;
        server_name mirror.wzx.net;
        charset utf-8;
        root /code1;
        autoindex on;
        autoindex_exact_size off;
        autoindex_localtime on;
        limit_req zone=req_one burst=3 nodelay;
        location / {
                index index.html;
        }
}

[root@nginx~]# nginx -t
[root@nginx~]# systemctl reload nginx
我们快速访问多次,就会出现503,是因为我们《503:过载保护》

1.4.6.限制并发连接数
Syntax: limit_req_zone key zone=name:size;
Default: -
Context: http
Syntax: limit_req zone number;
Default: -
Context: http, server, location
1.设置共享内存区域和给定建值的最大允许个连接数。超过此限制时,服务器将返回503错误已回复请求
[root@nginx~]# cat /etc/nginx/conf.d/mirror.wzx.net.conf
limit_conn_zone $binary_remote_addr zone=conn_od:10m;
server {
    listen 80;
    server_name mirror.oldxu.net;
    root /code;
    charset utf8;
    autoindex on;
    autoindex_exact_size off;
    autoindex_localtime on;

    limit_conn conn_od 2;

    location / {
        index index.html;
    }
}
1.4.7.限制并发连接数示例
[root@nginx~]# vim /etc/nginx/conf.d/mirror.wzx.net.conf

limit_req_zone $binary_remote_addr zone=req_one:10m rate=1r/s;
limit_conn_zone $binary_remote_addr zone=conn_od:10m;
server {
        listen 80;
        server_name mirror.wzx.net;
        charset utf-8;
        root /code1;
        autoindex on;
        autoindex_exact_size off;
        autoindex_localtime on;
        limit_rate 200k;
        limit_conn conn_od 2;
        location / {
                index index.html;
        }
}

[root@nginx~]# nginx -t
[root@nginx~]# systemctl reload nginx

因为我们要建立2次连接,那么就用到了tcp的握手

创建一个文件
[root@nginx~]# dd if=/dev/zero of=/code1/Concurrencyfile bs=500M count=1

但是我们平常看到一些页面不让下载了,肯定不会报这个503,可能会返回一个请充值的页面,那我们接下来就简单的操作一下
[root@nginx~]# vim /etc/nginx/conf.d/mirror.wzx.net.conf

limit_req_zone $binary_remote_addr zone=req_one:10m rate=1r/s;
limit_conn_zone $binary_remote_addr zone=conn_od:10m;
server {
        listen 80;
        server_name mirror.wzx.net;
        charset utf-8;
        root /code1;
        autoindex on;
        autoindex_exact_size off;
        autoindex_localtime on;
        limit_rate 200k;
        limit_conn conn_od 2;
        error_page 503 @temp;
        location @temp {
                default_type test/html;
                return 200 '请充值VIP服务';
        }
        location / {
                index index.html;
        }
}
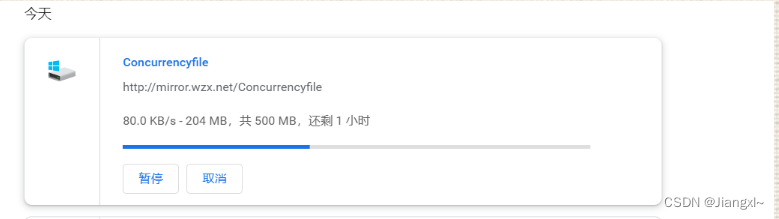
1.4.9.限制下载速度
[root@nginx~]# vim /etc/nginx/conf.d/mirror.wzx.net.conf

limit_req_zone $binary_remote_addr zone=req_one:10m rate=1r/s;
limit_conn_zone $binary_remote_addr zone=conn_od:10m;
server {
        listen 80;
        server_name mirror.wzx.net;
        charset utf-8;
        root /code1;
        autoindex on;
        autoindex_exact_size off;
        autoindex_localtime on;
        limit_rate_after 200m;   #达到200m开始限速
        limit_rate 100k;
        location / {
                index index.html;
        }
}

[root@nginx~]# nginx -t
[root@nginx~]# systemctl reload nginx
前面我们看还是MB大小
后面就变成KB大小
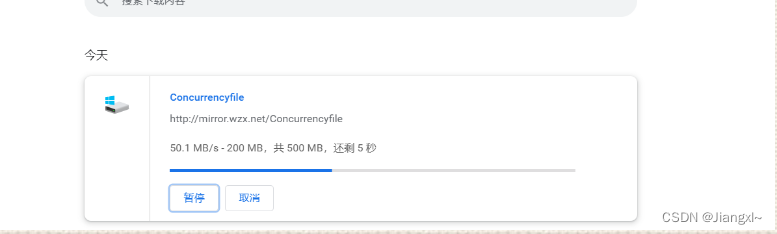
1.4.10.综合场景实践
限制web服务器请求数处理为1秒一个,触发值为5,限制用户仅可同时下载一个文件
当下载超过100M则限制下载速度为500k
如果同时下载超过2个视频,则返回提示"请进行会员充值"或者跳转到其他页面
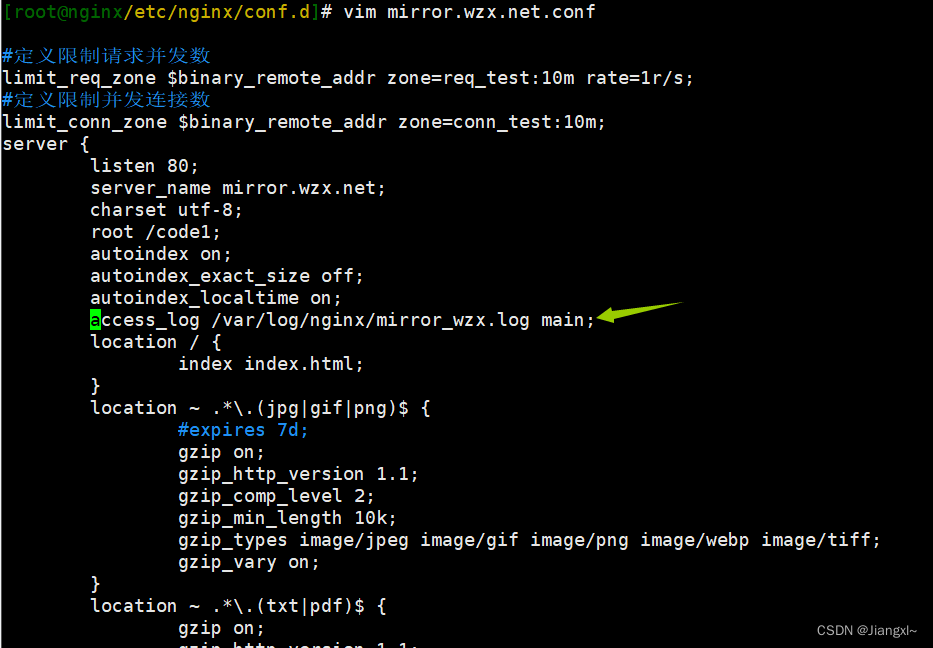
[root@nginx~]# vim /etc/nginx/conf.d/mirror.wzx.net.conf
#定义限制请求并发数
limit_req_zone $binary_remote_addr zone=req_test:10m rate=1r/s;
#定义限制并发连接数
limit_conn_zone $binary_remote_addr zone=conn_test:10m;
server {
listen 80;
server_name mirror.wzx.net;
charset utf-8;
root /code1;
autoindex on;
autoindex_exact_size off;
autoindex_localtime on;
#调用
limit_req zone=req_test burst=5 nodelay;
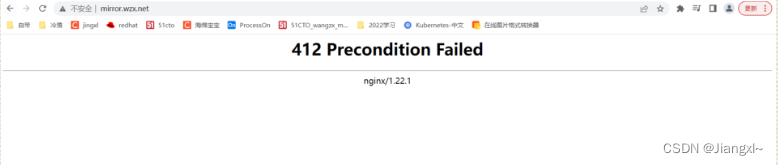
#定义返回值,随便写(连续多次访问)
limit_req_status 412;
#限制用户仅可同时下载一个
limit_conn conn_test 1;
#当达到100m开始限速
limit_rate_after 100m;
limit_rate 500k;
#如果出现503 502 500,则调整到内部页面 @:表示内部 error_page是自定义
error_page 503 502 500 @error_page;
location @error_page {
return 302 https://vip.qq.com;
}
location / {
index index.html;
}
}
[root@nginx~]# nginx -t
[root@nginx~]# systemctl reload nginx
连续多次访问
只能下载同时下次一次,如果再次下载则会跳转到vip.qq.com页面

进行了302的跳转


2.Nginx状态监控
ngx_http_stub_status_module模块提供对基本状态信息的访问。
默认情况下不集成该模块,需要使用–with-http_stub_status_module集成(编译安装)
但是yum安装的就自带了,这个模块可以对我们的nginx进行基本的监控

2.1.ngx_http_stub_status_module模块配置语法
Syntax: stub_status;
Default: —
Context: server, location
2.2.配置示例
[root@nginx~]# cat /etc/nginx/conf.d/mirror.wzx.net.conf
server {
        listen 80;
        server_name mirror.wzx.net;
        charset utf-8;
        location /nginx_status {
                all 127.0.0.1;
                all 172.16.0.0/32;
                deny all;
                stub_status;
        }
}
2.3.配置实践
1.创建配置文件
[root@nginx~]# vim /etc/nginx/conf.d/nginx_status.conf
server {
        listen 80;
        server_name nginx.status.net;
        charset utf-8;
        location /nginx_status {
                stub_status;
        }
}

[root@nginx~]# nginx -t
[root@nginx/code1]# systemctl reload nginx

#此配置创建一个简单的网页,其基本状态数据可能如下所示:
[root@nginx~]# curl -HHost:nginx.status.net http://192.168.146.101/nginx_status
Active connections: 3
server accepts handled requests
 85 85 198
Reading: 0 Writing: 1 Waiting: 2

#Active connections:当前活跃连接数,包括
#accepts: 已接收的总TCP连接数量。
#Reading: 当前读取的请求头数量。
#Writing: 当前响应的请求头数量。
#Waiting: 当前等待请求的空闲客户端连接数。
#handled: 已处理的TCP连接数量
3.Nginx资源缓存
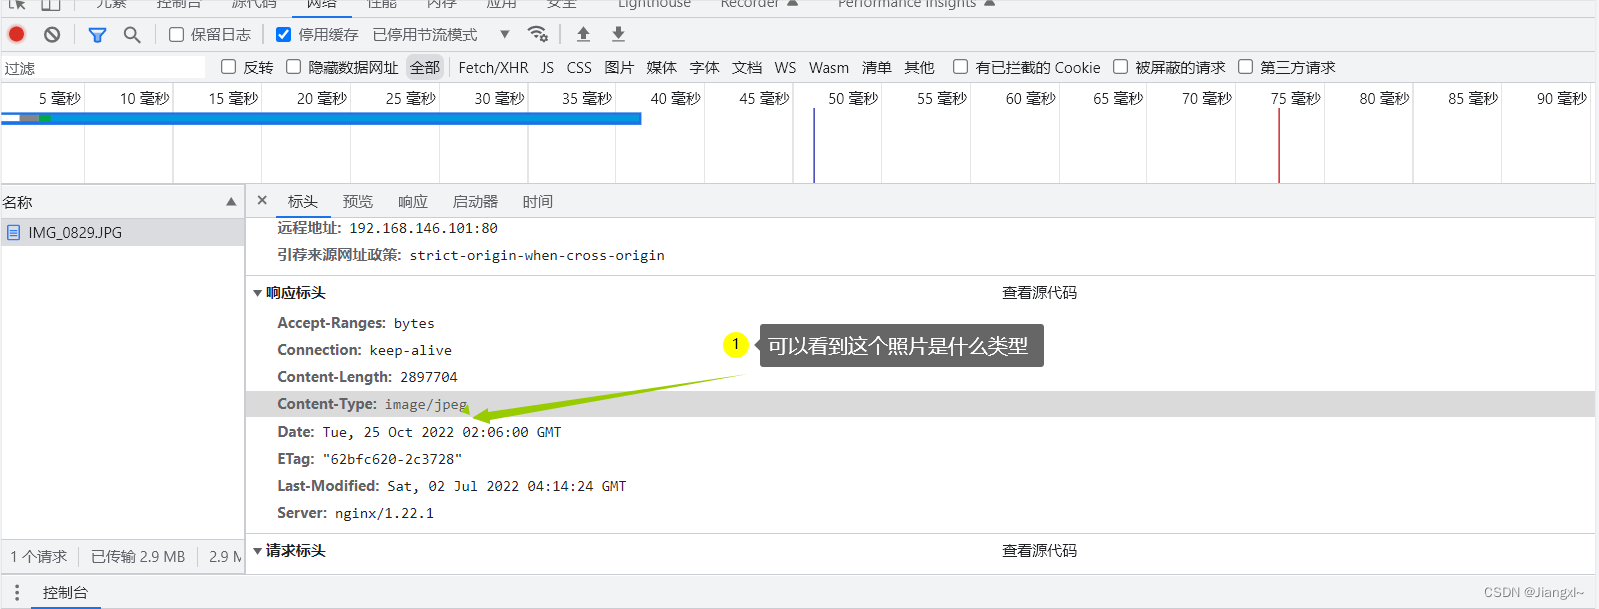
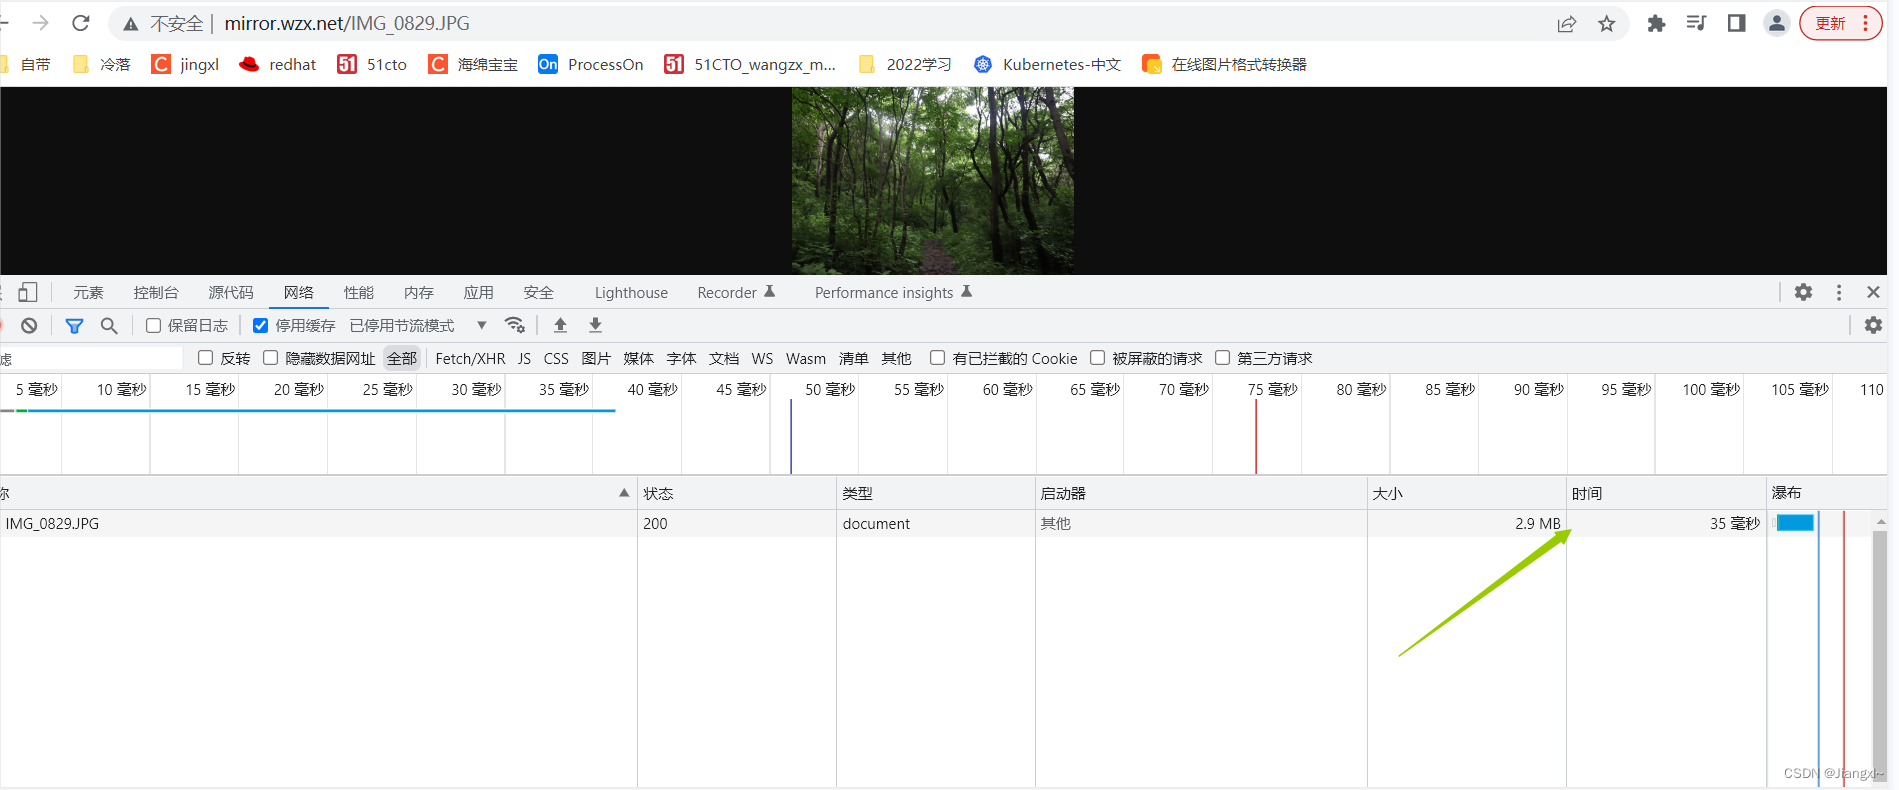
浏览器缓存设置用于提高网站性能,尤其是新闻网站,图片一旦发布,改动的可能是非常小的。所以我们希望
能否用户访问一次后,图片缓存在用户的浏览器长时间缓存
浏览器是有自己的缓存机制,它是基于HTTP协议缓存机制来实现的,在HTTP协议中有很多头(Headers)信息,
那么实现浏览器的缓存就需要依赖特殊的头信息来与服务器进行特殊的验证,如:Expires(http/1.0)
Cache-control(http/1.1)
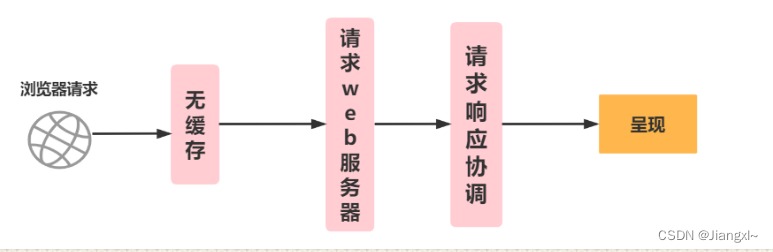
3.1.浏览器无缓存(图片)
3.2.浏览器有缓存(图片)

3.3.缓存过期校验
浏览器缓存过期校验检查机制,说明如下:
1.浏览器请求服务器会先进行Expires、CacheControl的检查,检查缓存是否过期,如果没有过期则直接从缓存文件中读取。
2.如果缓存过期,首先检查是否存在etag,如果存在则会客户端会向web服务器请求if-None-Match,与etag值进行比对,由
服务器决策返回200还是304。3.如果etag不存在,则进行last-Modified检查,客户端会向web服务器请求If-Modified-Since,
与last-Modified进行比对,由服务器决策返回200还是304。
3.4.缓存配置语法
#作用: 添加Cache-Control Expires头
Syntax: expires [modified] time;
expires epoch | max | off;
Default: expires off;
Context: http, server, location, if in location
3.5.资源缓存配置场景
[root@nginx~]# cat /etc/nginx/conf.d/mirror.wzx.net.conf
server {
        listen 80;
        server_name mirror.wzx.net;
        charset utf-8;
        root /code1;
        autoindex on;
        autoindex_exact_size off;
        autoindex_localtime on;
        location / {
                index index.html;
        }
        location ~ .*\.(jpg|gif|png)$ {
                expires 7d;
        }
        location ~ .*\.(css|js|swf|json|mp4|htm|html)$ {
                add_header Cache-Control no-store;
                add_header Pragma no-cache;
        }
}

[root@nginx~]# nginx -t
[root@nginx~]# systemctl reload nginx
4.Nginx资源压缩
Ngin将发送至客户端之前的数据进行压缩,然后传输这能够有效地节约带宽,并提高响应速度;但是也有个弊端,就是会消耗我们的cpu;可能会对图片,文本压缩
4.1.配置语法
#1、启用或关闭gzip压缩
Syntax: gzip on | off;
Default: gzip off;
Context: http, server, location, if in location
#2、gzip支持的压缩类型
Syntax: gzip_types mime-type …;
Default: gzip_types text/html;
Context: http, server, location
#3、gzip压缩比率,压缩率越高(级别越高),CPU消耗越大 默认级别是1,最高是9
Syntax: gzip_comp_level level;
Default: gzip_comp_level 1;
Context: http, server, location
#4、gzip压缩的最小文件,小于设置的值文件将不会被压缩(由"Content-Length"响应头字段确定)最少20字节
Syntax: gzip_min_length length;
Default: gzip_min_length 20;
Context: http, server, location
#5、gzip压缩支持的协议版本
Syntax: gzip_http_version 1.0 | 1.1;
Default: gzip_http_version 1.1;
Context: http, server, location
#6、启用压缩,是否在响应报文首部插入"Vary: Accept-Encoding" 因为有些浏览器是不支持的
Accept-Encoding"
Syntax: gzip_vary on | off;
Default: gzip_vary off;
Context: http, server, location
4.2.图片压缩案例
[root@nginx~]# vim /etc/nginx/conf.d/mirror.wzx.net.conf
server {
        listen 80;
        server_name mirror.wzx.net;
        charset utf-8;
        root /code1;
        autoindex on;
        autoindex_exact_size off;
        autoindex_localtime on;
        location / {
                index index.html;
        }
        location ~ .*\.(jpg|gif|png)$ {
                #expires 7d;
                gzip off;
                gzip_http_version 1.1;
                gzip_comp_level 2;
                gzip_min_length 10k;
                gzip_types image/jpeg image/gif image/png image/webp image/tiff;
                gzip_vary on;
        }
}

[root@nginx~]# nginx -t
[root@nginx~]# systemctl reload nginx

解释说明:
gzip_types类型可以在/etc/nginx/mime.types这个文件进行查看;可以多写几个,这样为了防止有些图片没有进行压缩
我们开启压缩看看大小是否发生改变
[root@nginx~]# cat /etc/nginx/conf.d/mirror.wzx.net.conf
server {
        listen 80;
        server_name mirror.wzx.net;
        charset utf-8;
        root /code1;
        autoindex on;
        autoindex_exact_size off;
        autoindex_localtime on;
        location / {
                index index.html;
        }
        location ~ .*\.(jpg|gif|png)$ {
                #expires 7d;
                gzip on;  #改为on
                gzip_http_version 1.1;
                gzip_comp_level 2;
                gzip_min_length 10k;
                gzip_types image/jpeg image/gif image/png image/webp image/tiff;
                gzip_vary on;
        }
}

[root@nginx~]# nginx -t
[root@nginx~]# systemctl reload nginx

4.3.文件压缩案例
编辑一个文件,内容随便
[root@nginx/code1]# vim test.txt
[root@nginx/code1]# vim /etc/nginx/conf.d/mirror.wzx.net.conf
server {
        listen 80;
        server_name mirror.wzx.net;
        charset utf-8;
        root /code1;
        autoindex on;
        autoindex_exact_size off;
        autoindex_localtime on;
        location ~ .*\.(txt|pdf)$ {
                gzip off;
                gzip_http_version 1.1;
                gzip_comp_level 2;
                gzip_min_length 1k;
                gzip_types text/plain application/pdf;
                gzip_vary on;
        }
}
[root@nginx/code1]# nginx -t
[root@nginx/code1]# systemctl reload nginx

我们先不开启压缩,看看大小是多少

开启压缩
gzip on;
压缩开到最大
gzip_comp_level 9;

5.Nginx Location
5.1.什么是Location
Location用来控制访问网站的uri路径
官网:https://nginx.org/en/docs/http/ngx_http_core_module.html#location
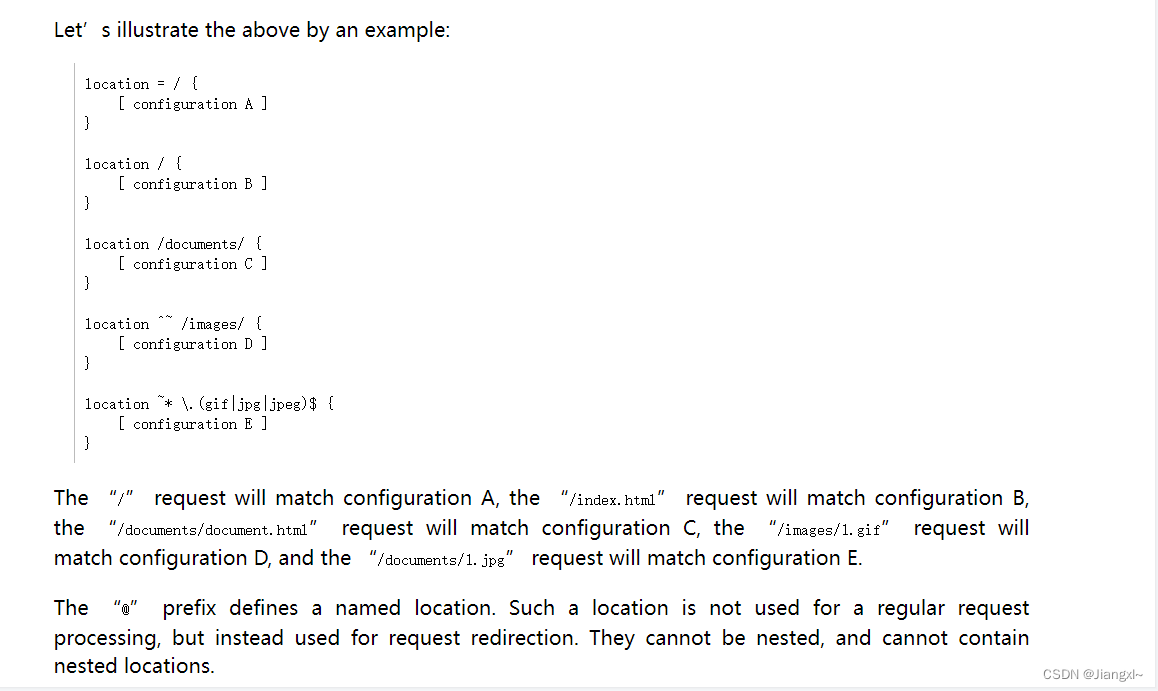
5.1.1.Location语法示例
location [ = | ~ | ~* | ^~ ] uri { … }
location @name { … }
/api/xxx/dadas/dsadsa
/apiv1/dsa/dsaxx/sadsa/
匹配符 匹配规则 优先级
= 精确匹配 1
^~ 以某个字符串开头 2
~ 区分大小写的正则匹配 3
~* 不区分大小写的正则匹配 4
/ 通用匹配,任何请求都会匹配到 5
5.2.Location优先级示例
[root@nginx~]# cat /etc/nginx/conf.d/location.conf

server {
        listen 80;
        server_name location.wzx.net;
        location = / {
                default_type text/html;
                return 200 'location = /';
        }

        location / {
                default_type text/html;
                return 200 'location /';
        }

        location /documents/ {
                default_type text/html;
                return 200 'location /documents/';
        }

        location ^~ /images/ {
                default_type text/html;
                return 200 'location ^~ /images/';
        }
        location ~* \.(gif|jpg|jpeg)$ {
                default_type text/html;
                return 200 'location ~* \.(gif|jpg|jpeg)';
        }
}


#测试结果如下(建议是curl测试)
#1.请求 http://location.wzx.net/会被 location =/ 匹配
#2.请求 http://location.wzx.net/index.html会被 location / 匹配
#3.请求http://location.wzx.net/documents/1.html会被 location /documents/ 匹配
#4.请求http://location.wzx.net/images/1.gif会被 location ^~ /images/ 匹配
#5.请求http://location.wzx.net/documents/1.jpg会被 location ~* \.(gif|jpg|jpeg)$匹配
5.3.Location应用场景
[root@nginx~]# cat /etc/nginx/conf.d/location.conf
server {
        listen 80;
        server_name location.wzx.net;
        charset utf-8;

        #通用匹配,任何请求都会匹配到
        location = / {
                root html;
                index index.html;
        }

        #精确匹配,必须请求的uri是/nginx-status
        location /nginx_status {
                stub_status;
        }

        #严格区分大小写,匹配以.php结尾的都走这个
        location ~ \.php$ {
                default_type text/html;
                return 200 'php访问成功';
        }

        #严格区分大小写,匹配以.jsp结尾的都走这个
        location ~ \.jsp$ {
                default_type text/html;
                return 200 'jsp';
        }

        #不区分大小写匹配,只要用户访问.jpg,gif,png,js,css 都走这个
        location ~* \.(gif|jpg|png|js|css)$ {
                expires 3d;
        }

        #不区分大小写匹配
        location ~* \.(sql|bak|tgz.gz|git)$ {
                deny all;
        }
}

[root@nginx~]# nginx -t
[root@nginx~]# systemctl reload nginx
5.4.Location@重定向
location @name这样的location不用于常规请求处理,而是用于请求重定
也就是我们访问的页面不存在,就会被重定向
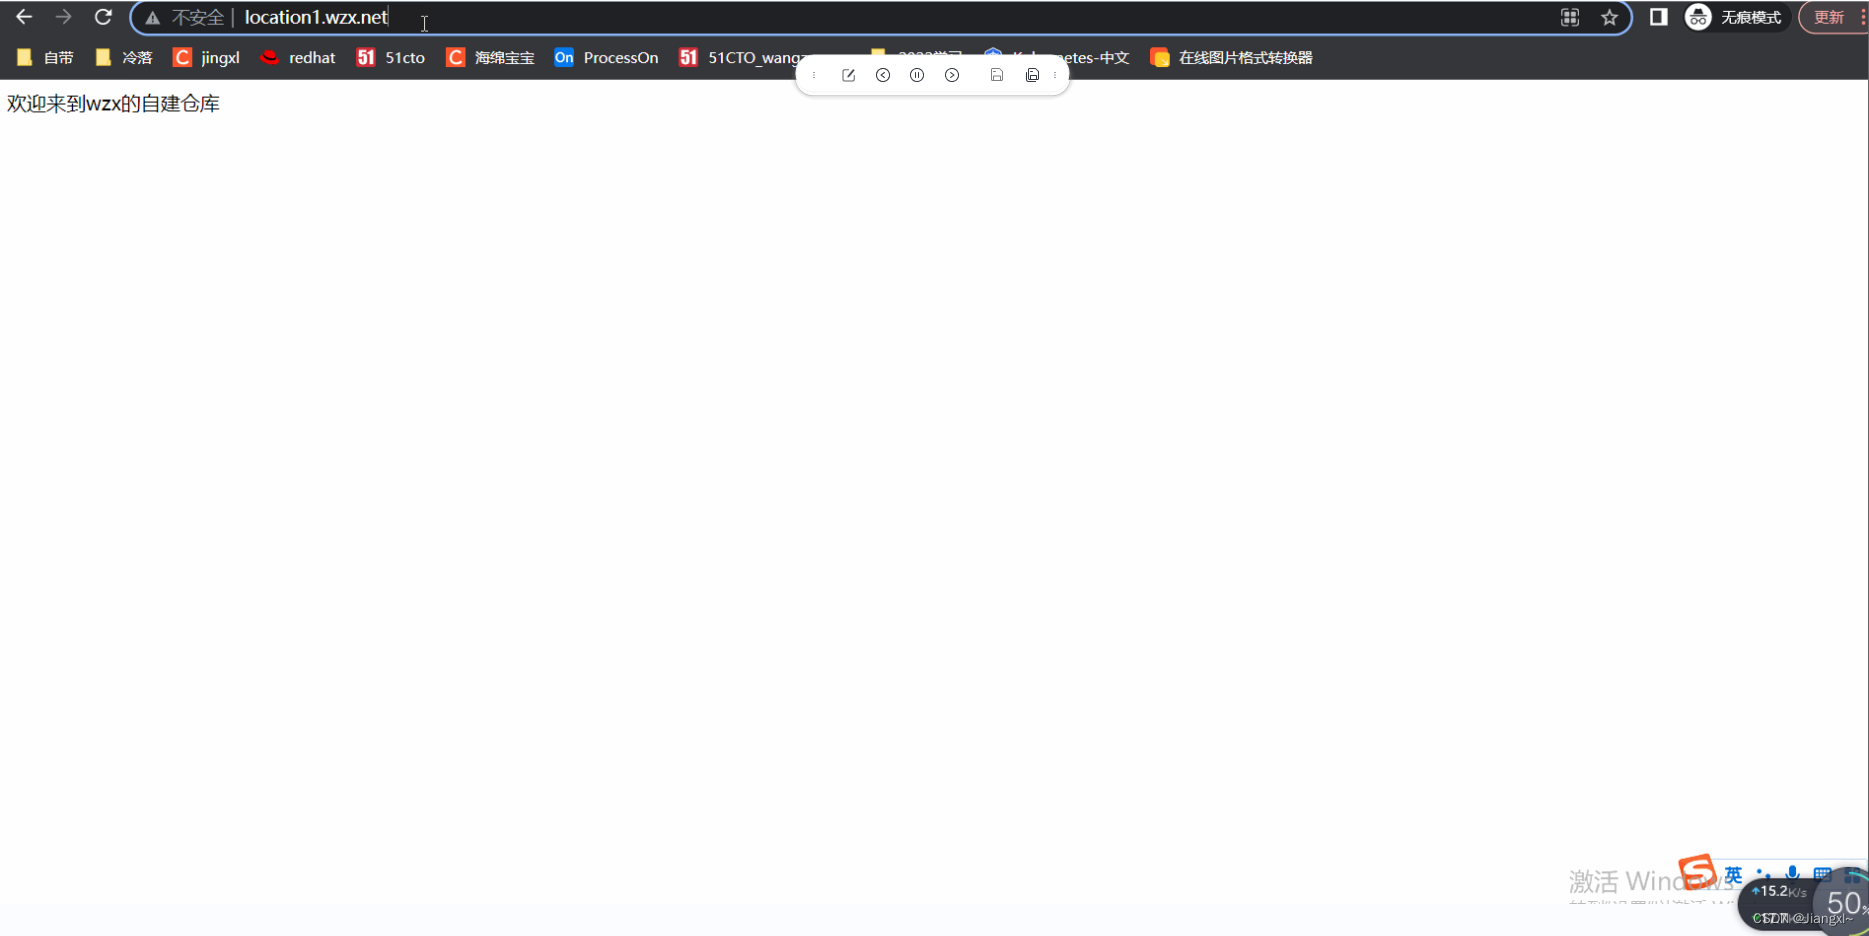
[root@nginx~]# vim /etc/nginx/conf.d/redirect.conf

server {
        listen 80;
        server_name location1.wzx.net;
        root /code1;
        charset utf-8;
        location / {
                index index.html;
        }
        #如果出现异常,则重新定向到@error这个location上
        error_page 404 @error;
        location @error {
                return 302 http://location1.wzx.net;
        }
}

[root@nginx~]# nginx -t
[root@nginx~]# systemctl reload nginx
6.Nginx日志模块
nginx的日志记录非常灵活,可以通过log_format来定义格式
6.1.Nginx日志格式
log_format定义日志语法格式
配置语法:包括:error.log access.log
Syntax: log_format name [escape=default|json] string …;
Default: log_format combined “…”;
Context: http
默认nginx定义语法格式如下
log_format main '$remote_addr -
r
e
m
o
t
e
u
s
e
r
[
remote_user [
remoteuser[time_local] “KaTeX parse error: Double superscript at position 34: … '̲status
b
o
d
y
b
y
t
e
s
s
e
n
t
"
body_bytes_sent "
bodybytessent"http_referer” ’
‘“
h
t
t
p
u
s
e
r
a
g
e
n
t
"
"
http_user_agent" "
httpuseragent""http_x_forwarded_for”’;
access_log /var/log/nginx/access.log main;
#我们可以自定义
log_format test ‘$remote_addr -
r
e
m
o
t
e
u
s
e
r
[
remote_user [
remoteuser[time_local] "KaTeX parse error: Double superscript at position 12: request" ' '̲status’;
access_log /var/log/nginx/access.log test;
6.1.1.Nginx日志格式中常用的变量意思
$remote_addr #记录客户端IP地址
$remote_user #记录客户端用户名
$time_local #记录通用的本地时间
$time_iso8601 #记录ISO8601标准格式下的本地时间
$request #记录请求的方法以及请求的http协议
$status #记录请求状态码(用于定位错误信息)
$body_bytes_sent #发送给客户端的资源字节数,不包括响应头的大小
$bytes_sent #发送给客户端的总字节数
$msec #日志写入时间。单位为秒,精度是毫秒
$http_referer #记录从哪个页面链接访问过来的
$http_user_agent #记录客户端浏览器相关信息
$http_x_forwarded_for #记录客户端IP地址
$request_length #请求的长度(包括请求行,请求头和请求正文)
$request_time #请求花费的时间,单位为秒,精度毫秒
#注:如果Nginx位于负载均衡器,nginx反向代理之后,web服务器无法直接获取到客户端真实的IP地址
#$remote_addr获取的是反向代理的IP地址。反向代理服务器在转发请求的http头信息中
#增加X-Forwarded-For信息,用来记录客户端IP地址和客户端请求的服务器地址
6.2.Nginx访问日志
access_log日志配置语法
Syntax: access_log path [format [buffer=size] [gzip[=level]] [flush=time] [if=condition]];
access_log off;
Default: access_log logs/access.log combined;
Context: http,server, location, if in location, limit_except
6.3.Nginx访问日志配置示例
[root@nginx/etc/nginx/conf.d]# vim mirror.wzx.net.conf
#添加一行
access_log /var/log/nginx/mirror_wzx.log main;

[root@nginx/etc/nginx/conf.d]# nginx -t
[root@nginx/etc/nginx/conf.d]# systemctl reload nginx
[root@nginx/etc/nginx/conf.d]# tail -f /var/log/nginx/mirror_wzx.log
接下来开始访问这个网站
http://mirror.wzx.net/

6.4.Nginx错误日志
nginx常见的错误日志级别有debug |info |notice |warn |error |crit |alert |emerg级别越高
记录的信息越少,如果不定义,默认级别为warn,它可以配置在main、http、server、location段里
6.5.Nginx错误日志
error_log /var/log/nginx/error.log warn;
#关闭错误日志
error_log /dev/null;
6.6.Nginx日志过滤
一个网站会包含很多元素,尤其是有大量的images、js、css等静态资源。这样的请求可以不用记录日志
#请求favorite.ico时,不记录日志
location /favicon.ico {
access_log off;
expires 3650d;
}
#当有人访问gif、png等资源时,将日志丢入空
location ~* .*.(gif|jpg|png|css|js)$ {
access_log /dev/null;
}