一、uView是什么?
uView是uni-app生态专用的UI框架,是一个开源、免费的优秀框架。
二、安装与配置
官方文档讲的很详细,所以这里就直接引用:安装与配置
三、使用步骤
在完成第二步,并成功引入后,进行如下步骤:
1、创建tabBar对应的页面文件
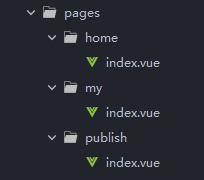
2、配置page.json中的tabBar属性
- 需要注意的是,这里仅需配置tabBar中list属性中各页面的路径,如下图所示:


这里要注意了,和官方文档不一样,但确实是不需要加/
因为我在实测过后发现加/是无效的,在去掉/后反而正常了
3、创建自定义tabBar文件
由于我们要使用自定义的tabBar覆盖原生的tabBar,所以需要创建一个自定义文件,一个对象对应tabBar按钮的配置,这里列出单个对象的所有字段属性:
let list =[{
iconPath: "/static/uview/example/component.png",
selectedIconPath: "/static/uview/example/component_select.png",
text: '首页',
count: 2,
isDot: true,
pagePath: "/pages/home/index",
customIcon: false,
midButton: false,
},
{
iconPath: "/static/uview/example/js.png",
selectedIconPath: "/static/uview/example/js_select.png",
text: '发布',
midButton: true,
pagePath: "/pages/publish/index",
customIcon: false,
},
{
iconPath: "account",
selectedIconPath: "account-fill",
text: '我的',
customIcon: false,
pagePath: "/pages/my/index",
customIcon: false,
},
]
export default list
- 这里可以创建多个对象
- 如果还有疑问,可以参考官网文档
4、配置Vuex
在创建了上面的不同角色对应的tabBar对象数组后,我们要在Vuex中使用,因为uni-app自动集成了Vuex,所以直接引用就好了,由于我将其分模块处理了,这里列出结构:
import Vue from 'vue'
import Vuex from 'vuex'
import api from '@/api'
import list from '@/utils/tabBar.js'
Vue.use(Vuex)
const store = new Vuex.Store({
state: {
store: {},
member: {},
tabList:list
},
getters: {
isLogin: state => Object.keys(state.member).length > 0
},
mutations: {
SET_MEMBER(state, member) {
state.member = member
},
SET_STORE(state, store) {
state.store = store
},
},
actions: {
async getStore({commit}) {
const store = await api('store')
commit('SET_STORE', store)
}
}
})
export default store
还需要在mian.js中引入并挂载:
import Vue from 'vue'
import App from './App'
import uView from 'uview-ui';
import store from './store'
import { $http } from '@escook/request-miniprogram'
uni.$http = $http
$http.baseUrl = 'https://www.uinav.com'
$http.beforeRequest = function (options) {
uni.showLoading({
title: '数据加载中...',
})
}
$http.afterRequest = function () {
uni.hideLoading()
}
Vue.use(uView);
Vue.config.productionTip = false
App.mpType = 'app'
Vue.prototype.$store = store
const app = new Vue({
store,
...App
})
app.$mount()
5、使用

总结
感谢你能阅读我的这篇文章,其实实现这个从技术角度上不是很复杂,但是很少看见一个系统且完整的配置tabBar的文章,遂将自己的一些步骤和代码记录下来,希望能帮到大家,如果该篇文章中有错误或不足之处,忘指出,谢谢~~
本文内容由网友自发贡献,版权归原作者所有,本站不承担相应法律责任。如您发现有涉嫌抄袭侵权的内容,请联系:hwhale#tublm.com(使用前将#替换为@)